How to Wear a Concealed Carry Holster Safely and Comfortably: 8 Essential Tips
Learning how to wear a concealed carry holster safely and comfortably starts with choosing the right holster, adjusting it to fit your body, and positioning it for easy access. Proper fit and placement reduce the risk of accidental discharge and improve your draw speed. Begin by ensuring your holster fits your specific firearm and secures it firmly against your body.
Key Takeaways
- Wear your holster tight against your body by adjusting rig straps for added security and comfort.
- Position the holster near your strong side hip or behind the hip at a 15 to 25-degree forward cant for natural grip alignment.
- The appendix inside-the-waistband (AIWB) position sits near the 12 o’clock spot, slightly left or right depending on your dominant hand.
- Move your holster placement as needed, such as from 3 o’clock to 5 o’clock, to switch between strong side hip and FBI carry positions.
- Choose holsters made with breathable, ergonomic materials like wide elastic bands to help keep you cool and comfortable.
- Always confirm you have a valid concealed carry permit before wearing a holster under a jacket or other outerwear.
1. Wear a Concealed Carry Holster for Safety and Comfort

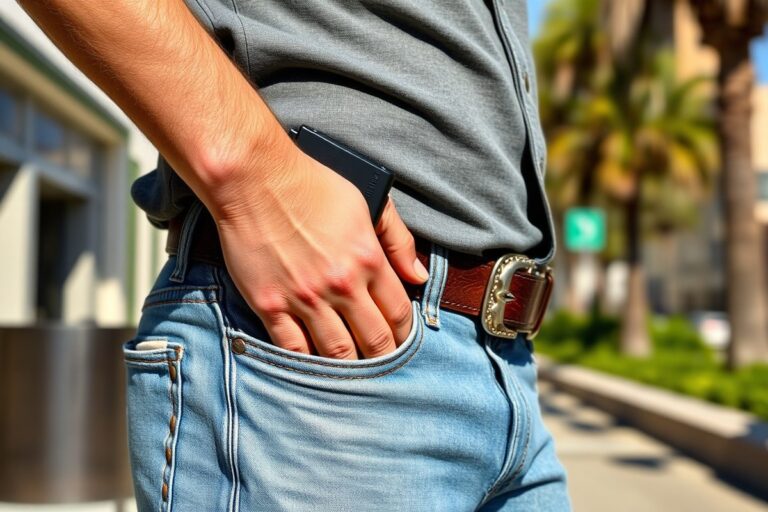
Positioning and wearing your concealed carry holster correctly is key to balancing safety, concealment, and comfort. A holster should secure your firearm firmly to prevent accidental discharge while keeping it close to your body to avoid printing, that is, the outline of your gun showing through clothing. Comfort matters because you may wear your holster for many hours, and any discomfort can lead to adjustment mistakes that compromise safety and concealment.
Strong side hip carry, often around the 3-o’clock position for right-handed carriers, offers a practical balance of quick access and comfort. Inside-the-waistband (IWB) holsters, worn just inside the pants, help keep your firearm close to your body and concealed under a shirt or jacket. Proper tension is important: your holster should hold the gun snugly without pinching or causing pressure points. Follow these steps to wear your concealed carry holster safely and comfortably:
- Choose a holster that fits your firearm and body: Select a holster specifically designed for your gun model and sized to suit your body type. An ill-fitting holster compromises retention, comfort, and safety.
- Pick a carry position that fits your daily activities: Start with the strong side hip position for balance and easy access unless your needs or comfort guide you elsewhere.
- Put the holster on with the firearm securely in place: Make sure the gun fully seats in the holster to activate any retention features. Check that the trigger guard is fully covered to prevent accidental contact.
- Adjust the holster’s tightness and cant (angle): Tighten the holster so the firearm doesn’t move or shift but avoid overtightening, which can cause discomfort and restrict movement. Tilting the holster slightly forward or backward can improve concealment and draw speed based on your body shape.
- Wear appropriate clothing to conceal the holster: Shirts or jackets that drape below the holster line help prevent printing. Test your silhouette in a mirror or with a trusted person’s help.
- Perform safety checks before wearing: Ensure your firearm is unloaded and safeties are engaged while holstering during practice. When carrying, verify your holster fully covers the trigger area and the gun does not shift with movement.
- Practice drawing and re-holstering until it feels natural: Smooth, confident handling reduces the risk of dropping the firearm or compromising your grip. Practice with an unloaded gun to build muscle memory.
- Evaluate comfort throughout the day: If you experience soreness, readjust the holster or try different accessories such as padded belt loops or softer clips to reduce pressure points.
Holster comfort is not just a personal preference; it affects your readiness and safety. A loose holster risks the firearm shifting or falling, while a holster that’s too tight can cause discomfort leading to frequent adjustments. Taking time to dial in your fit prevents these issues. Using accessories designed for concealment, such as sweat guards or adjustable clips, can improve both comfort and safety, especially when moving or sitting for long periods.
2. Best Concealed Carry Positions and How to Choose Them

Choosing the best concealed carry position depends on your body type, daily activities, and comfort needs. Common positions like inside the waistband (IWB), outside the waistband (OWB), appendix, ankle, and shoulder carry each offer distinct advantages and tradeoffs. Understanding these options helps you pick a position that fits your lifestyle while ensuring safety and accessibility.
Inside the Waistband (IWB) Positions
Inside the waistband (IWB) holsters fit between your body and the inner waistband of your pants, usually positioned from 3 to 5 o’clock for right-handed shooters. This placement keeps the firearm close to your torso, making it easier to conceal under shirts that aren’t tucked or under jackets. Many find IWB carry comfortable for daily wear, but bigger guns or sitting for long periods might cause some discomfort or restriction.
Appendix carry is a variation of IWB located in front of the hip, around the 12 o’clock to 2 o’clock position. It can provide quicker access due to its natural hand movement but requires extra caution because it points toward sensitive body parts. Appendix carry suits those who want minimal printing and easy draw but is less ideal for sitting or driving.
Outside the Waistband (OWB) and Shoulder Carry
Outside the waistband (OWB) holsters attach to your belt on the outside of your pants, commonly around the 3 to 5 o’clock spot for right-handed carriers. OWB offers quicker access and often feels more comfortable because it doesn’t press against your body directly. Still, tight clothing or a cover garment is necessary to prevent the gun from showing, and using a sturdy holster is critical to keep your firearm secure and discreet.
Shoulder holsters distribute the weight across your torso, which can be more comfortable for extended periods of sitting or driving. This position often includes a vertical or horizontal holster on either side of the torso. The tradeoff is an increased need for a cover garment like a jacket and the extra step required to reach the firearm, which might slow draw speed.
Alternative Positions: Ankle and Bra Holsters
Ankle holsters hold a backup firearm on the inside edge of the non-dominant leg, making them ideal when your primary carry option is limited or for additional protection. This method offers excellent concealment since the firearm is away from the waistband but is slower to access and may be uncomfortable for prolonged walking or running.
Bra holsters are designed for females, providing an option to carry discreetly under the bust. Like ankle carry, bra holsters suit smaller firearms and offer concealment with certain clothing types. Accessibility depends on your routine and clothing choices, and they generally work best as backup carry options.
| Carry Position | Pros | Cons | Best For |
|---|---|---|---|
| Inside the Waistband (IWB) | Close to body, good concealment, stable | Can be uncomfortable when sitting, limits large guns | Everyday carry, average body types |
| Appendix (AIWB) | Quick access, easy concealment | Risks pointing at sensitive areas, less comfortable sitting | Fast draw, slim profiles, minimal printing |
| Outside the Waistband (OWB) | Comfortable, easy access, good for larger guns | Requires cover clothing to conceal, risk of printing | Active users, those with jackets or loose clothing |
| Shoulder Holster | Comfortable when seated, balanced weight distribution | Needs cover garment, slower access | Drivers, office environments, sitting for long periods |
| Ankle Holster | Great concealment, good backup position | Slow access, not ideal for running or walking | Backup carry, low profile needs |
Use your daily routine as a key factor in selecting a carry position. For example, if you spend hours driving, shoulder carry can reduce discomfort where an IWB might cause pressure. Alternatively, an OWB with a loose jacket is comfortable and quick to access during active days. Prioritize positions that allow safe and natural access without requiring extreme body movements.
Tip: Always test your chosen carry position by wearing it during typical activities like sitting, standing, or driving to ensure comfort and quick access before relying on it daily.
3. Types of Concealed Carry Holsters and Choosing the Right One
The most common holster types for concealed carry include inside-the-waistband (IWB), outside-the-waistband (OWB), shoulder holsters, and specialty holsters such as ankle, belly band, and bra holsters. Each type has unique features in materials, retention, and concealment effectiveness suited for different carry needs and body types. Choosing the right holster depends on your daily activities, clothing style, and comfort preferences, along with how you prioritize quick access versus maximum concealment.
Inside-the-Waistband (IWB) Holsters
IWB holsters are highly popular because they position the firearm inside your waistband, making them easier to conceal under most clothing. They work well with both small and medium-size handguns and offer better concealment than OWB options. Most IWB holsters use leather, Kydex, or hybrid materials, which impact comfort and durability. Leather offers good comfort but may need a break-in period, while Kydex provides excellent retention and durability but can be less comfortable initially.
Adjustable retention is critical for IWB holsters because it controls how tightly the gun fits, balancing security with quick draw capability. You can usually adjust tension via screws, allowing for a personalized grip based on daily activities. For example, you might tighten retention for tactical use and relax it for quick access when carrying concealed all day. Typical IWB holsters range from $40 to $120 depending on materials and features.
Outside-the-Waistband (OWB) and Shoulder Holsters
OWB holsters are worn outside the waistband, offering faster access and better comfort during extended wear, though they are usually better suited to looser clothing for concealment. They are commonly made from leather or polymer for durability and precise retention. OWB holsters cost between $30 and $100 and tend to be popular for situations where concealment is less critical, such as open carry or duty use.
Shoulder holsters provide an alternative for carrying when waist carry is inconvenient. They consist of a harness with a holster on one side and often a magazine carrier on the other. These holsters distribute weight across the torso and are ideal for heavier firearms or those who drive frequently. Materials typically include nylon, leather, or synthetic blends. Adjustable retention screws or straps help maintain weapon security without sacrificing fast access.
Specialty Holsters: Ankle, Belly Band, and Bra Holsters
Specialty holsters serve niche needs and body types. Ankle holsters strap to the lower leg and work well for backup guns, favored by some law enforcement officers due to accessibility when seated. They require properly sized straps and usually firm retention to prevent movement, with typical prices around $20 to $60.
Belly band holsters wrap around your midsection and allow concealed carry without belt loops or a gun belt. Made of stretchy fabric with pockets for pistols, magazines, or other gear, these are versatile but can trap heat and moisture. They work best for those who prioritize concealment over quick draw and cost between $20 and $50.
Bra holsters provide a discreet option for women, securing firearms inside or attached to a bra. These holsters are often lightweight fabric or leather and designed for comfort while allowing carry without altering clothing style. They suit smaller firearms and offer moderate retention, making them practical for concealed carry without bulky gear. Prices range from $15 to $40.
| Holster Type | Material | Retention Feature | Ideal Use Case | Typical Price Range |
|---|---|---|---|---|
| Inside-the-Waistband (IWB) | Leather, Kydex, Hybrid | Adjustable screws/spring tension | Full-day concealed carry, varied handgun sizes | $40, $120 |
| Outside-the-Waistband (OWB) | Leather, Polymer | Fixed or adjustable retention | Open carry, quick access, comfortable long wear | $30, $100 |
| Shoulder Holster | Leather, Nylon, Synthetic | Straps, adjustable tension | Heavy firearms, driving, weight distribution | $40, $120 |
| Ankle Holster | Leather, Fabric Straps | Straps, firm retention | Backup guns, seated positions | $20, $60 |
| Belly Band Holster | Stretchy Fabric | Elastic pockets | No belt loops, flexible clothing options | $20, $50 |
| Bra Holster | Leather, Fabric | Elastic or snap retention | Women’s discreet carry | $15, $40 |
Choosing a holster involves balancing retention with comfort and how well it fits your clothing. For example, IWB holsters need retention you can adjust for daily activities to keep the gun secure yet accessible. OWB offers faster draws but may require a jacket or looser shirt to conceal. Specialty holsters like belly bands and bra holsters fit specific body shapes or clothing choices without sacrificing carry capabilities. Understanding materials and retention mechanisms helps you pick the right holster for your lifestyle and carry preferences.
4. Adjusting Holster Placement and Cant for Quick Access
Adjusting your holster’s cant, height, and retention is essential for rapid, smooth access to your firearm. The right angle and positioning tailor the draw to your body type and carry style, improving speed without sacrificing comfort or safety. For appendix carry, many prefer a neutral (0-degree) or slight reverse cant to align the grip naturally with your hand, easing the draw while avoiding interference from the seatbelt or body. On the hip, a forward cant of about 10 to 15 degrees can reduce pressure during sitting and match your natural arm movement.
Retention keeps your firearm securely in place but should allow for a quick release when drawing. Adjusting retention too tight can slow your draw and cause fumbling, while too loose risks accidental dislodging. Proper holster placement means the gun is stable yet easily accessible, with no awkward angles preventing a confident, fast draw.
- Choose your carry position: Identify where you plan to carry (appx, strong side hip, behind hip). This determines your ideal cant and height.
- Set initial cant angle: Start with a neutral (0 degrees) cant for appendix or side carry. For hip carry, angle the holster forward 10 to 15 degrees to align with your arm’s natural draw path.
- Adjust ride height: Position the holster so the grip rests at a comfortable and accessible height, typically at or just below your beltline. For appendix carry, raise or lower the holster to avoid seatbelt discomfort and ensure fast draw clearance.
- Test retention tightness: Insert your firearm and check that it stays secure. Tighten retention if the gun moves excessively but avoid making it so stiff your draw slows down or struggles to release.
- Practice draws: Perform multiple draws from your adjusted holster angle and height to gauge speed and comfort. Feel how your hand approaches and grips the firearm and note any resistance or awkward angles.
- Refine cant angle: Shift the holster by 5-degree increments forward or backward from your initial setup. Repeat draws until the grip feels naturally positioned for a smooth, direct pull.
- Fine-tune ride height: Move the holster up or down slightly to avoid clothing interference and prevent the firearm from digging into your body during sitting or movement.
- Confirm concealment and comfort: Wear your usual clothing and test concealment. Adjust as needed without compromising draw speed or holster retention.
Adjustments take time and repeated testing. An adjustable holster simplifies cant and retention tweaks, especially for carry positions like the FBI or appendix. Avoid extreme cant angles that require awkward wrist manipulation, as they can slow your draw. Regular practice after each adjustment helps the draw feel natural. With proper angle, height, and retention settings, your holster will hold the gun securely yet let you access it quickly when every second counts.
5. Dressing Tips to Conceal Your Holster Effectively
Wearing the right clothing is essential to keep your concealed carry holster hidden and comfortable throughout the day. Opt for loose-fitting shirts or jackets that add a natural layer of cover, especially when carrying outside the waistband (OWB). Shirts made of thicker fabrics like denim or flannel can reduce printing by softening the outline of your firearm. Avoid tight or thin materials, as they tend to cling to the holster and reveal its shape.
Layering works well to conceal your holster effectively. For example, wearing a lightweight jacket or hoodie over a t-shirt can help break up the lines of your firearm while keeping you comfortable in varying temperatures. If the weather is warm, long-sleeve button-up shirts left untucked offer better concealment than short sleeves. For cold conditions, heavier outerwear naturally hides even larger setups with less effort.
Different carry positions may require specific clothing choices. For a holster behind the hip, your body shape naturally blocks the firearm, so a standard shirt might be enough. On the strong side or appendix carry, where printing is more common, loose layers become more critical. Ankle holsters demand long pants to maintain concealment, as shorter bottoms expose the weapon.
- Wear shirts or jackets that are one size larger to allow room for the holster.
- Choose patterns or darker colors that help camouflage bulges and shadows.
- Use shirt tails or untucked styles to break straight lines over the gun area.
- Layer carefully: start with a base shirt, add a mid-layer, then a jacket or outerwear.
- Avoid stiff, thin fabrics that reveal the holster’s edges.
- Consider stretch fabrics that move with your body without revealing hard outlines.
Printing occurs when the shape or outline of the firearm shows through clothes. To minimize printing, adjust your holster’s cant and placement until it rests naturally and closely against your body without shifting. Consistent practice wearing your chosen clothing and holster setup can help you recognize which combinations succeed in hiding the weapon.
Always check your concealment in different lighting and positions before leaving your home to avoid accidental exposure.
Loose shirts and jackets don’t just conceal; they add comfort by preventing the holster from digging into your skin. Remember that adding these layers may increase heat retention, so balance concealment with comfort based on your local climate and activity level.
6. Staying Comfortable While Sitting, Driving, or Active
Comfort while sitting or driving with a concealed carry holster depends largely on holster placement and adjustment. Positions toward the back, such as 4:00 to 5:00 or 7:00 to 8:00 on your belt, reduce direct pressure when seated. These angles tuck the firearm behind the hip, limiting contact with the seat and lowering discomfort. Using a belt specifically designed for carrying helps keep the holster stable and prevents shifting that causes irritation.
Adjusting the holster based on your activity matters. Driving requires slightly different access and comfort priorities than walking or standing. You may want a holster that allows a lower carry position or one that permits cant adjustment so you can quickly clear the steering wheel and seatbelt without disturbing the weapon. For active situations or prone movements, holster kits letting you lower or reposition the firearm can improve both concealment and accessibility.
Shoulder holsters offer an alternative that often feels more comfortable for extended sitting periods, especially in vehicles. They distribute weight across your upper body, avoiding pressure against the thigh. However, they may require a good cover garment like a jacket to conceal the firearm effectively.
- Test holster positions by sitting in different chairs and your vehicle seat to identify pressure points
- Use a gun belt designed for concealed carry to keep the holster stable
- Shift to 4:00 to 5:00 or 7:00 to 8:00 positions for less seat contact during long sitting periods
- Consider holster cants that angle the grip for easier access while seated or driving
- Try a shoulder holster if you spend many hours seated, but plan for appropriate cover clothing
- Use holster kits that allow repositioning when switching between active, seated, and prone positions
- Practice draws from each carry position to ensure quick access despite adjustments
Comfort isn’t just about avoiding pain; it affects how well you can maintain concealment and accessibility throughout your day. If your holster presses too hard while seated, you’re more likely to adjust it repeatedly or even remove it, risking safety. Good results look like smooth movement with your firearm securely in place and easy reach from any seated or active posture. Too tight or rigid placements can lead to soreness or restrict access, so adjust and test regularly.
7. Common Concealed Carry Holster Mistakes and How to Fix Them
Poor fit is a common error with concealed carry holsters. Your gun protruding from clothing or your holster shifting while you move signals your current setup isn’t suitable. The holster should hold your firearm snugly without excessive force that makes drawing difficult. Check for loose retention by gently shaking the holster while holstered; if the gun moves noticeably, look for a model with adjustable retention or better retention design. A secure fit not only prevents accidental drops but also improves comfort and access speed.
Printing happens when the outline of your gun is visible through your clothing. It compromises concealment and can draw unwanted attention. To fix printing, wear holsters that position the firearm closer to your body, such as an inside-the-waistband holster with a forward cant of 15 to 25 degrees, resembling the traditional FBI carry. Clothing choice matters too; looser, thicker layers help reduce printing. Pocket carry requires a dedicated holster that fully covers the trigger and prevents the gun from printing or shifting.
Signs that you need a different holster include frequent holster shifting, gun wobble inside the holster, discomfort during sitting or driving, or wear on the holster material. Regular inspection is key. Look for frayed edges, cracked leather or worn polymer, and weak retention screws. Small issues can quickly turn dangerous by impairing function or even causing an accidental discharge. Here is a checklist of common conceal carry holster mistakes with practical fixes:
- Loose retention: Adjust screws or choose holsters with retention adjustment for a snug fit
- Gun printing: Use holsters with deeper concealment angles and wear appropriate clothing layers
- Holster shifting during movement: Secure holster mounting and consider different positions like appendix or strong side hip with 15-25 degree cant
- Discomfort when sitting or driving: Switch to a slim profile holster and adjust placement slightly forward or backward
- Worn or damaged holster: Replace holster every 1-2 years or earlier if wear affects retention or safety
- Lack of trigger coverage (especially pocket carry): Use purpose-built pocket holsters that fully cover the trigger guard
For pocket carry, use a holster designed specifically for this style, ensuring the trigger guard is fully covered and the gun stays upright and stable. For hip carry, try the traditional FBI method placing the holster behind your strong side hip with a slight forward cant between 15 and 25 degrees. This position keeps the gun tight to your body and reduces the chance of printing or shifting.
Choose a holster by considering your firearm model, daily routine, and comfort needs. Test it during your routine to ensure it stays secure, conceals well, and feels comfortable. Holsters that fail these checks should be replaced or adjusted promptly to maintain safe and effective concealed carry.
8. Maintaining Your Concealed Carry Holster for Longevity and Safety
Keeping your concealed carry holster clean, inspected, and well-maintained ensures your firearm stays secure and ready to use. Regular care prevents damage, preserves retention, and upholds safety. Following specific steps based on your holster type helps you maintain it effectively over time.
Cleaning Different Holster Materials
Holsters come in various materials like leather, Kydex, and nylon, each needing different cleaning methods to avoid damage. Leather requires gentle cleaning and conditioning to maintain flexibility and avoid cracking. Kydex and nylon are more durable and easier to clean but still need regular upkeep to remove dirt and sweat.
Leather holsters can be wiped with a damp cloth and cleaned using saddle soap or a leather cleaner. Avoid soaking leather or exposing it to extreme heat. After cleaning, apply a leather conditioner to keep it supple. For Kydex or polymer, use mild soap and warm water, then dry thoroughly. Nylon holsters benefit from gentle hand washing with mild detergent and air drying.
- Remove your firearm from the holster before starting any cleaning.
- For leather holsters, wipe off surface dust with a dry cloth.
- Apply saddle soap or leather cleaner sparingly with a soft cloth, then wipe clean.
- Condition leather using a product designed for holsters to prevent drying.
- For Kydex or polymer holsters, wash with warm water and mild soap, scrubbing lightly.
- Rinse nylon holsters by hand with mild detergent; avoid machine washing to protect stitching.
- Dry holsters completely in a well-ventilated area, away from direct sunlight or heat.
Never submerge leather holsters in water or use harsh chemicals, as this can weaken the material and reduce durability.
Inspecting Retention and Fasteners
Retention is critical for safe carry and quick access, so check your holster’s retention regularly. Inspect screws, tension devices, clips, and snaps to ensure none are loose, worn, or broken. Adjust retention screws or tensioners to maintain firm but smooth draw and re-holstering.
Look for signs such as the holster collapsing when the gun is drawn, loose fasteners, or excessive wear that might affect grip on the firearm. Adjust retention when it feels too tight or too loose to find a balance that keeps the weapon secure but still allows a quick draw. Checking retention every few months, or more often with heavy use, helps maintain safety.
- Check all screws and fasteners; tighten any loose components with the appropriate screwdriver or tool.
- Test retention by holstering and drawing your firearm slowly to feel for smoothness and security.
- Adjust retention screws or tension devices incrementally, then retest the draw to ensure proper fit.
- Inspect clips and belt attachments for signs of bending, cracking, or damage; replace if worn.
- Examine stitching and seams for fraying or separation that could compromise holster integrity.
- Replace holsters or their components if wear affects retention or overall safety.
Retention adjustment is not a one-time fix; recheck after every few weeks of carry because heat, moisture, and use can change the setting.
Storing Your Holster Properly
Correct storage keeps your holster in good shape and ready to use. Store it unloaded in a dry, cool place away from direct sunlight, which can degrade materials over time. Avoid folding or crushing the holster, especially leather ones, to prevent permanent distortion.
For leather holsters, storing them with a firearm or a form that mimics your gun’s shape helps maintain form. Kydex-style holsters naturally hold their shape but should be kept clean and dust-free. Nylon holsters should be kept dry to prevent mildew or odors.
- Unload your firearm before placing it in the holster for storage.
- Keep the holster away from humidity; use silica gel packs if necessary to reduce moisture.
- Store the holster in a breathable container or on a shelf, avoiding plastic bags that trap moisture.
- Storing long-term requires periodic checks of the holster for any signs of damage or wear.
- For leather holsters, occasionally apply conditioner even in storage to preserve suppleness.
- Do not stack heavy items on the holster or store it under pressure to avoid deformation.
Proper storage preserves your holster’s retention ability and material longevity, which are key to safe concealed carry.
Step-by-Step Action Plan
Follow these steps to wear your concealed carry holster safely, comfortably, and with quick access every day.
- Before you start: Select a holster type and carry position that fits your firearm and daily outfits. You’ll know it worked if the holster feels secure and your gun stays covered when you move.
- Day 1: Adjust the holster’s cant and placement on your waistband or belt. Test drawing your firearm slowly to confirm smooth access and retention.
- Week 1: Practice carrying the holster during normal activities like walking, sitting, and driving. Notice any discomfort or printing, then adjust the holster or clothing to fix these issues.
- Week 2: Add layering or change clothing to better conceal your holster without restricting your movement or draw speed. Confirm you can draw discreetly from under your clothing.
- Week 3: Perform dry-fire drills and quick draws multiple times daily while wearing your holster. Assess your reaction time and make small position tweaks if needed.
- Ongoing: Clean and inspect your holster regularly for wear and retention. Replace or repair parts as necessary to maintain safety and comfort.
- As you advance: Consider carrying at different positions depending on your outfit or activity, testing comfort and concealment each time.
Frequently Asked Questions
Can You Wear a Concealed Carry Holster Without a Permit?
In most states, you need a concealed carry permit to legally wear a concealed holster unless local laws state otherwise. Always check your state’s regulations before carrying concealed to avoid legal issues and ensure compliance.
Should the Grip of the Firearm Point Forward or Backward in a Holster?
The firearm grip should point backward, toward your rear, to allow a natural drawing motion. This grip orientation helps you draw safely and quickly without printing or catching on clothing.
Can You Wear a Concealed Carry Holster with Light or Tight Clothing?
Wearing a concealed holster under lightweight or tight clothing can increase printing risk. Choose holsters designed for minimal printing and heavier or layered clothes to effectively conceal your firearm.
Is It Better to Keep the Holster on Your Strong or Weak Side?
Most people carry on their strong side for better control and faster draw speed. However, some prefer the weak side for comfort, so test both to find what works best for you.
How Often Should You Check and Adjust Your Concealed Carry Holster?
Check your holster placement and retention regularly, especially after changing clothes or activity. Frequent adjustments maintain comfort, safety, and quick access throughout daily carry.
Can You Use a Hidden Carry Holster for Different Firearm Models?
Many concealed holsters are model-specific to ensure proper fit and retention. Using an ill-fitting holster risks unsafe carry or slower draw, so buy one made for your firearm model.
Before You Go
Wearing your concealed carry holster correctly helps keep your firearm secure and accessible without sacrificing comfort. Prioritize safe holster adjustment and concealment techniques during your daily routine. Start by practicing smooth draws in controlled settings today to build muscle memory and confidence for real-world use.