How Does a Retention Holster Work? A Complete Guide to Levels and Security
How does a retention holster work? It secures your firearm using mechanical features that prevent accidental drops or unauthorized access. These holsters rely on retention levels defined by one or more locking mechanisms or friction points, holding the gun in place until intentionally drawn. Start by choosing a retention holster level that matches your daily activity and security needs for optimal protection.
Key Takeaways
- Passive retention holsters use friction or natural holster fit to secure a firearm, requiring one smooth action to draw.
- Active retention holsters include additional locks or straps that need deliberate manipulation to release the gun.
- Level 1 retention typically involves a single retention method and suits low-risk everyday carry scenarios.
- Level 2 retention holsters include two retention mechanisms, improving security during physical activities like climbing or crawling.
- Level 3 retention holsters have three retention methods, offering improve protection against theft or forcible removal.
- Retention around specific firearm features, such as the trigger guard or light attachment, creates secure hold points in rigid holsters.
How Does a Retention Holster Secure Your Firearm?

A retention holster holds your firearm securely by using a combination of design features and mechanical elements to prevent accidental or unauthorized removal. The core principle behind most retention holsters is retention itself, the ability of the holster to firmly hold the gun in place until you deliberately draw it. This is typically achieved through a snug fit and specific retention mechanisms that balance security with accessibility.
At a basic level, retention depends on friction. Passive retention holsters rely on the natural grip the holster’s shape and material provide. For example, a leather or molded Kydex holster is crafted so the firearm fits tightly inside. The friction generated between the holster and the gun holds the firearm securely without requiring any action from you. This friction is often adjustable by tightening screws or adjusting straps, allowing you to customize how firmly the holster grips your firearm. Such holsters are good for everyday carry because they secure your gun while allowing for a smooth, quick draw with a single motion.
Active retention holsters add mechanical features to increase security. Common examples include thumb break straps, hood catches, or locking mechanisms that physically lock the firearm in place. To draw your weapon from an active retention holster, you first have to release one or more of these mechanisms using your thumb or another deliberate action. These features make the holster more secure against attempts to grab or knock the firearm loose. For instance, a thumb break strap snaps over the back of the pistol grip and requires a deliberate finger motion to release. More advanced models might include locking devices requiring specific sequences or tools to disengage.
Retention holsters are often categorized by retention levels, with basic friction-only holsters termed Level 1. These hold the firearm through shape and friction alone without locks or straps. Higher-level retention holsters include one or more mechanical devices, making it harder for someone other than you to remove the firearm. The friction fit prevents accidental drops while the locking mechanisms guard against forced or surprise grabs.
Selecting a holster with the right retention depends on how you plan to carry and use your firearm. A friction-based, passive retention holster is usually enough for concealed carry where ease of access is a priority. Tactical or duty holsters often use active retention to offer additional security in dynamic environments or public settings. Adjustability in retention is important. Many holsters let you tighten or loosen screws or straps to find the right balance of grip and draw speed according to your preferences and holster material, whether leather, nylon, or molded plastic shells.
Differences Between Passive and Active Retention Systems
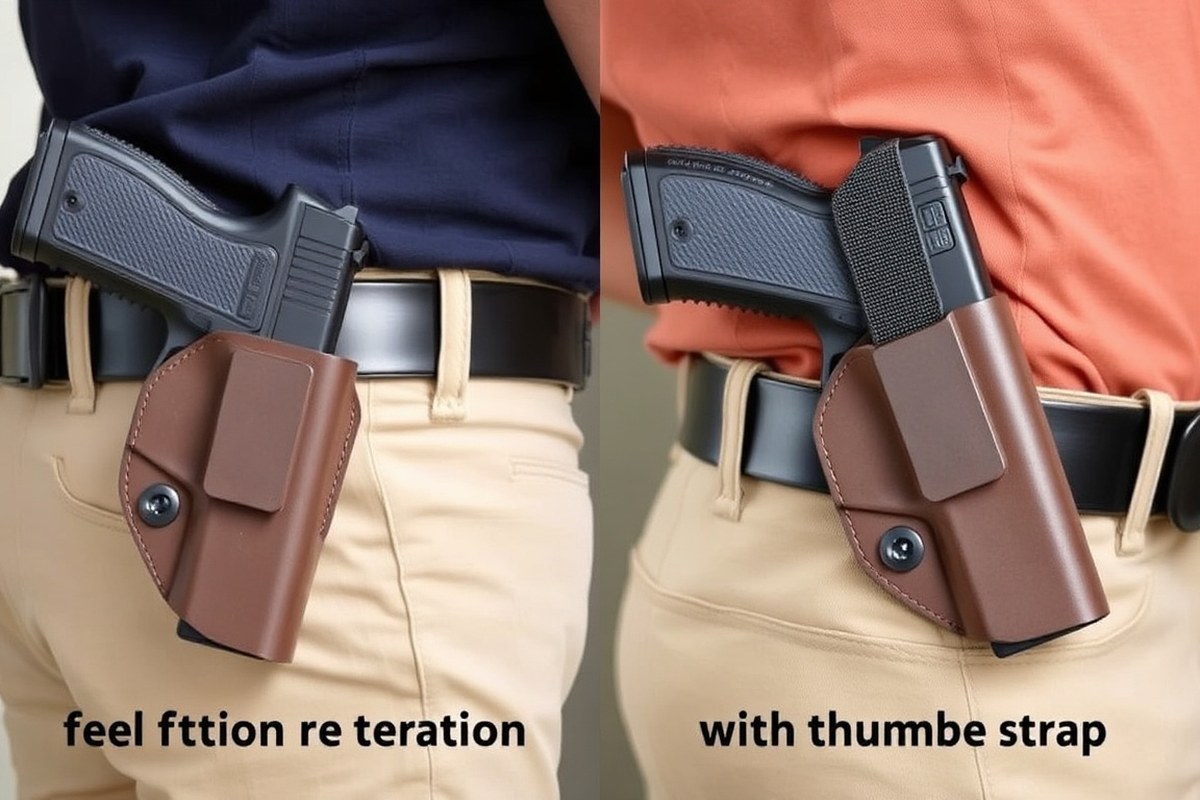
Retention holsters come in two basic types: passive and active. Passive retention keeps your firearm secure through a snug fit and friction. Active retention uses extra locking features like buttons or thumb breaks that must be deliberately moved to free the firearm.
Passive retention holsters typically offer Level 1 retention. They hold the gun primarily through a snug design tailored to the specific pistol, making it quick and simple to draw, usually one smooth motion. This design is common for everyday carry or concealed carry, where accessibility and speed matter most. Conversely, active retention holsters provide Level 2 or higher retention by combining passive friction with an additional locking system like a trigger guard lock or thumb break strap. These holsters are common in law enforcement and security due to the improve protection against unauthorized access or weapon grabs.
The following table compares passive and active retention holsters by activation method, security level, ease of draw, and typical use cases. This should help you determine which system fits your needs.
| Feature | Passive Retention | Active Retention |
|---|---|---|
| Activation | One simple motion (draw with friction fit) | Requires pressing a lever/button or releasing strap |
| Security Level | Level 1 (friction fit, tight design) | Level 2 or 3 (friction + locking mechanisms) |
| Ease of Draw | Faster, fewer steps | Slower due to unlocking action |
| Typical Use Cases | Everyday carry, concealed carry, personal use | Law enforcement, security personnel, high-risk environments |
| Examples | Passive friction holster; bucket style holster | Thumb break strap; trigger guard lock; ejection port lock |
Choosing between passive and active retention depends on your daily activities and threat level. Passive retention holsters are sufficient for most civilian users who need fast draws for personal defense. Active retention holsters are ideal for those in professions with improve risks of weapon grabs or where additional security outweighs draw speed concerns.
Test your holster’s retention regularly to ensure it’s holding securely without compromising quick access when needed.
Understanding Retention Levels: Level 1, 2, and 3 Explained
Retention holsters are rated by levels indicating how many steps you must take to draw your firearm and how secure it is. Level 1 requires a single action, Level 2 adds an active locking mechanism requiring two steps, and Level 3 incorporates multiple active locks for higher security, needing three separate actions to release your gun. Each level balances ease of access against protection from unauthorized grab attempts.
Level 1: Friction Fit and Passive Retention
Level 1 retention holsters rely primarily on passive retention through friction and a tight fit around the firearm. You draw the gun with one single motion, pulling it free. These holsters are usually made of leather, molded plastic, or Kydex, shaped precisely to hold your weapon securely by squeezing its body without additional mechanical locks. The simplicity means Level 1 holsters offer quick access but minimal resistance against someone trying to snatch your firearm. Examples include common competition holsters or everyday carry options where speed is important and risk of interference is low.
This level is suitable for open-carry users or those who value a fast draw over maximum retention. Cost-wise, Level 1 holsters tend to be more affordable due to their simpler construction. Its main drawback is vulnerability; if a person tries to seize your weapon, just one pull can release it because there are no secondary locking mechanisms.
Level 2: Adding One Active Locking Mechanism
Level 2 retention holsters combine passive retention with one active locking feature, such as a thumb break strap, a button release, or a trigger guard lock. Drawing the firearm requires two actions: first disengaging the active lock, then withdrawing the weapon. This additional step significantly improves security by preventing accidental or unauthorized draw. For example, a leather holster with a thumb strap that you must unlatch before pulling the gun gives you Level 2 retention.
These holsters strike a balance between speed and security. While the second action slows your draw slightly, regular training can help achieve a smooth, confident release. Level 2 retention holsters are common for law enforcement officers who need extra protection without overly sacrificing draw speed. Popular models include tactically designed holsters fitted with retention snaps or automatic triggers that engage when the weapon is holstered.
Level 3: Multiple Active Locks for Maximum Security
Level 3 retention holsters require three distinct actions to draw your firearm, using multiple active locking mechanisms. For example, you might need to release a thumb break, disengage a hood cover, and press a trigger guard lock. Combining these steps offers the highest standard of security, making it very difficult for someone else to remove your gun without your knowledge or consent. Well-known Level 3 holsters for firearms like the Glock 17 or Glock 19 often feature a thumb snap plus an automatic locking hood or a trigger guard retention device.
These multi-lock holsters suit high-risk environments where preventing weapon theft or loss is critical, such as on duty for police or security personnel. The tradeoff is slower draw speed, so you must practice regularly to pull your weapon efficiently under stress. Level 3 holsters typically cost more due to their complex design and multiple parts. They offer reassurance when security outweighs the need for rapid access.
How Retention Mechanisms Like Straps and Locks Work
Retention holsters hold your firearm securely using physical locking features. These include thumb breaks, straps, trigger guard locks, and button-activated mechanisms. Each system requires a specific action to release the gun, stopping unauthorized draws and accidental drops.
Thumb Break and Snap Straps
Thumb breaks and snap straps are common active retention features. A strap crosses over the firearm and fastens with a snap button or Velcro, holding the gun in place. To access the firearm, you must manually unsnap the strap with your thumb before drawing.
These devices physically block the firearm from coming free until disengaged. They work well for quick but controlled draws when you train to release the strap smoothly. However, failing to fully release the thumb break can slow your draw or cause a hang-up. Steps to draw a firearm with a thumb break or snap strap:
- Place your thumb on the snap button securing the strap.
- Apply pressure to unsnap or release the strap.
- Pull the strap clear of the firearm grip.
- Grip the firearm firmly.
- Draw the firearm smoothly from the holster.
Trigger Guard Locks and Levers
Trigger guard locks secure the firearm by physically locking around the trigger guard area. These often use a locking lever or latch that must be released manually before the gun can be drawn. The lock prevents the trigger from being accessed or the firearm from being pulled free.
To draw, you engage the unlocking lever or button with your finger or thumb, releasing the lock holding the trigger guard. This step prevents unauthorized access, as the lock cannot be released accidentally or without practiced technique. Draw steps with a trigger guard lock:
- Locate the locking lever or release button near the trigger guard area.
- Use your thumb or finger to push, pull, or slide the lever to get the mechanism.
- Maintain a firm grip on the firearm’s handle.
- Draw the firearm straight from the holster once unlocked.
Automatic Locking Systems (ALS/SLS)
Automatic locking systems (ALS) like those from Safariland engage automatically when the firearm is holstered. These lock the gun in place using a trigger guard mechanism or hood. A secondary release, such as a button or lever, must be activated to draw.
These systems add security with a hands-on unlocking step. For a combined ALS and SLS (Self Locking System) configuration, releasing the firearm requires multiple coordinated actions, increasing security against unauthorized draws. Drawing from an ALS/SLS system typically involves these steps:
- Place your thumb on the SLS button and press it to release the hood.
- Rotate or push the hood forward as indicated on your holster.
- Pull back the ALS retention lever with your index finger or thumb.
- Grip the firearm firmly and draw it forward and free.
Training is important to perform these steps smoothly and quickly under stress. While these systems add draw steps, they greatly increase anti-theft and anti-tampering security.
How Retention Level Affects Draw Speed and Accessibility
The choice of retention level affects how much time you should expect to spend training. Level 1 holsters typically require less practice to master a fast draw because there is only the passive friction retention. Active retention holsters at Levels 2 and 3 require more focused training for smooth disengagement under pressure. Frequent drills with a timer can help. The tradeoff comes down to security versus accessibility: more retention equals slower draw but higher protection against unauthorized grabs. If you carry concealed daily in low-risk environments, Level 1 holsters are generally preferable for their faster draws. For higher-risk roles, such as law enforcement, the security of Levels 2 or 3 outweighs slower access. When training, simulate real conditions including clothing, stance, and known threats, so your draw speed measurement and skills reflect reality. How quickly you can clear the retention mechanism without fumbling matters more than raw speed alone. Holstering and reholstering safely also deserve equal practice time to avoid weapon drops or negligent discharges. Practice your draw regularly with your exact holster and retention mechanism until the movements become second nature, especially if you rely on active retention levels.
Factors to Consider When Choosing a Retention Holster
Selecting a retention holster starts with matching the retention level to your specific environment and activity. For everyday carry, many find a Level 1 passive retention holster sufficient because it offers quick access and basic security through snug fit and friction. Law enforcement and military personnel typically use Level 2 or Level 3 holsters, which add active retention features like straps or locking mechanisms to prevent unauthorized removal under stressful or high-risk situations.
Material and design significantly affect how well a holster retains the firearm and its comfort during use. Holsters made from rigid materials like Kydex or injection-molded polymers often provide consistent retention pressure and durability, which can maintain retention levels without loosening over time. Leather holsters can offer comfort and conform to the firearm shape but may require frequent adjustment to maintain proper retention since they can stretch or wear. Consider the holster profile and how it distributes weight against your body to match your activity, whether sitting, running, or moving in tactical situations.
Your firearm model influences the retention holster choice because holsters are often molded to specific guns to ensure proper fit and security. For example, holsters designed for popular models like the Glock 19 or Glock 22 have features tailored to their dimensions and controls. Using a holster not made for your exact firearm can compromise retention and safety, increasing the risk of the gun shifting or slipping out unintentionally. Use the following checklist to assess your retention holster needs:
- Activity level: consider if you’ll be mostly stationary or moving vigorously
- Concealment preferences: determine if you need a low-profile holster or open carry is acceptable
- Threat risk: evaluate your environment for the likelihood of firearm grabs or interference
- Retention level: balance between speed of draw and security needs (Level 1 for everyday carry, Level 2 or 3 for law enforcement)
- Holster material and design: choose for durability, comfort, and consistent retention
- Firearm compatibility: ensure the holster is molded or adjustable for your exact model
Costs vary by retention level and materials, ranging roughly from $30 for simple passive holsters to $150 or more for advanced Level 3 models with multiple retention mechanisms. Proper choice results in a holster that secures your firearm reliably without hindering draw speed or comfort. A poor fit or mismatch between retention level and environment can lead to accidental drops, slow access, or exposure to theft. Invest time in evaluating these factors so your retention holster supports your safety and readiness throughout your daily routine or professional duties.
Common Mistakes and Myths About Retention Holsters
Retention holsters often get a bad rap for slowing down your draw, but that’s not always true. Level 1 retention holsters, which rely on passive retention, allow you to grab and shoot quickly without extra steps. The key is a well-made, properly fitted holster with adjustable retention screws to fine-tune tension. When set up right, these holsters provide good security while keeping your draw speed fast.
Many users assume any holster with straps or thumb breaks automatically qualifies as Level 2 retention, but this isn’t accurate. Level 2 retention involves active mechanical features like straps or locks that require deliberate release when drawing. Not every holster with a strap meets this standard, so don’t rely on appearance alone when choosing one. Check the manufacturer’s specifications or test how much effort it takes to release the firearm before assuming it’s Level 2.
While passive retention holsters do offer convenience, some shooters think they are insecure because the firearm isn’t locked down. A properly designed Level 1 retention holster actually offers solid security without complexity. The “tightness” from adjustable screws holds the firearm firmly in place, reducing movement or accidental falls. Incorrectly adjusted tension or poor fit, however, can make passive retention less reliable and increase the risk of firearm loss during movement. Common mistakes users make with retention holsters include:
- Over-tightening retention screws, which can slow down your draw or cause wear on the firearm’s finish.
- Assuming a strap or thumb break always means higher retention, leading to surprise delays in emergencies.
- Using generic holsters that lack proper fit, compromising both security and draw speed.
- Ignoring regular checks and maintenance, which can let screws loosen and retention degrade over time.
- Neglecting to practice draws from a retention holster to build muscle memory with its unique release system.
Avoid these pitfalls by adjusting the retention tension so the gun stays secure but still draws with a confident, smooth motion. Confirm the retention level before purchase, especially if you depend on active mechanisms. Practice regularly with your retention holster to build speed and familiarity. These steps prevent surprises and help you use the holster safely and effectively.
Best Practices for Maintaining and Using Retention Holsters Safely
Retention holsters need regular care and deliberate practice to ensure they function securely and allow you fast, safe access to your firearm. Maintaining your holster’s mechanisms, training consistently on their operation, and observing strict safety measures will keep your firearm secure and ready when you need it.
Cleaning and Inspecting Holsters Regularly
Retaining mechanisms rely on smooth movement and sturdy components to lock and release your firearm properly. Dirt, debris, sweat, and oils from your skin can accumulate and interfere with these mechanisms over time. Inspect your holster weekly for any signs of wear, loose parts, or buildup. Clean it at least once a month using mild soap and warm water; avoid harsh chemicals that can degrade holster materials or retention devices.
Check moving parts like straps, locks, and triggers frequently. Lubricate metal components lightly with a gun-safe lubricant to prevent corrosion without attracting dirt. Inspect stitching and attachment points to ensure the holster remains secure on your belt or body. Neglecting this maintenance can cause retention devices to fail, reducing security and increasing the risk of accidental loss.
Training Steps to Master Retention Devices
Retention holsters often feature multiple mechanisms requiring specific sequences to release your firearm quickly. Mastering these actions under stress demands focused training. Start slowly, learning each step individually, such as releasing a thumb break or pressing a locking tab. Use dry-fire practice at home before moving to live-fire drills at the range. Effective training includes:
- Practice drawing from your holster at least twice a week
- Incorporate retention device release sequences into your draw routine
- Use timers to track and improve your draw speed
- Train under varying conditions, such as low light or with different clothing
- Simulate stress by adding physical activity or mental distractions
Consistent practice builds muscle memory, so disengaging retention devices becomes instinctive. This improves draw speed while maintaining firearm security, especially important with Level 2 and Level 3 holsters that have more complex locking systems.
Safety Rules for Carry and Draw
Safe handling prevents accidental discharges and maintains your firearm’s security during daily use. Always confirm your retention holster is properly secured on your body before carrying. Check that all locks or straps are engaged each time you holster your gun. Avoid forcing your hand into the holster without deliberate intent to draw. Keep these safety reminders in mind:
- Never look away or become distracted while drawing or holstering
- Keep your finger off the trigger until you are ready to fire
- Practice the draw slowly during training to reinforce safe habits
- Ensure your holster fully covers the trigger guard at all times
- Inspect your retention devices regularly to prevent accidental releases
Always test your retention holster’s locking features during practice to ensure they engage and release properly before relying on them in real situations.
Your First Steps: Getting Started with Retention Holsters
Follow this action plan to choose and use your retention holster effectively, ensuring both security and accessibility.
- Before Purchase: Identify your daily carry needs, consider your environment and typical activities to select the right retention level. Check that the holster model fits your specific firearm.
- Day 1: Practice securing your firearm in the holster, engaging all retention features. Confirm it holds firmly with no wobble when you move your wrist or arm.
- Week 1: Start daily dry draws without live ammunition, focusing on overcoming active retention controls smoothly. Track your draw speed and confidence.
- Week 2: Introduce varied positions and movements to test holster security during simulated activities. Adjust fit or retention tightness if experiencing retention failure or difficulty.
- After 3 Weeks: Conduct live-fire training sessions with the retention holster to adapt muscle memory under realistic conditions. Verify safe firearm handling and quick re-holstering.
- Monthly: Inspect the holster’s retention mechanisms and materials for wear or damage. Clean and lubricate moving parts as recommended to maintain function.
- Ongoing: Regularly refresh your practice with both dry and live drills to keep your skills sharp and assess if your retention holster still meets your security and accessibility needs.
Frequently Asked Questions
How Does a Retention Holster Prevent Firearm Theft During a Physical Struggle?
A retention holster uses one or more locking mechanisms to prevent unauthorized access even during a struggle. Active retention levels two or higher require specific actions to release the firearm, making it hard for a perpetrator to grab it quickly.
Can a Retention Holster Be Used for Concealed Carry Without Sacrificing Comfort?
Yes, many retention holsters are designed for concealed carry with slim profiles and comfortable materials. Passive retention holsters with level one retention often balance security and everyday comfort effectively.
How Do Retention Holsters Affect the Weapon’s Accessibility in Emergencies?
Higher retention levels add security but can slow draw speed due to extra release steps. Training often helps users manage this tradeoff safely under stress.
Are There Certain Firearm Models That Work Best with Retention Holsters?
Retention holsters are often model-specific to ensure optimal fit and retention. Examples include the level 3 retention holsters made for Glock 19 or Glock 22 pistols.
Is It Necessary to Train with a Retention Holster Before Using It on Duty?
Yes, training is essential to master the release mechanisms and smooth draw. Proper practice prevents fumbling and maintains readiness in high-pressure situations.
What Is the Difference Between Holster Retention and Belt Retention?
Holster retention secures the firearm inside the holster, while belt retention ensures the holster stays attached to you. Both work together to maintain control during movement or confrontation.
Before You Go
Retention holsters provide a balance between securing your firearm and granting fast access when needed. Mastering their use means regular practice and mindful selection based on your routine. Start by getting hands-on experience with your holster today to build confidence and protect yourself effectively.