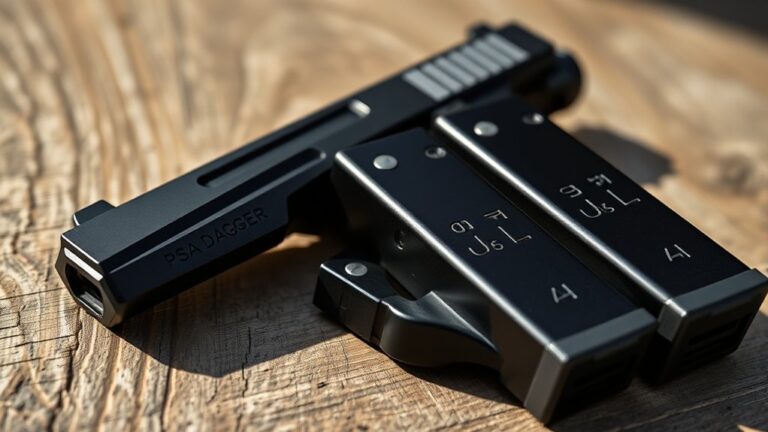
How Do You Adjust Iron Sights in 10 Simple Steps?
Introduction
If you’ve ever found yourself frustrated by inconsistent accuracy with your firearm, you’re not alone. Many shooters struggle with getting their iron sights perfectly adjusted, leading to missed targets and wasted ammunition. The good news is that with the right steps, you can master this adjustment process and enhance your shooting precision.
Whether you’re a novice or a seasoned shooter, knowing how to fine-tune your sights can make all the difference in your shooting experience. Let’s dive into how you can confidently adjust your iron sights in just ten simple steps.
—
To adjust your iron sights in 10 simple steps, first guarantee your firearm is unloaded and stable.
Take a shot to see where you hit, then mark and record your sight settings.
Use the adjustment knobs—turn them small, consistent increments—based on impact shifts.
Fire test groups to confirm your zero and make precise calculations for impact correction.
Keep track of all changes and tighten your sights to prevent drift.
If you want detailed tips, you’ll find plenty more helpful guidance to improve your accuracy.
Key Takeaways
- Ensure the firearm is unloaded and securely mounted before making adjustments.
- Fire a test shot to identify current impact points and record initial sight settings.
- Use the sight knobs to make small, incremental vertical (elevation) and horizontal (windage) adjustments.
- Measure impact shifts with a target and calculate necessary clicks for precise zeroing.
- Verify accuracy by firing groups and fine-tuning sights until shots cluster around the aim point.
How Do I Prepare My Firearm for Sight Adjustment?
Before you start adjusting your iron sights, it’s essential to prepare your firearm properly.
First, verify the firearm is unloaded and safe—double-check the chamber and magazine to confirm there are no rounds present.
Safety comes first, so always handle your gun as if it’s loaded until verified otherwise.
Always treat your firearm as loaded until you have personally verified it is safe.
Next, mount your firearm securely on a stable surface or rest.
This prevents any movement during the adjustment process, guaranteeing accuracy.
Once mounted, take a shot at your target to see where your current point of impact is.
Record or mark the initial sight settings so you can track changes as you make adjustments.
Use the appropriate tools, like a sight adjustment tool or a small screwdriver, for precise tuning.
Taking these steps guarantees your firearm is safe, stable, and ready for accurate sight adjustments, giving you confidence in your shooting precision.
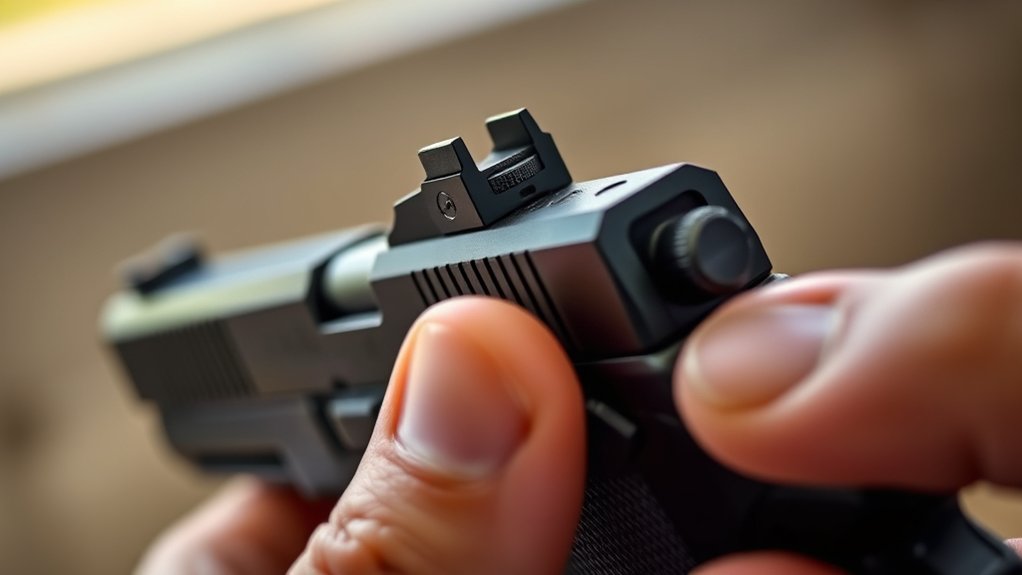
What Are the Types of Iron Sight Adjustments?
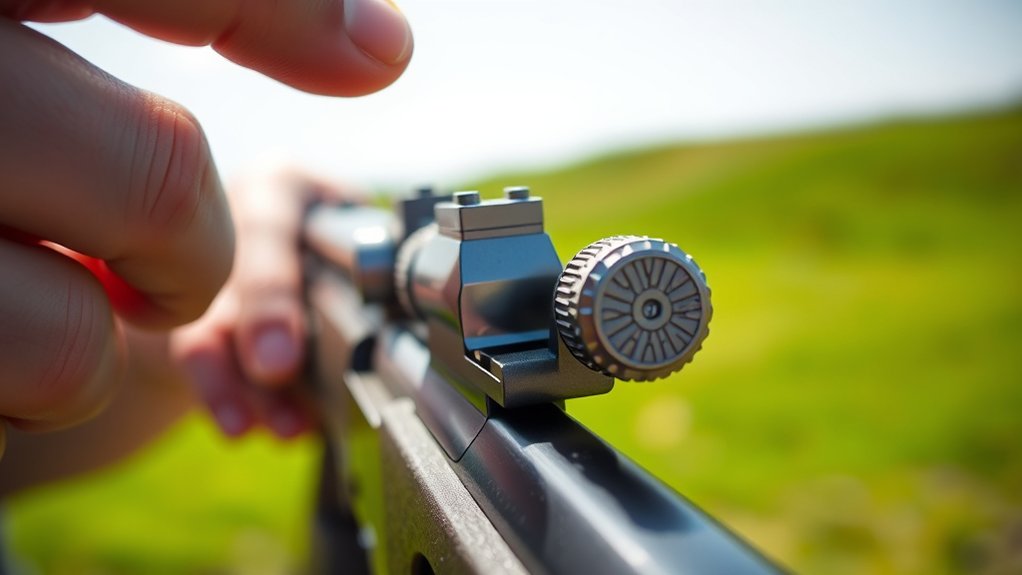
Iron sight adjustments typically involve either vertical or horizontal movements to fine-tune your aim, and these are usually achieved through specific mechanisms on the sights themselves.
You’ll primarily use the rear sight’s windage knob for horizontal corrections and the elevation adjustment for vertical changes.
Click adjustments are common, with each click shifting your point of impact by a set amount, often measured in MOA.
Here are the main types of adjustments:
- Vertical Adjustments: Moving the rear sight up or down to correct elevation or raising/lowering the front sight accordingly.
- Horizontal Adjustments: Turning the windage knob on the rear sight to shift your aim left or right.
- Click Adjustments: Precise, incremental changes that make small, predictable adjustments to point of impact.
- Calculative Adjustments: Using formulas or calculations when exact impacts are needed without marked increments.
Understanding these types helps you make precise, confident adjustments for accurate shooting.
How Do I Know Which Way to Turn the Adjustment Knobs?
To know which way to turn the adjustment knobs, start by checking if they’re marked with arrows or indicators showing the direction of impact movement.
If they’re unmarked, make a small turn and see how the sight shifts, then mark the knobs so you remember the direction.
Always test your adjustments before making final changes to guarantee accuracy.
Mark the Adjustment Knobs
Knowing which way to turn the adjustment knobs can be confusing at first, but marking them clearly helps prevent mistakes.
To do this, use a permanent marker or tape to mark your current position on each knob. This way, you’ll know which direction you’re turning and how it affects sight movement.
- Mark the knobs with arrows or color codes to show the direction for elevation and windage.
- Turn the knobs in small, consistent clicks—just one or two—to observe precise sight movement.
- Test the adjustments by shifting the knob slightly and noting how the sight moves relative to your target.
- Use a test target to see which way impact shifts, creating a clear link between knob turns and sight movement.
Observe Sight Movement
When you start adjusting the sight, it’s important to carefully observe how the impact point shifts on the target.
As you turn the adjustment knobs, watch for sight movement—does the impact move closer to or farther from your aim?
Noting this helps you understand which way to modify the sight to correct your aim.
Use markings like arrows or tape on the knobs to remind yourself which direction to turn for specific sight movement.
Remember, turning the knob up or down adjusts vertically, while left or right turns adjust horizontally.
To guarantee accuracy, adjust the sight slightly, then fire a small group to observe how the impact point responds.
Consistently observing sight movement allows you to make precise corrections for better accuracy.
Test Before Final Changes
Wondering how to guarantee your adjustments are accurate before making final changes?
You need to test your sight adjustments thoroughly to understand the impact of each turn. First, mark the original position of the adjustment knobs so you can compare later. Then, turn the knob in small, consistent increments—just one click at a time—and shoot a group to see how the impact shifts on the target.
Observe if the impact moves in the expected direction. Use labeled or marked knobs to remember which way they turn for up, down, left, or right. Finally, test at a known distance with clear reference points to verify your adjustments are precise and effective before settling on your final settings.
How to Use a Target and Mark Your Sights for Better Accuracy
Have you ever fired a shot and wondered exactly where it hit?
To improve accuracy, use a target with measurement markings like MOA rings or grid lines.
Fire a group at a known distance, then draw horizontal and vertical lines through the center of your shots to identify the point of impact.
Comparing your shots to the front sight post helps determine how to adjust the sights for better alignment.
| Impact Location | Adjustment Needed |
|---|---|
| Above point of aim | Raise the front sight post or adjust the sight upward |
| Left of point of aim | Turn the sight adjustment to move impact right |
| Below point of aim | Lower the sight or adjust downward |
Mark the adjustment knobs with arrows or stickers.
Then record the number of clicks needed to move impact to your desired point.
This process ensures consistent, precise shots.
How Do I Calculate the Number of Clicks Needed for Impact Shift?
To figure out how many clicks you need for an impact shift, you need to understand how angular measurements like MOA relate to your target distance.
Then, you’ll apply a simple formula that divides the total MOA shift by your sight’s click value.
Understanding Angular Measurements
Understanding how angular measurements relate to your target is essential for accurately adjusting your iron sights.
MOA, or minutes of angle, helps quantify impact shift when making sight adjustments. Typically, one click shifts the impact by about 0.5 MOA at 100 yards, but this can vary.
To figure out how many clicks you need, divide your desired impact shift in MOA by the MOA per click (e.g., 2 MOA / 0.5 MOA per click = 4 clicks).
Remember, converting impact shift from MOA to inches involves multiplying by (distance in yards / 1.047).
Moving your sight in the same direction as the impact shift ensures your shot hits closer to your point of aim.
- Feel confident in precise sight adjustments.
- Master the impact shift with every click.
- Turn MOA calculations into real-world results.
- Aim with certainty, adjust with clarity.
Applying the Click Adjustment Formula
Calculating the number of clicks needed to adjust your sights involves translating your desired impact shift into a measurable, actionable figure.
First, determine the impact per click by multiplying the distance to your target by the MOA per click and converting it to inches. For example, at 100 yards, 1 MOA equals about 1.047 inches.
Once you know the impact per click, divide your desired impact shift (in inches) by this value. For instance, if each click moves the impact by 0.5 inches and you want a 2-inch shift, you need 4 clicks (2 / 0.5).
Always test your adjustments with shots to verify the impact shift matches your calculations before finalizing your sight adjustment.
Converting Impact Shifts
Ever wondered how to convert your desired impact shift into the number of clicks needed? It’s simple once you understand the basics.
First, determine how many inches your bullet needs to move on the target. Then, divide that by your sight’s impact per click, which is specified by your manufacturer.
For impact shifts measured in MOA, convert MOA to inches at your shooting distance—1 MOA is roughly 1.047 inches at 100 yards—and multiply by your impact shift in MOA.
Here’s what you need to do:
- Convert MOA to inches at your distance.
- Decide your desired impact shift in inches.
- Divide impact shift by impact per click.
- Confirm your sight’s impact per click for accuracy.
This guarantees precise impact shifts adjustment every time.
How to Make Small, Precise Adjustments Without Overcorrecting
To make small, precise adjustments without overcorrecting, it’s essential to change your sights gradually and observe the effects carefully.
Start by adjusting the sight knobs one click at a time, avoiding large or rapid turns.
Make small, deliberate adjustments to sight knobs, avoiding quick or heavy turns for better control.
Use a target with clearly marked rings to measure how many MOA or inches the group moves with each click, helping you make accurate corrections.
Before turning the knobs, mark their current position so you always know which way to adjust for the desired shift.
After each small change, fire a test shot or group to see if the impact moves closer to the center.
Be cautious not to overcompensate based on a single shot; instead, repeat the process, combining small clicks with pattern recognition.
This gradual approach prevents overshooting your target zero and ensures your adjustments are precise, effective, and controlled.
How to Shoot Test Groups and Confirm Your Zero
Before finalizing your zero, it’s crucial to shoot test groups to accurately assess where your shots are impacting relative to your point of aim.
This helps you determine if your sights need adjustments.
To do this:
- Fire a test group of at least three rounds at your zeroing distance. Then mark the center and measure how far your shots deviate from the point of aim.
- Use this data to decide which adjustments are necessary—moving your rear sight left, right, up, or down.
- Make small, incremental adjustments and fire another test group to see if your shots are improving.
- Continue this process until your test groups consistently cluster around your point of aim.
Finally, shoot a final test group after making adjustments to confirm your zero.
When your shots are tight and centered, you’ve successfully confirmed your zero.
How Can I Record and Mark My Sight Settings for Future Use?
Keeping track of your sight adjustments makes future zeroing and fine-tuning much easier.
Before making any changes, mark the current position of your sight adjustment knobs with a permanent marker or a small piece of tape.
Use a consistent method, like drawing arrows or numbering the knobs, to clearly indicate the direction and amount of adjustment.
After each sight adjustment, record the number of clicks or specific settings in a shooting log or on a dedicated chart.
This helps you keep a clear record of your sight settings over time.
When adjusting your sights, turn the knobs in the marked direction, then note the new settings to track your progress.
Periodically verify and update your recordings to guarantee your sight markings stay accurate after multiple adjustments.
Properly marking and recording your sight adjustment settings helps you quickly return to previous zeroes, saving time and frustration during future shooting sessions.
What Are Common Sight Adjustment Problems and How Can I Fix Them?
Many shooters encounter common sight adjustment problems that can lead to frustrating inaccuracies.
Understanding the root causes makes fixing them easier. Incorrect sight adjustment often results in impact points that miss your target, wasting time and ammo.
Here are key issues:
- Unclear adjustment directions – Without marking knobs with arrows, it’s easy to turn in the wrong direction, messing up your impact point.
- Inadequate zeroing – Not firing enough rounds to get a reliable shot group causes improper sight adjustments.
- Sight drift – If sight screws aren’t tight, the sight can shift during shooting, disrupting impact points.
- Wrong adjustment method – Turning sights opposite to the desired impact shift, or ignoring the FORS rule, leads to misalignment.
Fix these by marking your knobs, firing sufficient rounds for zeroing, tightening sight screws, and understanding proper adjustment techniques.
These steps ensure accurate sight adjustment and better impact point control.
Tips to Keep Your Sights Zeroed Over Time
To make sure your sights stay accurate over time, it’s important to regularly check and verify your zero, especially after changing ammunition or environmental conditions.
Start by confirming your rear sights are properly aligned at your typical shooting distance.
Mark your sight adjustment knobs with a permanent marker or tape to track any changes and guarantee consistent zeroing.
Keep your firearm clean and well-maintained, as dirt or corrosion can hinder sight movement and compromise accuracy.
Use a stable shooting position and consistent technique during zero checks to get reliable results.
Re-zero your sights periodically—every 100 to 200 rounds or after rough handling—to maintain precision.
When adjusting the sights, make small, deliberate adjustments to the rear sights, and always verify your zero afterward.
Regular maintenance and careful adjustment help keep your sights accurate, so you can trust your shots over time.
Frequently Asked Questions
What Is the Basic Rule for Sight Adjustment?
The basic rule for sight adjustment is to move the sight in the same direction you want the point of impact to shift.
For example, if your shot hits high, you lower the rear sight or raise the front sight.
If it hits low, you do the opposite.
Always make small adjustments, one click at a time, and check your aim after each change to guarantee accuracy.
How Do Adjustable Iron Sights Work?
Adjustable iron sights work by allowing you to fine-tune your aim using knobs or screws.
When you turn the windage knob, it shifts the rear sight left or right, while adjusting the elevation moves it up or down.
Each click causes a small, precise change—often around 0.5 MOA—helping you align your sights with your point of impact.
Marked indicators guide you to make accurate, repeatable adjustments.
Do You Have to Adjust Iron Sights?
Yes, you do need to adjust iron sights if your shots aren’t hitting where you aim.
If your shots are consistently off-center, use the windage and elevation knobs to fine-tune the sights.
Regularly zeroing your sights guarantees accuracy, especially after changing ammo or environmental conditions.
Proper adjustments help you hit your target more consistently, making your shooting more precise and reliable.
What Range Are Iron Sights Zeroed At?
You typically zero your iron sights at 25, 50, or 100 yards, depending on what you’re shooting for.
Imagine the moment you line up your shot, knowing it’s perfectly aligned for that distance.
When you zero at 25 yards, it’s great for close-range targets;
50 yards offers a balanced shot; and 100 yards is ideal for precision.
Your choice shapes every shot ahead, making every pull of the trigger count.
Conclusion
So, next time you’re out shooting, remember that a little patience and these simple steps can turn a tricky sight adjustment into a quick win.
It’s funny how a few small tweaks can make all the difference, almost like the rifle and your aim are finally syncing up after months apart.
With your sights zeroed, you’ll find yourself hitting bullseyes more often—making every shot feel a little more like second nature.
Happy shooting, and may your iron sights always be perfectly adjusted!