How to Aim a Glock: Complete Guide for Accurate Shots and Confident Shooting
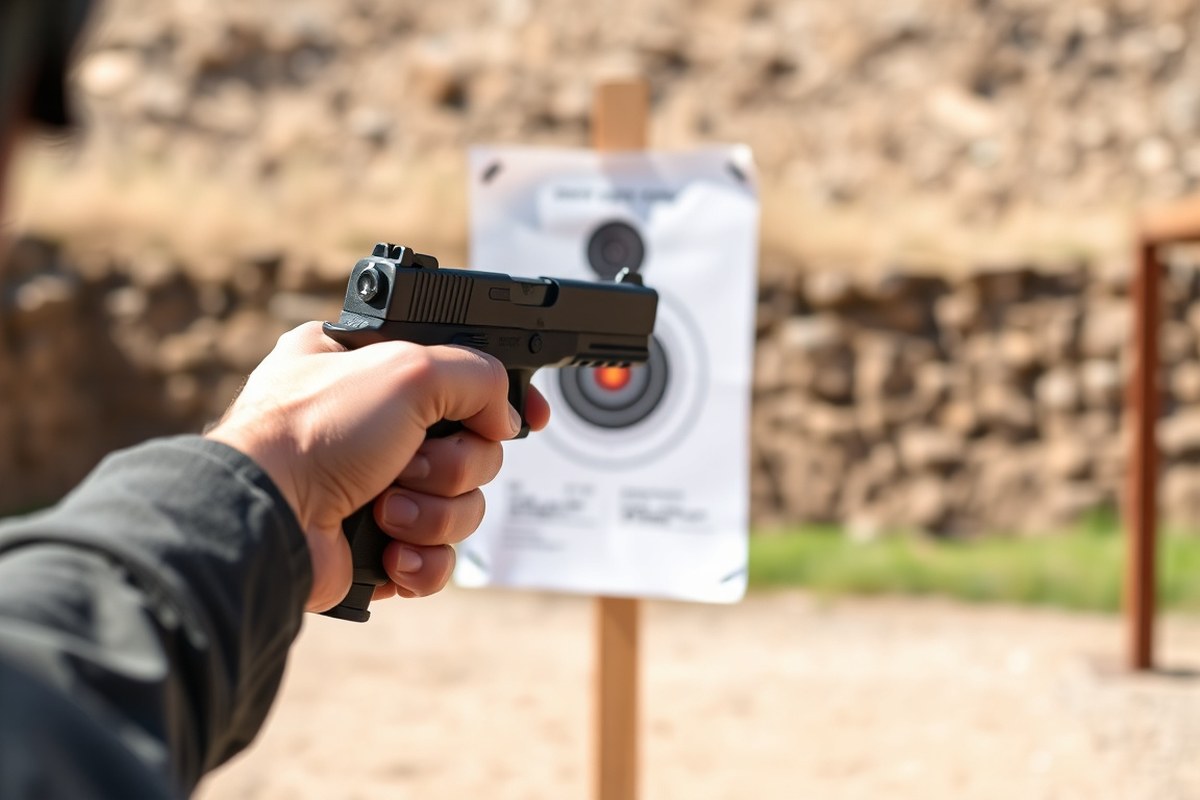
How to aim a Glock starts with proper sight alignment and a stable grip. Focus on aligning the front sight with the rear sight and target using a Point of Aim (POA) picture for reliable accuracy. Begin by establishing a firm, V-shaped grip on the backstrap to control recoil and maintain steady aim.
Key Takeaways
- Use your dominant eye to align Glock sights for more precise targeting.
- Choose between a Point of Aim or 6-o’clock hold to predict where your shots will land.
- Apply about 70% pressure from your support hand for a stable Glock grip.
- Focus on the front sight during aiming since your eyes cannot focus on all sights and target simultaneously.
- Practice breath control and smooth trigger pulls to avoid jerking and improve shot consistency.
- Clean your Glock every 500 to 1,000 rounds to maintain firing accuracy.
How to Align Glock Sights for Accurate Aiming
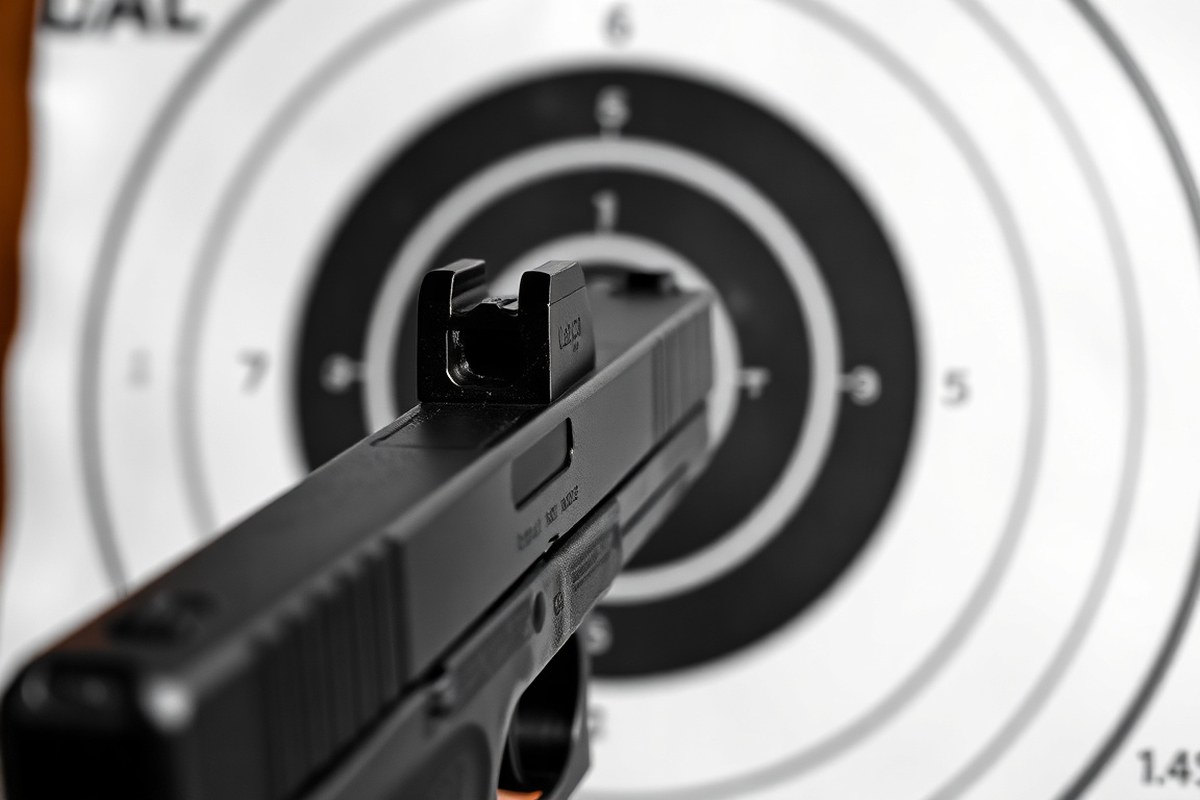
Proper sight alignment on a Glock means lining up the front and rear sights so the top of the front sight is level with the top of the rear sight and centered evenly within the rear notch. This alignment is the basis for a clear sight picture, which you need to hit your target accurately. The rear sight acts as a reference point, and the front sight is what you concentrate on most while aiming. This helps your brain translate the placement of the sights onto the target for a precise shot.
Because your eye can’t focus on the rear sight, front sight, and target all at once, you should focus sharply on the front sight. The rear sight and target will appear slightly blurred, which is normal and expected. Most Glock owners find the Point of Aim (POA) sight picture useful at typical shooting distances such as 25 yards. This sight picture places the front sight directly on the center of the target with the top of the front sight level with the rear sight. Other sight pictures, like the 6 o’clock hold, are more precise but may require more practice. To align your Glock sights properly and create an effective sight picture, follow these steps:
- Identify your dominant eye. Use it to aim through the sights for best accuracy.
- Raise your Glock to eye level. Bring the pistol to a natural shooting position with your grip and stance set.
- Focus on the front sight post. Look sharply at the front sight, allowing the rear sight and target to blur slightly.
- Align the front sight in the rear sight notch. Center the front post between the two rear sight posts and level the top edges.
- Choose and maintain a consistent sight picture. Most shooters use the Point of Aim picture, lining the front sight on the exact point they want to hit.
- Keep your focus steady on the front sight as you prepare to fire. This will minimize aiming errors.
- Practice sight alignment drills regularly. This builds muscle memory and helps your eye adapt to the focusing demands.
Correct sight alignment costs little but takes practice to master. Failing to properly align the sights leads to shots that consistently land off target, often low or to the side. Practicing at 25 yards or closer allows you to see immediate results and make adjustments. Factory Glock sights designed for POA at 25 yards provide reliable accuracy when used correctly. Adjusting your focus and alignment in varied lighting or rapid-fire conditions may require additional effort, but the fundamentals remain the same.
Establishing a Stable Grip and Stance for Glock Accuracy

Aiming a Glock accurately starts with establishing a solid grip and stable stance. The grip controls recoil and muzzle rise, which are key to staying on target. Hold the Glock with your dominant hand first, using a firm V-shaped grip on the backstrap, placing the web between your thumb and index finger high and tight against the frame. Your support hand then wraps around the dominant hand, applying about 70% of the total grip pressure to the sides of the grip for stability and recoil management. This balance prevents excessive muzzle flip and keeps your sights aligned during rapid fire.
The stance supports your body’s reaction to the gun’s recoil and helps maintain balance. The isosceles stance is a reliable and straightforward method: stand with your feet shoulder-width apart and square to the target, lean slightly forward at the hips, and bend your knees slightly. This position uses your entire body to absorb recoil, shifting weight forward so you don’t lean backward when firing. Your arms should extend forward in a straight line, locking your elbows lightly without excessive tension to avoid muscle shake.
- Grip: Use a firm V-shaped hold with your dominant hand high on the backstrap.
- Support Hand: Wrap around dominant hand, apply roughly 70% of grip pressure to stabilize.
- Thumb Position: Point both thumbs forward along the frame to help control recoil.
- Stance: Adopt the isosceles stance with feet shoulder-width and square to the target.
- Body Lean: Lean forward slightly at the hips to brace against recoil.
- Arm Extension: Keep arms straight but avoid locking elbows to maintain steadiness.
- Keep consistent grip pressure during shooting to reduce muzzle rise and promote accurate follow-up shots.
A firm and well-distributed grip pressure combined with the isosceles stance reduces muzzle movement, allowing you to maintain focus on the front sight. Consistently applying about 70% of pressure with your support hand minimizes the Glock’s recoil effect and keeps your shots on target. Dry firing while paying attention to grip pressure and stance can help engrain good habits.
Maintain even grip pressure and avoid gripping too tightly, as excessive force can cause muscle fatigue and reduce shot stability.
Using a grip strength trainer outside the range can improve your ability to hold the Glock steady over multiple rounds. Take time to practice these fundamentals regularly; inconsistent grip or stance often leads to canting or tilt of the pistol, making shots less predictable and harder to correct. Focus on building these basics, and your shot stability and Glock accuracy will improve noticeably.
Mastering Breathing and Trigger Control for Consistent Shots
Controlling your breathing and trigger pull directly impacts your Glock shooting accuracy. Proper breathing steady your aim, while smooth, consistent trigger pressure prevents muzzle movement that throws off shot placement. Mastering these helps deliver consistent, precise shots, especially under pressure.
Breathing Techniques for Aim Stability
Breathing affects your body’s natural movement and can cause the gun to shift slightly if not controlled. The best approach is to take a deep breath, exhale partially, then hold your breath briefly to steady the pistol as you aim. This pause limits motion caused by breathing, giving a clearer sight picture and better shot focus. Holding your breath for about 2 to 4 seconds after exhaling is usually enough to maintain stability without causing excessive muscle tension or discomfort.
Trigger Squeeze vs. Trigger Pull
Applying smooth, steady pressure to the trigger, commonly called a trigger squeeze, is essential. Avoid jerking or pulling sideways, which can move your Glock off target. Your finger should apply pressure evenly, pressing straight backward using the pad rather than the joint or tip.
Focus on the exact moment the shot breaks by steadily increasing pressure until the trigger releases. This controlled pressure timing prevents surprise recoil from disturbing your aim.
- Place the pad of your index finger on the center of the trigger face with consistent placement.
- Squeeze the trigger slowly and straight back without shifting your finger sideways or moving your whole hand.
- Maintain even pressure and acknowledge the precise moment you feel the shot break.
- Avoid anticipating the shot; instead, keep pressing steadily until the trigger resets if doing follow-up shots.
- Practice dry firing to build muscle memory for this smooth trigger squeeze.
Follow-Through After the Shot
After the trigger breaks and the shot fires, continue holding the trigger back briefly and keep your sights aligned on the target. This follow-through helps you avoid immediate movement that can disturb the bullet’s path.
Watching how the front sight moves as you call your shot provides feedback on your trigger and aim control. If the front sight shifts off target, it signals an error in your trigger squeeze or grip to correct on subsequent shots.
Determining Your Dominant Eye for Better Glock Aiming
Aiming accurately with your Glock depends heavily on which eye you use to line up your sights. Your dominant eye provides the clearest and most precise line of sight, which helps you hit the target more consistently. Since both eyes work together to provide depth perception, closing one eye can make aiming tricky. Identifying your dominant eye is a straightforward way to improve accuracy and avoid confusion during rapid shooting.
Using your dominant eye allows for better alignment of the front and rear sights and minimizes parallax errors. It’s especially important if your dominant eye is opposite your dominant hand, a common situation that might require subtle adjustments in stance or head position. Not knowing your dominant eye can lead to improper sight picture and missed shots, even if your grip and trigger control are solid. Here’s an easy step-by-step process to identify your dominant eye and adjust your aiming accordingly:
- Form a small circle: Bring your hands up in front of you and create a 1-inch (2.5 cm) circle using your thumb and index finger, holding it at arm’s length.
- Pick a distant object: Look through the circle at a small, distinct object at least 10 feet away. Focus on keeping the object centered inside the circle.
- Close one eye: Shut your left eye and see if the object remains in the circle. Then open the left eye and close the right eye.
- Identify your dominant eye: The eye that keeps the object centered in the circle without noticeable shift is your dominant eye.
- Confirm usage: While aiming your Glock, use the dominant eye to look through the sights, even if it means slightly adjusting your head position or cheek weld.
- Adjust your stance: If your dominant eye is opposite your shooting hand (right hand shooter with left dominant eye), bring your head closer to the sights or slightly tilt to improve sight alignment.
- Practice aiming: Regularly dry-fire or live-fire while consciously using your dominant eye. Monitor your shot placement versus your point of aim and adjust your stance or sight picture as needed.
These steps require just your hands, a target, and a few minutes, making it a no-cost test you can repeat anytime. Most shooters find one eye clearly dominates, but some might have near-equal dominance requiring more deliberate training to find the best approach. Use this knowledge to guide your sight alignment and stance adjustments for consistent Glock accuracy.
Zeroing Your Glock: Setting Sight Adjustments and Distances
Adjusting your Glock sights means aligning them so your point of aim matches where the bullet lands. Many shooters choose 25 yards to zero because that’s where the bullet’s trajectory intersects the sight line, offering reliable accuracy from nearby out to medium distances. Begin shooting groups at 10 yards to figure out sight adjustments, then head to 25 yards for final confirmation. Move the rear sight with a sight adjustment tool or a brass punch toward where you want the bullet to land. Keep in mind that beyond 25 yards, bullets begin to drop more, so aim just above your intended spot.
Starting at 10 Yards for Initial Grouping
Begin zeroing by shooting a tight group of at least five rounds at a target 10 yards away. This distance lets you see where your Glock naturally shoots with your current sight settings and technique. Use a standard paper target with clear aim points, such as a bullseye or a simple dot, to precisely judge your shot placement. Good lighting and a calm environment improve your ability to focus on the front sight. Follow these steps to start your initial grouping:
- Set up a target at exactly 10 yards from your shooting position, ensuring a safe backdrop behind it.
- Assume your preferred grip and stance, focus intently on the front sight, and ignore the target briefly to maintain proper sight focus.
- Fire five shots in a consistent manner, concentrating on steady breathing and smooth trigger pulls.
- Analyze your group placement to determine if your shots tend to cluster to one side, high, or low relative to your point of aim.
Keeping your eyes focused on the front sight, not the target, helps maintain consistent shot groups at 10 yards.
Adjusting Sights Based on Impact Points
After evaluating your initial grouping, adjust your Glock’s rear sight to center your shots where you want them to land. The rear sight moves the point of impact in the direction you push it. For example, sliding the rear sight to the right will shift your bullet impacts to the right. Make small, incremental adjustments rather than large movements to avoid overshooting your target area. Use this checklist to adjust your sights:
- Confirm your target distance remains the same (10 yards).
- Use a dedicated Glock sight tool or a small brass punch to carefully shift the rear sight in the direction you want the bullet impacts to move.
- Move sights a small amount, typically 1 click on Glock sights moves point of impact about 1/4 inch at 25 yards, so expect less at 10 yards.
- After each adjustment, fire another 5-shot group to assess changes.
- Repeat until your group clusters centered on the point of aim.
Never adjust sights while your firearm is loaded or cocked; work on a safe, cleared weapon on the bench.
Confirming Zero at 25 Yards
Once your Glock shoots groups centered at 10 yards, move your target to 25 yards for confirmation. Bullet trajectory usually peaks around this distance, aligning your point of aim with your point of impact using a standard point-of-aim sight picture. Shots at 25 yards might hit slightly low or high depending on your Glock model and ammunition, so a final fine-tuning of rear sight elevation might be necessary. Ensure these conditions before confirming zero:
- Proper target setup with clear aim points and safe backdrop.
- Consistent shooting position and technique as during earlier testing.
- Adequate natural lighting to see sights and target clearly.
- At least one 5-shot group, ideally two, confirming shot placement within half an inch of your point of aim.
- Low shot groups call for raising the rear sight, while high groups require lowering it to adjust point of impact.
Expect to raise your point of aim slightly when engaging targets beyond 25 yards to compensate for bullet drop.
Common Glock Aiming Mistakes and How to Fix Them
Many common aiming mistakes with a Glock stem from subtle issues you can correct with focused practice. Flinching, for example, often causes shots to hit low or to the left for right-handed shooters. This happens because anticipating recoil makes you push the gun down or to the side as you pull the trigger. To stop flinching, try slow, controlled trigger pulls during dry-fire practice, focusing on pressing the trigger smoothly without rushing. Counting “one-Mississippi, two-Mississippi” between shots helps maintain a steady rhythm and reduces anticipation.
Inconsistent grip pressure is another frequent problem that affects shot placement. If your grip changes from shot to shot, your sights won’t line up the same way, which throws off your aim. A firm, consistent two-handed grip that locks the gun in place keeps your sights aligned with the target. Pay attention to how your thumbs and palms apply pressure, both should be steady but not overly tight, which can cause shaking.
Improper sight picture also leads to poor accuracy. Some shooters focus too much on the target and not enough on the front sight, resulting in shots that land off-center. To fix this, concentrate on the front sight blade, keeping it level with the rear sight and centered in the notch. Avoid letting the front sight drift too high or low; even small changes cause misses. This is especially important inside 25 yards, where Glock pistols tend to shoot slightly low.
Adjusting your sights methodically helps compensate for consistent shot placement errors. For instance, if your groupings land to the right, you can move the rear sight to the left in small increments to bring shots back on target. Sight adjustments require a proper tool and should be done after confirming that grip and trigger control are solid.
| Common Error | Cause | How to Fix | Expected Result |
|---|---|---|---|
| Flinching | Anticipation of recoil causes downward or sideways movement | Practice smooth trigger pulls during dry-fire, count between shots | Shots group closer to point of aim, less low/left misses |
| Grip Inconsistency | Uneven pressure alters sight alignment from shot to shot | Use firm, even two-handed grip; practice at the range to build muscle memory | Consistent sight alignment, tighter shot groups |
| Improper Sight Picture | Focus on target instead of front sight; front sight too high or low | Focus sharply on front sight, keep it level and centered in rear sight notch | Improved shot placement, particularly at distances under 25 yards |
| Incorrect Sight Adjustment | Sights not aligned with shot impact points | Use sight adjustment tool to move rear sight opposite shot group error | Shots center on target once mechanical alignment is correct |
Consistently applying these corrections takes regular practice, both dry-fire and live-fire. Watching your shot groups and comparing them to where you hold your sights helps identify which error to focus on next. Accuracy improves as you build muscle memory fixing flinch and grip, while maintaining a clear front sight focus and performing sight adjustments as needed.
Maintaining Your Glock to Sustain Aim and Accuracy
Regular cleaning and maintenance of your Glock directly affect your ability to maintain consistent sight alignment and smooth trigger function. Dirt, fouling, and debris can build up on the slide, barrel, and inside the frame, leading to misfeeds, trigger issues, and slight changes in sight picture. Cleaning your Glock every 300 to 500 rounds or at least once a month if you shoot less often helps keep these parts performing as intended.
Cleaning improves accuracy by ensuring the barrel remains free of residue that can shift the bullet’s path and by preventing sticky or gritty triggers that disrupt a smooth pull. A clean, well-lubricated Glock guarantees consistent mechanical operation, which supports steady aiming and shot placement.
During inspections, focus on key parts that influence aim and trigger function. Check the front sight for damage or looseness because it is the most critical component for precise aiming. Inspect the slide rails, barrel feed ramp, and trigger mechanism for signs of wear, rust, or grime that could cause inconsistent cycling or trigger pull.
- Check and tighten front sight screws if loose.
- Clean barrel bore and chamber with a bore brush and solvent.
- Wipe slide rails and apply Glock-recommended lubricant sparingly.
- Inspect trigger bar and connector for wear and smooth movement.
- Ensure the recoil spring assembly is clean and correctly installed.
- Examine magazine lips and followers for damage affecting feeding.
Poor maintenance can lead to aiming problems like erratic shot placement or a trigger that feels gritty or catches, causing you to jerk the gun and lose sight alignment. A dirty or damaged front sight can cause your eye to misalign the target, reducing accuracy. Keeping your Glock clean and promptly addressing worn parts preserves the consistency needed for precise shooting fundamentals.
The cleaning process typically takes 15 to 30 minutes with a basic Glock cleaning kit, costing around $20 to $40 for combined brushes, solvents, and lubricants. After cleaning, proper function checks should include dry-firing with snap caps to confirm the trigger resets smoothly and sight picture remains clear. Reliable, repeatable mechanical function after maintenance translates directly into better aim and shooting performance.
Using Dry-Fire and Training Techniques to Improve Glock Aim
Dry-fire practice combined with focused grip strengthening and mental exercises can dramatically improve your Glock’s aiming precision. Safe dry-firing sharpens your trigger control while repetitive drills build muscle memory. Exercises that improve your breathing and concentration keep you calm under pressure and help you maintain consistent shot placement.
Setting Up a Safe Dry-Fire Practice Environment
Ensure every dry-fire session happens in a controlled, secure area free from distractions and hazards. Confirm your Glock is unloaded by removing the magazine and visually inspecting the chamber multiple times. Choose a safe backstop that won’t be damaged by repeated dry-firing and never point the gun at anything you do not intend to shoot. A safe setup helps prevent accidents and lets you focus completely on your aiming and trigger control without worry.
- Clear the Glock: Remove the magazine and check the chamber for no rounds.
- Point the gun in a safe direction, such as a solid wall with a backstop or a designated dry-fire target.
- Remove ammunition from the room to eliminate risk of live rounds being accidentally chambered.
- Set up a target or use a laser training cartridge for instant feedback on aim and trigger press.
- Wear eye protection even during dry-fire to condition safe gun handling habits.
- Practice in short sessions of 10, 15 minutes to keep focus sharp and avoid careless mistakes.
Never dry-fire a Glock loaded with a live round, always double-check the chamber yourself before starting.
Grip and Trigger Control Drills
A proper grip stabilizes the Glock and reduces muzzle flip, which improves shot accuracy. Strengthening your grip muscles and practising smooth, consistent trigger presses prevent jerking the gun and pulling shots off target. Repetitive slow trigger squeezes build motor memory, so your finger moves straight back without disturbing your sight alignment.
Using grip trainers or even rubber stress balls can help develop hand strength and endurance without shooting. These improvements show up in your dry-fire and live-fire precision. Practice a simple grip and trigger drill to develop these skills:
- Hold the unloaded Glock in your firing stance with a full grip.
- Focus on aligning your front sight precisely on the target.
- Squeeze the trigger slowly, counting to three on the pull, keeping sights steady.
- Release the trigger smoothly and reset without moving your grip or disturbing sight alignment.
- Repeat 20 to 30 times per session, aiming for steady, consistent movement.
- Incorporate grip trainers 3 times a week to build hand and forearm strength.
Deliberate slow trigger pulls help reduce flinch and improve accuracy far more than rapid dry-fire sessions.
Mental Focus and Breathing Exercises
Breathing control is a key part of making steady, repeatable shots. Practice taking a deep breath, exhaling halfway, and then pressing the trigger during the natural respiratory pause. This rhythm reduces tension and improves stability. Pair this with mental focus drills to build concentration and reinforce positive shooting habits.
Calling your shot, mentally predicting where your bullet will hit, sharpens front sight focus and strengthens your mind-to-action connection. Regular mindfulness practice during dry-fire improves your ability to maintain calm under real shooting stress.
- Find a quiet spot where you can focus without interruptions.
- Take deep breaths, inhaling through your nose and exhaling through your mouth slowly.
- Align your sights on the target and hold until you reach the natural respiratory pause after exhale.
- Mentally visualize your shot hitting exactly where the front sight is aimed.
- Squeeze the trigger gently while maintaining front sight focus.
- Reset your trigger and repeat for 10 to 15 minutes several times per week.
Consistent breathing and focus exercises help reduce flinch and develop steadiness, even before you fire a live round.
Step-by-Step Action Plan to Improve Your Glock Aiming
Follow these steps to build proper aiming skills and see noticeable improvement with your Glock target hits.
- Before your first range session: Clean and inspect your Glock to ensure the sights and barrel are free of debris, confirming maintenance won’t affect your accuracy.
- Day 1: Practice dry-firing using your Glock’s sights at home to reinforce sight alignment and trigger control without recoil. You’ll know it’s working when your front sight stays clear and steady.
- Week 1: Focus on identifying your dominant eye and adjusting your stance to a stable, consistent position. Accuracy should improve as you become more comfortable with your grip and posture.
- Week 2: Zero your Glock at the range at a standard distance (usually 7 yards) by adjusting the sights until your shots group at the point of aim.
- Week 3: Combine controlled breathing, steady grip, and smooth trigger pull during live fire practice sessions to develop repeatable shots within your groups.
- Week 4: Record your progress by measuring group sizes and making note of adjusted shooting mechanics, correcting any common aiming errors such as front sight focus or flinching.
- After 1 month: Continue regular dry-fire training and maintain your Glock to keep aiming consistency sharp and your pistol functioning reliably.
Frequently Asked Questions
How Do I Choose Between Point of Aim and 6-o’clock Hold When Aiming My Glock?
Choose Point of Aim for predictable results, especially at 25 yards; 6-o’clock hold changes point of impact with distance, so pick one and practice consistently to know your Glock’s performance.
What Role Does Dominant Eye Alignment Play in Glock Aiming Accuracy?
Dominant eye alignment helps you line up sights naturally, improving aim speed and precision; knowing your dominant eye lets you position yourself and sights correctly for clearer target acquisition.
How Do I Adjust My Stance to Improve Aiming Stability with a Glock?
A solid stance with feet shoulder-width apart and knees slightly bent stabilizes your body, reducing sway; this foundation lets you maintain aim consistently during shooting.
Why Is a Firm Two-Hand Grip Necessary for Steady Glock Aiming?
A firm two-hand grip reduces recoil and muzzle rise, helping maintain sight picture; steady hands are key to accurate and repeatable shot placement.
How Can Dry-Fire Practice improve Glock Aiming Skills?
Dry-fire practice lets you focus on trigger control and sight alignment without recoil distraction; it builds muscle memory and confidence before live shooting.
What Common Aiming Mistakes Should I Avoid with My Glock?
Avoid misalignment of sights, inconsistent grip, and poor trigger control; these lead to inaccurate shots and target misses, so correct them promptly to improve accuracy.
Final Thoughts
Focusing on precise sight alignment, a stable grip, and smooth trigger control lays the foundation for accurate Glock shooting. Begin training with dry-firing drills and confirm your progress on the range by zeroing your sights carefully. Prioritize consistent practice while keeping your pistol well-maintained to sustain your aiming improvements over time.