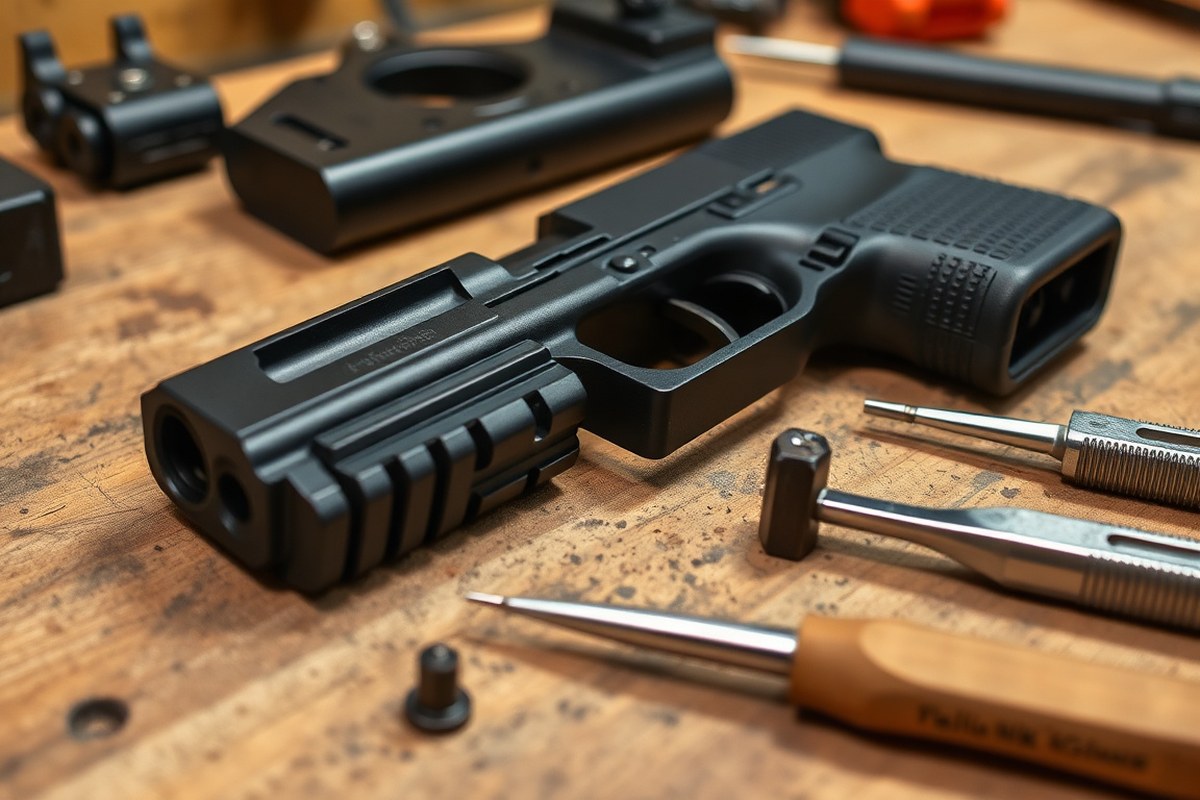
How to Change Glock Sights: Simple Steps and Expert Tips for Perfect Accuracy
Learning how to change Glock sights involves removing the old sights using a 3/16-inch driver for the front and a punch for the rear, then installing new sights carefully to ensure proper alignment. The key is using the right tools and following a methodical process to avoid damage and maintain accuracy. Always unload your Glock before starting any sight replacement work.
Key Takeaways
- Use a 3/16-inch nut driver to remove the front sights on most Glock models securely.
- The most common Glock rear sight height is 6.5mm (.256 inches), suitable for many models.
- Clean the sight channel with 70% isopropyl alcohol or gun scrubber before installing new sights.
- Allow adhesive or thread locker to cure for 24 hours to ensure a lasting sight hold.
- Replacing tritium night sights every 10 to 15 years keeps them bright and reliable.
- Expect to spend about $50 on DIY sights, with professional sight installation costing $20 to $50.
What Tools Are Needed to Change Glock Sights
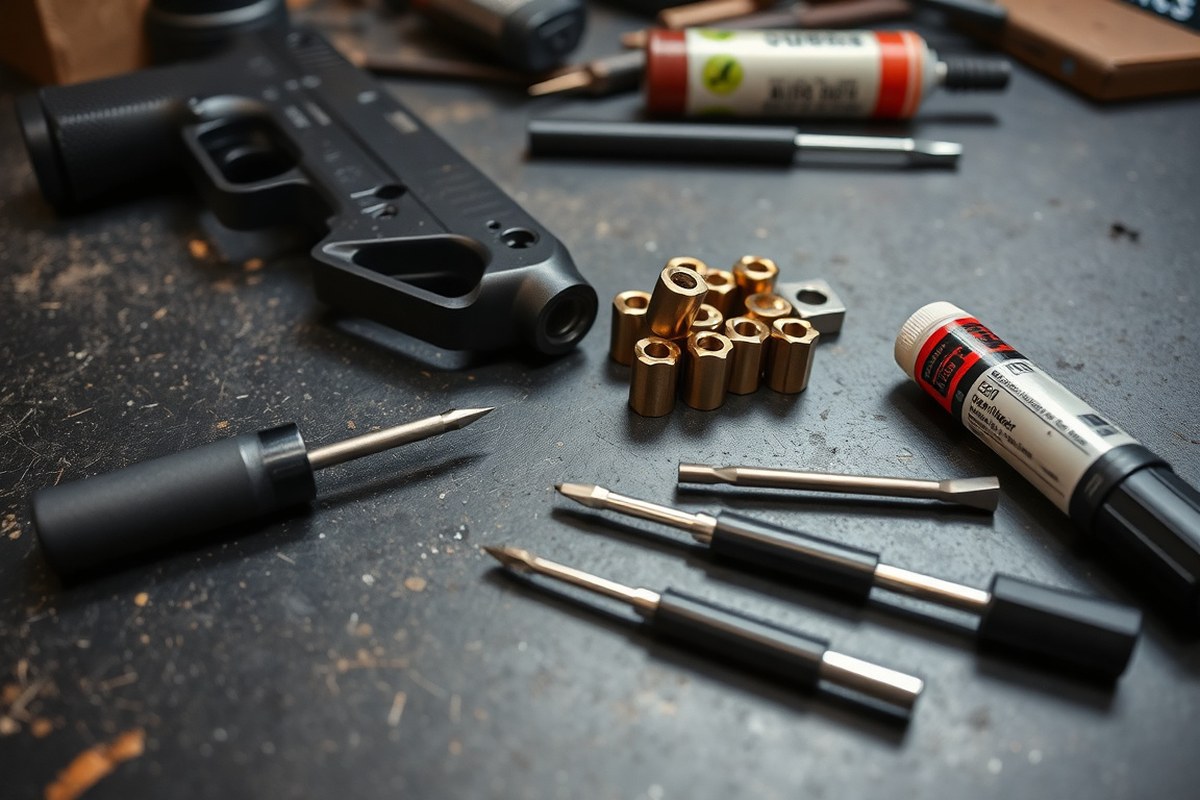
Changing Glock sights requires a few specific tools, mostly basic or specially made for Glock models. For the front sight, the ideal choice is a 3/16-inch Glock front sight tool or a slim 3/16-inch nut driver, as Glock front sights often use a small hex screw or nut. Using the right tool helps prevent stripping screws or harming the sight when removing or installing it.
Rear sight removal and installation typically require a rear sight pusher tool. Without the right tool, a nylon drift punch with a light hammer and a stable surface like a block or bench can work to remove sights, but this approach demands extra caution to avoid scratching or damaging the slide’s finish. Dedicated Glock rear sight pushers are designed to fit perfectly and make the job cleaner and faster.
Using a medium-strength blue threadlocker, like Loctite 242 or equivalent, is important for securing the front sight screw. Apply a tiny drop, just enough to cover the threads before tightening. This prevents the screw from loosening under recoil but doesn’t make future removals too difficult. Avoid heavy or red threadlockers since they may require heat or special tools to remove, complicating future sight changes.
Cleaning materials are a helpful addition. Use isopropyl alcohol or a dedicated gun cleaner to remove old threadlocker residue from screw threads and mating surfaces before installing new sights. Also, have a soft cloth or gun cleaning patches to wipe down parts to ensure proper adhesion and fitting.
- 3/16-inch Glock front sight tool or thin 3/16-inch nut driver for front sight screws
- Rear sight pusher tool or nylon drift punch with light hammer and bench block
- Medium-strength blue threadlocker (e.g., Loctite 242), applied sparingly
- Isopropyl alcohol or gun cleaning solvent for surface prep
- Soft cloth or patches for cleaning and wiping sights and screws
- Optional: small Allen wrench if your replacement sights require one
- Optional: pliers, only if removing pinned or previously Loctite-set sights
Generic tools work in many cases, it’s possible to remove the front sight with a thin nut driver and the rear with basic punches and a hammer, but Glock-specific tools simplify the process and reduce damage risk to the slide or sights. The investment in specialized tools is worthwhile if you plan to change Glock sights frequently. For a one-time install, basic tools plus careful technique can suffice.
Spend a few extra minutes cleaning surfaces before applying threadlocker and tightening screws to ensure a secure fit. Applying too much threadlocker can cause excess seepage onto the sights or slide, so less is more. Using the right tools, proper cleaning, and the correct amount of threadlocker results in a stable, long-lasting installation without damage or unnecessary difficulty in the future.
Step-by-Step Process for Removing Glock Front and Rear Sights

Removing factory Glock sights requires careful handling to avoid damage to the slide and sight dovetails. Start by safely unloading and disassembling your Glock. Use the right tools for the front sight screw and employ a nylon punch or sight pusher for the rear sight, applying steady pressure to prevent marring the finish.
Unloading and Basic Disassembly
Always ensure your Glock is completely unloaded before removing sights. Remove the magazine, then rack the slide several times to clear the chamber. Double-check visually and physically that the gun is empty. Disassemble the slide by locking it back, pushing out the slide lock, and separating the slide from the frame.
After removing the slide, take out the recoil spring assembly and barrel to access the sights on a clean slide. Clean these parts with a solvent to remove oil and grime, which could interfere with sight removal or damage the dovetails. Work in a well-lit and stable area using gloves if preferred for safety and cleanliness.
- Ensure magazine is removed and chamber is empty.
- Rack slide several times to clear any rounds.
- Pull slide back, lock with slide lock lever.
- Push out slide lock lever from frame to separate slide.
- Remove recoil spring and barrel from slide.
- Clean slide, barrel, and spring thoroughly with solvent.
Check twice for an empty chamber before working on your Glock to avoid accidents.
Removing the Front Sight
The front sight on most factory Glocks is secured by a screw accessible from the bottom of the slide. Use a 3/16” hex tool or the appropriate front sight tool to back out this screw carefully. Avoid applying too much torque, which can strip the screw or damage the sight base.
Once the screw is loose, lift the front sight straight up from the top of the slide. If the sight resists, wiggle slightly without forcing. Keep the screw and any crush pads or washers aside for reference or reuse. This method avoids file marks or unwanted slide modifications common with crude methods.
- Place the slide upside down with the bottom facing up.
- Locate the 3/16” hex screw securing the front sight.
- Insert the hex tool and turn counterclockwise to loosen the screw.
- Carefully lift the front sight straight up from the slide’s top.
- Set aside the screw and any washers or crush pads.
Do not use pliers or excessive force on the screw; it may strip the hex recess and complicate removal.
Removing the Rear Sight
The rear sight is friction-fitted into a dovetail cut on the slide. Use a padded vise to secure the slide, preventing movement and damage. A nylon punch or dedicated sight pusher tool works best for pushing the rear sight out carefully. Apply pressure evenly on the dovetail base, avoiding strikes on the sight blade, which can cause chipping.
Tap the sight gently and steadily until it moves laterally out of the dovetail. For factory sights with crush pads, a sight pusher is safer to avoid slide damage. Do not use steel punches or hard tools. After removal, clean the dovetail thoroughly and inspect for burrs or rough spots before installing new sights.
- Secure slide in padded vise with the dovetail facing upward.
- Position a nylon punch or sight pusher on the dovetail base of the rear sight.
- Apply steady, controlled pressure or gentle taps to push sight horizontally.
- Shift the sight slowly until it frees from the dovetail slot.
- Clean the dovetail area and inspect slide finish for damage.
Press on the wide base of the rear sight dovetail, never on the narrow blade, to avoid breaking or scratching the sight.
How to Install New Glock Front and Rear Sights Correctly
Installing new Glock sights requires careful attention to alignment, proper torque, and the right use of threadlocker to ensure they stay securely in place under recoil. Positioning the rear sight gently in the dovetail without damaging the slide is important, as is applying just enough threadlocker on the front sight screw for a secure hold. Checking alignment during installation ensures reliable accuracy at the range.
Preparing the Slide and Sights for Installation
Begin by thoroughly degreasing all contact surfaces on the slide and sights to remove oil and residues. This cleaning step improves adhesion and helps ensure the threadlocker bonds properly. Test-fit both the front and rear sights on the slide to confirm the correct fit before committing with adhesive or torque. This avoids wasted time and potential damage caused by forcing incompatible sights into the dovetails.
For night or fiber optic sights, extra care is needed since materials can be more fragile. Handle these sights gently to avoid chipping or scratching the tritium inserts or fiber rods during test-fitting or positioning.
Installing the Rear Sight with Proper Alignment
The rear sight typically fits into the dovetail on the slide and adjusts windage by drifting it left or right using a sight tool or brass punch. Avoid marring the slide by using a plastic or brass tool to tap the sight, never steel. Take your time to position the sight squarely in the dovetail before securing it. Here are the steps for correctly seating the rear sight:
- Clean the dovetail and sight base with an alcohol wipe to remove any oils.
- Place the rear sight into the dovetail groove, oriented properly for your Glock model.
- Use a non-marring tool like a nylon or brass punch and a small hammer to gently tap the sight into place.
- Check for even contact along the dovetail edges, ensuring no gaps or tilting.
- Adjust windage by drifting the sight slightly with the sight tool if needed for alignment.
- Apply a small amount of medium-strength threadlocker to the rear sight screw threads before final tightening.
- Torque the rear sight screw carefully to the manufacturer’s recommended setting, generally around 10-12 inch-pounds, avoiding overtightening that can strip threads or damage the sight.
Securing the Front Sight Screw and Applying Threadlocker
The front sight screw requires medium-strength threadlocker on the threads to prevent loosening from recoil but still allow future removal. Use a small drop of threadlocker, excess can make removal difficult or seep into unwanted areas. Follow these steps to install the front sight securely:
- Orient the front sight so the sight dot faces the rear sight for proper target alignment.
- Put a small amount of medium-strength threadlocker on the threads of the front sight screw before installing it.
- Insert the front sight into its dovetail, seating it firmly but carefully without forcing it to avoid damaging the slide or sight.
- Use the correct torque screwdriver to tighten the front sight screw to about 10 inch-pounds, ensuring it is snug but not overtorqued.
- Wipe away excess threadlocker immediately to prevent it from spreading.
- Let the threadlocker cure for at least 12 hours at room temperature before using or cleaning the firearm to ensure maximum hold.
Night sights, especially tritium-powered ones like R3D Night Sights, can be more challenging to install because of their delicate inserts. Avoid excessive force during seating and verify compatibility before starting. Fiber optic sights need careful alignment of the fiber rods to maximize light gathering, so adjust alignment during installation with minimal handling to prevent damage.
How Long Does Changing Glock Sights Take and What Affects It
Replacing Glock sights usually takes about 20 to 40 minutes of active work, depending on your experience and the tools you have. You’ll spend time removing the old sights, prepping the slide, and pushing the new sights into place. The rear sight, which often uses screws and threadlocker, can take a bit longer to secure correctly than the slip-fit front sight.
The curing time for any adhesive or threadlocker applied during installation is important. Most threadlockers, such as medium-strength variants, require at least 24 hours to fully cure before the firearm is used. This curing ensures the sights won’t loosen from the recoil vibrations typical during shooting. Using your Glock before the threadlocker cures can cause sights to shift or back out, requiring you to recheck alignment and potentially reinstall sights entirely.
Several factors influence how quickly you complete the process. Familiarity with Glock models and sight types speeds work by reducing guesswork and hesitation. Using specialized sight pusher tools designed for Glock sights also cuts down installation time and avoids damage to the slide. Environmental conditions affect threadlocker curing, the recommended 24 hours assumes room temperature around 70°F (21°C). Cooler temperatures can slow curing, extending the wait time before your Glock is ready for use.
Practice plays a significant role in how swiftly you can change sights. A first-timer might need an hour or more to be careful and precise, whereas someone regularly working on firearms can complete the swap in under 30 minutes. Taking your time during initial installs prevents mistakes like scratching the slide or misaligning the sight, which waste more time fixing errors than the extra patience costs upfront.
For faster sight changes without threadlocker, slip-fit sights that don’t use screws and adhesives can be swapped in as little as 15 minutes. However, most Glock rear sights rely on threadlocker to maintain solid attachment. If you are swapping sights multiple times in one session or field-stripping for maintenance, plan to allocate about an hour including curing time to avoid rushed, unreliable installation.
To make the process smooth and reliable, prepare all tools and parts before starting. Lay out the new sights, a Glock-compatible sight pusher, a small screwdriver if needed, and your threadlocker. After installing new sights, double-check the fit and alignment visually and mechanically. Let the Glock rest undisturbed for the full curing time specified on the threadlocker bottle, then confirm zero at the range to ensure performance meets your expectations.
Common Mistakes and How to Fix Glock Sight Installation Problems
Common errors during Glock sight installation include misaligned sights, breaking the sight, and damaging the slide. Misalignment often results from forcing a sight into the dovetail without ensuring proper fit for your Glock model. Using excessive hammering or incorrect tools can chip the sight or gouge the slide’s metal surface. These mistakes compromise shooting accuracy and the firearm’s cosmetic condition.
To fix misaligned sights, first loosen the sight if it’s stuck by applying a small amount of penetrating oil on the dovetail area. Let it sit for 10 to 15 minutes to reduce friction. Then, gently tap the sight sideways with a non-marring punch and a light hammer blow while holding the slide securely in a vise or clamp with protective pads. Avoid driving the sight out with heavy force as this can cause breakage or slide damage. Use a fine punch to carefully tap out the locking pin before removing the sight when the sight has one.
Damage to the dovetail during removal usually appears as burrs or widened slots, preventing a secure fit for the replacement sight. Minor burrs can be smoothed with fine needle files or sanding sticks designed for gunsmithing. Larger gouges might require professional gunsmith repair to restore slide integrity. Inspect the slide carefully before installing new sights to ensure no parts are bent or cracked.
Prevent scratching or marring the slide surface by always using a properly sized brass or polymer punch, not steel, and placing protective tape on the slide near the dovetail. Securing the slide firmly in a padded vise keeps it from moving and reduces accidental strikes. Work slowly and methodically rather than forcing parts quickly. Incorrect technique increases the risk of cosmetic or functional damage.
- Confirm new sight compatibility with your exact Glock model and generation
- Soak stuck sights with penetrating oil for 10, 15 minutes before removal
- Use a brass or polymer punch to avoid slide surface marring
- Tap the sight gently with a hammer; avoid heavy blows or repeated force
- Remove locking pins with a fine punch before sight removal
- File burrs or rough edges on the dovetail to ensure proper fit
- Seek professional help to avoid permanent damage when you are unsure.
Never try to force a stubborn sight out with heavy hammering; this often causes irreparable damage to both the sight and slide.
Successful repairs and installation require patience, suitable tools, and verifying the fit of each component. Align the base of the sight gently with the dovetail and seat it evenly before tapping it in place. Proper alignment ensures accuracy and longevity of the sight hardware on your Glock.
Choosing the Right Replacement Sights for Your Glock Model
Choosing the right replacement sights for your Glock depends on your shooting goals and the specific model you own. Original equipment manufacturer (OEM) sights often come standard on Glock pistols, but upgrading to aftermarket options can improve visibility and durability. Common aftermarket choices include fiber optic sights, night sights using tritium, and hybrid sights that combine both features for versatile use in daylight and low light.
Night sights glow in the dark thanks to tritium, a radioactive isotope, offering a bright, consistent display that lasts around 10 years. Fiber optic sights gather ambient light to create a bright sight picture during the day but do not glow in the dark. Hybrid or combination sights use fiber optic for daylight and tritium for night, making them popular for defensive shooting. Fixed sights tend to be more durable, suitable for defensive use, while adjustable sights may benefit target shooting.
Glock models feature different rear sight heights, and selecting compatible sights is critical for maintaining accuracy and holster fit. Taller or wider aftermarket sights might require altered carry equipment. Typically, low-profile sights preserve the factory fit and function for optics-ready or Modular Optic System (MOS) models. Understanding vertical alignment helps ensure reliable shot placement. Measure the height difference between the front and rear sight to match your Glock model’s factory specs or intended upgrade.
| Sight Type | Visibility | Durability | Compatibility | Use Case | Approximate Cost |
|---|---|---|---|---|---|
| OEM Sights | Standard | Standard | All Glock Models | General Use | $20-$40 |
| Fiber Optic | Bright Daylight | Moderate | Most Glock Models | Target Shooting, Day Use | $50-$100 |
| Night Sights (Tritium) | Glows in Low Light | High | Most Glock Models, MOS Compatible | Defensive Use, Low Light | $90-$150 |
| Hybrid (Fiber Optic + Tritium) | Day and Night Visibility | High | Most Glock Models | All-Around Use | $100-$180 |
| Low-Profile Aftermarket | Varies | Varies | Optics-Ready and MOS Models | Maintain Holster Fit | $70-$130 |
Match the rear sight height to your Glock model by consulting manufacturer specs or using a caliper to measure the front-to-rear sight height difference. This prevents changes to point of impact and preserves the accuracy you expect from your pistol. For optics-ready or MOS Glocks, use low-profile sights designed to not interfere with mounting red dot optics. Fixed night sights suit defensive purposes because of their toughness and ability to glow in low light.
Choosing sights aligned with your style, such as fiber optic for quick sight acquisition in daylight or night sights for low-light defense, will impact your accuracy. Faster sight pictures help in competition or casual shooting, while high-visibility night sights boost defensive readiness after sunset. Replacement option costs vary, but combining features often provides the best performance tradeoff for most Glock owners upgrading their sights.
Safety and Legal Considerations for DIY Glock Sight Replacement
Before you start swapping out Glock sights, the first safety step is to clear the firearm completely. Remove the magazine, rack the slide multiple times, and visually inspect the chamber to make sure it’s empty. Practicing good muzzle discipline by always pointing the gun in a safe direction during the entire process is critical. Handle your Glock as if it’s loaded, even though you’ve cleared it.
Some jurisdictions have regulations that limit or restrict modifications to firearm sights. Check your state and local laws before you replace your Glock sights yourself. Certain areas may require original factory parts or limit the use of specific types of aftermarket sights, especially those with illuminated or night-vision features. Failing to comply could result in fines or legal trouble.
Warranty coverage is another key consideration. Glock’s warranty does not explicitly void due to sight replacement, but improper installation causing damage can. Damaging the slide or any part of the firearm during sight installation might void the warranty coverage. Using OEM-compatible sights and following proper installation procedures reduces this risk. When your Glock is new or still under warranty and you’re uncertain, it’s safer to consult a professional.
Hiring a gunsmith is advisable under certain conditions. Pinned or welded sights on your Glock should not be removed by yourself. These installations require specialized tools and techniques to avoid damaging the firearm. High-end sights designed for exact fitment also warrant professional installation to ensure proper alignment and function. A gunsmith charge typically ranges from $40 to $100 depending on your area and complexity. Use the following checklist to decide if you should proceed with DIY sight replacement or hire a professional:
- You have cleared and inspected the firearm to confirm it’s unloaded.
- The sights are not pinned or welded.
- You have the necessary tools and knowledge to remove and install the sight without damaging parts.
- Your local laws allow sight modifications for your Glock model.
- The sight set you purchased matches your Glock model specifications.
- You accept that improper installation could affect your warranty and firearm function.
- You are experienced with safe firearm handling and comfortable working on your gun.
Not meeting these conditions or feeling resistance while removing sights means you should choose professional assistance. A gunsmith can ensure correct sight fitment, alignment, and maintain your Glock’s condition at a reasonable cost. Doing so minimizes risks and improves your chances of long-term satisfaction with your new sight setup.
How to Confirm Sight Alignment and Zero After Installation
To confirm proper sight zero on your Glock, set up a controlled shooting test and verify that the point of impact matches the point of aim. Use tools to check sight alignment before test firing, then fine-tune windage adjustments on the rear sight as needed. Ensuring accurate zero means your shots consistently hit where the sights indicate on target.
Setting Up a Safe Shooting Test
Start by choosing a safe firing range where shooting is permitted and follow all local regulations. Position a target at a standard testing distance of 15 yards, which is common for handgun zeroing. Ensure you have a stable shooting rest or bench to minimize movement during test firing.
Your test target should include clearly marked aiming points like a bullseye or a grid to measure shot placement precisely. Using a consistent grip and stance will help produce reliable shot groups for evaluating sight alignment and zero.
Checking Initial Sight Alignment at the Range
Before firing, confirm basic sight alignment by measuring how centered the front sight is within the rear sight notch across the slide. This can be done visually or with calipers for more precision. Proper centering reduces the need for major windage corrections later.
- Load your Glock safely and chamber a round.
- Assume your shooting position at the 15-yard mark with a stable rest.
- Aim at the center of your target, aligning the front sight within the rear notch so it sits exactly centered with equal light on both sides.
- Fire a controlled group of 3 to 5 rounds, using slow, deliberate trigger presses to minimize movement.
- Observe the shot group placement on the target relative to your point of aim.
- Record any horizontal or vertical deviation from expected impact location to identify offset.
Always confirm your Glock’s slide is locked back and the firearm is unloaded before adjusting sights or checking alignment up close.
Making Windage Adjustments to the Rear Sight
Minor adjustments to windage compensate for horizontal offsets when the shot group isn’t centered on the target. Most Glock rear sights can be drifted left or right using a sight pusher tool or a brass punch and a hammer carefully applied to the sight dovetail. Adjustments should be small, about 1/16 inch shifts per attempt, to prevent overcorrection.
After each adjustment, repeat the test firing to confirm improvement in point of impact. Elevation is generally fixed on Glock sights and harder to adjust without replacement sights if vertical error exists.
- Unload your Glock and ensure it is safe to handle.
- Use a sight pusher tool or brass punch to apply gentle taps to the rear sight in the direction needed (left or right).
- Measure the sight’s center relative to the slide edges to confirm approximate movement.
- Reassemble and fire another 3-5 round group at the 15-yard target.
- Assess shot grouping to see if the point of impact is closer to the point of aim.
- Repeat adjustments in small increments until shots group accurately at zero.
- Lock sights in place by verifying torque per manufacturer’s recommendation if applicable.
If your shots consistently hit too low or too high, consider upgrading to adjustable target sights since most stock Glock sights lack elevation adjustment capability.
Step-by-Step Action Plan for Changing Glock Sights
Follow this plan to replace your Glock sights safely and ensure they are properly aligned and ready for use.
- Before you start: Gather all necessary tools like a sight pusher or punch set, a suitable hammer, thread locker, and your new sights. Confirm the replacement sights match your Glock model.
- Step 1: Clear your Glock of all ammunition and verify the chamber is empty for safety. Your pistol is safe to handle and work on.
- Step 2: Remove the existing rear and front sights using the sight pusher or punches, starting with the rear sight. Confirm the sights slide out smoothly without damage to the slide.
- Step 3: Install the new front sight first by pressing or tapping it into the dovetail slot, then apply medium-strength thread locker to the rear sight screw if applicable before securing it. Check that both sights sit flush and firmly in place.
- Step 4: Visually inspect sight alignment by eye and then dry-fire the Glock at a safe backstop. Note if the sights align with the target marks as expected.
- Step 5: Test fire at the range to zero your new sights. Adjust or re-install if the point of impact does not match your point of aim within a few shots.
- After 1 week: Reconfirm sight tightness and alignment after initial shooting. Retighten screws if necessary and ensure thread locker remains effective.
Frequently Asked Questions
Can You Change Glock Sights Without Removing the Slide?
No, you must remove the slide to access and safely replace the Glock sights. Doing so prevents damage and allows proper alignment.
Are Night Sights Harder to Install on a Glock?
Night sights install the same way as standard sights but require careful handling to avoid damaging the tritium inserts.
Do I Need to Apply Loctite When Installing New Glock Sights?
Applying a small amount of red Loctite prevents the screws or nuts from loosening during recoil. It’s recommended for all sight installations.
Can I Upgrade Glock Sights for Better Accuracy?
Yes, upgrading to higher-quality sights can improve your sight picture and accuracy, especially compared to factory plastic sights.
What’s the Best Lighting for Sight Installation on a Glock?
Bright, even lighting helps you see small screws and alignment clearly during installation, reducing errors.
Can I Use non-Glock Specific Tools to Change My Glock Sights?
Basic gunsmithing tools often work, but Glock-specific sight tools simplify installation and reduce risk of damage.
Before You Go
Changing Glock sights yourself can restore your firearm’s precision and confidence at the range. Focus on careful removal and installation to avoid damaging your slide or sights. Your next step should be a live-fire test to fine-tune sight alignment, ensuring your Glock shoots accurately and reliably with its new sights.