How to Remove Your Gun Safe Door in 10 Simple Steps
Opening Paragraph
Removing a gun safe door can feel like an overwhelming task, especially if you’re not sure where to start. You’re not alone—many people struggle with this process, whether it’s to relocate the safe or perform maintenance.
The good news is, with the right approach, you can tackle it efficiently and safely.
In this guide, we’ll walk you through 10 simple steps to ensure you can remove that door without a hitch. So, take a deep breath, gather your tools, and let’s dive in!
—
To remove your gun safe door, start by ensuring safety and verifying hinge type. Look for external hinges with removable pins.
Clear a leveled workspace, then support the door with helpers or lifting straps. Use a pry bar or screwdriver to carefully remove hinge pins, lifting the door straight up.
Support it during transport with a dolly or hoist.
Once removed, properly realign and reinstall the door, keeping safety and security in mind.
Continue along to discover detailed steps and tips for each part.
Key Takeaways
- Verify lock alignment and security before removing the door to prevent damage or misoperation.
- Identify hinge type and gather appropriate tools like screwdrivers, pry bars, or socket wrenches.
- Support the door with helpers or lifting equipment to manage weight safely during removal.
- Carefully remove hinge pins using the right tools, lifting the door straight up to disengage hinges.
- Reinstall and realign the door by lining up hinge holes, ensuring smooth operation, and securing with hinge pins.
Why and When Should You Remove Your Gun Safe Door?
Wondering when it’s a good idea to remove your gun safe door?
Removing the door can make safe removal or transport much easier, especially since nearly one-third of a safe’s weight is in the door.
Removing the door eases safe transport by reducing weight, as nearly one-third of it is in the door.
If you’re moving or shipping a large safe, taking off the gun safe door reduces the overall weight, making handling safer and more manageable.
It also helps prevent damage during transport, especially through tight spaces or stairs.
Removing the door is often necessary for on-site repairs or upgrades to the lock or mechanical components housed within it.
If your safe has external hinges and removable hinge pins, it’s designed for safe removal, making the process straightforward.
Just keep in mind that door weight and door alignment are vital factors—properly removing the door without damaging hinges or misaligning it ensures the safe functions smoothly afterward.
Knowing when to remove the door saves time and reduces risk during relocation or maintenance.
How to Identify Your Safe’s Hinge Type and Construction
Before attempting to remove your gun safe door, it’s important to identify the hinge type and construction.
Check if your safe has external hinges with visible pins, which are usually easier to handle during hinge removal.
Examine the hinge area closely to see if the hinge pins can be accessed with a screwdriver or pry bar—this often indicates external hinges.
If the hinge pins slide out vertically or are held with clips or rivets, it confirms an external hinge setup.
On the other hand, internal hinges are typically concealed behind the frame and may be welded or riveted, making hinge removal more complicated.
Consult the safe’s manual or manufacturer’s website to confirm the hinge construction and whether the hinges are removable or fixed.
Recognizing whether your safe has external or internal hinges will guide your approach and help you prepare for the hinge removal process effectively.
What Tools and Safety Gear Do You Need for Safe Door Removal?
To safely remove your gun safe door, you’ll need a selection of specific tools and safety gear to prevent accidents and damage.
Essential tools include pry bars, screwdrivers, and socket wrenches to carefully remove hinge pins and detach the door.
Support straps, dollies, or engine hoists help lift and transport the door securely, avoiding drops that could cause damage or injury.
Safety gear is vital—wear heavy-duty gloves to protect your hands from sharp edges and safety glasses or eye protection to shield your eyes from debris and potential splinters.
Good lighting, like a flashlight or work light, guarantees you can see hinge pins and attachment points clearly.
Additionally, having a level surface or padding, such as plywood or carpet, helps prevent scratching or damaging the safe or flooring during removal.
Gathering these tools and safety gear beforehand makes the process safer and more efficient.
How to Prepare Your Workspace for Safe Door Removal
Preparing your workspace properly sets the stage for a safe and smooth door removal.
First, clear the area around the safe, removing any obstacles to give yourself ample space. This helps prevent accidents and makes handling the heavy door easier.
Protect the floor by laying down padding or plywood to prevent damage if the door slips or drops. Gather all the tools you’ll need, like pry bars, screwdrivers, and support straps, so you’re ready to work efficiently.
Before starting, inspect the hinges and door to see if external hinge pins are accessible, which can simplify removal.
Also, verify the safe is turned off and, if possible, emptied to avoid injury or damage during the process.
Taking these steps helps create a safe, organized environment, reducing risks and making the removal process smoother and more controlled.
Proper preparation makes all the difference in safely removing your gun safe door.
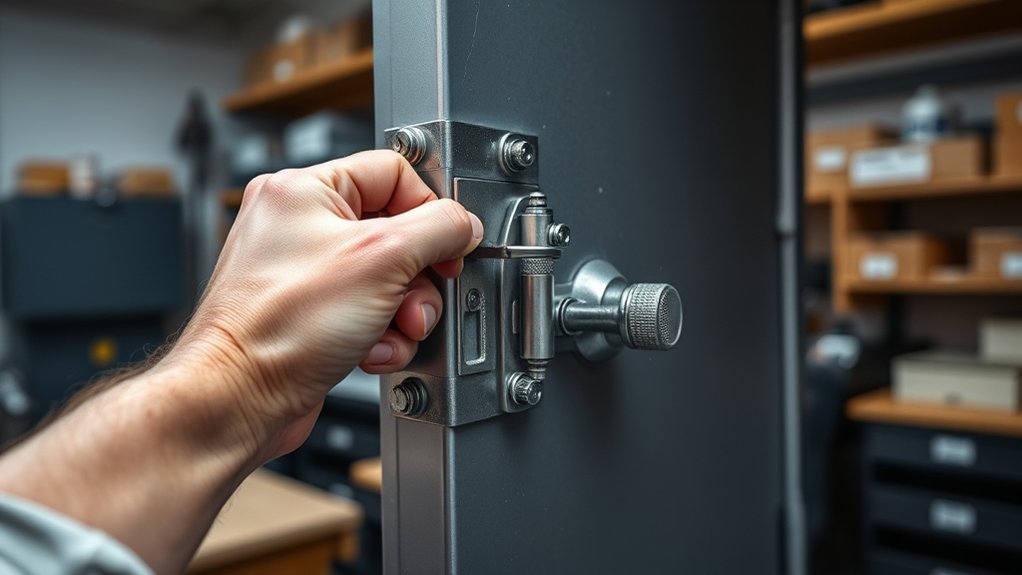
How to Detach Hinge Pins on Your Safe Door
Whether your hinges are external with visible pins or internal and concealed, the first step is to identify which type you’re dealing with. This will determine your approach for detaching the hinge pins.
For external hinges, you’ll see the hinge pins clearly, making removal straightforward.
To remove the door, start by supporting it securely—use a helper or lifting straps to prevent it from falling once the hinge pins are out.
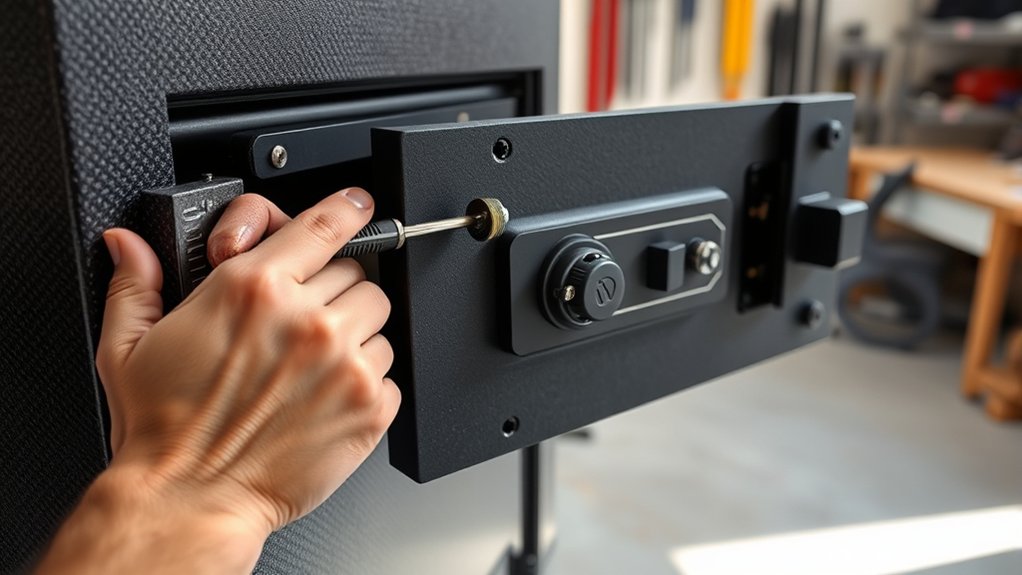
Use a flat-head screwdriver and a pry bar to gently pry and lift the hinge pins, beginning with the bottom hinge for better leverage.
Tap the hinge pins out carefully with a hammer or mallet, applying even pressure to avoid damage.
Once the pins are free, you can carefully lift the door away from the safe.
Be cautious throughout the process to guarantee safe door removal without damaging the hinges or safe frame.
How to Lift and Remove Your Safe Door Safely
When lifting your safe door, make certain to support it evenly with help or straps to keep it balanced and prevent accidents.
Use a pry bar or screwdriver to remove the hinge pins carefully.
Then lift the door straight up while maintaining a firm grip.
Always place the door on soft surfaces, and for heavy doors, consider using a dolly or hoist to guarantee safe handling.
Proper Lifting Techniques
Lifting and removing your safe door safely requires proper technique to prevent injury or damage. Start with good lifting techniques by supporting the door evenly, using lifting aids like straps or a pry bar to grip it securely.
This minimizes strain on your back and arms. Position yourself close to the door’s center of gravity to help maintain balance during removal.
Keep your feet shoulder-width apart and bend your knees, lifting with your legs rather than your back. Clear communication with helpers is essential to coordinate movements smoothly.
Proper lifting guarantees you support the door safely, reducing the risk of dropping or tilting it unexpectedly. Remember, a controlled, balanced approach is key to lifting the safe door safely and efficiently.
Support and Balance
Supporting and balancing the safe door properly helps prevent accidents and damage during removal. To do this, confirm the weight is evenly distributed with multiple helpers or lifting straps.
Use a pry bar or a dolly to lift and hold the door securely, maintaining a balanced weight distribution before lifting. Position the door at a 90-degree angle to the safe for better control.
Support the weight of the door with straps or brackets to reduce strain and prevent accidental drops. Always keep the floor surface protected with padding or plywood to create a slip-resistant, stable base.
- Support with multiple helpers or lifting straps
- Use a pry bar or dolly for secure lifting
- Maintain a 90-degree angle during removal
- Distribute weight evenly for balance
- Protect the floor surface for stability
Safety Precautions
To remove your safe door safely, it’s crucial to take proper safety precautions throughout the process.
Always wear safety gloves and eye protection to guard against sharp edges or falling parts. Supporting the door evenly with helpers or lifting straps prevents tipping or falling unexpectedly.
Use tools like pry bars and dollies carefully to lift and maneuver the heavy door without damage. Make sure your work area is clear of obstacles and on a stable, level surface for better control.
Carefully coordinate movements with helpers, lifting the door slowly and steadily to avoid injury or damage.
| Safety Gear | Proper Support |
|---|---|
| Safety gloves, eye protection | Use lifting straps or helpers |
| Clear, level work area | Coordinate movements carefully |
How to Support and Transport the Safe Door During Removal
When removing a gun safe door, it’s essential to support it evenly to prevent tipping or falling, especially if you’re working with multiple helpers.
Use lifting straps or a sturdy dolly to securely lift and transport the door, ensuring it stays balanced throughout. This reduces the risk of damage or injury.
Securely lift and transport the door with lifting straps or a sturdy dolly to keep it balanced and prevent damage or injury.
To handle safely:
- Support the door with multiple helpers for even weight distribution.
- Use lifting straps for better grip and control.
- Place padding or blankets between the door and support equipment.
- Use a dolly or engine hoist with ratchet straps for secure transport.
- Carefully lift the door straight upward to disengage hinge pins.
Maintaining even support and using proper equipment helps you handle the door safely during removal.
Keep control at all times and avoid sudden movements.
Proper handling ensures the door’s safety and prevents damage during transport.
How to Reinstall and Realign Your Safe Door Properly
To reinstall and realign your safe door, start by carefully lining up the hinge holes with the hinge pins, beginning with the bottom hinge.
Gently lower the door onto the pins, making sure they slide in fully and securely.
Once in place, check that the door is flush with the frame and opens smoothly before testing the lock and operation multiple times.
Align Hinges Correctly
Reinstalling and realigning your safe door requires careful attention to the hinges to guarantee proper operation.
Start by ensuring the hinge pins are fully inserted and properly positioned before reattaching the door.
When reattaching, begin with the bottom hinge pin, then move to the upper hinges to maintain hinge alignment.
Use a level to check that the door is square and flush with the safe body before tightening hinge bolts completely.
If the door isn’t aligned, loosen the hinge bolts slightly, adjust the door’s position, and then retighten.
Regularly verify that the lock and handle operate smoothly after reinstallation to confirm proper alignment.
- Check hinge pins are fully inserted
- Start with bottom hinge pin first
- Keep door square with a level
- Adjust hinge bolts for proper alignment
- Confirm smooth lock and handle operation
Secure Hinge Pins Properly
Securing the hinge pins properly is key to guaranteeing your door stays aligned and operates smoothly.
During reinstallation, align the hinge pins with the hinge holes and gently tap them in using a rubber mallet for a snug fit. This helps secure the pins without damaging the metal and assures proper positioning.
Start with the bottom hinge pin to stabilize the door, then proceed to the top hinge to maintain correct alignment.
Before fully securing the pins, verify that the door swings smoothly and closes flush with the safe body.
After installation, regularly check the hinge pins for tightness and smooth movement to prevent future misalignment or door sagging.
Proper securing of hinge pins guarantees a secure, well-aligned door that functions properly.
Test Door Functionality
Once the door is aligned and the hinge pins are securely in place, it’s important to test its functionality thoroughly.
Carefully open and close the door several times to check for smooth movement and proper operation.
Pay attention to how the door swings and make sure it doesn’t stick or sag.
Verify that the lock mechanism engages correctly and that the handle turns easily without resistance.
Also, check the door’s seal to confirm it closes tightly, maintaining the safe’s security and fireproof integrity.
If the door doesn’t operate smoothly, make final adjustments to the hinge alignment.
Focus on these key points:
- Test door movement by opening and closing multiple times.
- Make sure hinge pin placement allows smooth operation.
- Verify lock engagement and handle rotation.
- Check that the door closes flush and securely.
- Adjust if necessary for ideal alignment.
Common Challenges During Safe Door Removal and How to Troubleshoot
Removing a safe door can present several common challenges, especially if you’re unfamiliar with the process or if the hinges have experienced wear over time.
Hinge removal can be tricky, particularly with internal hinges that may need specialized techniques or professional help.
External hinges are generally easier to handle since their pins are accessible with basic tools, but improper removal can cause damage.
Misaligned or worn hinges can lead to a sagging or stuck door, making removal more difficult.
To troubleshoot, inspect the hinge condition first—look for wear or rust—and confirm if the pins are removable.
Using the right tools, like screwdrivers or pry bars, helps prevent damage.
Heavy or large doors require safe support, such as dollies or hoists, to avoid injury or damage during removal.
Proper support and careful handling are essential for damage prevention and smooth hinge removal, ensuring your safe remains intact.
Tips for Maintaining Your Safe After Removing the Door
After removing the door, it’s important to regularly check and lubricate the hinges and locking parts to keep everything operating smoothly.
You should also clean all surfaces gently and test the lock and handle to guarantee proper alignment before securing the safe again.
Keeping the safe in a climate-controlled space helps prevent damage and keeps it functioning properly over time.
Regular Lubrication Checks
Even when your gun safe door is removed, regular lubrication remains essential to keep the hinges and locking mechanisms functioning smoothly.
Proper lubrication prevents rust, reduces wear, and guarantees smooth operation over time. After door removal, it’s important to check and reapply lubricant every 6 to 12 months, especially after cleaning or humidity exposure.
Use a graphite-based lubricant or silicone spray to avoid dust buildup and debris attraction. Regular lubrication also helps maintain hinge alignment, preventing sticking or jamming.
Neglecting these checks can lead to decreased performance and potential damage. Keep these tips in mind for effective safe maintenance, guaranteeing your hinges and locks stay in top shape.
Staying consistent with lubrication will extend your safe’s lifespan and reliability.
- Prevent rust and debris buildup
- Guarantee smooth operation of hinges
- Maintain proper hinge alignment
- Reduce wear on moving parts
- Extend the lifespan of hinges and locks
Clean and Inspect Components
Once you’ve taken the door off, it’s a good idea to clean and inspect the components to keep your safe operating smoothly.
Use a soft cloth to remove dust from hinges, lock mechanisms, and surfaces.
Inspect hinge pins and hinges for signs of wear or rust, replacing or lubricating them as needed.
Proper lubrication with a graphite-based lubricant on moving parts ensures smooth operation.
Check door alignment to prevent strain or misfit, adjusting if necessary.
Keeping everything dry helps prevent rust and corrosion.
Regularly maintaining these parts prolongs your safe’s lifespan and performance.
| Key Components | Maintenance Tips |
|---|---|
| Hinge pins & hinges | Inspect for rust, lubricate or replace |
| Door alignment | Periodically check and adjust |
| Rust prevention | Keep surfaces dry and free from moisture |
| Lock mechanism | Clean and inspect for smooth operation |
| Surfaces | Regular dusting and cleaning |
Test Lock Functionality
Have you tested your safe’s lock mechanism thoroughly after reattaching the door?
It’s essential to verify the lock’s alignment and functionality to guarantee your safe remains secure.
Test the lock mechanism multiple times using the original keys, combination dial, or electronic keypad to confirm smooth operation.
A successful test guarantees that the lock mechanism secures properly and functions reliably.
Additionally, perform a visual inspection to check for proper door alignment and no gaps that could compromise security.
Don’t forget to lubricate the lock and hinges with a graphite-based lubricant to maintain smooth, sticking-free operation.
Regularly check the lock’s performance over time, and address any issues immediately to keep your safe secure and in prime working condition.
Frequently Asked Questions
How Easy Is It to Remove a Door?
Removing a safe door can range from fairly easy to quite difficult, depending on the hinge type and door size.
If your hinges are external with visible pins, you might do it yourself with some tools.
But if the hinges are internal or the door is heavy, you’ll likely need help or professional assistance.
Always prioritize safety, especially with large or heavy doors, to prevent injury or damage.
How Do I Open My Safe if I Lost the Key?
Losing your key might feel like hitting a wall, but don’t worry—you’ve got options.
First, check if your safe has a backup or override key hidden behind the keypad or logo plate.
If that’s not available, use the master code or follow the factory reset instructions.
Still stuck? It’s best to call a professional locksmith—trying to force it could do more harm than good.
What Are the Steps to Open the Safe?
To open your safe, start by locating the keypad or lock mechanism.
Enter your code or use the backup key if available.
If it’s electronic and unresponsive, check the batteries or consult the manufacturer’s instructions.
For mechanical locks, turn the dial correctly.
If all else fails, contacting a professional locksmith or the safe’s manufacturer is your best bet to prevent damage and guarantee proper opening.
How to Remove an Old Safe?
To remove an old safe, first check if it has external hinges with visible pins, as those are easier to work with.
Always consult the manufacturer’s instructions or a professional to avoid damage.
Support the safe with help or equipment, then carefully pry out the hinge pins starting from the bottom.
Once the pins are out, lift the door evenly and steadily to detach it from the safe body.
Conclusion
So, there you have it—removing your gun safe door isn’t rocket science, just a bit of careful planning and patience.
Just imagine, after all that effort, you might find yourself longing for the good old days when your door was securely in place.
But hey, now you’re a pro at safe maintenance—who knew that a simple door removal could turn you into a DIY hero?
Just don’t forget to reassemble everything; or you’ll end up with an even more challenging problem!
Remember, mastering how to remove your gun safe door can make future maintenance a breeze.