How to Lock Ammo Can Securely: Complete Guide & Best Methods Explained
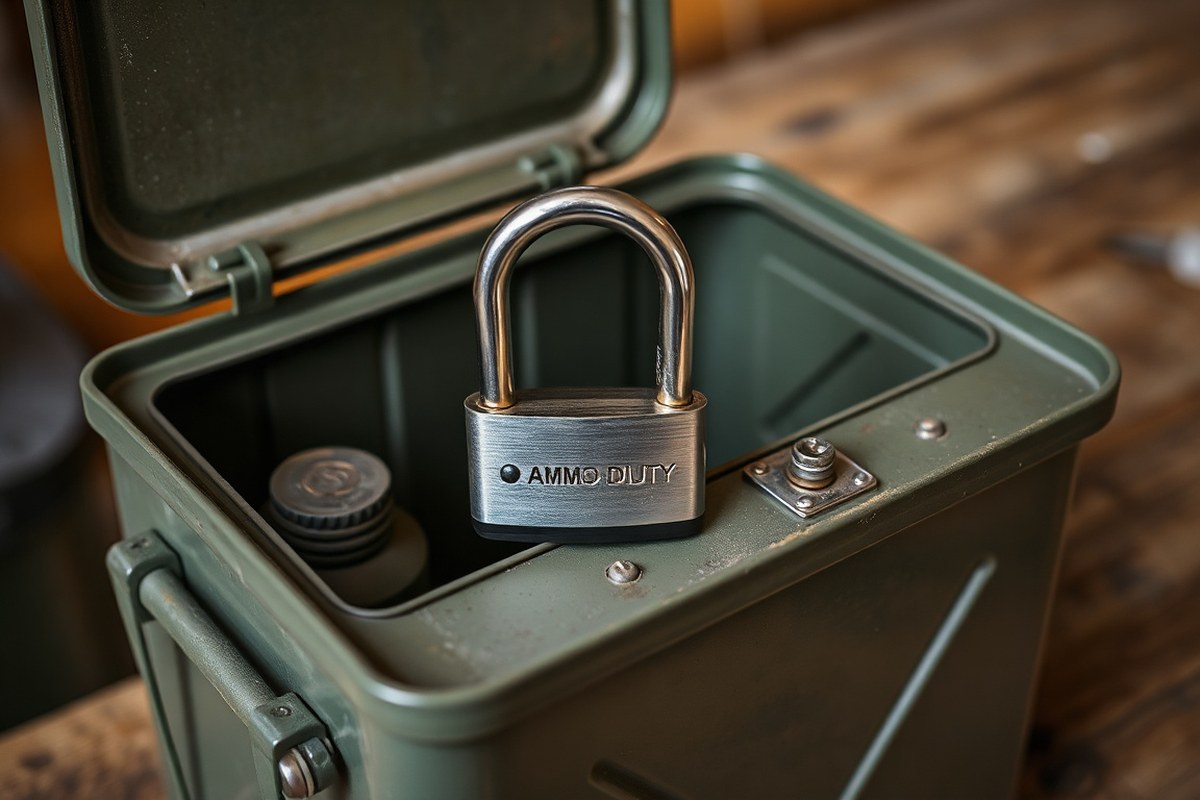
Knowing how to lock ammo can securely protects your ammunition from unauthorized access and damage. The best way involves using dedicated locking hardware like no-drill latch locks or drill-in kits designed specifically for standard metal ammo cans. Start by selecting a locking solution compatible with your ammo can size and type to ensure a snug, tamper-resistant fit.
Key Takeaways
- No-drill latch locks provide quick, secure locking without altering your ammo can.
- Choose locking hardware that fits your ammo can model, such as 30 cal, 50 cal, or Fat 50 sizes.
- Drill-in locking kits offer higher security but require careful installation and compatibility checks.
- Select locks with shackles up to 1/4 inch diameter for maximum fit with latch hardware.
- Avoid hardware incompatible with 30 Ammodors, WWII-era .50 cal cans, or .30 cal/M19 olds.
- Regularly test your locked ammo can for secure closure and resistance to tampering.
What Are the Best Methods to Lock an Ammo Can?
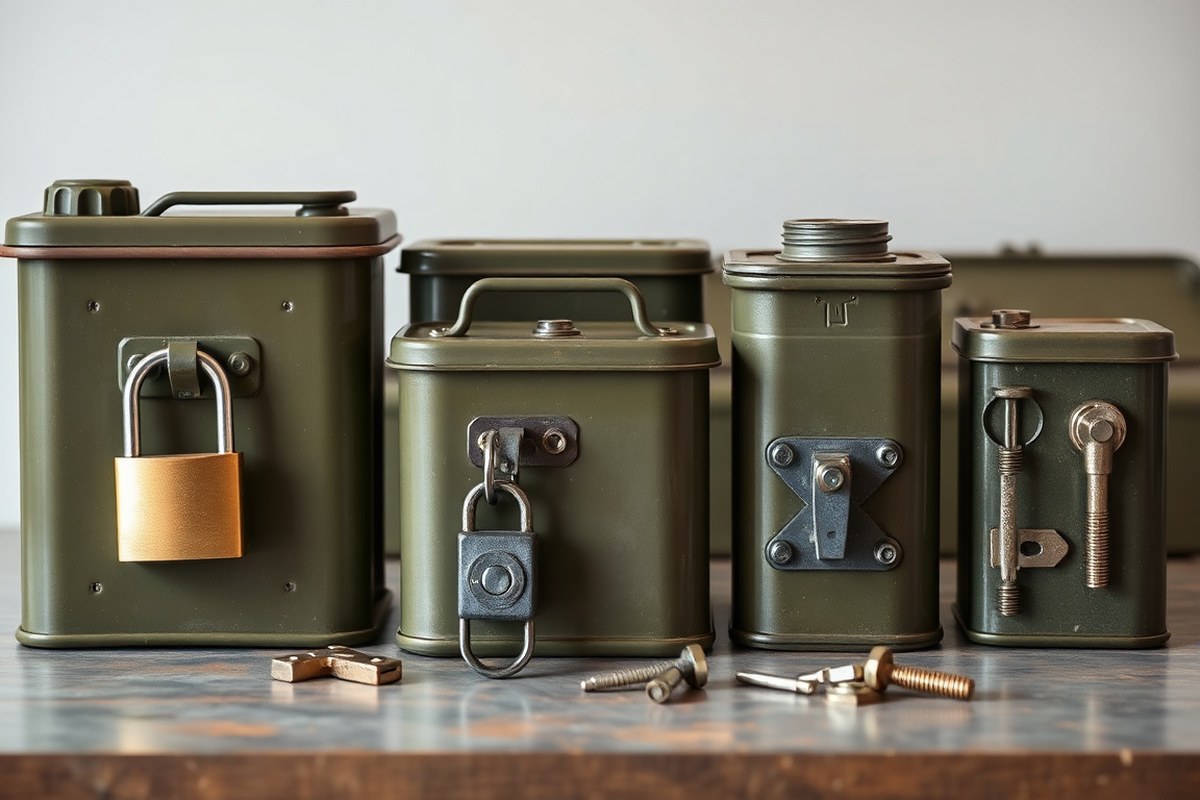
You have several options to lock an ammo can, ranging from no-drill solutions to traditional hardware kits that require drilling. Choosing the right method depends on the type of ammo can you own, how much modification you want to do, and the level of security needed.
No-drill locks like the Latch Lock™ are the quickest to install and preserve the ammo can’s watertight seal. The Latch Lock easily attaches outside the can without any permanent changes, protecting standard 30 cal, 50 cal, and Fat 50 ammo cans and accommodating padlocks with up to a 1/4″ shackle. It installs in seconds and comes with a lifetime warranty, making it a low-effort, reliable choice if your ammo can fits its specifications. However, it won’t fit certain models like .30 cal/M19 ammo cans or WWII-era .50 cal cans.
Hardware kits that require drilling, such as those from Ammo Can Man® and Army Force Gear, provide a more secure lock by adding a locking mechanism directly onto the can with high-quality, often stainless steel materials. These kits are suitable for a wide range of military surplus cans, including 20mm, 30mm, 40mm, and 60mm containers, and can maintain the can’s weather resistance if installed correctly. But drilling is time-consuming, needs tools like drills and metal bits, and may compromise the can’s seal if not done carefully. The process also permanently modifies the can.
Traditional padlocks alone can be used if the ammo can has an existing latch hole or if you modify the can by drilling your own hole. This method is low-cost, but it exposes ammo cans to theft if the padlock or latch is weak. Larger shackles up to 1/4″ diameter can be used with specific locking hardware kits.
The table below compares these options across installation ease, security, and hardware requirements:
| Locking Method | Installation Type | Security Level | Ammo Can Compatibility | Impact on Can Seal | Typical Cost Range |
|---|---|---|---|---|---|
| Latch Lock™ (No-Drill) | No drilling, mounts externally in seconds | Medium, uses padlock up to 1/4″ shackle | Standard 30 cal, 50 cal, Fat 50, 20mm, 40mm cans | None, preserves watertight seal | $40-$60 for hardware; padlock not included |
| Ammo Can Man® Drill-In Hardware | Drilling required, install locking hardware inside/outside | High, stainless steel hardware, sturdy lock points | Wide range: 30 cal, 50 cal, M2A1, Tall 50, various military surplus | May compromise seal if not sealed properly post-install | $50-$100 for kit; padlock extra |
| Army Force Gear Drill-In Kit | Drilling required with tools; stainless steel materials | High, durable and weather resistant locking points | US military surplus cans, some new/imported models | Potential to affect seal, dependent on installation care | $50-$90 for kit; padlock extra |
| Traditional Padlock Only | May require drilling or use existing holes | Low to medium, depends on padlock quality | Any can with latch or drilled hole | Potential permanent modification if drilling | Varies widely, $10-$40 for padlock |
Before choosing, verify your ammo can model fits the lock hardware, especially with no-drill options like the Latch Lock™, which do not fit all surplus ammo cans. Using drill-in kits demands more time, tools, and care but achieves a higher level of security and durability. Traditional padlocks provide a budget choice but may require modifying the can and don’t always deliver strong security without quality locks and hardware.
How to Install a No-Drill Latch Lock on Ammo Cans
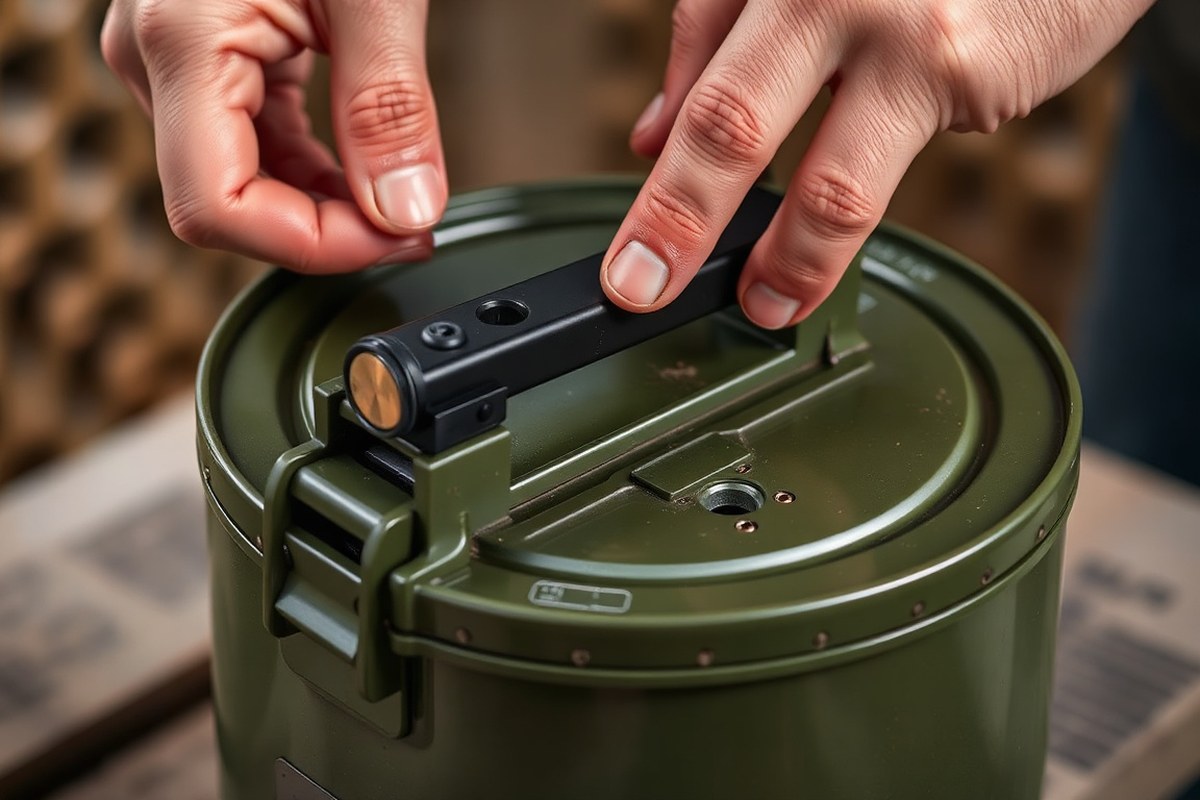
Installing a no-drill latch lock on your ammo can locks the lid securely without compromising the can’s watertight seal or integrity. The lock fits over the existing latch and fastens with a pin, allowing easy removal when needed. This method protects your ammo or valuables while preserving the can’s durability and moisture resistance.
Preparing the Ammo Can for Installation
Start with a clean, dry ammo can to avoid trapping dirt or moisture that could damage your contents. Ensure the existing latch moves smoothly and fully closes the lid. No drilling or permanent modifications are needed, which keeps the can’s seal unaffected.
Gather the tools before you begin. You will need the latch lock kit, which includes a security bar, lock pin, and matching lock (usually sold separately). A flat surface for workspace is helpful to keep parts organized.
Attaching the Latch Lock Components
The latch lock fits right over the existing closure system. The security bar slides over the lid latch, aligning its hole with the latch’s locking point. Then you insert the lock pin through both aligned holes to hold the bar in place securely.
This step requires no drilling or modification and is designed so the watertight gasket under the lid remains untouched. The strong carbon steel lock and bar resist rust and protect against tampering.
- Hold the ammo can on a flat surface with the lid closed tightly.
- Position the latch lock’s security bar over the current latch, ensuring the holes for the lock pin line up perfectly.
- Insert the stainless steel lock pin through the holes, locking the bar firmly in place.
- Verify that the latch cannot be lifted without removing the pin.
Tip: Avoid forcing the lock pin if it doesn’t slide easily; realign the components to prevent bending the lock or damaging the latch mechanism.
Securing the Lock and Testing Closure
After pin insertion, attach your keyed or combination padlock through the lock pin’s eyelet. This keeps the pin from being removed without the key or combination. Choose a weather-resistant lock to maintain durability in various storage conditions.
Test the lock by trying to open the ammo can without unlocking it first. The water-tight seal should remain unaffected since you didn’t drill any holes or alter the gasket. Double-check the latch moves freely when the lock is removed.
Using Drill-In Locking Hardware Kits: What to Expect
Ammo cans with no pre-existing lock holes require drilling to install drill-in locking hardware kits. Drilling must be precise to avoid weakening the can or compromising its watertight seal. Drill-in locks typically offer higher security than clamp locks because they are integrated directly with the can’s metal, making forced removal more difficult.
Choosing the Drill Bit and Location
Select a drill bit suitable for metal, ideally a high-speed steel (HSS) or cobalt bit, sized to match the stainless steel stud included in the locking kit. Check the kit’s instructions for the exact drill diameter, which typically ranges from 1/4 inch to 3/8 inch. Position the drill hole on the can’s lid lip or side panel, where the locking stud can secure the lid without interfering with the seal.
Avoid drilling near the edges where the rubber gasket seals the lid, to maintain the can’s waterproof integrity. Confirm your ammo can model’s compatibility with the hardware before drilling; some cans have thinner lids or flanges that may not support drill-in locks well.
Drilling the Hole Safely
Drilling into steel requires steady control and safety precautions. Use eye protection and gloves. Clamp the ammo can securely to prevent shifting, and mark the drill location with a centre punch to reduce bit slippage. Start drilling at low speed and moderate pressure, cooling the bit with occasional drops of light oil to prevent overheating and metal warping.
Pause regularly to clear metal shavings from the drill site and inside the can, which can damage the ammunition or show signs of tampering. After drilling, file any sharp edges around the hole to prevent injury and protect the locking hardware from wear.
Installing Lock Hardware and Final Checks
Assemble the lock hardware following the kit’s components: place the large washer on the outside, followed by the neoprene washer to seal moisture, then insert the stainless steel stud through the drilled hole from outside to inside. Secure it tightly with the small washer and grade 8 nylon locknut on the inside, which resists loosening under vibration or impact.
Before final tightening, ensure the lid closes fully and the seal sits correctly. Test the lock with your chosen padlock for smooth operation. Check for gaps or damage to the gasket, since a damaged seal can let moisture in, risking ammunition corrosion.
- Confirm ammo can and hardware kit compatibility and select the drill bit size indicated in the instructions.
- Mark the drill location away from sealing surfaces and use a centre punch to mark the spot precisely.
- Secure the ammo can in a vice or clamp on a stable surface.
- Put on safety glasses and gloves, then drill slowly, cooling the bit with light oil.
- Clear metal shavings frequently, and file sharp edges around the hole.
- Assemble the lock hardware: slid the large washer, neoprene washer, insert the stud, add the small washer, then tighten the nylon locknut.
- Close the lid and verify the seal is intact and the lock operates smoothly with your padlock.
Which Ammo Cans Are Compatible with Locking Hardware Kits?
Most locking hardware kits on the market are designed to fit modern U.S. Ammo cans manufactured after World War II. These post-WWII models have standard dimensions and consistent lid and latch designs, making them compatible with commonly available drill-in and no-drill locking systems. Standard ammo cans include the popular 50-caliber and 30-caliber sizes, which feature uniform thickness metal and standard holes or latches where locks or hasps can be mounted. This standardization simplifies adding locking hardware without extensive modification.
Vintage and WWII-era ammo cans often present challenges for locking hardware compatibility. These older cans vary widely in size, material thickness, and latch design. Many WWII cans lack reinforced areas for drill-in locks, and their lid gaps or hinge setups may prevent reliable fitment of off-the-shelf locking kits. Some collectors use custom brackets or retrofit modern locking mechanisms, but these solutions require additional skill and time, and they can risk damaging collectible cans.
Imported ammo cans and custom-made containers generally do not follow U.S. Military specs. Their material dimensions, lid styles, and latching systems differ significantly. Standard locking kits rarely fit without modification. Installing locks on these cans may involve welding, custom drilling, or aftermarket parts tailored for the specific container model. This process usually costs more and takes longer, requiring metalworking tools and expertise.
Below is a comparison table showing common ammo can models and their compatibility with popular locking hardware kits. This helps you select the right solution for the cans you already own or plan to purchase.
| Ammo Can Model | Size (inches) | Material Thickness | Locking Hardware Compatibility | Notes |
|---|---|---|---|---|
| M2A1 50 cal | 11.5 x 7 x 7 | 16 gauge steel | High | Standard drill points, fits most drill-in and no-drill locks |
| M19A1 30 cal | 11.5 x 7 x 5 | 16 gauge steel | High | Similar to M2A1, widely supported |
| WWII M1 (various calibers) | Varies | Thinner steel (18 gauge) | Medium to Low | Non-standard latches, requires custom retrofit |
| Imported NATO cans | Varies | Varies | Low | Different specs; custom work needed |
| Custom homemade cans | Varies | Varies | Low | No standard fit; requires welding or drilling |
Choosing an ammo can that matches standard U.S. Military sizes and construction simplifies adding locking hardware without damaging the container. Typical kits cost between $15 and $40 and take 20-40 minutes to install on a compatible can. Installing a lock on vintage or custom cans often needs additional parts or professional services, which raise costs and time.
Good results mean a secure fit with minimal metal deformation and easy lock operation. Poor fits risk lock damage or ineffective security. Always verify the ammo can model before buying locking hardware or expect to test-fit your chosen lock methods carefully.
Choosing the Right Lock: Pads, Shackles, and Security Features
Selecting the right padlock and shackle for your ammo can means balancing size, material, and security features to prevent theft and withstand harsh conditions. Focus on a shackle size that fits securely through the ammo can’s latch or hasp, choose materials like stainless steel or boron for corrosion resistance, and decide between keyed or combination mechanisms based on convenience and security needs.
Shackle Size and Fit for Ammo Cans
The shackle size directly affects how well your lock secures the ammo can. Most ammo cans have a latch or hasp opening between ⅜ inch to ½ inch wide. Choose a lock with a shackle diameter slightly smaller than the opening to ensure a snug fit without forcing it. For example, a 3/8-inch shackle diameter with at least a 1-inch clearance under the shackle usually works well.
Ensure the shackle length is long enough to pass through the latch but not so long that it leaves slack, which can be exploited by bolt cutters. Confirm the ammo can’s latch dimensions before purchasing by measuring the exact gap and latch thickness.
Material Options for Durability and Security
Lock material affects rust resistance, tamper resistance, and durability. Stainless steel shackles resist rust but may be softer and easier to cut. Hardened steel shackles are tougher to cut but prone to rust without coatings or special finishes. Boron steel shackles blend high hardness with corrosion resistance, making them ideal for outdoor storage or humid environments.
Lock bodies made of laminated steel or solid brass offer good corrosion protection. Plastic or zinc bodies tend to wear faster and offer less physical security. Look for locks rated for weather exposure if your ammo cans are stored outside or in damp basements.
Keyed vs. Combination Locks for Ammo Storage
Keyed padlocks offer consistent security without accidental lockouts since only a physical key opens them. You can carry a spare key as backup. They typically offer stronger resistance against brute force attacks and picking, depending on the lock cylinder quality.
Combination locks eliminate the need for keys and allow quick access after memorizing the code. They can be reset but might be less secure against manipulation, especially with lower-quality mechanisms. Heavy-duty combination padlocks with hardened shackles can be effective for less critical ammo storage or where carrying keys is inconvenient.
Checklist of Essential Lock Features
Use these criteria to evaluate locks for securing your ammo can:
- Shackle diameter matches the ammo can’s latch gap (commonly 3/8 inch)
- Short shackle length to minimize exposed shackle and prevent use attacks
- Hardened steel or boron shackle for cut resistance
- Corrosion-resistant lock body material (stainless steel, laminated steel, or brass)
- High-security locking mechanism (disc detainer or pin tumbler cylinders)
- Weatherproof design if exposed to elements
- Keyed or combination type based on personal preference and usage scenario
Including these features in your lock choice reduces the risk of rust, tampering, and accidental damage.
How to Decide on Padlock Size and Type
Match your padlock size strictly to your ammo can’s latch to avoid locks that are too loose or impossible to close properly. Smaller shackles reduce exposed metal and increase security but must pass easily through the latch hole. If uncertain, measure twice and check manufacturer specs.
Choose keyed locks for long-term storage and higher security needs, especially if access control and key backup are priorities. Opt for combination locks when you want keyless convenience and easy access, but prioritize high build quality. Consider your environment, locks used outdoors must prioritize corrosion resistance.
Always keep a spare key or write down your combination and store it separately, losing access to your ammo can defeats the purpose of secure locking.
Common Mistakes When Locking Ammo Cans and How to Fix Them
Incorrectly locking an ammo can often leads to damage that jeopardizes the container’s security and weather resistance. A common problem is drilling holes in the wrong spots, which can weaken the metal or puncture the watertight gasket, allowing moisture inside. You can prevent this by consulting the ammo can’s design or manufacturer guidance before drilling. Measure precisely and mark the drilling location to avoid hitting tight seams or areas next to the lid gasket.
Choosing an incorrect lock size can also cause issues. A padlock that is too large might not fit within the ammo can’s hasp or locking hardware, while an undersized shackle could be vulnerable to easy removal or cutting. To fix this, verify the lock dimensions match the hasp measurements. Standard ammo can locking hardware often fits padlocks with shackles around 1/4-inch in diameter, so select accordingly.
Breaking the seal by damaging or dislodging the rubber gasket during lock installation or use reduces the ammo can’s ability to keep moisture and dirt out. Avoid this by handling the lid carefully and limiting force on the gasket when tightening locks or modifying the can. If the gasket is already damaged, replace it promptly with a rubber or silicone gasket cut to the original size and thickness. You can usually purchase replacement gaskets online for $10 to $20.
- Confirm drilling points with a ruler and center punch before drilling
- Use a drill bit slightly smaller than the lock hardware bolts to ensure tight fits
- Match padlock shackle diameter to hasp opening for a secure fit
- Inspect the gasket after installation and replace if cracked or compressed
- Apply rust-inhibiting spray on cut or drilled metal edges to prevent corrosion
- Use lock hardware kits designed for your ammo can model to minimize errors
- Test lock and seal function before storing ammo long-term
Repairing damaged locking hardware involves removing the compromised parts and installing compatible replacements. Drilled holes that are too large may require reinforcing with a metal patch or welding to restore rigidity, professional help is recommended for welding. For bent or broken hasps, swapping in a new locking latch kit costs about $15 to $35 depending on the brand and material quality. Replacing the lock is straightforward; purchase a new padlock or latch that fits the ammo can’s locking system specifications.
Maintaining the watertight integrity while securing your ammo ensures its longevity and reliability. Avoid over-tightening or forcing lock components, which can warp lids or break seals. Following precise installation steps and using correct hardware minimizes damage risk and keeps your ammo safe from environmental exposure.
Maintaining and Testing Your Locked Ammo Can for Security
Keeping your locked ammo can secure over time requires regular inspections and proper maintenance. Start by checking the lock and hardware every three months for signs of wear, rust, or damage. Inspect the hinge, latch, and lock body for any corrosion or looseness that could compromise security.
To maintain rust resistance, wipe down metal surfaces with a lightly oiled cloth every six months, using a light machine oil like 3-in-1 or gun oil. This prevents moisture build-up in humid or damp environments, which can cause oxidation. Store your ammo can in a dry place and use desiccant packets inside to reduce internal humidity.
Check the lock’s function by repeatedly locking and unlocking it during inspections. The mechanism must operate smoothly, without catching or strong resistance. A lock that sticks, feels shaky, or has a loose shackle needs to be replaced. Single-piece metal locks, often free of tiny internal components, usually offer greater durability and tamper resistance, but regular maintenance remains necessary.
- Inspect locks and hardware every 3 months for corrosion or wear
- Apply a light coating of machine oil twice a year to prevent rust
- Store ammo cans in dry, well-ventilated areas away from moisture
- Use silica gel packs inside the can to absorb humidity
- Operate the lock several times during inspection to check for smooth function
- Replace locks or hinges if corrosion or mechanical faults appear
- Keep spare keys or combination codes stored securely but accessible
Replace any hardware showing rust that cannot be removed with gentle cleaning or parts that no longer lock securely. Expect induction or replacement costs to range from $10 to $25 per lock, depending on quality. Neglecting routine checks and maintenance can lead to seized locks, weakened metal, or compromised security over time. Performing these simple steps ensures your locked ammo cans remain durable and secure in all storage conditions.
When to Use Professional Services to Lock Ammo Cans
Professional assistance for locking ammo cans becomes necessary in certain situations, especially when the cans you own don’t match standard sizes or when you require a level of security beyond common DIY options. Non-standard ammo cans, such as vintage military surplus or custom-fabricated containers, may not have compatible locking mechanisms that work with off-the-shelf hardware. A locksmith or security professional can design and install tailored solutions that maintain the container’s integrity while providing reliable locking.
High-security needs also call for professional help. If your ammo storage demands resistance to tampering, forced entry, or environmental factors such as extreme temperatures or moisture, specialized locks and reinforced mounting points may be required. Professionals can recommend and install hardened steel locks, weld-in hasps, or electronic locking systems that go beyond typical padlocks. These modifications often involve precise metalwork and electrical work, which are best handled by qualified technicians to ensure safety and effectiveness.
Custom modifications like welding locking tabs on fragile cans, retrofitting electronic alarms, or integrating biometric access require tools and skills outside a typical gun owner’s toolkit. Hiring a locksmith or metalworker prevents damage to your ammo can and ensures the security feature functions as intended. The cost for these services can vary widely depending on material and complexity, ranging from $75 for simple lock installations to $250 or more for intricate security system setups.
To decide whether you need professional help, start with a checklist: assess if the ammo can is non-standard or damaged, evaluate your security requirements compared to available DIY lock options, and consider if the lock installation involves metal modification or electrical work. When these points indicate complexity or risk, contact a reputable locksmith or security specialist experienced with firearms storage.
Finding the right professional involves researching local locksmiths or security companies with positive reviews and expertise in gun safe or secure container work. Ask about their experience with ammo or firearm-related locking solutions before hiring. Avoid general locksmiths unfamiliar with firearm regulations, as improper installation can violate local laws or compromise safety. Getting written estimates and clear descriptions of services helps prevent surprises.
Always verify that a locksmith or security professional understands firearm-related storage concerns and legal compliance before trusting them with your ammo can modifications.
Contact professionals early in the planning stage, not after damaging your ammo can attempting an unsuitable lock installation yourself. Clear communication about your container type, ammo volume, and security threat level will guide them in proposing cost-effective, secure solutions fit for your storage needs.
Step-by-Step Action Plan to Secure Your Ammo Can
Follow these clear steps to lock your ammo can effectively and ensure your ammunition stays protected.
- Before you start: Choose an ammo can compatible with locking hardware or equipped for latch locks. Check the can’s material and design to confirm fit.
- Day 1: Select the right lock based on your security needs, preferring hardened steel padlocks with weather-resistant features. Verify lock size matches lock kit specifications or latch closures.
- Day 2: For no-drill latch locks, attach the latch by aligning it properly on the can’s existing holes or hooks. Test the latch closes smoothly and locks securely without forcing.
- Day 3: If using drill-in hardware, carefully mark drill points on the can following the hardware kit instructions. Drill holes precisely and mount locking hardware firmly. Test latch movement before locking.
- Day 4: Install your chosen lock onto the latch or locking hardware. Make sure the lock engages fully and the key or combination functions easily.
- Day 5: Perform a security test by trying to open the locked ammo can without the key or combination. It should stay firmly shut and show no signs of easy tampering.
- After 2 weeks: Inspect the latch and lock for wear, rust, or loosening. Apply lubricant if needed and retighten hardware to maintain security standards.
- Monthly check: Open and re-secure the ammo can to confirm lock function remains reliable. Replace locks or hardware at any sign of compromised security.
Frequently Asked Questions
What Tools Are Needed to Secure an Ammo Can Without Drilling?
You’ll need a no-drill latch lock like the Latch Lock™ and a suitable padlock, which install quickly without damaging the can, preserving its integrity for collectors or resale.
Can I Use a Bicycle Lock to Secure an Ammo Can?
A bicycle lock is generally not recommended because it’s bulky and may not fit the ammo can latch properly, reducing security and convenience compared to locks designed specifically for ammo cans.
How Do Weather Conditions Affect Locks on Ammo Cans?
Exposure to moisture and temperature changes can cause rust and weaken locks; stainless steel hardware like Army Force Gear’s is more resistant and better for long-term outdoor storage.
Can I Upgrade My Existing Ammo Can Lock Hardware?
Upgrading to newer kits like a custom 1-piece Latch Lock device is possible if your can fits standard sizes, offering better convenience and security over older installed locks.
What Should I Do If My Ammo Can Is a Non-Standard Size?
Non-standard ammo cans may require modifications or custom solutions such as cutting into the box, but this can reduce resale value or historical integrity, so consider professional consultation.
Is It Better to Lock Ammo Cans Individually or Group Them in a Locked Container?
Locking individual cans offers portability and flexible storage, but grouping cans inside a larger locked case adds a second security layer and protects all cans together.
Key Points to Remember
Your ammo can will stay secure by using appropriate locks and following proper hardware installation steps. Start by assessing your current ammo cans’ compatibility and proceed with installing a lock that fits your security needs. Keeping up with regular inspections ensures long-term protection. Take your first step today by selecting the best lock based on the ammo cans you own.