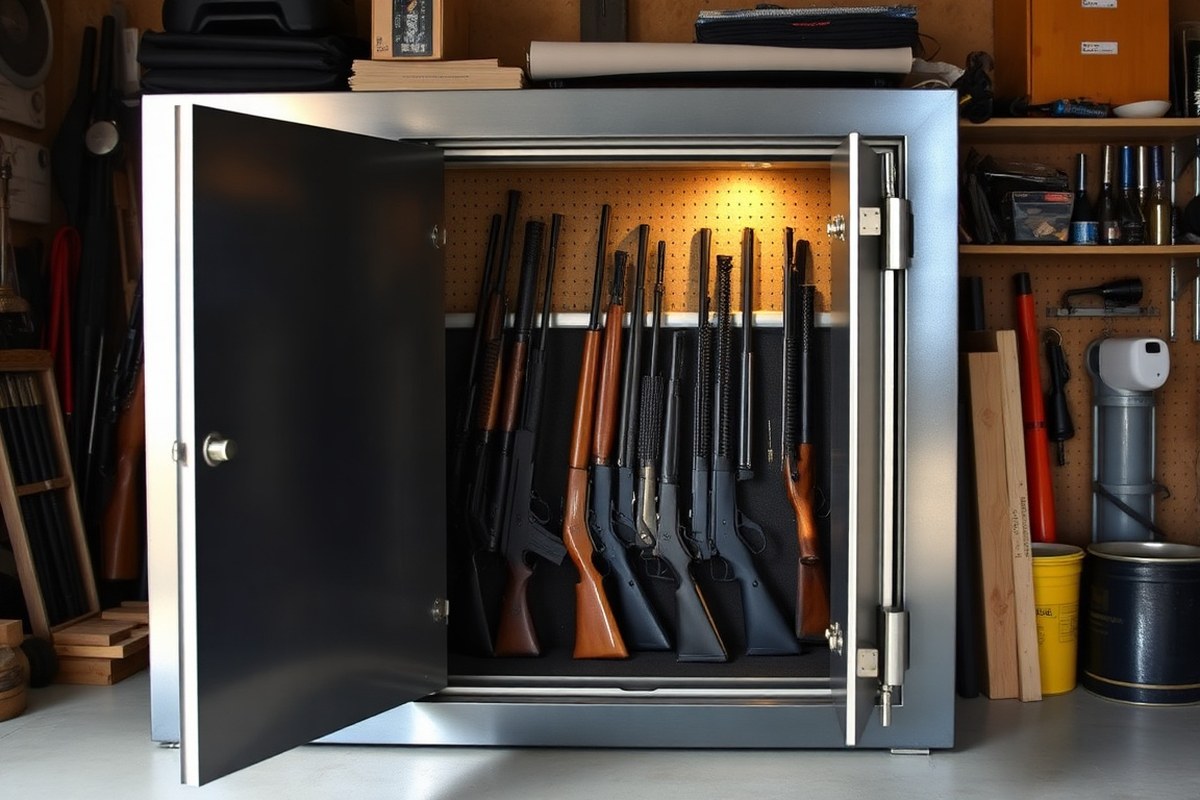
How to Make Your Own Gun Safe: A Complete Guide with Expert Tips
How to make your own gun safe starts with choosing steel and fire-resistant insulation for strong and secure storage. Build a frame using reinforced wood or steel, then install a heavy-duty door with proper locking mechanisms. Position your safe in a discreet spot that limits unauthorized access and exposure to heat or moisture.
Key Takeaways
- Select steel from scrap yards at around $0.78 per pound for budget-friendly, durable construction.
- Use mineral wool insulation to withstand temperatures over 2000°F and improve fire resistance.
- Match the steel door thickness to your room’s construction for consistent protection against forced entry.
- Design your safe size based on the number of firearms and space, like 32″ wide, 72″ tall, 42″ deep for closets.
- Incorporate expanding fire seals on the door to achieve up to 2.5 hours of fire resistance at 1200ºF.
- Plan for a safe weight of at least 250 pounds empty to deter theft and increase sturdiness.
Choosing Materials for a Strong and Fire-Resistant Gun Safe
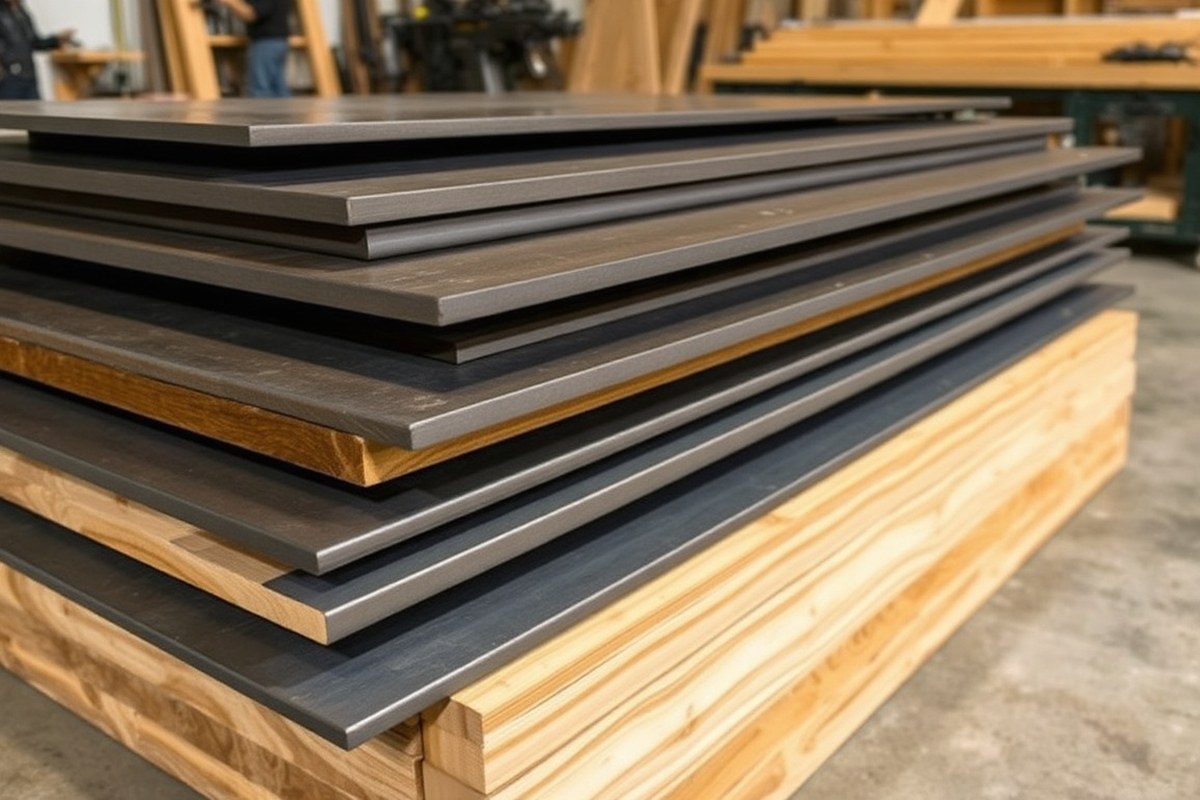
For the frame and walls of your homemade gun safe, choose steel at least 1/4 inch thick. This gauge offers solid resistance against forced entry and can stop small-caliber rounds like .22 caliber handguns. Thin steel sheets under 1/8 inch risk bending or puncturing easily. Combining steel panels with laminated wood inside the walls boosts structural strength while helping distribute impact forces. For the door, use 1/4 inch or thicker steel plates, ideally with reinforced steel strips welded inside to block prying tools. A steel door skin of this thickness balances security with manageable weight and cost.
Wood can be used structurally in your DIY gun safe as framing or internal wall layers. Select strong lumber like 2×4 pine or fir studs, which form durable framing. To increase fire resistance, cover wood surfaces with fire-rated drywall and include fireproof insulation. Laminated wood panels help absorb shock but need to be paired with steel and fireproof materials to protect against heat and flames effectively. Avoid relying on wood alone for security or fire protection.
Insulation is critical for fire protection, giving firearms time against extreme temperatures that can damage finishes and internal components. Mineral wool insulation is a top choice; it resists temperatures above 2,000°F and is non-combustible. This material also provides sound dampening and moisture resistance. Ceramic fiber blankets and boards offer excellent fireproof qualities, tolerating temperatures around 2,300°F, but tend to be more expensive. For a cost-effective yet safe option, use layers of mineral wool between steel and wood panels combined with fire-rated drywall inside the safe walls.
To source materials affordably, check local metal supply yards for steel sheets and plates; expect to pay around $3 to $5 per square foot for 1/4 inch steel. Home improvement stores commonly carry 2×4 lumber at $3 to $5 each and mineral wool insulation batts priced between $0.50 and $1 per square foot. Fire-rated drywall costs slightly more than standard drywall, about $15 to $20 per 4×8 sheet. For ceramic fiber insulation, specialized industrial suppliers or online retailers are your best options; prices vary widely but budget at least $50 to $100 per square foot for good-quality fiber.
Preparing a checklist before buying helps. Start with heavy-gauge steel plates for walls and door skins to ensure durability and resistance to tampering. Include 2×4 lumber or steel studs for framing support. Fireproof insulation like mineral wool or ceramic fiber goes between structural layers to provide thermal barrier protection. Cover interior surfaces with fire-rated drywall to shield wood from heat flames and reduce smoke damage risks. This combination creates a strong, fire-resistant safe capable of protecting your firearms from both break-in attempts and fire damage.
Planning Your Homemade Gun Safe Size and Location

Choose a gun safe size based on the number and type of firearms, plus room for accessories. Location should balance security, ease of access, and environmental factors. A well-planned interior layout helps keep guns organized and protected from humidity and temperature swings.
Calculating Gun Safe Dimensions
Start by counting all firearms and accessories you plan to store. A general rule is to allocate at least 4 to 6 inches of width per long gun and additional space for pistols, ammunition, and other gear. For example, if you have 15 rifles or shotguns, multiplying 15 by 5 inches gives a width of about 75 inches. Add 12 to 18 inches for pistol racks and shelves for ammunition, totaling roughly 90 inches (7.5 feet) wide inside. The height should be at least 72 inches to stand upright comfortably, and a depth of 30 to 42 inches accommodates larger firearms and shelving.
Use this layout estimation to set your safe’s outer dimensions, remembering walls add thickness, typical heavy steel walls add 2 to 4 inches per side. A practical outer size for 15 guns might be roughly 80 inches wide by 72 inches tall by 36 inches deep.
Consider future collection growth and allow an extra 10 to 20% space where possible. Check your available installation area early to ensure your safe fits without crowding.
Evaluating Home Safe Locations
Secure your gun safe where it’s not obvious or easily accessible to unauthorized persons but still convenient for quick access. Common good spots include master bedroom closets, a dedicated gun room, or a basement storage area with limited entry. Check for these factors when choosing the spot:
- Assess available space for the safe’s full dimensions and door swing clearance.
- Ensure the floor can support the safe’s weight, steel and concrete floors are best.
- Locate away from moisture sources (e.g., bathrooms, laundry rooms) to prevent rust and mildew.
- Pick places with stable temperature and humidity; avoid garages or attics where conditions fluctuate.
- Consider sight lines and the probability of unauthorized discovery, hidden or behind false walls or furniture offers extra security.
- Check local building codes or HOA regulations about safe installation.
- Confirm ease of emergency access for you and family members authorized to retrieve firearms.
Avoid placing gun safes in areas prone to flooding or extreme heat, as these environments can damage firearms and locking mechanisms.
Designing Interior Organization
Plan shelves, racks, and compartments to hold each firearm type securely and accessibly. Vertical racks keep rifles spaced and upright, reducing contact that could cause scratches or damage. Pistol shelves or foam inserts organize handguns separately, preventing collisions.
Include designated spaces for ammunition, gun cleaning kits, manuals, and related accessories to avoid clutter inside the safe. Adjustable shelving allows you to reconfigure spaces as your needs change. Adding interior lighting or humidity control devices can improve usability and gun preservation.
Using foam padding or rubberized liners on shelves and racks cushions firearms and limits movement. Label compartments clearly to ensure quick identification and maintain order as your collection grows.
Essential Security Features to Reinforce Your DIY Gun Safe
To improve the security of a homemade gun safe, focus on using strong locking mechanisms, reinforcing the door with steel and multiple bolts, and adding layers of protection like anti-drill plates or surveillance. A safe’s door and its lock system are the most vulnerable points, so upgrading these parts is critical. Proper installation and additional security measures help resist forced entry and theft attempts.
Types of Gun Safe Locks
Choosing the right lock is important for secure gun storage. Three popular lock types are mechanical, electronic, and biometric locks. Mechanical locks are reliable and cost-effective but usually slower to open. Electronic locks offer faster access with digital keypads but rely on batteries. Biometric locks use fingerprint sensors for quick, personalised entry but tend to be more expensive and sensitive to dirt or wear. Below is a comparison of these locking systems outlining their security benefits and tradeoffs.
| Lock Type | Security Level | Access Speed | Cost Range | Maintenance |
|---|---|---|---|---|
| Mechanical (dial or key) | High | Slow to moderate | $30 – $150 | Low, no battery needed |
| Electronic (keypad) | Moderate to High | Fast | $50 – $300 | Requires battery changes |
| Biometric (fingerprint) | High | Very fast | $150 – $500+ | Regular cleaning and battery changes |
Mechanical locks provide durable security without electronics, suitable if you prefer simplicity and reliability. Electronic locks allow easier access, useful when you need quick entry, but plan for battery upkeep. Biometric locks give the fastest entry with added personalized control, although they cost more and need regular cleaning for optimal function.
Door Reinforcement Techniques
Construct your DIY gun safe door using a minimum of 1/4 inch thick heavy-duty steel to withstand forced entry. Multiple locking bolts that insert deeply into the safe frame make it much tougher to pry open. Strengthen weak spots like edges and corners with steel plates or added framing to block cutting or hammering attempts. Here is a step-by-step method for installing reinforced locks and bolts on your safe door:
- Measure and mark bolt locations evenly spaced around the door edge.
- Cut slots into the frame where locking bolts will slide in securely when locked.
- Install high-quality steel locking bolts of at least 1/2 inch diameter, ensuring they extend at least 1 inch into the frame.
- Attach the locking mechanism (mechanical, electronic, or biometric) firmly to the door, aligning lock bolts with slots.
- Reinforce the door’s inner side with anti-drill plates or hardened steel shields around lock areas to prevent drilling attacks.
- Test locking and unlocking multiple times before moving valuables inside.
Ensuring the door is solid and well-bolted slows down or prevents break-in attempts. Poor reinforcement or single locking points are vulnerable to pry bars and drills. Properly installing multiple 1/2-inch bolts takes about a day for an experienced DIYer and costs $40 to $100, including bolts and steel plates.
Advanced Security Additions
Beyond the lock and door, consider extra security layers. Installing an automatic relocker activates if the lock is tampered with, locking the safe tighter and alerting you to break-in attempts. Anti-drill plates protect critical locking components from power tools. Position the safe in a basement or secured room with reinforced concrete floors and walls to resist forced entry further.
Adding surveillance cameras or alarms near your gun safe area can deter theft and provide alerts on suspicious activity. Another important upgrade is securing your safe to the floor with heavy-duty anchors to stop thieves from carrying it away.
For bullet resistance, steel thickness and inner plates can be increased, but this adds substantial weight and cost. Unless you require specific ballistic protection levels certified by standards, focus on strong steel doors and secure locks as the priority.
Step-by-Step Construction Process for Your Gun Safe
Building a durable DIY gun safe requires careful planning and precise construction. You begin by constructing a sturdy frame, then adding strong walls with insulation, followed by secure door and lock installation. Proper anchoring, alignment, and safety checks throughout the process ensure a reliable final safe.
Building the Safe Frame
Start with a heavy-duty frame using 2×4 lumber or steel beams for strength. The frame must be level, square, and firmly anchored to the floor and surrounding structure. Use a level to confirm flatness and a stud finder to avoid hidden wiring or plumbing in the installation area.
Secure the frame with heavy-duty screws or bolts. When you work with wood, pre-drill holes to avoid splitting. Anchoring the frame into concrete or sturdy subflooring improves resistance to forced entry.
Mounting Walls and Insulation
Attach fire-resistant wall panels to the frame using appropriate fasteners based on your wall material, metal screws for steel panels or wood screws for plywood. Ensure the walls align flush with the frame, eliminating gaps that lower security or fire resistance.
Insert fireproof insulation, such as mineral wool or fire-rated rock wool, inside wall cavities before closing the panels. This keeps temperatures inside stable and protects your firearms from heat damage. Seal any joints or seams with fire-rated caulk for added protection.
Installing Doors and Locks
Select a door that matches your wall thickness and security level, such as a steel door with a thick AR500 plate for heavy resistance. Position the door frame flush with your walls to avoid gaps that reduce security. Use heavy-duty hinges rated for load and impact resistance.
Secure the door with high-quality locks, preferably multiple locking mechanisms like deadbolts and electronic locks. Drill precise holes for lock installation and test their operation repeatedly to ensure full engagement. Lock installation may require professional help, especially for electronic or biometric systems.
Finishing and Sealing
After assembling the safe, seal edges and joints with waterproof and fire-resistant sealants to protect against moisture and fire leaks. Check for any uneven surfaces or protruding fasteners and sand them down to prevent damage to firearms or storage components.
Install interior organization systems such as racks or padded shelves to keep firearms secure and prevent shifting. Finally, perform a complete inspection, verify door alignment, locking operation, and wall integrity under different conditions.
- Measure and plan the safe location, ensuring enough clearance and a flat base.
- Construct the frame from 2x4s or steel, anchoring it securely to the floor and adjacent walls.
- Install fire-resistant wall panels and add fireproof insulation between framing elements.
- Prepare door frame, ensuring it matches wall thickness and is properly aligned with the safe’s front.
- Install heavy-duty hinges and mount the door securely onto the frame.
- Fit reliable locking mechanisms, testing multiple times for proper function.
- Seal all seams and edges with fireproof and waterproof material.
- Add interior storage solutions and perform a final safety and security check.
Tools you’ll need: Circular saw or metal cutting saw (for lumber or steel), power drill with appropriate drill bits, level, stud finder, tape measure, heavy-duty screwdriver or impact driver, caulk gun for sealants, and clamps to hold pieces in place. Safety Tips: Wear eye and ear protection when cutting or drilling. Use gloves to handle steel or sharp edges. Secure workpieces firmly before cutting and avoid working alone. When handling heavy doors, get help or use lifting equipment. Follow all tool manufacturer instructions to prevent injury.
Fireproofing and Moisture Control Strategies for DIY Safes
To protect your firearms from fire damage in your homemade gun safe, use fire-resistant insulation such as mineral wool or fire-rated drywall. Mineral wool offers good heat resistance and soundproofing, and when installed between steel plates (minimum 1/4 inch thick), it helps maintain internal temperatures below critical levels during a fire. Fire-rated drywall adds an extra barrier against heat and slows flame spread. Consider layering these materials: start with a steel outer shell, add a layer of mineral wool insulation, then cover the interior with fire-rated drywall for the best combined protection.
Sealing gaps is essential to prevent smoke and heat from entering your safe. Use high-temperature silicone caulk or intumescent sealants around all seams, edges, and joints. After construction, carefully inspect the safe’s door frame and walls with a flashlight to find small cracks or openings. Apply sealant generously, then let it cure fully. Install a door gasket made from heat-resistant materials like fiberglass to create an airtight closure between the door and frame, reducing smoke infiltration during a fire. Pay special attention to hinges and locking bolt areas, as these spots can be weak points.
Controlling humidity inside your safe helps keep firearms free from rust and prevents damage to the safe’s internal materials. Integrate moisture control by placing desiccant packs or an electric dehumidifier designed for small enclosures inside the safe. Silica gel packets costing around $10 to $20 can maintain humidity levels between 30% and 50%, which is ideal for firearms. For larger or walk-in safes, consider small plug-in dehumidifiers that keep humidity stable without overheating the space. Proper sealing of your safe not only blocks smoke and heat but also minimizes moisture ingress from the surrounding environment.
UL-rated fireproof materials for DIY projects are less common than pre-made rated safes but researching UL certifications on insulation like mineral wool or calcium silicate board can improve fire resistance. While a full UL rating for a homemade safe is difficult to achieve, using materials with fire test listings gives more confidence in protection. Costs vary: mineral wool insulation may cost about $1 to $2 per square foot, fire-rated drywall around $10 per sheet, and intumescent caulking about $15 to $30 per tube. Investing in these fireproofing elements can protect firearms from typical household fires that reach temperatures of 1200ºF or higher within 30 minutes, a critical time frame noted by fire safety standards.
Make sure to seal all edges and joints with intumescent caulk and verify airtightness with a smoke test to prevent dangerous heat and smoke infiltration during a fire.
Cost, Time, and Tools Required to Build Your Own Gun Safe
Building your own gun safe requires a clear budget, a reasonable timeline, and the right set of tools. Expect to spend between $300 and $1,200 on materials depending on the size and complexity of your safe, with larger walk-in types costing more due to substantial wall, floor, and ceiling reinforcements. Labor costs are saved when you do it yourself, but factor in the time and effort needed to get everything secure and functional.
The assembly time usually ranges from a weekend (16 to 24 hours) for a smaller closet safe up to several weekends (40 to 60 hours) for a more elaborate walk-in safe with modular interiors and dedicated electrical circuits. The timeline can vary based on your woodworking and construction experience, the design complexity, and whether you add features like fireproofing or special lighting.
Basic construction tools are essential to get started. At minimum, you’ll need a power drill with various bits, a circular saw or miter saw for cutting panels, a tape measure, a stud finder, a level, clamps, and drills for metal if you’re reinforcing walls with steel. Hand tools such as screwdrivers, a hammer, and a chisel will also come in handy. For electrical work, wire strippers and voltage testers are necessary if you plan to install dedicated circuits or lighting inside.
Costs can be optimized by selecting standard plywood or MDF panels reinforced with steel sheets only where needed, rather than full steel walls, which tend to be more expensive. Reusing materials or buying dimensional lumber from discount suppliers can reduce expenses. However, avoid cutting corners on locks, reinforcement, and fireproofing because these are critical for safety and security.
| Expense Category | Estimated Cost Range | Notes |
|---|---|---|
| Wood Panels (Plywood/MDF) | $100 – $400 | Depends on size and thickness |
| Steel Reinforcements | $150 – $500 | For secure walls, doors, or framing |
| Locking Mechanisms | $50 – $200 | High-quality locks improve safety |
| Fireproofing Materials | $50 – $200 | Includes fire retardant boards or sprays |
| Tools (if needed) | $100 – $300 | Drills, saws, and hand tools |
| Electrical Work | $50 – $150 | For dedicated circuits and lighting |
Setting aside several hours exclusively for measuring and cutting materials pays off by reducing mistakes during assembly. Take your time with the construction, and test locks and reinforcements as you go. Remember that installing dedicated electrical circuits for lighting or power tools inside your gun safe improves functionality if you reloading ammunition or maintaining firearms there.
Common Mistakes and How to Avoid Them When Building a Gun Safe
Structural weaknesses are a major risk when building your own gun safe. Thin or poorly joined walls can be breached easily, defeating the purpose of the safe. Use at least 3/4-inch thick hardwood or steel panels and secure them with tamper-resistant screws or bolts. Avoid relying on simple nails or staples, as these fail under force or attempts to pry. Reinforce corners with metal brackets to maintain integrity over time and shifting house settling.
Poor fireproofing and air leakage reduce the safe’s ability to protect firearms in a fire or against moisture damage. Fireproof safes use materials rated for heat resistance up to 1,000°F lasting 30 minutes or more. Add specialized fireboard insulation inside the walls and door to meet this standard. Seal all gaps with high-temperature caulk designed for fireplaces or stoves to stop smoke and air from entering. Check for leaks by feeling for drafts or using a smoke pen before finishing the interior.
- Improper door alignment causes sealing failure and weakens security.
- Installing a low-quality lock or poorly mounted locking bolts leaves the safe vulnerable.
- Neglecting to anchor the safe to the floor reduces theft resistance.
- Cutting corners on fireproof ratings compromises safe contents during a home fire.
- Using non-fire-rated caulking or adhesives allows smoke and heat penetration.
- Failing to verify the safe door swings smoothly and locks evenly can cause warping.
Align the door precisely by using a carpenter’s square during installation and test the fit frequently. Adjust the hinge placement with shims and replace any warped components immediately to ensure tight sealing. Choose a lock rated for security safes, such as a biometric or UL-listed mechanical lock, and mount locking bolts on multiple sides of the door. Drill holes for bolts carefully to avoid weakening surrounding metal. For anchoring, bolt through the safe’s floor into a concrete slab or wood framing to prevent it from being carried away.
Shortcuts with materials like foam insulation instead of fireboard or inexpensive silicone caulk instead of fire-rated sealant can cost you the safe’s effectiveness. Investing an extra $100 to $200 in certified fireproof materials can save thousands in firearm replacement and keep your collection secure. Remember to routinely inspect your safe’s door alignment, locking mechanisms, and seals every few months, especially if you live in a humid environment where expansion might cause gaps. A well-built DIY gun safe requires time, patience, and precision but protects your firearms much better than a rushed or budget-cut project.
When to Hire Professionals Instead of Building DIY
Building your own gun safe may seem like a rewarding project, but certain complexities can make hiring professionals a safer and more reliable option. When you need fireproof certification to satisfy insurance or legal requirements, hiring professional services is the most reliable option. Certified fire-resistant safes meet strict testing for temperatures and duration, such as Fire Level 2 ratings, which include Heavy and Magnum safe doors without ceramic fiber. Meeting these requirements involves precise materials and construction techniques beyond most DIY skill sets.
Assess your ability honestly by considering your experience with advanced carpentry, welding, and concrete work, as well as your familiarity with security features like reinforced locks and proper door installation. Complex tasks such as pouring concrete with rebar for maximum strength or building a gun safe room demand knowledge of structural engineering and local building codes. Available tools alone won’t guarantee safe results; professionals use specific hardware and follow tested installation protocols to ensure structural integrity and security.
Starting with a decision rule checklist helps clarify when to call experts: Do you need fireproof certification? Does your project involve structural reinforcement with concrete or rebar? Planning to build a gun room in a basement or another area prone to moisture that needs special waterproofing? Will the safe’s weight necessitate moving heavy materials requiring professional handling? Answering yes to any of these questions means it’s smart to hire professionals. They provide services including design consultation, installation, and certification testing, which can cost anywhere from $1,000 to several thousand dollars depending on complexity.
Risks of attempting DIY beyond your skill set include insecure locking systems vulnerable to break-ins, inadequate fire resistance putting firearms and documents at risk, and structural failure that could damage your property or injure you. For example, a poorly constructed door or frame can be compromised by forced entry, and an unsafe concrete mix might fail under fire exposure, defeating the purpose of the safe. Moisture control is another common challenge; improper sealing or ventilation in a basement environment can cause rust and corrosion over time. A professional team can evaluate environmental risks and mitigate them with proper materials and construction methods.
Always verify local building codes and insurance requirements before starting your project, and never underestimate the complexity of fireproof certification and structural safety when it comes to your firearm storage.
Step-by-Step Action Plan for Building Your Gun Safe
Follow these clear steps to start constructing a secure and fire-resistant gun safe that fits your needs and space.
- Before you start: Choose high-quality steel and fire-resistant insulation materials. Check your budget allows for these purchases.
- Day 1: Measure your available space and design the safe dimensions accordingly. Confirm the design fits your firearms comfortably.
- Week 1: Assemble the frame and weld or bolt the metal panels securely. Inspect all joints for tightness and strength.
- Week 2: Install fireproof insulation inside the walls and seal any gaps. Use a moisture barrier to prevent condensation.
- Week 3: Mount a reliable locking system, preferably a combination lock or biometric lock, and test multiple times for reliable operation.
- Week 4: Add interior fittings such as racks or foam padding to protect your firearms. Ensure they hold your weapons without shifting.
- After 1 month: Perform a fire-resistance test using safe methods and check the interior for heat damage or moisture buildup.
- Ongoing: Regularly inspect and maintain the safe’s locks, seals, and interior environment to guarantee ongoing protection.
Frequently Asked Questions
What Type of Lock Mechanism Should I Use for My Homemade Gun Safe?
Use a high-quality mechanical or electronic lock for reliable security. Electronic locks offer quick access but require battery maintenance.
How Can I Ensure Proper Ventilation Inside My DIY Gun Safe?
Install a small vent with a moisture-absorbing element to reduce humidity. Proper ventilation prevents rust and mold while keeping firearms in good condition.
Is It Necessary to Use Steel Panels for All Parts of the Safe?
Focus steel reinforcement on the door and frame; wood can be used elsewhere. Heavier steel improves security, but wood reduces weight and cost for less vulnerable areas.
What Are Some Good Methods to Secure the Safe to the Floor or Wall?
Anchor the safe to concrete floors or wall studs with heavy-duty bolts to prevent theft by removal. This adds an important layer of security beyond the safe’s construction.
How Do I Test My DIY Gun Safe’s Security Before Use?
Simulate forced entry attempts using safe tools like pry bars without damaging the safe. This helps identify weak points you can reinforce before storing firearms.
Can I Add Alarm Systems or Sensors to a Homemade Gun Safe?
Yes, integrating motion or door alarms adds extra intrusion alerts. Wireless models are easy to retrofit without damaging your safe’s structure.
Before You Go
Building your own gun safe gives you control over customization while ensuring your firearms stay secure and protected from fire and moisture. Start by selecting the right materials and locking system today, and build step by step with careful attention to detail. A secure home gun safe provides peace of mind and keeps your collection safe for years to come.


