How to Sight in a Leupold Scope: A Complete Guide for Accurate Zeroing
Learning how to sight in a Leupold scope means aligning the crosshairs so your bullet hits exactly where you aim. Start by securely mounting the scope with correct eye relief of about 3 to 4 inches and ensuring it’s level and centered. Then bore-sight at a close distance like 25 yards to get on target quickly before adjusting at your final zeroing distance.
Key Takeaways
- Slide the scope fore and aft until eye relief offers a full sight picture without scope bite, usually 3 to 4 inches.
- Check that the scope sits low and square on the rifle with about 1.5 to 2 inches clearance above the barrel.
- Use compatible mounts; Leupold scopes often work well with third-party mounts for flexibility and cost savings.
- Bore-sight at 25 yards to ensure your shots land on paper before advancing to longer distances like 100 yards.
- Adjust elevation and windage dials in 1/4 MOA increments, where one click equals a 1/4 inch shift at 100 yards.
- Set your initial zero at 100 yards for flatter trajectories or longer-range shooting unless your cartridge’s ballistics favor a different range.
How to Mount and Prepare Your Leupold Scope for Zeroing
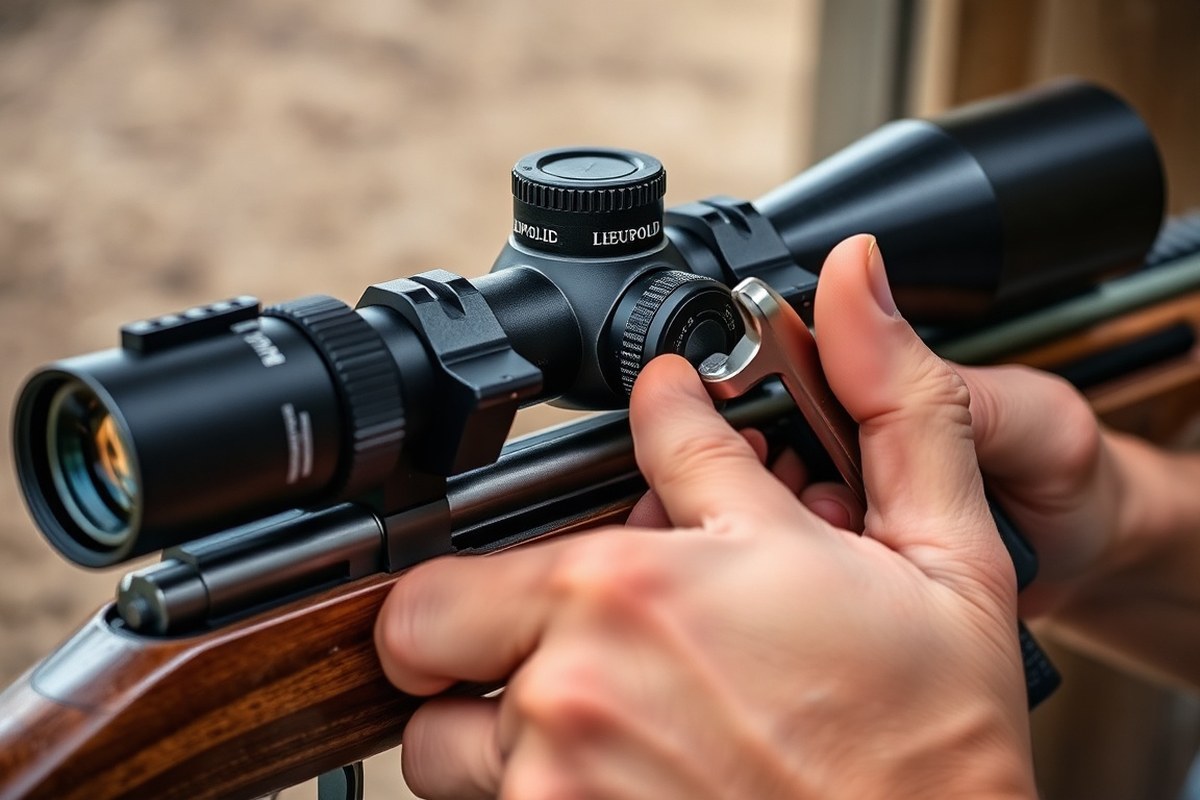
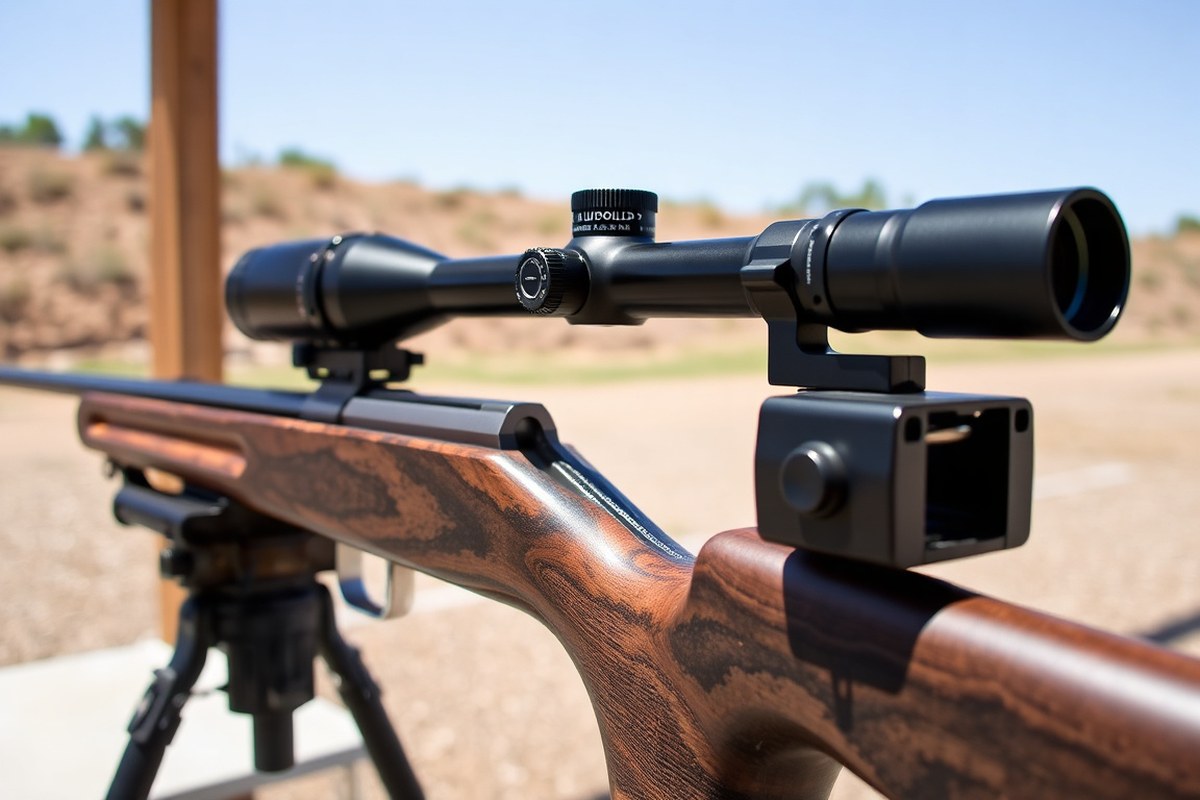
Begin by preparing your rifle and workspace with the correct tools and components to mount your Leupold scope securely and accurately. Proper mounting ensures stable eye relief, precise reticle alignment, and consistent accuracy when zeroing. Key tools include a torque wrench, compatible scope rings (such as Leupold PRW low rings), a bubble level or dedicated scope leveling tool, and a clean workspace free of dirt and debris.
Eye relief typically measures between 3 and 4 inches from your eye to the scope lens. This distance prevents scope bite while maintaining a full, clear sight picture. Adjust the scope fore and aft on the rifle’s mounting base until you achieve this distance comfortably with your shooting position. Proper eye relief also supports a consistent cheek weld, which is critical for repeatable accuracy.
The scope must be aligned both vertically and horizontally to avoid cant-induced errors. Level the rifle using a bubble level, then place the scope in the rings while ensuring the reticle appears perfectly horizontal. This often requires slight tube rotation before final tightening. Keep the scope mounted as low as possible to allow for a natural cheek rest and maximize elevation adjustment range at 100 yards.
Check the mounting hardware for compatibility with your rifle’s base and the scope tube diameter. Use quality mounting rings and bases designed for the Leupold scope model you own. Proper mount height is essential to clear the barrel while maintaining good eye relief and reticle height.
- Gather all tools and parts: torque wrench, mounting rings compatible with your Leupold scope, bubble level, and a clean cloth.
- Set the rifle on a stable rest to prevent movement during mounting.
- Position the mounting rings on the rifle’s base and loosely fasten them so you can still adjust the scope position.
- Place the scope in the rings and slide it fore and aft to achieve 3 to 4 inches of eye relief with your shooting stance.
- Level the reticle using a bubble level while the rifle is also leveled to avoid canting error; rotate the scope tube as needed.
- Check bore clearance by confirming that the scope sits low without touching the barrel or other components; raise mounting height if necessary.
- Tighten the ring screws gradually in a crisscross pattern using a torque wrench, following Leupold’s recommended torque specs, typically around 15 to 18 inch-pounds.
- Double-check eye relief and reticle alignment after final tightening to confirm nothing shifted during the process.
Proper mounting with these steps sets a stable foundation for sighting in your Leupold scope with confidence. Neglecting correct eye relief or improper leveling can cause discomfort, inconsistent shots, or zeroing errors that complicate later adjustments. This controlled approach also reduces the risk of scope damage from recoil or scope bite during shooting.
Essential Gear and Tools for Sighting Your Leupold Scope

To sight in your Leupold scope accurately, start by assembling essential tools and equipment. A bore sighter helps you align the scope roughly with your rifle’s barrel before live firing, saving time and ammunition. While not mandatory, using a bore sighter is highly recommended to get on paper quickly, especially if you’re new to scope zeroing. You’ll also need quality ammunition suited to your rifle and shooting conditions, a stable shooting rest or bench, and a proper target placed at your chosen zeroing distance.
Ammunition choice impacts zeroing precision. Match-grade factory ammo with consistent powder loads and bullet weights generally provides better accuracy than budget or surplus rounds. Below is a comparison to help you choose:
| Ammunition Type | Accuracy | Cost (approx. Per round) | Recommended Use |
|---|---|---|---|
| Match-grade factory ammo | High (tight groups) | $1.00 – $1.50 | Final zeroing, precision shooting |
| Standard factory ammo | Moderate (consistent groups) | $0.50 – $0.80 | Initial zeroing and practice |
| Surplus or budget ammo | Lower (variable groups) | $0.20 – $0.40 | Practice, sighting in bore sighter used |
Using a stable rest dramatically improves shot consistency during zeroing. Shooting rests range from simple sandbags to advanced mechanical rests. A sturdy bench with sandbags or a purpose-built rifle rest stabilizes the rifle and reduces shooter error. Avoid makeshift rests like folding chairs or unstable surfaces, as movement during firing affects group size and zeroing accuracy. Here is a checklist of gear to have before heading out to sight in your Leupold scope:
- Rifle with properly mounted and cleaned Leupold scope
- Bore sighter for initial alignment
- Quality ammunition selected for accuracy
- Stable shooting rest or bench setup
- Target appropriate for zero distance (usually 100 yards)
- Tools for adjusting windage and elevation (if needed)
- Rangefinder or measuring tape (to confirm target distance)
Arrive at the range ready to work methodically. Confirm your rest is secure, your target hits the correct distance, and your scope mounts are tight. Begin with bore sighting to get on paper, then load your rifle with chosen ammo for live firing adjustments. Using high-quality rest equipment lets you consistently place shots near the target center, speeding up the zeroing process.
Always double-check scope mounts and rest setups before firing; loose components cause inconsistent groupings and wasted ammo.
Bore-Sighting at 25 Yards to Get on Paper Quickly
Bore sighting is the process of aligning your Leupold scope’s reticle roughly with the rifle’s barrel before firing live rounds. Doing this at 25 yards helps you get on paper quickly, making it easier to complete your zeroing with fewer shots. You can bore sight either using a laser bore sighter tool or manually by looking through the barrel and adjusting the scope accordingly.
Position Rifle Securely on Rest
Start by placing your rifle on a stable rest or sandbags to minimize movement during bore sighting. A steady position reduces errors caused by shaking or shifting and makes your adjustments more precise. You don’t necessarily need a professional shooting bench; any stable support that holds the rifle firm enough for careful alignment will work.
Your Leupold scope should already be firmly mounted before bore sighting. Tighten mounting rings and bases to prevent any movement when adjusting the turrets. This preparation lets you trust that any reticle shift is from your turret moves, not a loose scope.
Align Barrel with Target at 25 Yards
Place a target at about 25 yards where you have clear visibility. This short distance is ideal because it magnifies minor misalignments for easier correction before shooting live rounds at longer ranges. The goal is to visibly center the barrel’s bore on your target.
You can align the barrel manually by looking directly through it from the breech end, centering the target bullseye inside the barrel’s visible circle. For a more precise start, use a laser bore sighter inserted into the muzzle or chamber; this projects a red or green dot on the target to help align your reticle quickly.
Adjust Reticle to Center with Bore
Without moving the rifle or your steady rest, adjust the scope’s windage and elevation turrets so the reticle’s crosshairs align precisely with the target bullseye that’s centered in the bore. This step creates your initial zero by matching the scope’s sight picture with the actual barrel direction. To do this correctly:
- Keep the rifle steady on the rest focused on the target through the barrel or laser bore sighter.
- Look through your Leupold scope and note where the crosshairs sit relative to the target.
- Adjust the windage turret (left-right) by turning it in the direction you want the reticle to move.
- Adjust the elevation turret (up-down) to move the reticle toward the bullseye.
- Repeat both adjustments until the crosshairs center on the same spot your bore or laser points to.
Manual bore sighting requires patience but no extra tools; laser bore sighters speed the process but add cost ranging from $20 to $100 depending on quality. Both methods get your scope sighted well enough for initial test firing.
Confirm Initial Group on Paper
Once your reticle roughly aligns with the barrel, take a shot at the 25-yard target to confirm your bore sighting. Expect the bullet holes to land close to the bullseye but likely off by a few inches, since bore sighting isn’t fully precise. This step tests and refines your alignment before final zeroing at longer distances.
After firing, examine the group’s location relative to the target’s center. Use your Leupold’s windage and elevation knobs to fine-tune the reticle based on how far the group is from the bullseye. Typically, you’ll need to adjust multiple clicks depending on your scope’s click value (e.g., ¼ MOA per click) to move the point of impact onto the paper’s center.
Continue this process, shoot groups, adjust turrets, until your shots hit within an inch or two of the bullseye at 25 yards. Then move on to zeroing at your preferred hunting or shooting distance.
Adjusting Windage and Elevation on Your Leupold Scope
The elevation turret on a Leupold scope adjusts the bullet’s vertical point of impact, while the windage turret moves the impact horizontally. Each click on these turrets typically shifts the point of impact by 1/4 inch at 100 yards. Understanding this is key to making precise corrections after you fire your initial shots.
To make adjustments, first measure how far your group of shots landed from the bullseye in inches. For example, if your shots impact 2 inches low and 1 inch left at 100 yards, you calculate clicks by dividing the distance by the click value. Since each click moves the impact 1/4 inch at 100 yards, for elevation you need 2 inches ÷ 0.25 inches = 8 clicks up, and for windage 1 inch ÷ 0.25 inches = 4 clicks right.
Move the elevation turret clockwise to raise the point of impact or counterclockwise to lower it. For windage, turning the turret clockwise typically moves the impact right, and counterclockwise shifts it left, but confirm this on your scope as models may vary. Start with small adjustments, firing groups of 3 to 5 shots between changes, to avoid overshooting the mark.
Overshooting often happens when adjustments are too large at once. If your bullet impact swings past the bullseye after turning several clicks, dial back in the opposite direction by smaller increments. Staying patient and adjusting incrementally ensures gradual zeroing without wasting ammunition.
Zeroing at different distances affects how many clicks you use. Since 1 click moves the bullet 1/4 inch at 100 yards, at 25 yards, one click moves the impact about 1/16 inch. To translate inches to clicks at other distances, multiply the click value by the ratio of 100 yards divided by your zeroing distance. For example, at 25 yards: 0.25 inch × (25/100) = 0.0625 inch per click.
Keep records of how many clicks you adjust for elevation and windage at each distance for future reference. This helps you replicate your zero after cleaning or in varying field conditions and makes compensating for bullet drop and wind drift easier when shooting at longer ranges with your Leupold scope.
Setting Up a Stable Shooting Position and Target for Accuracy
Choose a stable shooting position that minimizes body movement and supports consistent aim. A bench rest or bipod setup provides the best stability by keeping your rifle steady. Sitting or prone positions with a solid surface beneath your elbows reduce muscle fatigue and shake. Make sure your cheek weld is firm but relaxed to maintain the same head placement for every shot.
Most shooters start zeroing their Leupold scope at 25 yards to confirm that shots are on paper quickly and avoid wasting ammo. After confirming basic alignment, move to your intended zero distance, commonly 100 yards. This distance balances long-range accuracy with practical shooting scenarios like hunting or target shooting. For varmint hunting or tactical uses, zeroing at 100 yards remains standard, while some hunters prefer 200 yards for game at longer range.
The target you choose impacts your ability to see precise bullet impacts and make accurate adjustments. Use high-contrast targets like black bullseyes on white or grid patterns with numbered holdover marks. Larger targets help in initial stages at shorter ranges, with smaller 1- or 2-inch dots used when fine-tuning at longer distances. Paper targets are popular outdoors, but reflective targets or electronic scoring targets provide excellent visibility as well.
Your rest setup plays a big role in eliminating shooter-induced error. A bipod, sandbags, or a dedicated bench rest rig can vastly improve shot-to-shot consistency. Without a solid rest, muscle tremors and breathing cause greater shot dispersion, making it harder to determine the true point of impact. Keep your rest position fixed and avoid repositioning between shots to track true deviations.
- Ensure your rifle is securely seated in the rest or bipod before shooting
- Wear ear and eye protection for safety during all shooting activities
- Set your target at 25 yards for initial sighting in
- Move to 100 yards for final zeroing, or farther depending on your use case
- Use high-contrast targets like bullseyes or grid patterns for easy shot plotting
- Adopt a steady, relaxed shooting position, prone or bench sitting works best
- Maintain consistent cheek weld and trigger control throughout the session
Never reposition your shooting rest or rifle between zeroing shots, as this can introduce errors that confuse your point-of-impact adjustments.
Indoor ranges may limit your zeroing distance, making 25 yards or 50 yards the maximum for sighting in. Outdoor settings allow more flexibility and typically greater distances, but consider lighting and weather conditions. Bright daylight provides the best visibility of target impacts, while wind and cold temperatures can affect bullet trajectory and shooter steadiness. Adjust your setup to minimize those variables for more reliable zeroing.
Fine-Tuning Your Zero with Test Shots and Group Analysis
Fine-tuning your zero involves firing accurate shot groups, analyzing their placement, and adjusting the Leupold scope turrets accordingly. A clear, stable three-shot group at your zeroing distance helps determine how to move the point of impact. You adjust windage and elevation turrets based on the group’s center relative to the bullseye, then repeat this cycle until your shots consistently hit where you aim.
Fire a Stable 3 to 5 Shot Group
Start by firing a stable 3 to 5 shot group at your zeroing distance, often 100 yards for riflescopes. Consistency is critical. Use the same shooting position, rest or bipod, and aim point for every shot. Avoid making adjustments after each shot; instead, complete the full group to assess overall performance.
A checklist helps maintain consistent technique during zeroing: ensure your breathing is controlled, your trigger squeeze is smooth, and your rifle is settled after each shot. This approach reduces shot dispersion due to shooter error rather than scope issues.
Measure Group Center Against Bullseye
After firing the group, measure the center of your group relative to the bullseye. Use a ruler or calipers to find the horizontal and vertical distance from the group’s midpoint to your point of aim. For example, if the group’s center is 2 inches left and 1 inch high at 100 yards, note those exact measurements.
Measurement accuracy matters because Leupold scopes often adjust in increments such as 1/4 MOA, where 1 click shifts impact approximately 1/4 inch at 100 yards. Documenting the group center ensures your turret adjustments move the point of impact precisely where needed.
Adjust Scope Turrets Based on Impact Point
Adjust the scope turrets based on the measured group offset. Use the windage turret on the side to correct horizontal errors and the elevation turret on top for vertical adjustments. Move each turret in the opposite direction of the group’s displacement. For example, if your group is 2 inches left and 1 inch high, move the windage turret right and elevation turret down.
Example: At 100 yards, with a 1/4 MOA scope, 1 click equals 0.25 inches. For 2 inches left, adjust windage 8 clicks right (2 ÷ 0.25 = 8). For 1 inch high, adjust elevation 4 clicks down (1 ÷ 0.25 = 4).
Make small, precise turret turns rather than large adjustments. This careful approach avoids overshooting your zero and saves time during fine-tuning.
Repeat Until Group Is Centered
Fire another 3 to 5 shot group after each adjustment to verify the change. Consistently analyze new group placement and make further small corrections as needed. Repeat this cycle until your group center aligns closely with the bullseye within an acceptable margin, typically under 1/2 inch at 100 yards.
Irregular groups call for reviewing your shooting technique or equipment setup before proceeding. Once groups are tight and the center matches your point of aim, your scope is zeroed accurately and ready for use under varying conditions.
- Set up your shooting bench with a stable rest and target aligned at your zeroing distance.
- Fire a 3 to 5 shot group without adjusting the scope to identify your initial point of impact.
- Measure the horizontal and vertical distance from the group center to the bullseye using a ruler.
- Calculate the necessary turret clicks based on your scope’s adjustment increment (e.g., 1/4 MOA per click).
- Adjust the windage and elevation turrets in the opposite direction of the group offset.
- Fire another 3 to 5 shot group to verify the correction.
- Repeat measurement and adjustment until your groups consistently strike the bullseye.
Confirming and Locking in Your Leupold Scope Zero
To confirm your zero with a Leupold scope, shoot precise groups at your chosen distance and check for consistency. Locking or resetting the turrets prevents accidental drift in your settings. Recording your exact windage and elevation values helps you return to your zero quickly and troubleshoot if it drifts later.
Fire Verification Groups at Zero Distance
Confirming your zero requires firing multiple groups at the distance you intend to use your rifle. This ensures your adjustments hold up under actual shooting conditions, fine-tunes accuracy, and reveals any inconsistencies before finalizing your setup.
A good rule of thumb is to fire three-shot groups, adjusting windage and elevation in increments of 1/4 MOA if needed. Wait for a stable shooting position and take controlled breaths between shots to minimize shooter error. After each group, verify that shots consistently hit the same point of impact.
Lock or Reset Turret Caps Securely
Leupold scopes often feature locking turrets or zero stops. Locking your turrets prevents unintended movement caused by recoil or handling, which keeps your zero reliable. To lock or reset your turret caps to zero, follow these steps to ensure your settings remain secure without losing your zero:
- Locate the windage turret (right side) and elevation turret (top) on your scope.
- Loosen the small set screws located on the turret caps using a suitable screwdriver or Allen wrench.
- Rotate the turret dial until the zero mark aligns exactly with the indicator line on the scope body.
- Tighten the set screws carefully to secure the turret cap without changing the dial position.
- Repeat the process for the other turret.
- Take at least one final verification shot to confirm the zero remains true after locking.
- Make any minor adjustments if necessary before fully tightening.
Failing to lock turrets can cause your zero to shift, leading to missed shots and unreliable performance when precision matters.
Record Windage and Elevation Settings
Jotting down your current zero settings offers a quick reference if your zero drifts or after you switch ammunition or shooting distances. It also makes resetting easier if your turrets become unlocked or damaged. Use a simple record template like this:
| Setting | Value | Notes |
|---|---|---|
| Windage (Right Turret) | _____ clicks / MOA | E.g., +8 clicks = 2 MOA right |
| Elevation (Top Turret) | _____ clicks / MOA | E.g., +12 clicks = 3 MOA up |
| Zero Distance | _____ yards | E.g., 100 yards |
| Date | _____ | Record when zeroed |
Keep this record accessible in your hunting or shooting log. Checking it against your scope after sight-in saves time and frustration in case of zero shifts. If you notice persistent zero drifting, inspect your scope mounts and turrets for looseness or damage and consider consulting a gunsmith.
Common Sight-In Mistakes and How to Troubleshoot Them
One typical mistake when zeroing a Leupold scope is installing the scope incorrectly or using an incompatible mount, which can cause the scope to shift under recoil or fail to hold zero. Ensure the mount fits your rifle and Leupold CDS scope precisely. Tighten the mounting screws evenly and check for a properly seated recoil lug or anti-rotation feature; this provides stability and prevents movement after each shot.
Improper stability during shooting is another common error. You might get inconsistent shot groups if your rest or shooting position wobbles. Use a stable bench rest or bipod and minimize human error by controlling breathing and trigger pull consistently. The clearer the sight picture and the steadier your position, the more accurate your zeroing will be.
Zeroing at the wrong distance can cause confusion with scope adjustments. Many shooters start at 25 yards for bore-sighting, but remember that your 1/4 MOA adjustment equals about 1/4 inch at 100 yards, not at 25 yards. Adjusting at short ranges requires more clicks to affect the point of impact equivalently at longer distances. Confirm you’re dialing adjustments according to the zeroing distance and note that environmental factors like wind and temperature can alter point of impact.
If your scope adjustments don’t move the point of impact, verify that your scope turrets are functioning correctly and that the elevation and windage knobs are turning in the expected directions. Leupold scopes typically operate so that turning the elevation turret up moves the point of impact up and the windage turret right shifts the impact right. Sticky or unresponsive turrets may indicate internal issues or lubricant thickening caused by cold temperatures.
Environmental factors like bright sunlight, glare, or temperature changes affect your scope’s performance and zero maintenance. Leupold’s advanced lens coatings reduce glare and improve light transmission, which helps maintain clarity in diverse light conditions. Temperature shifts cause internal parts and gas pressure to expand or contract, affecting the zero slightly; colder weather might thicken lubricants, making scope adjustments sluggish. Monitor these conditions during a shoot and be ready to compensate.
- Check mounting tightness and recoil lug fit before zeroing.
- Use a stable rest to avoid shifting between shots.
- Adjust at your chosen zeroing distance and understand your click values.
- Verify turret functionality and rotation directions.
- Protect optics with sunshades or lens covers in bright conditions.
- Account for temperature variations affecting zero and adjustments.
- Seek gunsmith help if turrets fail to move point of impact or mount stability is questionable.
Always confirm turret clicks correspond to expected point of impact changes; persistent zeroing issues may signal a faulty mount or scope needing professional inspection.
Professional gunsmith assistance becomes necessary if the scope or mount shows signs of mechanical failure, such as loose internal parts, slipping mounts, or turret malfunctions. Adjustments that have no effect on bullet placement risk damaging your scope or causing inaccurate shots. Trust an expert to inspect and repair or replace components when troubles persist beyond typical troubleshooting steps.
Maintaining Zero Accuracy over Time and Environmental Effects
Maintaining your Leupold scope’s zero accuracy requires regular care and awareness of environmental factors. Start with a maintenance checklist: ensure scope mounts and rings are tight, inspect for any physical damage, clean lenses with a soft microfiber cloth using lens-specific cleaning solutions only, and keep lens covers on when not in use. Avoid abrasive materials or household cleaners to protect Leupold’s coatings. Every few outings or at least once every hunting season, check mechanical components for smooth turrets and secure locking systems. This proactive maintenance preserves the scope’s mechanical integrity and optical clarity, helping to maintain your zero.
Temperature changes impact bullet velocity, which in turn affects your zero. Higher temperatures can increase velocity slightly by reducing air density, causing bullets to hit higher or further than expected. Conversely, colder weather reduces velocity and range. Altitude also plays a role; shooting at higher altitudes means less air resistance, so bullets travel faster and flatter, potentially shifting the point of impact. Wind speed and direction are the main environmental factors causing horizontal bullet drift, consistent crosswinds of just 10 miles per hour can move impacts several inches off target at 100 yards. These conditions don’t change your scope zero mechanically but will affect where your rounds land.
Keep in mind how these factors influence your shooting: temperature rises, altitude increases, and strong winds all require compensations, either by adjusting your scope dials or holding off your aim. Fine-tuning your zero to the typical environmental conditions of your hunting area or shooting range improves accuracy. For example, if you regularly shoot in cold weather, plan to re-zero after seasonal temperature shifts to stay on target. Checking your zero is wise after every significant change in location, temperature (a 20-degree change or more), or if you notice inconsistent shot groupings.
Re-zero your Leupold scope any time you notice your impacts have shifted noticeably or after heavy use, rough handling, or any scope adjustment. A practical approach is to verify your zero before each hunting season and after transporting your rifle to prevent surprises in the field. Test shots should be taken at your standard zero distance using a steady rest or bench to confirm consistent groupings. If group centers move by more than one-third of an inch at 100 yards, make incremental adjustments using your windage and elevation turrets and retest to restore precision.
Cleaning your Leupold lenses with gentle methods is critical to maintain optical performance. Use only soft microfiber cloths, specialized lens cleaning fluids, or isopropyl alcohol diluted with water if necessary. Avoid paper towels, tissue, or clothing that can scratch or wear down multi-layer coatings. Consistent cleaning preserves brightness and clarity, letting you see fine target details that contribute to precise sighting. Protect your scope by always using lens covers and storing the rifle in a padded case when not in use.
Regular maintenance combined with awareness of environmental effects enables the best performance from your Leupold scope. Adjust your shooting approach or scope settings as conditions change, and routinely confirm zero accuracy to ensure the confidence needed for ethical and effective shooting.
Step-by-Step Action Plan for Sighting in Your Leupold Scope
Follow this plan to quickly and accurately sight in your Leupold scope, ensuring consistent performance at the range and in the field.
- Before You Start: Mount and secure your Leupold scope properly. Confirm tight rings and proper eye relief to prevent movement during shooting.
- Day 1: Bore-sight your rifle at 25 yards. Adjust windage and elevation knobs until your reticle aligns with the bore-sighted target to get on paper quickly.
- Day 2: Fire three-shot groups at 25 yards from a stable bench rest. Analyze group placement to make precise windage and elevation adjustments on your scope turrets.
- Day 3: Increase distance to 100 yards. Repeat 3-shot groups and fine-tune adjustments based on shot group center to zero your scope accurately at your preferred range.
- Day 4: Confirm zero by shooting multiple groups under varying light and wind conditions. Lock turret adjustments or record settings to maintain zero.
- After 1 Week: Practice shooting from different positions (prone, sitting, standing) to verify scope zero in real use scenarios.
- After 2 Weeks: Check zero again before your next outing, especially if the rifle has been transported or the scope mount loosened. Maintain your setup by cleaning and inspecting your scope and rifle.
Frequently Asked Questions
Can I Sight in My Leupold Scope at Distances Other Than 100 Yards?
Yes, you can sight in your Leupold scope at different distances like 200 yards; just adjust your target setup and scope settings accordingly for accurate results.
Is It Necessary to Use a Bipod or Sandbags When Sighting in a Leupold Scope?
No, you can sight in your Leupold scope without a bipod or sandbags by using a stable shooting rest or bench to maintain steadiness.
How Do I Adjust Eye Relief on My Leupold Scope Before Zeroing?
Slide the scope fore and aft until you get a clear, comfortable sight picture, usually about 3 to 4 inches from your eye.
What Type of Ammunition Is Best When Sighting in a Leupold Rifle Scope?
Use consistent, high-quality ammo matching your typical shooting load to ensure accuracy when zeroing your scope.
Why Is Consistent Maintenance Important for Keeping My Leupold Scope Zeroed?
Regular cleaning and checking mounts prevent shifts and maintain accuracy, ensuring your zero stays reliable over time.
Is It Possible to Lock in My Zero on a Leupold Scope?
Yes, once you confirm your zero, use Leupold’s locking turrets or zero stop features to maintain consistent settings during use.
Before You Go
Properly sighting in your Leupold scope sets the foundation for accurate, consistent shooting. Taking the time to follow each step carefully helps secure your zero and builds confidence in your shots. Start by mounting your scope correctly today to prepare for reliable performance at the range and beyond.