How to Sight in a Thermal Scope: 8 Essential Steps for Accurate Zeroing
How to sight in a thermal scope starts with mounting it securely on your rifle and choosing a clear reticle setting. Zero your scope beginning at 25 to 30 yards for new setups, then confirm at 50 to 100 yards based on your hunting range. Let your scope acclimatize to outdoor temperature for about 20 minutes to ensure accurate readings before you start shooting.
Key Takeaways
- Mount the thermal scope tightly to avoid shifting during shooting and affecting zero.
- Acclimate your scope to ambient temperature for 20 minutes before zeroing to prevent image distortion.
- Start zeroing at 25 to 30 yards if it’s a new scope or rifle, then move to longer ranges.
- Confirm your zero at 50 to 100 yards, matching your typical hunting distance for best accuracy.
- Adjust reticle windage and elevation after the initial shot group to center your impact points.
- Achieve a shot grouping of 2 to 3 centimeters (0.8 to 1.2 inches) to verify your zero is precise.
1. How to Sight in a Thermal Scope Step-by-Step
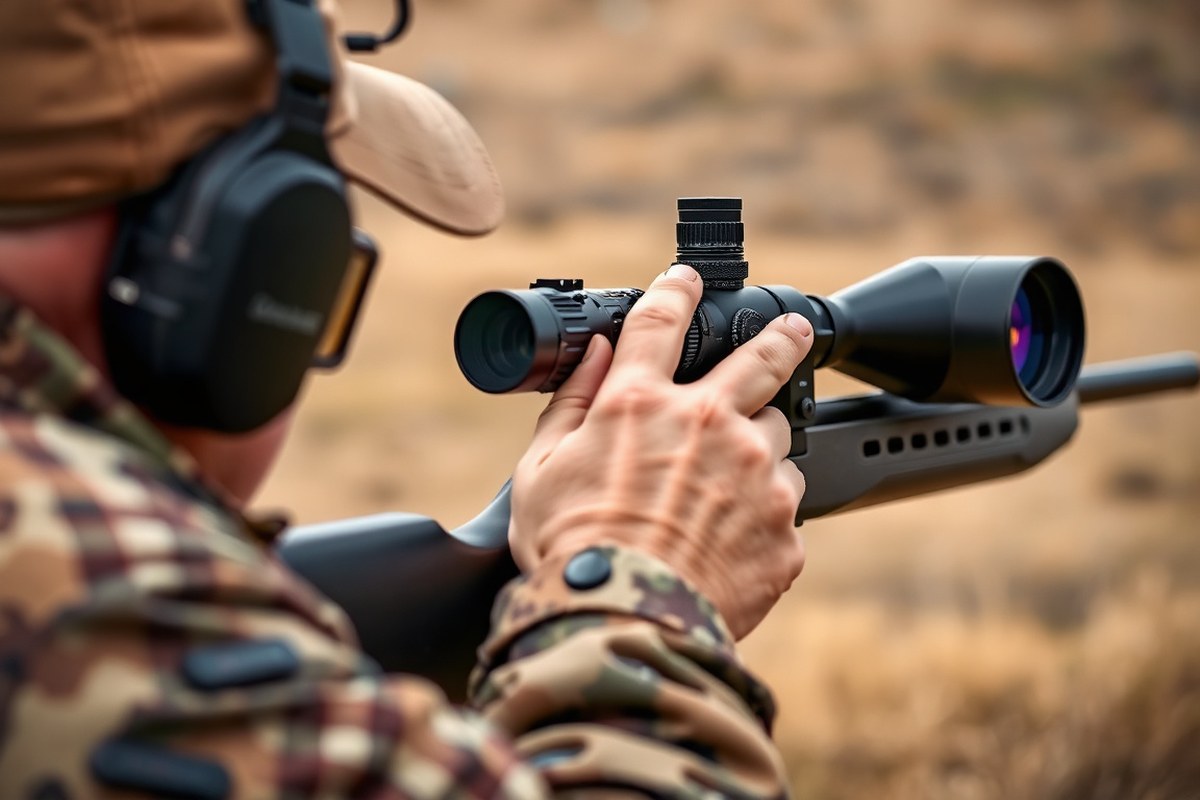
Sighting in a thermal scope ensures that your reticle aligns precisely with where your bullet hits, critical for accurate shooting in low-visibility conditions. The process differs from traditional scopes by relying more on the scope’s digital zeroing tools, which allow for quicker, more repeatable adjustments without mechanical turret changes. You start close to minimize external variables like wind, then move to your normal hunting distance for confirmation. Saving your zero profile is essential since many thermal scopes let you store multiple settings, letting you quickly switch between rifles or shooting conditions. Follow these steps to sight in your thermal scope accurately, from mounting to locking in your zero:
- Mount and Secure the Scope: Attach your thermal scope tightly on the rifle with the recommended mounting hardware. Make sure the mount rings are evenly torqued to avoid shifting. Double-check that the scope sits level to prevent cant errors.
- Power Up and Set Image Mode: Turn on the scope and verify the batteries are fresh or fully charged. Choose an image mode that offers clear contrast and a visible reticle. Set the reticle style and brightness for optimal clarity against the thermal background.
- Start Zeroing at 25-30 Yards: Position your target at 25 to 30 yards to reduce bullet drop and wind influence. Rest your rifle on a stable surface or shooting rest to minimize movement. Fire one carefully aimed shot at the center of the target.
- Use Digital Zero Function to Adjust: Freeze the thermal image if your scope allows, then move the reticle directly to the bullet’s impact point using the scope’s on-screen controls. This instantly aligns the aiming point without turning external turrets.
- Fire a Verification Group: Shoot a small group of 3 to 5 rounds at the same distance to confirm that the reticle matches your impact consistently. Look for tight grouping centered on the target.
- Confirm at Hunting Distance: Move your target to 50 or 100 yards depending on your typical hunting setup. Repeat the shooting and reticle adjustment if needed to ensure accuracy at the practical distance.
- Save Your Zero Profile: Access your scope’s menu to save the zero setting. Store separate profiles if you use different rifles or ammo to quickly recall the correct zero later.
- Double Check Before Use: Before heading out, power cycle the scope and confirm the zero remains intact. Changes in temperature or battery power can sometimes require minor tweaks.
Good results include a reticle that consistently matches bullet impacts at your hunting distance without needing external turret adjustments. Avoid moving the rifle or target during the process, use consistent ammunition, and rest your rifle firmly to prevent any false zeroing caused by shaky aim or environmental factors.
2. What Distance Is Best to Zero a Thermal Scope?
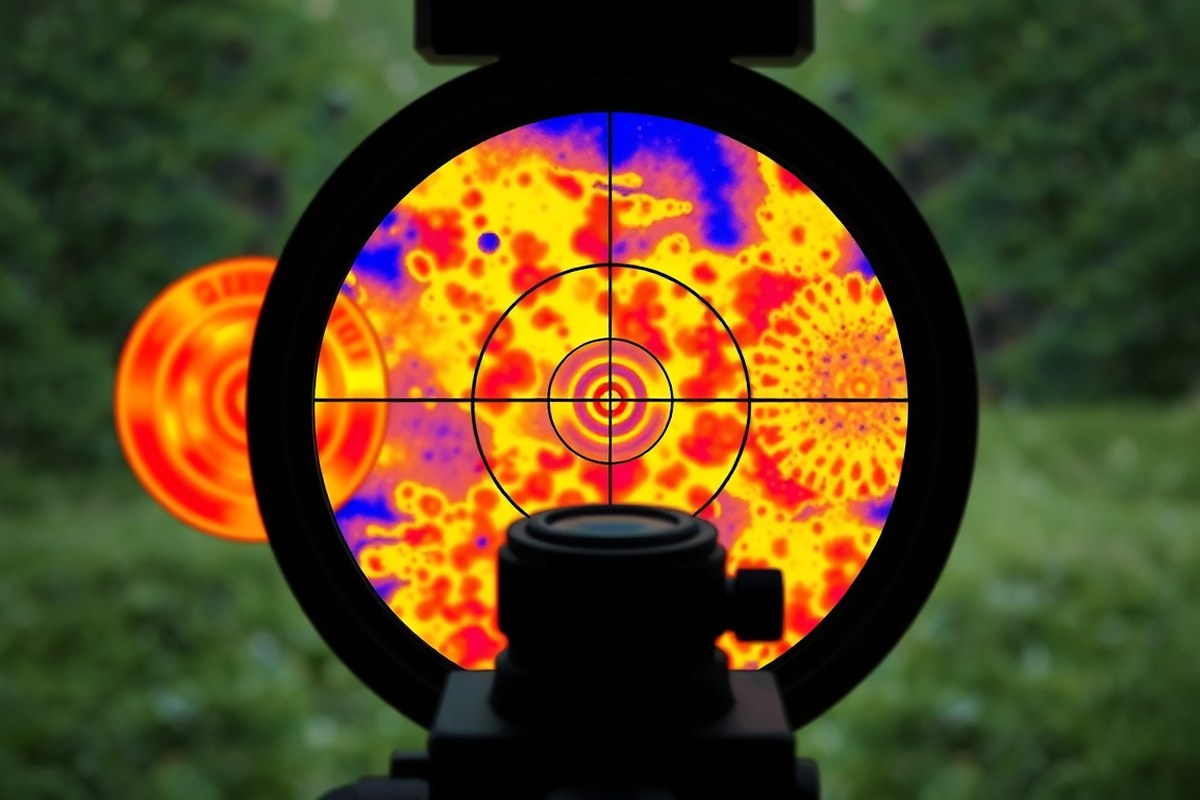
Start zeroing your thermal scope at a close range of around 25 to 30 yards to quickly get on target. Move to 50 yards next to refine your aim for common night hunting distances. Finish by confirming your zero at 100 yards or longer if you anticipate taking shots at mid-to-long range. Your hunting style and typical shooting distances should guide these decisions.
Short Range Zeroing at 25, 30 Yards
Beginning your zero at 25 to 30 yards allows you to find your first bullet impacts quickly and make rough adjustments. At this short range, the bullet drop is minimal, which simplifies the zeroing process. This step ensures that your shots land close enough to the target to proceed confidently to farther distances without wasting ammo or time.
This stage helps you save effort and frustration, especially during low-light conditions common in thermal scope hunting. Keeping the target on a safe backstop free of thermal interference is important for clear sighting. After achieving good grouping at this range, you will have a solid baseline for more precise zeroing steps.
Confirming at 50 Yards
Moving your target to 50 yards sharpens accuracy for short-to-mid range hunting, which covers most night hunting scenarios. Zeroing at this distance reduces aiming errors inside of 75 yards where many hunters take shots on thermal targets. It bridges the gap between initial setup and long-range flexibility.
Adjust your reticle for both windage and elevation at 50 yards to account for bullet drop and environmental effects better. Confirming sights here also builds confidence that your scope performs well under the moderately challenging conditions hunters often face, such as low visibility and variable angles.
| Zero Distance | Best Use | Main Advantage |
|---|---|---|
| 25, 30 Yards | Initial Setup | Helps You Get On Target Fast |
| 50 Yards | Short-To-Mid Hunting Distances | Reduces Error At Common Night Hunting Ranges |
| 100 Yards | Mid-To-Longer Hunting Distances | Gives Better Flexibility For Longer Shots |
This progression supports a complete zeroing routine, starting with quick setup and ending with tested accuracy suitable for the maximum range relevant to your hunting style. It balances effort, ammo use, and precision to improve confidence in your thermal scope’s performance.
Start close to get on paper quickly, but always confirm your zero at your actual hunting distance to avoid surprises in the field.
Final Zero at 100 Yards or More
Zeroing at 100 yards is considered standard for many hunting scenarios, especially when you expect shots at mid-to-long range. This distance balances bullet trajectory and real-world shooting conditions, giving you flexibility across various ranges. If you frequently engage targets beyond 100 yards, extending your final zero distance to 200 yards or more can improve accuracy at those longer shots.
After completing initial zeroing and confirmation at 25 and 50 yards, moving your target back to 100 yards allows you to fine-tune adjustments. Repeat the zeroing process at this distance to verify that your scope holds zero and that your holdover points match your ballistic calculations. Adjust for environmental factors like wind when necessary to further improve precision.
3. Essential Gear and Setup Before Zeroing
To sight in a thermal scope, you need specific gear that accounts for the scope’s reliance on heat signatures rather than visible light. This includes a stable setup with the rifle and scope properly mounted, a target that produces a clear thermal contrast, and preparation for environmental conditions affecting thermal detection.
Mounting Hardware and Leveling Tools
Start by securely mounting your thermal scope on your rifle. Use appropriate rings or mounts designed for your specific scope model. A loose mount will cause your zero to shift with every shot. After mounting, level the scope using a bubble level to ensure the reticle aligns properly with the bore. This prevents canting errors that can cause your shots to group off-target. A rifle rest or stable shooting bench is essential to reduce movement and increase repeatability when zeroing the scope.
Gather adjustment tools such as hex keys or small screwdrivers included with your scope for fine reticle adjustments. These ensure you can make precise changes to windage and elevation during zeroing without delays.
Thermal Zeroing Targets and Heat Sources
Unlike traditional scopes, thermal scopes require targets visible through heat signatures. Thermal zeroing targets with heat-reactive materials are ideal. For example, a 13 x 13 inch thermal zeroing target is designed so shot impacts show clearly in the thermal image, allowing you to confirm hits from your shooting position.
If commercial thermal targets are unavailable, DIY heat sources like activated hand warmers or aluminum foil over a warm surface can serve as thermal contrast points. The key is creating a consistent, strong heat signature for your scope to detect. Positioning the heat source on or behind the target ensures it stands out sharply against the background.
Paper or standard visual targets won’t show under thermal conditions unless combined with a heat source. Arranging your setup to use a warm object allows the thermal scope to detect shot placement precisely.
Batteries, Tripod, and Environmental Preparation
Check the batteries in your thermal scope before zeroing. Cold temperatures drain battery life faster, so having fresh or fully charged batteries on hand is critical to avoid interruptions. Bring spare batteries rated for your model. Maintaining a stable image is important throughout zeroing.
Mount your rifle on a stable tripod or rest. This reduces movement and helps maintain the exact point of aim during adjustments. Stability improves repeatability and accuracy across shots.
Set up your shooting station in conditions that closely resemble the environment where you will hunt. Thermal contrast can vary with temperature and humidity, so performing zeroing on a cool but stable day is best. Avoid direct sunlight on the target area, which can reduce contrast by heating the background. Your goal is a clear heat signature with minimal background noise for precise aiming.
- Rifle with mounted thermal scope, securely fixed
- Bubble level and hex keys or screwdrivers
- Thermal zeroing target or DIY heat source (hand warmers, foil)
- Fresh batteries and spare power supply
- Stable rest or tripod for rifle support
- Controlled outdoor environment with clear line of sight
Following these preparation steps gives you the best chance of achieving an accurate and consistent zero with your thermal scope. Skipping stable mounting or using improper targets can cause missed shots or require you to redo the zeroing process multiple times.
4. How to Adjust Reticle for Windage and Elevation
Interpreting shot groupings and adjusting the reticle on a thermal scope involves understanding the difference between windage and elevation, and how to shift your reticle to match your point of impact (POI) with your point of aim (POA). Windage controls the horizontal adjustment, moving the reticle left or right, while elevation adjusts vertical alignment, moving up or down. Adjustments are digital, moving the reticle over the thermal image sensor, not physically shifting glass lenses as in traditional optics. Proper alignment ensures your shots land precisely where you aim, which is key for accuracy in hunting or shooting scenarios.
To correctly interpret shot impacts, start by firing at a heat-visible target placed at your chosen zeroing distance. The grouping location relative to your reticle reveals how far off your current zero is horizontally and vertically. Use your scope’s zeroing menu to shift the reticle to the actual POI on the target. Moving the reticle onto the bullet hole digitally shifts your aim point to match where the bullet hit, effectively zeroing your scope.
- Fire a shot at a heat-visible target from a stable rest, aiming at the center of the reticle. This shot will show your current POI relative to the POA.
- Observe where the bullet hit on the thermal target and note the offset from your reticle center. The horizontal offset is the windage error, the vertical offset is the elevation error.
- Enter your scope’s zeroing or oneshot zero mode. This mode allows you to digitally move a secondary reticle or the main reticle over the sensor pixels without mechanically shifting lenses.
- Move the reticle horizontally (windage adjustment) so it aligns directly over the bullet’s impact on the thermal image.
- Move the reticle vertically (elevation adjustment) to match the bullet hole’s vertical position, ensuring the reticle sits exactly on the POI.
- Save or confirm the zeroing adjustment in the scope’s menu, which sets the new digital reticle alignment as your baseline.
- Fire additional shots to verify the reticle correctly represents the new POA and POI. The grouping should now center around the reticle.
- Repeat adjustments as necessary until the shot grouping consistently matches the reticle center, showing that windage and elevation are properly dialed in.
Cost and time for these adjustments mostly come from ammunition used and time spent at the range or field. Precision in this process avoids wasted shots and improves confidence in your thermal scope’s accuracy in real hunting conditions. Poor adjustments place shots consistently off-target, which might lead you to misjudge distance or wind effects, so take careful, measured steps to align your reticle accurately.
5. Why and When You Should Re-Zero Your Thermal Scope
You should re-zero your thermal scope whenever any factor that can change your point of impact (POI) occurs. Common triggers include transporting your rifle, switching ammunition types, drastic temperature shifts, and significant changes in lighting conditions. Each of these situations can cause shifts in the scope’s alignment or image display that affect shot accuracy.
Temperature and ambient conditions directly influence how a thermal scope performs. Thermal optics detect heat signatures, so temperature changes, from cold mornings to warm afternoons, can alter the target’s thermal contrast and the reticle’s calibration. For instance, a thermal scope might show slight drift in POI if the internal sensor’s temperature fluctuates, even by 10 or 20 degrees Fahrenheit. That’s why some models, like the ThOR 6 640 2-16x, include heating targets to maintain a stable thermal reference point regardless of external conditions. Without stabilization, your zero could become inaccurate as the scope warms up or cools down during a hunt.
After transporting your firearm, it’s essential to verify and likely re-zero the thermal scope. Movement, bumps, or vibration during transport can lightly move the scope’s internal components. A quick field check at 25 to 50 yards helps confirm that your zero remains consistent. Cartridge changes also require re-zeroing because different loads produce varying bullet velocities and trajectories. Even switching between two loads with similar muzzle velocity can shift your POI by an inch or more at 100 yards, enough to affect a critical shot in hunting or tactical scenarios.
To re-zero your thermal scope, set up a stable rest at your chosen zeroing distance, usually 50 or 100 yards. Use a heating target or ensure the environment has consistent thermal contrast for the target area. Fire a three-shot group and observe the impact points relative to your reticle. Adjust elevation and windage knobs in small increments until the group centers on your aiming point. Take your time, as rushing can introduce errors. If conditions change during your session, wait for temperature and thermal signatures to stabilize before proceeding. Re-check zero periodically during extended hunts or shooting sessions, especially if you move through different climate zones or altitudes.
Re-zeroing requires time and patience but costs nothing beyond your ammunition and effort. Accurate zero ensures shot precision and ethical harvesting, avoiding wounded animals or missed opportunities. Failing to re-zero when needed risks shooting off-target, which can waste valuable game or endanger safety. Consistent re-zeroing protects your investment in your thermal scope and improves your confidence and performance in the field.
Always confirm zero after any transport or ammo change before relying on your thermal scope in critical shooting situations.
6. Common Mistakes and How to Avoid Them During Zeroing
Common zeroing mistakes with thermal scopes often reduce accuracy fast and waste valuable time. One typical error is choosing the wrong zeroing distance, which can skew your point of impact. Make sure to pick a target range that matches your hunting conditions. Oversized or thick reticles also cause aiming errors by hiding the exact impact point. Select a reticle style and thickness suited for your shooting distance and target size.
Environmental factors play a big role too. Thermal scopes detect heat signatures, so weather and terrain affect the clarity and contrast of your image. Attempting to zero on hot surfaces or during extreme temperatures can mislead your adjustments. Zero your scope in stable conditions close to typical hunting environments, and adjust settings for terrain to maintain accurate thermal images.
- Avoid zeroing on reflective or hot surfaces like rocks or metal to prevent false heat signatures
- Choose a consistent target distance relevant to your typical shooting range
- Use a fine reticle for pinpoint accuracy rather than thick or cluttered crosshairs
- Check and reset your zero regularly, especially if you notice shifts after moving or rough handling
- Zero during calm weather with minimal wind to reduce bullet drift variables
- Give your thermal scope time to fully warm up before zeroing for stable image quality
Failing to provide sufficient warm-up time can cause image distortion, making zeroing adjustments off-target. Waiting 10 to 15 minutes lets your thermal sensor stabilize and battery performance settle, ensuring accurate readings. Also, neglecting to account for windage or elevation changes quickly leads to misses. Adjust reticle settings step-by-step, verifying with multiple shots at the target. This approach avoids over-correcting and confirms each adjustment improves your shot placement.
Battery endurance is another hidden factor affecting zeroing sessions. Most thermal scopes last 4 to 8 hours on a full charge, so plan zeroing and practice within this window. Running low on power mid-session risks inconsistent thermal performance. Bringing spare batteries or a power bank for extended zeroing days is a good investment for uninterrupted accuracy.
7. Best Magnification and Image Settings for Sighting In
Use your thermal scope’s lowest native magnification, often 1x or 2x, for zeroing. This approach provides the sharpest and most accurate image since thermal scopes rely on sensor pixels rather than optical glass. Digital zoom enlarges the image by stretching pixels, which reduces clarity and can make the exact point of aim hard to pinpoint. After zeroing at base magnification, you may add slight digital zoom if needed to better see the reticle alignment, but avoid zooming too much to prevent pixelation.
Reticle style affects how easily you confirm zero. Simple crosshairs often work best because they stand out clearly against a thermal image without clutter. More complex reticles with extra markings may help with holdovers or range estimation but can make zeroing slower and less precise. Choose a reticle with good contrast options, such as adjustable brightness or color, so it stays visible on different thermal image backgrounds.
Image settings impact the clarity of your target and reticle during sight-in. Thermal scopes typically offer different image modes, like white hot (hot targets appear white), black hot (hot targets appear black), or fusion modes that combine thermal and standard optics characteristics. Pick the mode that produces the strongest contrast between your thermal target and its background. Consistent image settings reduce variables while zeroing, so avoid switching modes mid-session.
- Zero at base magnification (1x or 2x) for best image clarity and accuracy
- Use minimal digital zoom only if required to refine sight picture
- Pick a high-contrast, simple reticle style for easier alignment
- Adjust reticle brightness or color to ensure visibility against thermal backgrounds
- Choose the thermal image mode that provides strongest target contrast (white hot or black hot)
- Keep image settings consistent while zeroing to avoid confusion
Thermal scopes often include a digital zeroing function to fine-tune reticle placement after rough mechanical adjustments. Use this feature to complete your zero with precision. Avoid rushing the acclimation time needed for your scope to stabilize temperature readings, as unstable thermal images can make sighting in difficult. Different brands have specific reticle adjustment controls, so follow your manufacturer’s instructions closely to ensure each setting works correctly and aligns your reticle to the bullet impact.
8. How to Confirm and Fine-Tune Your Thermal Scope Zero
Confirming your thermal scope’s zero at longer distances ensures your shots land where you expect when it counts most. Begin by selecting a distance that matches your hunting environment, then fire a small group to check accuracy. Make fine reticle adjustments one click at a time, retesting after each change, until your zero remains consistent.
Move to Confirm Range Based on Hunting Needs
After initial zeroing at a short distance like 25 to 40 yards, move your target to a longer range that mirrors your typical hunting scenarios. Common confirmation distances range from 100 meters (about 109 yards) for deer-sized game out to 200 yards or more if you expect to take longer shots. Choosing the right confirmation range ensures your thermal scope is reliable where it matters most.
Set up a stable shooting rest and use a visible heat target, such as a metal plate warmed by sunlight or a thermal target specifically designed for sighting in. The heat signature will confirm your aim point clearly through the scope. Make sure there is minimal wind and consistent temperature conditions, as these factors can affect bullet trajectory and thermal imaging.
Fire a Group and Analyze Shot Placement
Shooting a group rather than a single shot provides a clearer picture of your scope’s zero and ensures repeatability. Aim carefully at the center of the heat target, then fire 3 to 5 rounds without changing your aiming point. Allow the thermal image to stabilize after each shot before observing the impact point relative to your reticle.
Compare the shot group center to your reticle’s aiming point. Consistent hits off-center indicate the need for adjustment in windage (horizontal) or elevation (vertical). A group that spreads widely may require you to check firearm stability or mounting consistency before making additional scope adjustments.
Freeze the image after each shot to evaluate hit placement precisely before adjusting your reticle or moving the target.
Make Small Reticle Adjustments and Save Final Zero
Based on your shot group analysis, make deliberate, small reticle adjustments, usually one click at a time. Each click will move the point of impact approximately 0.1 to 0.2 inches at 100 yards, but check your scope’s user manual for exact values. After adjusting, fire another group to verify the correction before making further tweaks.
Once satisfied with your grouping aligning perfectly with the reticle at your confirmation distance, save the zero in your scope’s profile settings if available. This ensures your final zero remains consistent across sessions. Return to a closer range and double-check your zero to confirm no shifts occurred during adjustment. Repeating this process builds confidence that your thermal scope is precisely calibrated for your hunting conditions.
- Set your target at a long-range distance reflecting your hunting environment.
- Use a stable rest and a clear heat signature target.
- Aim carefully and fire a 3-to-5 shot group.
- Freeze the image and analyze shot placement relative to your reticle.
- Adjust windage or elevation by one click increments based on shot group location.
- Fire another group to verify adjustments.
- Save the final zero to your scope’s profile if possible.
- Re-check at shorter distances to confirm stability of your zero.
Step-by-Step Action Plan for Sighting in Your Thermal Scope
Follow this clear plan to zero your thermal scope accurately and quickly for reliable shooting performance in the field.
- Before you start: Mount your thermal scope securely and set your rifle on a stable rest or bipod to eliminate movement.
- At 25 yards: Begin by firing a three-round group to check initial point of impact; adjust reticle windage and elevation based on group position.
- At 100 yards: Shoot another three-round group to confirm adjustments at your chosen zero distance; make fine elevation tweaks as needed.
- After adjusting reticle: Test adjustments with multiple shots, ensuring tight shot groups consistently land on target.
- Once zeroed: Adjust magnification and image contrast to optimal levels for your typical hunting conditions.
- After moving to varied terrain: Reconfirm zero by shooting at targets in different natural backgrounds and lighting environments.
- Weekly or before hunts: Inspect scope mounts and reticle settings to ensure zero has held and make quick readjustments if necessary.
Frequently Asked Questions
Can You Sight in a Thermal Scope Without a Dedicated Thermal Target?
Using a thermal scope to zero your rifle doesn’t require a special thermal target as long as the object you aim at has a noticeable heat difference, such as a hand warmer or a heated metal surface. This temperature contrast allows the scope to accurately register the target for proper adjustment.
Is It Possible to Sight in a Thermal Scope During Daylight?
Daytime sighting with a thermal scope is possible because these devices rely on detecting heat rather than visible light. This means you can zero your rifle anytime, avoiding the need to wait until night falls.
What Is the Fastest Way to Sight in a Thermal Scope?
The fastest method is firing one precise shot, then using the scope’s digital zero function to move the reticle to the bullet impact. Confirm accuracy with a small shot group afterward.
Do I Need to Remove the Scope from the Rifle to Sight It In?
No, keep the thermal scope mounted and securely attached to maintain consistent zero throughout the sighting-in process. Removing it can cause shifts in alignment and affect accuracy.
How Often Should I Check the Zero on My Thermal Scope?
You should check zero regularly, especially after changing ammunition, weather shifts, or rough handling. This maintains reliable accuracy during your hunting or shooting session.
Can I Use Regular Paper Targets to Sight in a Thermal Scope?
Regular paper targets are not ideal unless they present a heat contrast for the thermal scope to detect. Using warm objects or thermal targets will give better sight-in results.
The Bottom Line
Getting your thermal scope sighted in correctly creates confidence and accuracy during hunts and shooting sessions. Take time to confirm and fine-tune your zero at practical distances and realistic conditions you expect in the field. Make it a habit to check your settings regularly and adjust for windage, elevation, or magnification changes to maintain precision. Your next step is to schedule practice sessions at varying ranges to build consistency and understand how environmental factors affect your shooting with the thermal scope.