How to Move a Gun Safe Safely: Complete Steps, Costs & Tips
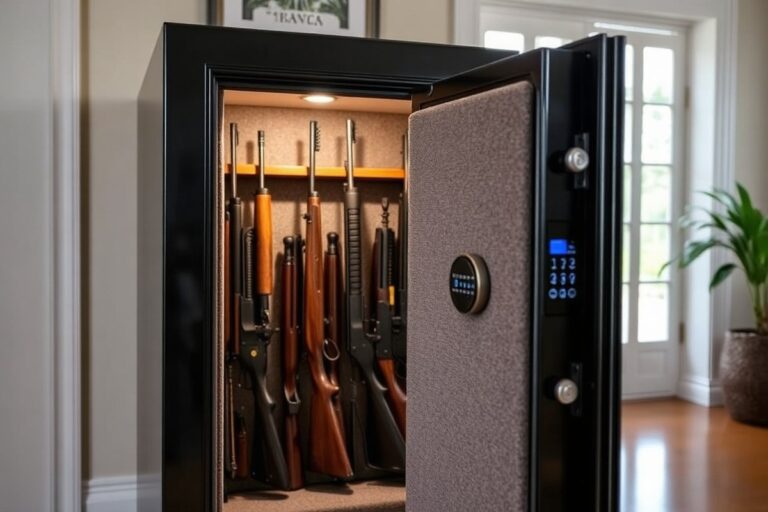
Knowing how to move a gun safe safely starts with recognizing the safe’s weight and size. For safes under 400 pounds, two people can usually handle the move using an appliance dolly on flat ground. For anything heavier or involving stairs, hiring professional movers is the best way to avoid injury and damage. Begin by clearing the path and gathering proper equipment to protect your floors and walls during the move.
Key Takeaways
- You can safely move a gun safe weighing less than 400 pounds with the help of two people and a strong appliance dolly on even ground.
- Hire professional movers for safes above 500 pounds or when stairs or tight spaces are involved.
- Most residential gun safes weigh between 200 and several thousand pounds, affecting how you move them.
- Professional gun safe moves typically cost $250-$550 for local moves, rising with weight and stairs.
- Safe doors make up 30-40% of total weight and should be secured or removed before moving.
- Protect floors and walls with blankets or plywood to prevent damage during transport.
How to Move a Gun Safe Safely: Step-by-Step Process
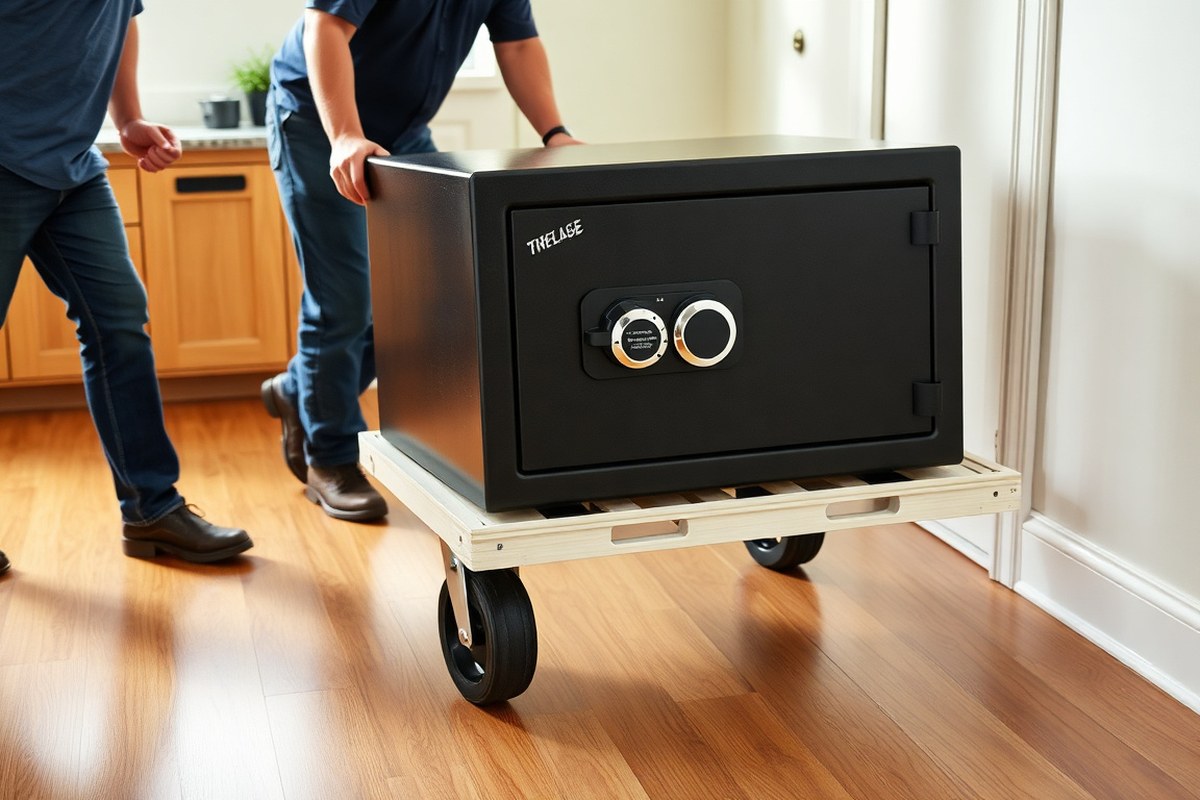
Moving a gun safe requires careful preparation and planning to ensure your belongings and home remain safe. Before you lift or push the safe, empty its contents and check if the door can be securely locked or removed. Securing or removing the door prevents it from swinging open and causing injury or damage.
Wrap the safe with moving blankets to protect its surface from scratches and dents during transit. Use strong securing straps to keep the blankets in place and to attach the safe firmly to dollies or moving equipment. Planning your route involves measuring doorways, stairwells, and hallways ahead of time to avoid tight spaces where the safe might get stuck or cause damage.
- Empty the safe. Remove all guns, ammunition, and valuables. This makes the safe lighter and prevents damage to your property.
- Secure or remove the door.Remove the gun safe’s door when possible to lower weight and prevent it from accidentally opening. When removing the door isn’t possible, lock it securely and add extra straps for safety.
- Wrap the safe. Cover the gun safe in thick moving blankets. Wrap around all sides and tape or strap the blankets tightly to protect from scratches and impacts.
- Plan your route. Walk the path from the safe’s current spot to the truck or its new home. Measure clearances at doors, hallways, and staircases. Make adjustments like removing doors from hinges to prevent tight squeezes.
- Place the safe on a dolly. Tilt the safe gently and slide a heavy-duty appliance dolly underneath. Use straps to securely fasten the safe to the dolly to prevent slips.
- Move slowly and carefully. Transport the safe along the planned route, with at least one other person helping. Watch for floor damage or obstacles and communicate during every step.
- Load securely. Once at your vehicle, carefully lift and position the safe to avoid tipping. Secure it with straps to prevent movement during transit.
- Set the safe in place. At the new location, reverse the process. Remove the dolly, unwrap, and if applicable, reattach the door and lock the safe.
What Equipment and Tools Are Essential for Moving a Gun Safe?

Securing the right equipment is essential when moving a gun safe, as these safes can weigh anywhere from under 100 pounds for a compact handgun safe to over 1,500 pounds for premium models. A heavy-duty appliance dolly rated well above your safe’s actual weight is important. Aim for a dolly capacity at least 25% higher than the safe’s weight to ensure safety and control during the move. For example, a 500-pound safe requires a dolly rated for at least 625 pounds, though opting for 1,000 pounds or more is safer, especially if stairs are involved.
Along with the dolly, sturdy ratchet straps are necessary to firmly secure the safe to the dolly and prevent slipping. Moving blankets or thick carpet scraps protect both the safe’s surface and your floors from scratches and damage. Gloves with good grip improve handling and reduce the risk of accidents. A loading ramp will help if you’re moving the safe into a truck or over curbs. Renting or borrowing this equipment ahead of time avoids last-minute issues on moving day.
| Safe Type | Typical Weight | People Needed | Dolly Rating | Realistic DIY Setup |
|---|---|---|---|---|
| Compact / Handgun Safes | Under 100 lbs | 1-2 | Standard Hand Truck | Yes, with a hand truck |
| Mid-Range Safes | 300-800 lbs | 3-4 | 1,200+ lb appliance dolly | Possible on single level, with straps |
| Large / Premium Safes | 800-1,500+ lbs | Professional Crew | Specialized Equipment Required | Not recommended DIY |
This table highlights the differences in equipment and manpower needed for common safe weights. For small safes under 100 pounds, a typical hand truck and one or two people is usually enough. Mid-range safes between 300 and 800 pounds require a stair-rated appliance dolly rated over 1,200 pounds, plus ratchet straps and a team of 3 to 4 people. Heavy premium safes over 800 pounds typically need professional movers with specialized gear due to the increased risks and difficulty. Always budget for quality straps and a dolly before the move to avoid safety hazards or damage.
Avoid using a standard hand truck on mid-range or heavy safes; it won’t support the weight and can cause serious injury or damage.
Protective gear like thick moving blankets shields the safe’s finish and prevents floor damage when rolling or sliding the safe. Moving straps or ratchet straps should be rated to handle the weight of your safe. Wrap the safe tightly and secure the straps with ratchets to avoid any shifting while moving. Gloves with rubberized palms improve your grip and help prevent hand injuries from sharp edges or pinching. A loading ramp rated to handle the safe’s weight helps when loading or unloading from trucks.
Gathering these tools ahead of time and choosing equipment rated appropriately for your gun safe’s weight lets you handle the safe more safely and efficiently. Using gear not rated for the load puts you at risk for accidents or damage during transport. Renting or borrowing a heavy-duty appliance dolly, quality straps, protective blankets, gloves, and ramps will make the move smoother and protect your investment.
Can I Move a Gun Safe by Myself or Should I Hire Professionals?
Moving a gun safe alone is only practical if it weighs under 500 pounds and the path is straightforward without stairs. Once your safe exceeds this weight or the move involves stairs or tight spaces, hiring professional movers is the safer, often more cost-effective choice. This approach minimizes risks of injury, property damage, and costly delays.
Weight and Stair Considerations
Safe weight is the main factor guiding your decision to DIY or hire professionals. Safes under 500 pounds might be manageable for you with the right tools and helpers. However, anything over 500 pounds, especially near or above 800 pounds common for large or premium models, becomes difficult and dangerous to handle without specialized equipment and expertise.
Stairs add another layer of complexity. Carrying a heavy safe up or down stairs increases the risk of injury and damage. The awkward angles and unstable footing require skills and tools beyond typical moving gear. Professionals have motorized stair climbers and special landing extensions designed to safely navigate narrow staircases and tight landings.
Complexities of Route and Tight Spaces
Even a lighter safe can become risky to move without help if the route involves tight hallways, narrow doors, or complex turns. These obstacles can cause scratches or dents to floors, walls, and the safe itself. Without experience, it’s easy to get stuck or drop the safe, causing serious injury or damage.
Assess the entire pathway from the safe’s current location to the moving vehicle or final spot inside your home. Tight corners and small spaces often require multiple people working in coordination. Handling these challenges alone increases chances of accidents and damage that could increase overall costs and stress.
Cost vs. Safety Trade-Offs
Professional safe movers typically charge between $175 and $525 for local moves depending on the safe’s size and weight. Stairs usually add $150 to $300 per flight, with complex staircases or landing shapes costing $400 or more. While this can feel steep compared to doing it yourself, these fees cover labor, equipment, and insurance protection against damage and injury.
DIY moving might save upfront costs but comes with risks. Injuries, property damage, or a dropped safe can lead to expensive repairs or medical bills, often exceeding professional fees. For safes over 500 pounds or tricky moves, spending $250 to $900 for pros is often cheaper in the long run when factoring in safety and peace of mind.
Professional Services Overview
Experts specializing in gun safe moves bring gear not commonly owned by individuals, such as motorized stair climbers, heavy-duty dollies, and padding materials to protect floors and walls. They understand how to balance the heavy load, navigate stairs safely, and maneuver tight spots without damage to your home or the safe.
Full-service movers accept safes up to certain weight limits, while specialty safe movers handle the heaviest models. Hiring pros also means having insurance coverage if accidents occur. By providing the safe’s make, model, and weight upfront, you can receive accurate quotes and avoid surprise fees on moving day.
How to Move a Gun Safe Up and Down Stairs Safely
Moving a gun safe up or down stairs requires the right equipment, careful positioning, and strong teamwork to avoid injury or damage. Using a stair-rated appliance dolly and securing the safe is important for stability. Never rush the process; moving slowly and following safety precautions helps protect everyone and everything involved.
Choosing a Stair-Rated Appliance Dolly
Selecting a proper dolly designed for stair navigation is key to moving your gun safe safely on stairs. Stair-rated appliance dollies have larger wheels and additional support mechanisms that make climbing or descending steps manageable. For gun safes weighing over 500 pounds, renting or buying a heavy-duty model like an Ultra Lift stair-climbing dolly greatly reduces the risk of accidents.
These dollies often come with ratcheting straps or attachment points to secure the safe firmly. Avoid standard furniture dollies or hand trucks not rated for stairs, they lack the control and support needed on uneven surfaces, increasing the chance of tipping or dropping your safe, which could cause costly damage or injuries.
Positioning and Balancing the Safe on Stairs
Keep the gun safe upright throughout the move as laying it down can harm its locking mechanism or structure. Position the dolly so that it sits beneath the safe’s center of gravity, which helps maintain balance and control. When moving upstairs, the dolly should be in front of you so you can pull and stabilize; when moving downstairs, it should remain ahead for control and to apply counter pressure to slow descent.
Ensure the weight is evenly distributed and secure on the dolly before starting. Irregular balance can cause the safe to tip, which is dangerous on stairs. Firm footing and slow, deliberate movements guard against loss of control, especially on stair landings or narrow steps.
Using Straps and Team Coordination
Use ratchet straps to bind the gun safe tightly to the dolly. Proper strapping prevents shifting that can unbalance the dolly while navigating steps. At least two people should handle the move: one controls the dolly and the safe, and the other braces from below, ready to support or catch if the safe shifts unexpectedly.
Clear communication between team members is essential. Move one step at a time and pause after each to check the load and adjust grip if needed. Trying to move continuously too quickly can lead to loss of control or fatigue, which raises injury risks. Agree on commands for stopping or adjusting pace before you begin to ensure everyone acts in sync.
Preventing Floor and Wall Damage
Use protective padding or furniture sliders on stair edges and walls to prevent scratches and dings from the dolly or safe. Stair treads and handrails can sustain significant damage if struck by metal wheels or edges of the safe. Protect these surfaces with blankets, foam, or sturdy cardboard.
Check the stair width and clearance beforehand to confirm the safe’s dimensions allow smooth passage. Tight corners may require changing the angle and lifting rather than rolling the safe. Using rubber or larger stair wheels helps absorb shocks and protects floors better during the process.
- Measure the safe’s dimensions against stair width and doorways.
- Secure the safe upright on a stair-rated appliance dolly using ratchet straps.
- Position the dolly so the safe’s center of gravity is balanced.
- As the lead mover, position yourself at the lower end moving downstairs or the higher end when moving upstairs.
- Have at least one additional person brace the safe from below or behind.
- Move one step at a time, pausing to adjust grips and communicate.
- Use padding to protect walls, stairs, and floors.
- Keep the dolly wheels in contact with the stairs at all times to maintain control.
Costs to Expect When Moving a Gun Safe Professionally
Moving a gun safe professionally usually costs between $175 and $2,500 or more, with the range affected mainly by the safe’s weight, the distance moved, and whether stairs are involved. The heavier and larger the safe, the more specialized equipment and manpower are required, driving up the price. Stair carries add a significant surcharge because the risk and difficulty increase, with extra labor charges common. Long-distance moves typically have a base rate around $300 to add the safe to an existing move, but that depends on transport logistics. Below is a breakdown of typical cost ranges for local moves by safe weight and long-distance moves to help you budget:
| Move Type | Safe Weight | Cost Range |
|---|---|---|
| Local Move | 200 to 400 lbs (Small Safe) | $200 to $400 |
| Local Move | 400 to 800 lbs (Medium Safe) | $300 to $700 |
| Local Move | 800 to 1,200 lbs (Large Safe) | $500 to $1,000+ |
| Local Move | 1,200+ lbs (Extra-Heavy Safe) | $1,000 to $2,500+ |
| Long-Distance Move | Any Weight | About $300 added for safe |
Key factors that affect the cost include the following:
- Weight and Size: Larger safes require more people or equipment such as heavy-duty dollies or cranes.
- Distance to be Moved: Short local moves tend to be less expensive; long-distance moves add costs for transportation and handling.
- Stairs and Accessibility: Moving a safe upstairs or downstairs can add $200 to $225 or more due to increased labor and risk.
- Permits and Insurance: Some areas may require special permits or higher insurance coverage for heavy moves.
- Time and Labor: Moves requiring careful handling or multiple trips will increase labor charges.
To budget wisely, request detailed quotes from movers specifying these factors. Ask how many people will be involved, what equipment is used, and whether stairs apply. Confirm if delivery includes positioning the safe in its new location or just curb-to-door service.
Always inform the moving company about stairs or tight spaces in advance to avoid surprise fees and ensure proper equipment is brought.
Failing to account for these cost variables can lead to unexpected expenses or unsafe handling. Accurately describing your safe’s weight, dimensions, and the move environment helps you receive realistic estimates and professional results.
Protecting Floors, Walls, and the Safe During the Move
Protecting your floors and walls is key when moving a gun safe to avoid costly damage. Different floors like hardwood, tile, linoleum, or carpet each require careful attention because scratches, dents, and scuffs are common risks. Start by laying down a protective barrier before moving the safe. Materials such as plywood sheets, moving blankets, and roll-out mats provide dependable surface protection. Plywood helps distribute the safe’s weight evenly, reducing floor stress, while moving blankets shield against scratches and impact.
For wall protection, use thick furniture pads or moving blankets secured with painter’s tape where the safe might brush against corners or narrow hallways. This prevents dents and chipped paint during navigation. Wrapping the safe itself with moving blankets cushioned by stretch wrap safeguards its finish from scrapes and moisture. Make sure the wrap is snug but not so tight that it compresses the padding or damages the safe’s exterior.
- Cover floors with plywood or a heavy-duty roll-out mat on delicate surfaces.
- Use thick moving blankets or furniture pads on walls, especially in tight spaces.
- Wrap the safe entirely in moving blankets, then secure with stretch wrap or wide packing tape.
- Place small-diameter, heavy-duty PVC pipes under the safe to roll it across smooth floors if needed.
- Protect corners and edges of the safe with foam corner guards under the wrap if available.
- Avoid dragging the safe to prevent scratches; use lifting and rolling methods where possible.
- Secure cushioning materials with tape that won’t leave residue, like painter’s tape.
Before starting the move, set up all floor and wall protections along the entire moving path, not just near the safe. This prevents accidental slips or bumps from causing damage farther along the route. Wrapping the safe also serves to stabilize any loose parts or external handles that could catch on doorframes or walls, which helps avoid dents both in your home and on the safe. The investment in good-quality moving blankets ranges from about $10 to $30 each, but you can often rent or borrow them. Plywood sheets or mats can be reused for future moves or projects.
Failing to protect surfaces usually results in scratches, gouges, or paint chipping that lower your home’s value and require costly repairs. Damage to the safe’s finish might diminish its resale value and void manufacturer warranties. Proper wrapping and floor coverage require some extra time upfront but minimize risk and create a safer moving experience for you and anyone helping. It’s especially important to keep the safe upright and handled steadily during the move to prevent shifting, which increases risks of contact with walls and floors.
Common Mistakes When Moving a Gun Safe and How to Avoid Them
One of the most frequent mistakes is underestimating the weight of the gun safe. This error often leads to inadequate planning or insufficient equipment, resulting in injury or damage to the safe and property. To avoid it, always check the manufacturer’s specifications or user manual for the exact weight. Knowing this helps you select the right dolly, the number of helpers needed, and the safest route for the move.
A second common error is failing to remove the safe’s door before moving it. The door can account for 30 to 40 percent of the total weight, so removing it reduces the load significantly. This makes the safe body easier to handle and balance on a dolly. Always remove and secure the door separately to lower the risk of tipping or dropped loads. Use dedicated tools to safely unbolt or unscrew the door, and keep it padded to prevent scratches.
Improper use of dollies or moving equipment causes many issues. Using a dolly that is not rated for the safe’s weight or one that lacks the correct platform size can cause tipping or slipping. For safes weighing over 1,000 pounds, heavy-duty appliance dollies with straps and wide wheels perform best. Always test the dolly’s stability before fully loading the safe. Avoid furniture sliders on carpet for extremely heavy safes, as they provide less control.
- Underestimating weight due to ignoring manufacturer specs
- Not removing the door before moving
- Using dollies or tools not rated for the safe’s weight
- Attempting to move a loaded safe without emptying it
- Laying the safe on its side, risking internal damage
- Neglecting floor protection, leading to scratches and gouges
Laying the safe on its side is a serious mistake. It can damage the internal locking mechanism and alignment. The safe’s locking bolts and reinforcement bars are designed to work when the safe is upright, so turning it sideways risks jamming or breaking components. To fix this, always keep the safe upright during the move. When a safe has been placed on its side, let it sit upright and locked for 24 hours before opening so internal parts can settle properly.
Address issues from incorrect moving methods by first inspecting the safe for visible damage like dents or broken seals. When the mechanical lock jams, consult the manufacturer’s troubleshooting guide or contact a locksmith who specializes in gun safes. For repairs related to internal alignment, professional service may be necessary. Prevent this by planning every step carefully, following weight guidelines, removing the door, and using the right equipment with enough help. Taking these steps ensures a safer move with fewer costly problems.
How to Secure and Bolt Down a Gun Safe After Moving
Bolting down a gun safe prevents it from tipping during an earthquake or theft attempts. Secure installation increases stability and protects your firearms and home. Use the right tools and follow steps that match your floor type to ensure a safe, sturdy fit.
Assessing the Installation Location
Choose a flat, stable floor area free from moisture to prevent rust and damage. Verify the floor material, concrete, wood, or tile, for appropriate anchors. Consider the safe’s weight and size to ensure the floor can handle it and allow room to open the door fully. Avoid carpeting or flexible substrates, which reduce bolt effectiveness.
Locate studs or solid framing if anchoring to a wooden floor. For concrete, avoid cracks or areas prone to crumbling. Measure and mark where the safe’s pre-drilled holes will align.
Tools and Materials Needed for Bolting
Gather these essential items for safe and effective bolting of your gun safe:
- Anchoring bolts (at least 3/8-inch diameter heavy-duty anchors for concrete, lag bolts with washers for wood)
- Hammer drill with masonry bit (for concrete floors)
- Cordless drill with drill bits matching anchor sizes
- Socket wrench or impact driver
- Measuring tape and pencil
- Protective gloves and safety glasses
- Vacuum or brush to clean drill dust
Choose bolts rated for the safe’s weight, typically 50 to 100 pounds minimum shear strength per bolt for security. Concrete anchors cost $5 to $15 per piece, and lag bolts cost less but require pilot holes in wood.
Anchoring Procedure by Floor Type
Follow these step-by-step instructions to bolt your gun safe safely, based on floor type:
- Place the safe in the desired location and open the door fully.
- Mark the bolt holes on the floor using the safe’s base as a template.
- For concrete floors, drill holes 1/2 inch deeper than anchor length using the hammer drill and masonry bit.
- Clean the holes with a vacuum or brush to ensure debris-free anchoring.
- Insert the concrete anchor bolts or lag bolts into the holes or pilot holes.
- Align the safe’s holes over the anchors and insert bolts with washers.
- Tighten bolts securely using a socket wrench or impact driver; do not overtighten to avoid damaging the floor.
- Check the safe for stability by applying gentle pressure to all sides.
For wooden floors, locate studs for solid attachment and drill pilot holes smaller than the bolt diameter. Tile floors require care to avoid cracking; use a carbide-tipped bit and drill slowly without hammer action.
Using the correct anchor type for your floor is essential to prevent the safe from loosening over time or damaging the floor material.
Final Safety Checks and Tips
Verify all bolts sit flush with the safe’s base and floor. Loose or uneven bolts increase tipping risks and reduce security. Inspect periodically, especially after moving the safe or heavy vibrations. If unsure about floor strength or bolt placement, consult a professional to avoid damage or ineffective anchoring.
For extra protection, install floor alarms or motion sensors connected to your home security system if your safe is in an exposed area. Avoid placing safes on slippery surfaces like polished tile without rugs, as vibration might loosen hardware.
Step-by-Step Action Plan for Moving Your Gun Safe
Follow these clear steps to move your gun safe safely and efficiently, minimizing risks to yourself and your property.
- Before You Move: Empty the safe completely and secure all firearms and valuables separately. Confirm the safe is fully unloaded to prevent any shifting inside.
- Gather Equipment: Collect essential moving tools like a heavy-duty dolly, furniture straps, moving blankets, and gloves. Check that all equipment is in good condition before starting.
- Recruit Help: Arrange for at least two strong helpers to assist the move. If the safe is over 300 pounds or stairs are involved, consider hiring professionals.
- Prepare the Path: Clear the route of obstructions, protect floors and walls with padding, and plan the safest path. Test stability by walking the route with the dolly first.
- Move the Safe: Carefully tilt the safe onto the dolly with your team’s coordinated effort. Secure it tightly, then proceed slowly along the prepared path, communicating continuously.
- Handling Stairs: Use lumber sliders or a stair roller system if going up or down stairs. Position spotters above and below the stairwell to guide and support, avoiding sudden moves.
- Secure in New Location: Once placed, bolt the safe to the floor or wall as recommended. Verify it’s stable by applying gentle pressure from different sides.
- Check for Damage: Inspect the safe and surrounding areas for any scratches or dents. Fix minor damage immediately to maintain security and appearance.
Frequently Asked Questions
What Is the Safest Way to Prepare a Gun Safe Before Moving?
The safest way to prepare your gun safe is to empty all contents, secure the door, and wrap it with protective materials to prevent damage. These steps protect both the safe and your firearms during the move.
How Should I Plan the Route When Moving a Gun Safe?
Plan the route by removing obstacles and measuring doorways to ensure the safe fits and can pass through easily. Clear paths reduce the risk of accidents or damage during the move.
Can a Dolly Be Used for Moving a Gun Safe on Carpet?
Yes, a heavy-duty appliance dolly can be used on carpet, but extra care is needed as carpet can cause instability. Using furniture sliders underneath the dolly wheels helps ease movement and protects carpet fibers.
What Is the Best Way to Transport a Gun Safe in a Moving Truck?
Secure the gun safe upright with straps or tie-downs to prevent shifting during transport. Keeping the safe upright preserves its structure and keeps door locking mechanisms intact.
How Do Temperature Changes Affect Moving and Storing a Gun Safe?
Sudden temperature changes can cause condensation inside the safe, risking rust and damage to firearms. Keep the safe dry and climate-controlled when transporting and storing to protect its contents.
What Level of Insurance Should I Consider When Moving a Gun Safe?
Check with your moving company about coverage and consider additional insurance for your gun safe’s value. This protects you financially if damage or loss occurs during the move.
Key Points to Remember
Moving a gun safe demands careful preparation and the right help to ensure safety for you and your property. Taking deliberate steps to empty, protect, and secure both the safe and your home prevents costly damage and injury. Start by emptying your safe and arranging competent assistance to make the process manageable and secure. This one action moves you firmly toward a successful relocation.