Where to Put Gun Safe in Home: 8 Smart Locations with Security & Access Tips
Where to put gun safe in home depends on balancing security, access, and environmental safety. Choose a climate-controlled, out-of-sight spot with low humidity, like a closet or basement with dehumidification. Prioritize ground floors if your safe is heavy to avoid structural risks.
Key Takeaways
- Keep gun safes in 30%-50% humidity areas to prevent rust and maintain firearms.
- Limit safe weight to 1,000 lbs on upper floors to avoid damaging the structure.
- Use active dehumidifiers in basements for safes over 500 lbs to control moisture effectively.
- Locate safes in low-visibility corners for better concealment from unauthorized users.
- Measure door widths and pathways to ensure safe delivery and installation without damage.
- Avoid placing large safes near exterior walls to reduce temperature fluctuation risks.
Best Locations to Put a Gun Safe in Your Home
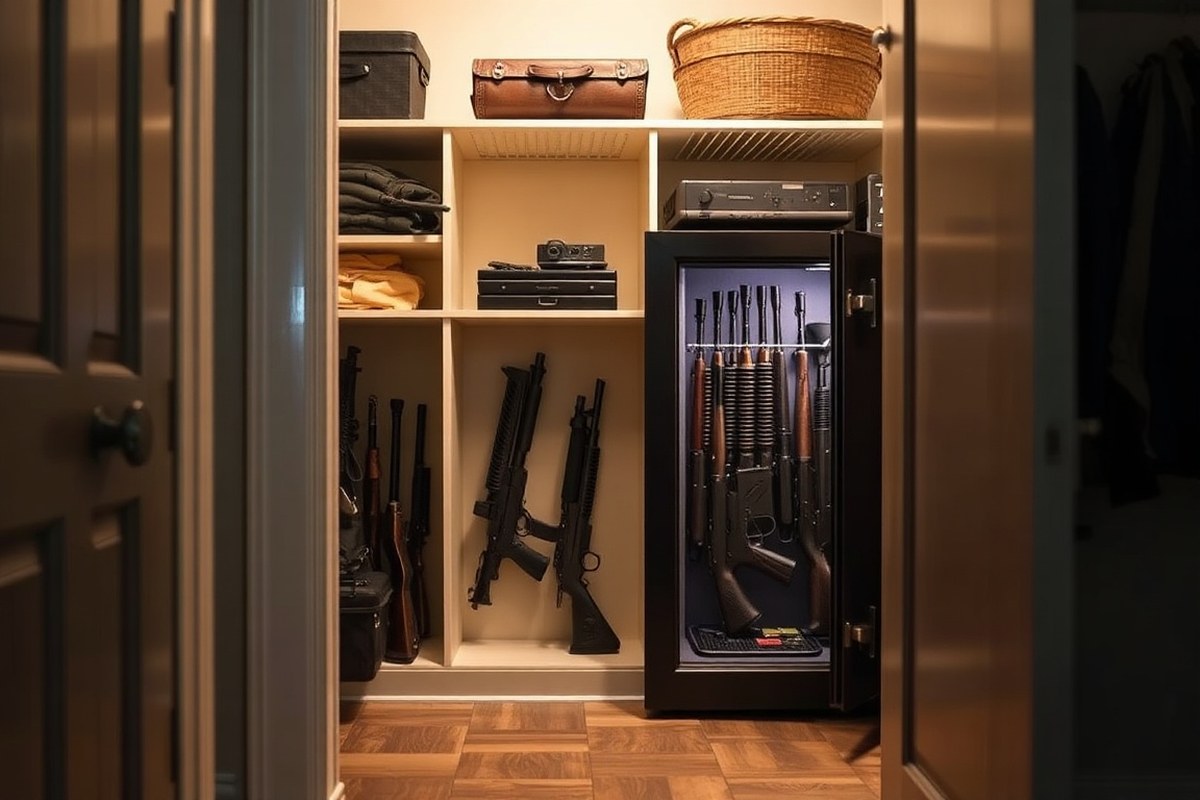
Choosing the right room or area in your home to place a gun safe depends on balancing security, access speed, and environmental factors like humidity and fire risk. Bedrooms, basements, closets, offices, and garages each offer distinct advantages and drawbacks you should weigh carefully to optimize safety and convenience.
Master Bedroom: Access and Risks
The master bedroom offers very quick access to your gun safe during emergencies, which is why many consider placing it there. However, the master bedroom is one of the first places criminals check, raising theft risk. Closets within the master bedroom improve concealment, but keep in mind children might also access these spaces if not securely locked. Installing the safe anchored properly reduces the risk of quick theft, but you should consider fire risk if the bedroom is near heat sources. Overall, this location prioritizes fast access while requiring extra security measures.
Basement: Structural Strength and Humidity
Basements typically provide strong structural support with concrete slabs that easily support heavy gun safes. This makes them ideal for large or vault-size safes holding multiple firearms. From a security standpoint, basements are less visible and usually not a first target for burglars. However, humidity in basements tends to be higher, so an active dehumidifier rod maintaining 30%-50% relative humidity is necessary to prevent rust and corrosion. Access speed is slower compared to bedrooms or closets, and basements may face flooding risk in some areas. For these reasons, they suit long-term storage rather than quick access.
Closets and Home Office Spaces: Convenience and Concealment
Interior closets, especially those on the main floor, strike a good balance between concealment and access speed. They are less obvious than a safe placed out in the open and can be anchored securely if floor joists are checked for strength. Home offices offer moderate concealment and access, making them a solid location for work-from-home users needing daytime access to firearms. These spaces generally maintain average humidity and fire risk, but their main tradeoff is potential visibility if the closet or room is not properly concealed within the home layout.
Garage and Entryways: Visibility and Environmental Challenges
Garages and entryways provide moderate access but often fall short in security and environmental protection. Garages especially expose safes to temperature extremes, moisture, and higher humidity, which can damage firearms and safe components over time. Visibility can be an issue, as burglars often target the garage, suspecting valuables inside. Concrete floors support heavy safes, but the higher fire and humidity risk make garages a less recommended choice unless you invest in specialized climate controls and concealment tactics.
| Location | Security | Fire Risk | Humidity | Access | Floor Type |
|---|---|---|---|---|---|
| Master bedroom closet | Good if anchored | Average | Excellent | Excellent | Slab fine, joists need a check |
| Basement | Good | Good | Needs a dehumidifier | Slow | Concrete, no question |
| Spare bedroom/home office | Good | Average | Excellent | Moderate | Slab fine, joists need a check |
| Garage | Poor | Poor | Poor | Moderate | Concrete, no question |
| Dedicated safe room | Excellent | Excellent | Excellent | Varies | Designed for it |
This table shows how different home areas rank for security, fire risk, humidity, access, and floor capability. Dedicated safe rooms offer the highest security and environmental control but require planning and investment. Basements provide sturdy floors and good security but need humidity control. Bedroom closets and home offices give quicker access with decent concealment when properly secured. Garages generally pose more risks in all categories.
How Structural and Weight Limits Affect Gun Safe Placement

Gun safes are often heavy, so assessing the strength of your floors and walls is essential before deciding where to place one. Floors vary by construction and weight capacity, especially between ground and upper levels. Making sure your chosen spot can handle the safe’s weight prevents structural damage and keeps your investment secure.
Calculating Safe Weight Limits per Floor
Floors on the ground level typically support more weight than upper floors because they rest directly on the foundation. A rule of thumb is to keep safes on upper floors under 1,000 lbs to avoid overloading the structure. Standard residential floor joists can bear loads around 40 to 50 pounds per square foot in living spaces, but this varies with joist size, spacing, and materials.
Before placing your safe, calculate how much weight the floor can support based on its construction. For example, if the joists are 2″x10″ wood spaced 16 inches apart, they generally support a live load up to 40 psf and dead load up to 10 psf. Multiply the floor area the safe will cover by this load limit to find the maximum safe weight.
Heavier safes may require additional support or a ground floor location to avoid risk. Floors with tile, hardwood, or laminate can also be damaged by concentrated weight, so consider placing a thin carpet underneath your safe to distribute load and protect flooring.
Identifying Load-Bearing Walls Near Safe Placement
Load-bearing walls support the weight of your home and usually align with foundation walls or beams. Positioning your gun safe next to one of these walls or in a nearby corner provides extra stability for heavy safes. Exterior walls often serve this purpose, but some interior walls do as well. Simple ways to identify load-bearing walls include:
- Locate the basement or foundation and find where floor joists rest.
- Check the direction of floor joists; walls perpendicular to joists are usually load-bearing.
- Use a stud finder and measure wall thickness; thicker walls often support weight.
- Review your home’s blueprints or hire a professional to confirm wall type to avoid damage.
Installing your safe near a load-bearing wall ensures the concentrated weight aligns with structural support, lowering risk of floor sagging or damage.
Reinforcement Options Before Installation
Choose to strengthen your flooring before installing a safe in an upper-level area or any location where the floor’s support is uncertain. Options include sistering new joists alongside existing ones, adding blocking between joists, or installing a plywood subfloor layer to spread the weight.
Hiring a structural engineer or contractor to inspect and recommend reinforcement can prevent costly damage. Costs for reinforcement vary but typically range from several hundred to a few thousand dollars depending on complexity. Adding reinforcements increases safety and longevity for your gun safe placement. Using a protective mat under the safe also helps distribute weight evenly and prevents floor scratches or dents.
Signs Your Floor May Not Support Your Safe
Warning signs of insufficient floor strength include visible cracks in walls or flooring, sagging or bouncing floorboards, creaking noises under load, and uneven or spongy areas. These indicate that the floor’s load capacity is compromised.
For safes weighing over 800 pounds placed on upper floors, consulting a contractor is an advisable step to ensure proper floor support. Avoid placing very heavy safes on upper floors far from load-bearing walls. Overloading could damage framing, cause uneven settling, or impair building safety.
Do not ignore floor damage or unclear structural conditions; consulting a professional before positioning a heavy safe is a critical safety step.
What Environmental Factors to Consider When Placing a Gun Safe
Maintaining proper humidity levels inside and around your gun safe is critical to prevent rust and corrosion on your firearms and safe components. An ideal relative humidity range for gun safes falls between 30% and 50%. Higher humidity encourages moisture buildup, which can damage metal parts. Gun safes with fire-resistant features often include internal seals designed to limit moisture intrusion during temperature shifts, which helps keep the internal environment more stable.
Protecting your safe from moisture starts with choosing a dry, climate-controlled location. Basements and garages frequently present challenges due to ambient humidity and temperature swings. Basements with high water tables or poor drainage pose a risk of water seepage, which can infiltrate a safe directly or through condensation caused by temperature differences between the inside and outside of the safe. Uninsulated or partially insulated garages typically experience wide daily temperature fluctuations, increasing the risk of condensation inside the safe. Avoid placing your safe near plumbing, vents, or windows where temperature changes happen rapidly. Instead, aim for a space with steady, moderate temperatures to lessen stress on stored firearms.
Also, you can protect the base of your gun safe from moisture by placing a moisture barrier beneath it. A hard rubber mat, such as a horse stall mat, is a practical and affordable option that prevents direct contact between the steel safe and concrete floors, which can retain moisture and promote corrosion. This mat usually costs between $30 and $80 and is easy to cut to fit the safe’s footprint.
Controlling humidity inside the safe is equally important. You should use desiccant packs or electric dehumidifiers designed specifically for gun safes. Silica gel packs need to be replaced or recharged every few months depending on room conditions. Plug-in safe dehumidifiers, while costing between $70 and $150, provide continuous moisture control and often include automatic shutoff features. These devices prevent excess moisture from accumulating without causing drying damage to wooden stocks or leather parts. Combining a sealed fire-rated safe with an internal dehumidifier provides complete protection.
Temperature swings create condensation inside sealed spaces as warm, moist air cools and deposits water droplets. Locating your gun safe away from attics, crawl spaces, heating systems, and direct sunlight minimizes these fluctuations. Placing the safe on a main floor interior wall usually provides the most stable environment. If you need to install the safe upstairs, take precautions to seal and insulate the room properly to reduce temperature differences.
Prioritize choosing a stable location and use protective accessories like moisture barriers and internal dehumidifiers to safeguard your firearms from environmental damage. Regularly monitoring humidity and inspecting your safe’s interior for any signs of rust will help you keep your collection in optimal condition over time.
Optimizing Security: Concealment and Locking Strategies
Hiding a gun safe usually offers better protection against theft than leaving it visible. The fewer people who know or can see where it is, the less likely it becomes a target. Concealment options include placing the safe inside a closet, behind false panels, or in furniture specifically designed with hidden compartments. However, if visibility improves your access during emergencies, a visibly mounted safe with strong locks can also work, but it must be very well secured.
Bolting the safe securely is important to prevent it from being removed. Focus on anchoring it to either the floor or the wall, not both, because attaching to both can misalign the door and locking mechanism. When bolting to the floor, use lag bolts at least 1/2 inch in diameter, anchored into floor joists or concrete. For wall mounts, ensure the safe is fixed between studs and use heavy-duty bolts. Avoid leaving space or gaps, as this can allow prying tools. To make installation safer and more secure, use a drill with concrete bits for floors or a stud finder and voltage tester for walls.
Integrating your gun safe with your home security system adds an important layer of protection. Connect a door or tamper sensor on the safe to trigger your alarm system if unauthorized access occurs. Some safes have built-in alarms or work with smart home security platforms. Coordinate with your monitoring service to add these sensors so they respond appropriately to alerts about your safe. This can help deter theft and notify you or emergency services faster.
- Use lag bolts 1/2” or larger for floor mounting into joists or concrete
- Mount wall safes securely between studs using heavy-duty bolts
- Avoid bolting both floor and wall simultaneously to prevent misalignment
- Install sensors and alarms on the safe for integration with your home alarm system
- Consider furniture or closet concealment for better security through obscurity
- Use stud finders and voltage testers to avoid hitting wires during installation
- Consult your security monitoring service about safe placement and sensor setup
Costs for bolting hardware and basic alarm sensors typically range from $20 to $100 depending on anchor type and system sophistication. Professional installation may add labor fees but ensures proper attachment and sensor setup. Properly bolted and integrated, a gun safe becomes a strong deterrent because it can’t be quickly removed or compromised without tripping alarms. Common pitfalls include loose bolts, poorly chosen anchor points, or skipping sensors, all of which weaken security despite a strong safe body.
Planning for Fast Access While Maintaining Safety
Fast access to your gun safe during an emergency is critical, especially in situations like home defense. Locating your safe in a nearby closet, bedroom, or living area often allows you to reach it quickly without crossing multiple rooms or floors. For example, having a fingerprint or keypad safe in your master bedroom can cut retrieval time to under 10 seconds, which matters greatly when every second counts. Avoid placing safes in basements or distant storage rooms if you frequently need emergency access, as stairs and hallways can slow you down significantly.
Balancing quick access with security means choosing spots that are both convenient for you and not visible from public or common areas. Burglars tend to target homes where gun safes are in plain sight. Concealing the safe inside a closet or behind furniture can reduce this risk. High-security safes with biometric locks provide faster and more reliable access than traditional combination or key locks. Testing your safe’s access speed under different conditions helps ensure you can open it swiftly but still keep it secure from unauthorized users.
Splitting gun storage between two safes is worth considering if your collection serves different purposes. For instance, a small, quick-access bedside safe can store your home defense handgun, while a larger, more secure safe in the basement holds hunting rifles and collectibles. This setup prevents you from having to carry multiple guns around the house during an emergency and reduces retrieval time for your primary defensive weapon. It also offers separation for different firearms, lowering liability and improving organization.
To optimize emergency retrieval, start with a clear plan: identify where you spend most of your time at home and install the quick-access safe nearby. Ensure it uses a fast, reliable locking mechanism like a biometric scanner or electronic keypad. Practice opening the safe regularly to build muscle memory. If using a second safe for broader storage, position it in a secure, low-risk area like a basement, but understand this location is not meant for emergencies. Finally, keep emergency lighting or a flashlight near your primary safe to aid access in low light.
Tradeoffs include sacrificing some concealment if you prioritize speed or accepting longer retrieval times if you want maximum security and reduced burglary risk. Also, fingerprint safes can cost between $500 and $1,500 depending on size and features, but this investment supports fast and safe access. Remember that your priority is efficient access when you need it while maintaining adequate protection against theft and accidental access.
Ensure your quick-access safe is tested regularly to open within seconds under stress, and never leave the combination or fingerprint access settings exposed or shared casually.
Practical Delivery and Installation Considerations
Choosing where to place your gun safe requires careful attention to how you’ll get it into your home and set it up securely. Checking door sizes, preparing the floor and walls, and deciding whether to hire pros can save you serious time and frustration. Planning these steps ensures the safe fits properly and stays secure long-term.
Measuring Doorways and Pathways
Measure all doorways, hallways, and staircases precisely before your safe arrives to ensure it fits through. Full-size gun safes commonly measure around 42 inches in width, 30 inches in depth, and 54 inches in height, with actual dimensions differing by brand and model. Since most interior doors range from 28 to 32 inches wide, many large safes require door removal or entry through other access points such as patios or garages.
Use a measuring tape to record the width and height of each door or narrow passage along the route from the entry point to the final location. Don’t forget to account for door trim, baseboards, and stair railings that reduce clearance. Also, consider ceiling height in stairwells, where lifts or rotations may be needed.
Failing to check this in advance often leads to costly delivery delays or damage. A safe that is too large or heavy for your home’s doorways may require choosing a smaller model or hiring professional movers experienced in handling bulky items in tight spaces.
Preparing Mounting Surfaces
For installation, floors and walls where you bolt your safe must provide solid support. Concrete slabs in basements or garages are ideal, offering the stability and security safe manufacturers recommend. Wood subfloors can work but may require reinforcement with plywood layers to prevent shifting or sagging over time.
Before installation, clear the area of rugs, clutter, and dust. Remove or modify baseboard trim where wall bolts will go. Use a stud finder to locate framing and avoid drywall-only anchoring, which isn’t secure. For floors, check thickness, concrete floors should be at least 4 inches thick and cured for 28 days. Improper bolting surfaces can cause the safe to shift or tip, diminishing security and potentially harming your floor or walls.
Coordinating Professional Delivery
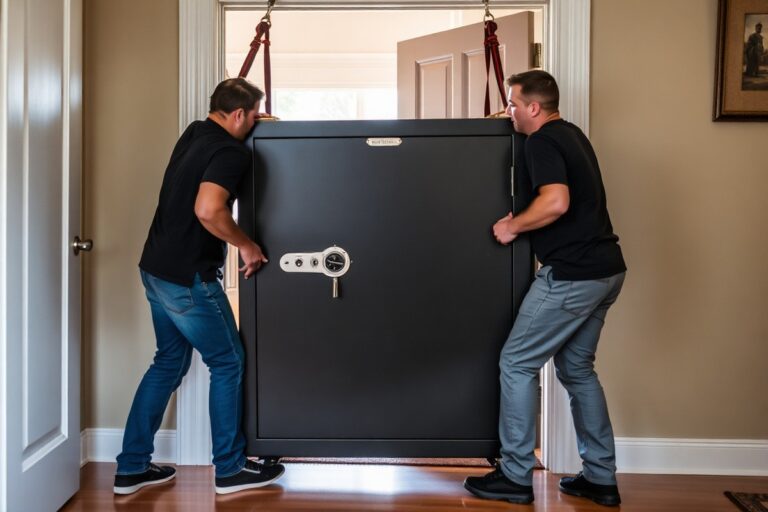
Many gun safes weigh hundreds of pounds. A 6+ gun safe can weigh 600 to 1,200 pounds or more, making DIY moves risky. Confirm with your safe seller whether professional delivery includes setup or if it’s curbside only. Liberty Safe, for example, leaves the safe on the curb unless you pay for inside delivery and installation.
Professional movers use equipment like dollies, straps, and ramps to handle heavy safes safely. They also can navigate narrow stairs or doorways with less risk of damage. Homes with narrow passages or complicated access may benefit from professional delivery services to prevent injuries or damage during safe installation.
DIY vs. Professional Installation Considerations
Installing the safe yourself saves money but needs planning and proper tools. Follow the manufacturer’s instructions carefully. Bolting involves drilling into concrete or wood and using wedge anchors or lag bolts. The key steps for DIY installation include:
- Clear the installation area and verify floor and wall suitability.
- Position the safe in its final location, checking fit and accessibility.
- Mark bolt hole locations on floor and/or walls precisely.
- Use a hammer drill and proper masonry bits for concrete or drill bits for wood.
- Insert anchors or bolts firmly, following torque specifications.
- Secure the safe, then test stability and lock function.
- Replace any baseboards or trim carefully around bolt points if possible.
You should hire professional installers if you lack power tools or experience drilling into masonry, if the safe weight exceeds what you can handle safely (more than 300 pounds is a common threshold), or if your home layout is complicated. Installation professionals charge between $150 and $400 depending on difficulty but can save costly mistakes and improve security.
Fire Safety and Its Impact on Safe Location Decisions
Placing your gun safe in the basement offers the best fire protection because concrete walls and slabs slow heat transfer significantly. The basement’s location at or below ground level means heat from a fire rises away from the safe, reducing exposure to extreme temperatures. Heat generally intensifies as it moves upward, so the higher you place the safe, the hotter it will get during a fire. Avoid the second floor or rooms above the first story to minimize this risk and the chance of floor collapse, especially with safes weighing over 1,000 pounds.
Rooms near the kitchen or fireplace represent higher fire risks due to the frequent presence of open flames, grease, and cooking appliances that can cause rapid fire spread. Interior rooms away from exterior walls also help reduce risks by avoiding areas where fire or smoke might enter from outside. Placing the safe in a room less prone to fire and limiting direct exposure to heat sources improve the effective fire resistance of your gun safe.
Mounting your gun safe a few inches off the floor provides extra protection. Elevating it 3 to 6 inches on a non-combustible base such as concrete blocks or metal risers keeps the safe away from potential water damage during firefighting efforts and helps reduce heat exposure from any surface fires or radiant heat coming from floor level. This setup also discourages rust and helps with cleaning under and around the safe.
- Choose the basement, preferably on a concrete slab or slab section
- Avoid placement near kitchen, fireplace, or garage areas
- Opt for an interior room away from exterior walls and windows
- Improve the safe 3 to 6 inches off the floor on a non-combustible base
- Ensure structural support if placing on upper floors, especially for safes over 500 pounds
Taking these precautions can significantly improve your gun safe’s ability to withstand fire damage. Placing it too high or near likely fire sources risks extreme heat exposure or structural failure during a fire, potentially compromising both the safe’s contents and the building’s stability. Thoughtfully selecting a basement location, keeping it improve, and avoiding high-risk rooms reduces these concerns and boosts your safe’s protective potential against fire events.
Common Placement Mistakes and How to Avoid Them
Choosing the wrong spot for your gun safe can lead to costly reinstallation and security gaps. One frequent mistake is placing it where the door can’t fully open or might slam shut unexpectedly, risking damage to the safe and injury to you. Make sure to measure clearance carefully, leaving at least 32 inches of space for the door to swing open freely. This prevents the door from catching on nearby walls, furniture, or fixtures.
Humidity is another common challenge. Installing a safe in damp basements or near water sources invites rust and damage to your firearms and safe components. Avoid placing the safe where humidity consistently exceeds 60%. Use a dehumidifier or silica gel packs inside the safe to control moisture, especially in areas prone to moisture buildup.
Poor bolting or neglecting to bolt your safe properly reduces security dramatically. Many gun safe thefts result from safes that aren’t anchored correctly. Securely fastening the safe to both the floor and optionally a wall solidifies its position, making it much harder for thieves to remove. Use heavy-duty anchor bolts at least 3/8 inch thick designed for concrete or wood floors depending on your mounting surface.
- Incorrect door clearance, measure space before installation to avoid reinstallation costs
- Ignoring humidity levels, place safe away from damp, unventilated areas
- Failing to bolt the safe securely to the floor and structure
- Positioning the safe on weak flooring without reinforcement or proper weight distribution
- Placing it in easy sightlines without additional concealment or layered security measures
Fixes include carefully planning the layout with a tape measure or laser before installing, installing moisture control items suited to your environment, and using recommended bolts with proper tools. Recheck bolt tightness annually to maintain security and prevent loosening. A well-anchored safe distributes weight and lowers the risk of tilting or damage to flooring, sometimes requiring plywood or steel plates underneath in weaker spots.
Test your safe door’s full motion before final installation to ensure smooth operation and avoid costly door damage or injury from accidental slamming.
Long-term upkeep of your gun safe’s location also matters. Check for shifting floors or walls and adjust or reinforce your mounting as needed. Monitor humidity fluctuations seasonally, especially if your climate changes markedly from summer to winter. These steps help maintain the safe’s integrity and protect the firearms inside from damage or theft over years of use.
Step-by-Step Action Plan for Choosing the Best Gun Safe Location
Follow these steps to place your gun safe where it balances security, accessibility, and environmental suitability. Each milestone verifies your progress toward a safer home setup.
- Before you start: Measure potential rooms and check floor load limits. Success looks like confirming the floor can support the safe without damage or instability.
- Day 1: Select a low-traffic but accessible location that’s dry and away from heat sources. You’ll know it’s right when the spot meets environmental and quick-access needs.
- Day 2: Plan concealment strategies like furniture placement or paneling to avoid drawing attention. Test concealment by asking someone unfamiliar if they notice the safe.
- Day 3: Decide on the locking mechanism best for your access speed and security level. Confirm usability by practicing lock operation under timed conditions.
- Day 4: Arrange delivery and installation with professionals considering tight spaces or building protections. Completion means the safe is securely mounted without floor or wall damage.
- Week 1: Check fire resistance and reposition if near fire hazards like kitchens or furnaces. The location passes when you confirm a safe distance or add fire shielding.
- Week 2: Conduct a final usability and security check, including lock function, concealment effectiveness, and ease of emergency access by authorized users.
- After 2 weeks: Review environmental factors seasonal changes bring and adjust ventilation or humidity control. Monitor for any signs of moisture or heat damage to the safe.
Frequently Asked Questions
What Are the Benefits of Placing a Gun Safe in a Closet?
Placing a gun safe in a closet keeps your firearms out of sight and secure, reducing theft risk. Choose a closet with stable temperature and low humidity to protect your guns from damage.
Can I Put a Gun Safe in a Basement?
Yes, basements can work if they are dry and climate-controlled. Avoid damp areas to prevent rust and mold on firearms inside the safe.
Is It Safe to Store a Gun Safe Near a Bedroom Window?
No, near windows is not ideal due to visibility and break-in risks. It’s better to keep the safe hidden away from easily seen or accessible spots.
How Heavy Are Typical Gun Safes, and How Does That Affect Placement?
Gun safes usually weigh between 100 to 500 pounds depending on size, affecting floor support needs. Ensure your floor can support this weight without damage, especially on upper floors.
Should a Gun Safe Be Anchored to the Floor or Wall?
Yes, anchoring secures the safe against theft or tipping. Use strong bolts into studs or concrete for the best stability.
Can Heat from a Nearby Furnace Affect My Gun Safe?
Heat can damage both the safe’s locking mechanism and firearms. Keep it away from heat sources to maintain safe integrity and gun condition.
Before You Go
Choosing the right spot for your gun safe takes thoughtful balance between security, quick access, and protecting your investment from environmental threats. Begin by evaluating your home’s layout and habits, then narrow down locations that fit these needs. Taking deliberate, measured steps now will help ensure your firearms stay secure yet ready when needed. Your next move should be measuring floor strength and identifying dry, hidden spots to start creating your plan.