How to Sight in a Rifle Scope: Simple Steps and Expert Tips for Precise Zeroing
How to sight in a rifle scope means adjusting it so your bullet hits exactly where your crosshairs point at a set distance, usually 100 yards. Start by mounting and leveling your scope, then bore sight to roughly line up your reticle with the barrel’s point of aim. This initial alignment gets your shots close enough to make precise adjustments at the range.
Key Takeaways
- Ensure at least 3-4 inches of eye relief to avoid scope contact during recoil.
- Bore sight your rifle by looking down the barrel and centering the scope reticle on a distant target.
- Confirm initial sight-in at 25 yards before moving to your final zero distance.
- Use your scope’s windage turret (usually on the right) to correct left/right bullet impact.
- Adjust elevation turret to raise or lower the point of impact based on shot groupings.
- At 100 yards, each click on a 0.1 Mil scope moves the impact 0.36 inches (about 3.6 inches per 10 clicks).
What Does It Mean to Sight in a Rifle Scope?
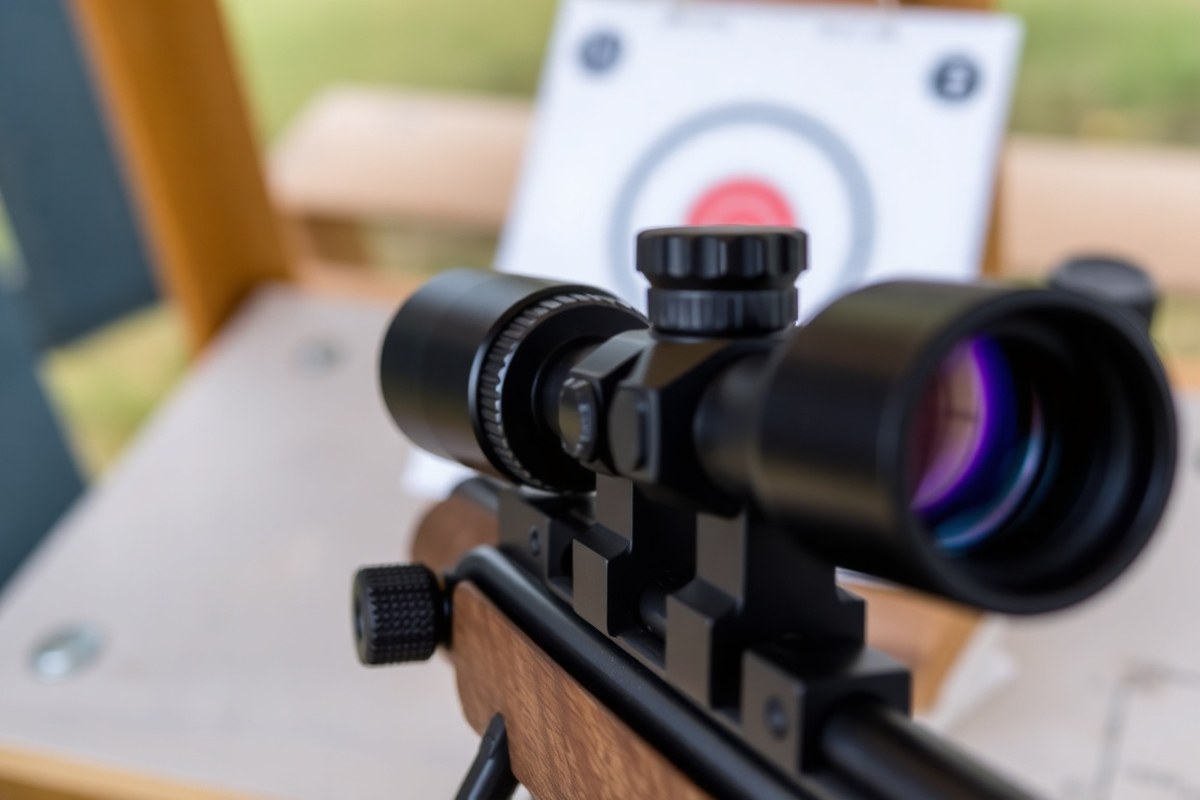
Sighting in a rifle scope involves adjusting the scope so the bullet hits exactly where the crosshairs point at a set distance. This adjustment process, known as zeroing, makes sure the bullet’s impact matches your aim. Matching these points allows you to shoot accurately at your selected range.
A rifle scope zero is the specific distance at which the point of aim and point of impact coincide. For most rifles, this distance is set around 100 yards, but other distances can be chosen depending on your hunting or shooting needs. The zero distance represents the range where the bullet crosses your line of sight, so shots at that range will hit exactly where you aim through the scope.
Proper zeroing is important because the bullet’s trajectory changes with distance due to gravity and air resistance. Without correctly sighting in the scope, your bullets might hit high, low, or off to the side of your target, making shots less accurate or forcing compensation by guessing. A good zero puts you on target at your preferred hunting or shooting distance, saving you time and ammunition in the field or at the range.
Start sighting in your rifle scope by securely mounting and leveling it. Perform a bore sight to roughly line up the scope with the barrel, aiming for hits on paper at about 25 yards to save ammunition. Then, shoot groups from a solid support at your zero distance, often 100 yards, and fine-tune the windage and elevation controls to align the impact with the crosshairs.
Each click on your scope’s turrets corresponds to a small movement of the reticle. For example, if your scope adjusts in 1/4 Minute of Angle (MOA) per click, then four clicks move your point of impact by roughly one inch at 100 yards. Keep shooting small groups and making fine adjustments until your bullet impacts cluster tightly around your crosshair.
Good results look like consistent shot groups where every bullet hits near or exactly where the scope’s crosshair was aimed at the zero distance. Poor results may include scattered shot placement or shots consistently off-center, which often points to incorrect adjustments, improper mounting, or unsteady position. Maintaining the same ammunition throughout the process also helps achieve a reliable zero since different ammo can shoot differently.
Sighting in does not require high-end equipment but does need patience, a safe shooting range, and proper technique. The entire process can take an hour or more. Skipping steps like bore sighting or rushing adjustments can waste ammo and cause frustration. Getting the zero right means your scope is dialed for accuracy when you need it most.
Choosing the Best Distance to Zero Your Rifle
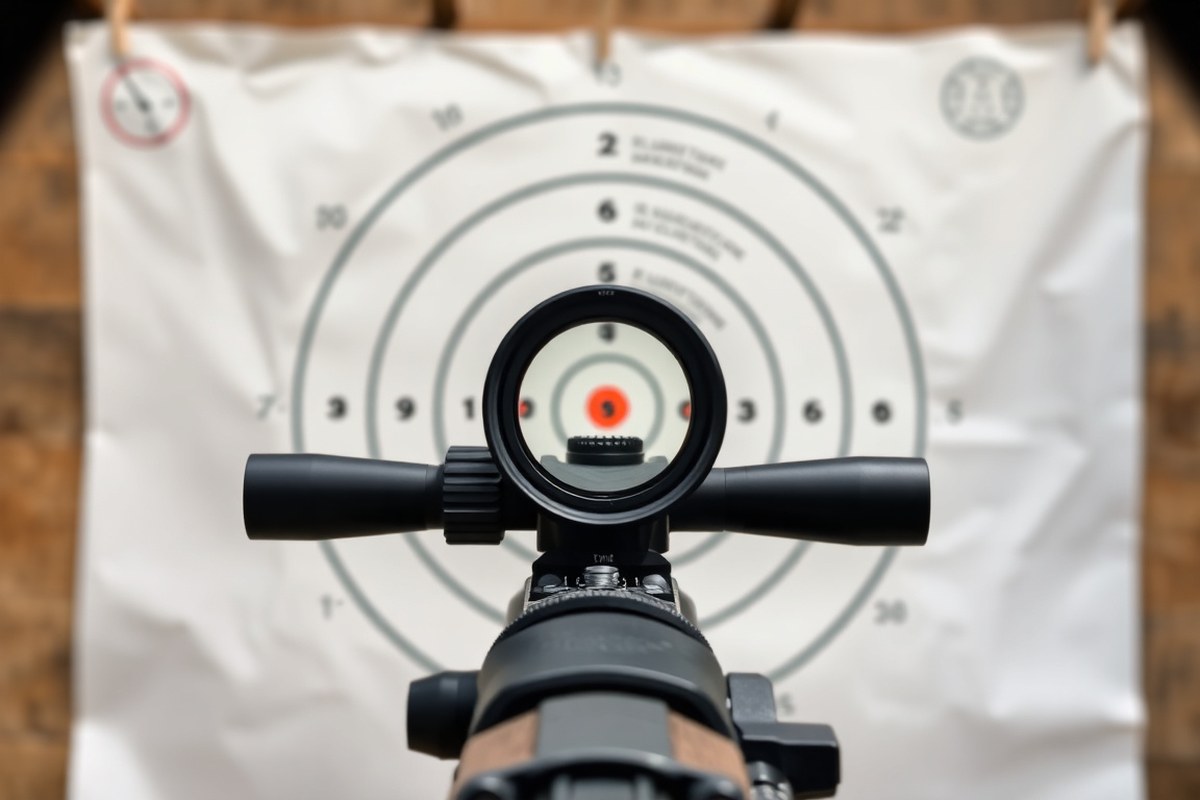
Zeroing your rifle depends on the shooting distances you expect and the type of rifle you use. For most hunters and general shooters, a 100-yard zero is standard. This distance balances ease of sighting with realistic hunting ranges. Starting your zero process at 25 yards is common because it lets you confirm your rifle’s aim without wasting ammo or missing the paper at longer ranges. Once you’re hitting close at 25 yards, moving to 100 yards fine-tunes your zero for practical use.
Zeroing at 25 yards helps see if your scope is roughly aligned. It reduces wasted rounds because you can adjust without the bullet missing the target at longer distances. However, zeroing only at 25 yards won’t perfectly translate to zero at 100 yards because the bullet’s path arches and your scope’s line of sight is above the barrel.
Shooters who use AR-style rifles or flat-shooting carbines often choose a 50/200 yard zero. This technique relies on the bullet crossing your sight line twice: near 50 yards and again around 200 yards. It keeps your shot within a couple of inches from where you aim over typical distances used for defense or hunting, reducing the need for frequent sight adjustments.
| Target Distance | Approximate Movement per Click (1/4 MOA) | Clicks for About 1 Inch |
|---|---|---|
| 25 yards | 0.06 inch | 16 clicks |
| 50 yards | 0.13 inch | 8 clicks |
| 100 yards | 0.26 inch | About 4 clicks |
| 200 yards | 0.52 inch | About 2 clicks |
Once you’ve zeroed your rifle at 25 yards, extend the distance to your preferred zero point, often 100 yards for hunting or precise shooting. Fire three shots using a stable rest to check how your group holds and where it lands. Adjust elevation and windage using the turret clicks from the earlier chart to bring your group to the center. For example, if your group is 2 inches low and 1 inch left at 100 yards, increase elevation by 8 clicks (2 inches divided by 0.26 inches per click) and move windage 4 clicks right.
Choosing a 50-yard zero may save time and ammo for certain rifles by covering close and medium distances effectively. This zero is handy for shooters engaging targets from around 50 to 200 yards without dialing elevation changes. However, if you expect to shoot beyond 200 yards or want maximum accuracy at one longer distance, zeroing at 100 yards or farther makes more sense.
Start your zero at 25 yards to avoid wasting rounds if your initial shots don’t hit the paper at long range, then move out to your primary zero distance to fine-tune.
Preparing Your Rifle and Scope for Sighting In
Preparing your rifle and scope carefully before sighting in is key to achieving an accurate zero. This involves correctly mounting and leveling the scope, checking the eye relief to protect against recoil, and securing the rifle on a stable rest. Taking these steps ensures consistent alignment and safer shooting conditions.
Mounting and Leveling the Scope Correctly
Start by reading both your rifle and scope manuals to confirm compatibility and recommended mounting hardware. Use quality scope rings or a dedicated mount designed for your rifle model to ensure a secure fit. Improper mounting can cause the scope to shift during recoil, ruining accuracy.
Check that the rifle is placed level in a gun vise or solid rest. A perfectly level rifle is essential before leveling the scope to avoid “cant,” which twists the reticle and misaligns the point of impact. Use a bubble level place on the rifle’s receiver or flat surface to establish horizontal alignment. Follow these steps to mount and level your scope precisely:
- Attach the mounting base securely to the rifle using the proper torque values specified in the firearm manual.
- Install scope rings loosely onto the base, allowing adjustment of position and orientation.
- Place the scope in the rings and slide it forward or backward to achieve initial eye relief.
- Level the scope’s reticle by rotating the scope inside the rings while watching through the eyepiece using a known vertical or horizontal reference.
- Confirm that the rifle itself is level using a bubble level on the receiver.
- Tighten the scope rings gradually and evenly to the recommended torque, checking the reticle stays level throughout.
- Double-check there is no contact between the scope and barrel or action that could shift the scope under recoil.
Checking and Adjusting Eye Relief
Eye relief refers to how far your eye must be from the back lens of your scope during shooting. Keeping enough space avoids the scope striking your face or brow when the rifle recoils, which is critical for rifles with strong kickback. A safe eye relief usually falls between 3 and 4 inches.
Mount the rifle against your shoulder and look through the scope to check the field of view. Adjust the scope forward or backward in the rings to get a full sight picture without dark rings or a tunnel view. The scope image should be clear and fully visible without moving your head excessively.
Failing to set proper eye relief often results in scope eye injuries or blurred vision. Take your time to find a comfortable, repeatable head position where you maintain the entire sight picture while keeping that 3-4 inch space.
Securing the Rifle on a Stable Rest
Stability during sighting is critical. Any movement reduces your ability to consistently place shots on target. Use a stable bench rest, sandbags, or a professional rifle rest to hold the firearm steady.
Set the rifle in the rest so it does not rock or shift. Check the rifle’s position and balance before firing by gently applying pressure in different directions. The rest should also hold the rifle level, allowing you to keep the scope aligned without constant adjustment. Improper rest setups that allow movement or canting of the rifle will cause inconsistent shot placement, increasing frustration and prolonging the zeroing process.
How to Bore Sight Your Rifle for Initial Alignment
Bore sighting is the process of roughly aligning your rifle scope to the barrel’s bore so your first shots land on or near the target. This initial step helps avoid missed shots and wasted ammunition during zeroing. You can bore sight by looking down the barrel (manual bore sighting) or by using a laser bore sighter device for faster alignment.
Manual Bore Sighting by Removing the Bolt
For bolt-action rifles, you can safely bore sight by removing the bolt and looking directly down the barrel. This method allows you to visually align the bore with a clearly visible target placed 25 to 100 yards away. A stable shooting rest or sandbags is essential to keep the rifle steady during this process. Take these steps to manually bore sight your rifle:
- Ensure the rifle is unloaded by removing the magazine and checking the chamber.
- Remove the bolt carefully according to the rifle’s instructions.
- Set the rifle firmly on a rest or sandbags aimed at a large, light-colored target at about 25 to 100 yards.
- Look through the bore from the breech end and center the target image inside the barrel bore.
- Without moving the rifle, look through the scope and adjust the windage and elevation turrets to center the reticle on the same target point.
- Reinstall the bolt and confirm the scope adjustments are still roughly aligned with the bore.
This manual bore sighting does not provide perfect zero but is a cost-free way to get your first shots “on paper.” Be sure not to move the rifle between bore sighting and scope adjustment to keep alignment accurate.
Using a Laser Bore Sighter Safely
A laser bore sighter is a device that fits into the rifle’s chamber or bore and projects a laser beam onto the target. It simplifies bore sighting by allowing you to quickly align the scope reticle with the laser dot on the target. Laser bore sighters can save time and ammo, especially if you want to avoid initial rounds landing off target. To use a laser bore sighter correctly:
- Unload the rifle according to safety protocols.
- Insert the laser bore sighter into the chamber or bore, depending on the model.
- Secure the rifle on a steady rest while pointing at a large target 25 to 100 yards away.
- Turn on the laser and adjust the scope turrets to center the crosshairs on the laser dot projected on the target.
- Remove the sighter and confirm the adjustments hold before firing live rounds.
Laser bore sighters range in price from about $20 to over $100. While some shooters find them convenient, others prefer manual bore sighting due to doubts about how accurately laser alignment matches the rifle’s actual ballistics and barrel harmonics.
Confirming Initial Impact on Target
Bore sighting only gives a rough alignment to place your first shots on paper. After bore sighting, fire a three-shot group at your chosen zeroing distance, commonly 100 yards. Use a large target so your shots land somewhere visible even if off-center.
Inspect the shot group and measure how far it is from the target’s center. Adjust your scope’s windage and elevation turrets based on the group’s direction and try again. Repeat this sight-in adjustment until the group is reasonably centered, ensuring your rifle is ready for precise zeroing at longer range.
Adjusting Your Scope’s Windage and Elevation Turrets
Your rifle scope’s windage and elevation turrets let you fine-tune where your bullet hits by shifting the crosshairs horizontally and vertically. The windage turret, usually on the right side of the scope, adjusts left or right, while the elevation turret, typically on top, adjusts up or down. Turning these turrets moves the reticle in small increments called clicks, each representing a precise angular adjustment. Knowing how to convert these clicks into inches or centimeters on your target is key to zeroing your rifle accurately.
Rifle scopes typically feature adjustments measured in either MOA (Minute of Angle) or MRAD (Milliradian). Each MOA click shifts the bullet’s impact by about 1.047 inches at 100 yards. Many American hunting scopes use 1/4 MOA increments, so four clicks equal a one-inch change in point of impact. MRAD clicks adjust the reticle by 0.1 mil per click, which equals 1 cm at 100 meters or roughly 0.36 inches at 100 yards. A ten-click MRAD adjustment moves the shot 3.6 inches at 100 yards, influencing how many clicks you need for precise zeroing.
| Adjustment Type | Click Value | Distance Reference | Impact Shift per Click |
|---|---|---|---|
| MOA | 1/4 MOA per click | 100 yards | ~0.26 inch (4 clicks = ~1 inch) |
| MRAD | 0.1 mil per click | 100 yards | ~0.36 inch (10 clicks = 3.6 inches) |
| MOA | 1 click | 100 yards | ~1 inch |
Start by firing a controlled group from a stable position, then measure the group’s center relative to your aiming point. Suppose your shots are one inch to the right at 100 yards on a 1/4 MOA scope. Since each click moves impact about 0.25 inches, you need to adjust your windage turret four clicks toward the “L” direction to shift the point of impact left. The elevation adjustment works similarly: shots low require turning the turret in the “UP” direction to raise the point of impact. Keep in mind you may need several small adjustments, as moving one turret can slightly affect others.
Precision relies on understanding your scope’s turret markings. Most turrets have arrows marked “UP,” “DOWN,” “L,” and “R” to indicate which way to turn for the desired point of impact movement. For example, if your bullet hits low and left, turn the elevation turret in the “UP” direction and the windage turret in the “R” direction by the number of clicks corresponding to the measured distance from your aim point.
Be careful not to over-adjust; make small changes, then shoot a new group to confirm your zero before dialing further.
Step-by-Step Process to Zero Your Rifle Scope Accurately
Sighting in your rifle scope involves firing multiple shots at a set distance, then adjusting your scope according to where those shots group. Start by shooting at 25 yards to get the shots “on paper” and roughly aligned. After that, move to 100 yards for fine tuning, then confirm your zero with a final group shot. Typically, fire groups of three to five shots each and adjust your scope in between groups based on the average point of impact.
Firing Initial Shots at 25 Yards for Rough Zero
Beginning at 25 yards helps you find your bullet’s initial impact point without wasting ammunition at longer distances. Fire groups of three to five shots, holding the rifle steady and squeezing the trigger smoothly to avoid jerking. Without moving the rifle, use your scope’s windage and elevation turrets to shift the crosshairs directly over the center of your group. Remember, adjustments at 25 yards are four times as large as those needed at 100 yards, so be conservative with your turret turns.
Avoid adjusting after a single shot; wait for a group to give an accurate idea of your average shot placement. Consistency in your shooting form is essential here because erratic holds will produce scattered groups, making accurate zeroing impossible.
Moving to 100 Yards and Making Fine Adjustments
Once your shots group near the bullseye at 25 yards, move to 100 yards for precise zeroing. At this distance, fire multiple groups of three to five shots, carefully noting each group’s average placement on the target. Make smaller adjustments using your scope’s turrets, mindful that 1 click often equals 1/4 MOA or 1/10 mrad, shifting the point of impact roughly 1/4 inch at 100 yards.
Continue to use the “shoot-adjust-shoot” approach: fire a group, calculate the group center, adjust accordingly, and repeat until your groups consistently hit the desired zero. Take breaks between groups to allow the barrel to cool, avoiding heat-induced shot shifts.
Confirming and Locking in Your Final Zero
After dialing in your scope, fire a final confirmation group of three to five shots at 100 yards without adjusting your turrets. This confirms both your zero and your consistent shooting technique. Your sight-in is complete when the group matches your zero point and patterns tightly. Repeat the fine adjustment process in smaller increments when it does not match.
Once satisfied, some scopes allow you to lock the adjustment turrets or fit turret caps to prevent accidental changes in the field. Marking your zero setting for future reference is also helpful, especially if you change ammunition or environmental conditions.
- Fire three to five shots at 25 yards using consistent shooting form.
- Without moving the rifle, adjust windage and elevation turrets to center the crosshair on the shot group.
- Repeat firing groups and adjusting until the group is near the bullseye at 25 yards.
- Move the target to 100 yards and fire another group of three to five shots.
- Adjust the scope turrets in smaller increments to bring the group onto the bullseye using the shoot-adjust-shoot method.
- Allow the rifle to cool between groups to maintain consistency.
- Fire a final confirmation group at 100 yards to verify your zero.
- Lock the turret settings if your scope has that feature; mark your zero for future reference.
Common Mistakes When Sighting in and How to Fix Them
One common mistake during sighting in is reversing the turret adjustments. Instead of moving your group closer to the bullseye, the shots go the opposite way. This usually happens when you misunderstand which direction the turret turns to correct for bullet impact. To fix this, check your scope manual to confirm which way “up” and “right” adjustments go. Adjust the turrets in small increments, say 1/4 MOA (minute of angle) clicks, and observe how your shot group moves on the target. Mark or reset your turret dials so “0” aligns with your zero point for easier readjustment in the future.
Poor shooting technique or inconsistent hold can also cause wandering groups that make zeroing difficult. Slight shifts in your rifle position between shots will affect your grouping more than the scope settings do. Use a solid benchrest or sandbags to stabilize the rifle. Ensure consistent cheek weld and trigger control. Practice dry firing to maintain a steady aim before live shots. Keeping the rifle and your body steady helps the group tighten and makes turret adjustments meaningful.
Slipping or loose turrets are another issue that spoils your zero. This problem could cause the scope to lose tracking or reset unexpectedly. Check that your scope mounts and rings are securely tightened but avoid overtightening, which can damage the scope tube. Some higher-end scopes offer locking turrets; use them if available. Turret slippage requires a gunsmith to check or fix your scope to keep it reliable.
- Confirm turret direction with your scope’s instructions to avoid reversed adjustments.
- Use stable shooting supports like sandbags or a benchrest to reduce movement between shots.
- Check that scope rings and mounts are properly torqued and secure.
- Maintain consistent eye relief by positioning your head at the correct distance to avoid scope shadow or blur.
- Let the rifle cool between groups to prevent heat affecting accuracy.
- Record your zero distance, ammunition type, group size, turret settings, and environmental factors.
- Seek professional help if you cannot achieve a consistent group or if the scope repeatedly loses zero.
Poor eye relief is often overlooked but critical. Failing to hold your head steady at the proper distance, typically around 3 to 4 inches from the eyepiece on many rifle scopes, causes a blurred or shaded sight picture and can falsely suggest the scope isn’t zeroed. Practice mounting your head consistently and check the eye relief while dry firing. The right distance prevents scope bite and ensures a clear reticle image.
Issues where the scope won’t zero despite correct adjustments could stem from an unsteady shooting position, inconsistent ammunition, or even mounting problems. Double-check that your mounts have not shifted or loosened after shooting. Use high-quality, consistent ammo and verify your hold is constant. When zero remains hard to achieve, a bore sight tool can confirm barrel alignment, or you might need a gunsmith to check for mechanical issues with your scope or rifle.
Verifying Your Zero and When to Seek Professional Help
To verify your rifle scope zero is stable and repeatable, start by firing several groups of three to five shots from the same rest or bipod at your zeroing distance. Your groups should be as tight as possible. A consistent group size between 1 to 2 inches at 100 yards generally indicates good stability for hunting or target shooting. Your shots start scattering wider than this, check your shooting position and make sure the rifle is firmly supported. Avoid any flinching or jerking during the trigger pull, as that affects grouping and can mask scope issues.
After firing your first group, without making any scope adjustments, reposition the rifle in your rest and shoot a second and third group. Your point of impact should stay within the same area, accounting for a small 1/2-inch or less variation. This consistency confirms a true zero, meaning your rifle and scope are aligned and the scope settings reflect where the bullet actually hits. Groups shifting significantly despite a controlled position might mean your scope is losing zero or your mounts are loose.
Once you verify that you have a solid zero, double-check by returning to the zeroing target after a break or on another day. Environmental factors like temperature changes can slightly alter your point of impact, so seeing consistent results over time shows your zero is repeatable. Keep track of your group sizes and the adjustments you make. Documenting your zero data helps maintain accuracy for future shooting sessions and hunting trips.
You should consider seeking professional help if your groups remain large despite stable shooting, or if your point of impact jumps erratically after seemingly minor adjustments. Problems like mounting errors, defective turrets, or issues with the scope’s internal mechanisms require a trained gunsmith or scope technician. A qualified professional can inspect scope rings, mounts, and the scope itself, often resolving problems that are hard to diagnose on the range. On average, gunsmith consultations cost around $50 to $100, depending on location and complexity.
Other indicators for professional help include visible scope damage, difficulty turning windage or elevation turrets, and inconsistent return to zero after taking scopes off and putting them back on. Consulting a range officer with experience can also guide you through troubleshooting before committing to repairs. Remember to regularly check all mounting screws with proper torque specifications and avoid overtightening, as this can strip threads or cause scope distortion.
Keep the rifle perfectly steady and use the same rest each time you verify your zero; inconsistent support will mask whether your scope is truly on target.
Step-by-Step Action Plan to Sight in Your Rifle Scope
Follow this simple plan to get your rifle scope zeroed quickly and confidently. Check your results at each stage to ensure precision.
- Before You Begin: Set up a stable shooting rest and place your target at the chosen zero distance, typically 100 yards. Confirm your rifle is unloaded and safe to handle.
- Initial Bore Sighting: Remove the bolt and align your sight picture through the bore with the target. Adjust your scope turrets until the reticle matches the target center. This should place your first shots on paper.
- Initial Shots at 25 Yards: Shoot three rounds aiming dead center on the target. Check where the group hits compared to the bullseye and tweak the windage and elevation dials to bring the shots nearer to the center.
- Move to Full Zero Distance (e.g., 100 Yards): Fire another three-shot group and fine-tune scope adjustments. When the group’s center matches your aiming point, you’re zeroed.
- Confirm Zero: Fire a final group and check consistency. Verify no point of impact shift occurs from shot to shot. Your rifle scope is now sighted in for accurate shooting.
- After Shooting Session: Clean your rifle and turrets lightly. Check scope mounts for tightness to maintain zero over time.
Frequently Asked Questions
What Is the Difference Between Sighting in a Rifle Scope and Zeroing It?
Sighting in is the initial process of aligning your scope to your rifle, while zeroing fine-tunes the scope so your point of aim matches the bullet’s point of impact at a chosen distance, usually 100 yards.
How Do I Know If My Rifle Scope Is Mounted at the Correct Eye Relief?
Proper eye relief means positioning your eye about 3 to 4 inches away from the back lens of the scope while comfortably holding the rifle. This distance helps avoid scope bite and gives you a complete view through the scope.
What If My Shots Group Low or High After Zeroing at the Range?
Shots grouping too high or low means you need to adjust your elevation turret; small clicks change point of impact and should be made at your zero distance for accuracy.
Why Should I Confirm My Bore Sight at 25 Yards Before Moving to 100 Yards?
Confirming bore sight at 25 yards lets you safely check that your shots are on paper before fine-tuning at longer distances, saving ammo and time during zeroing.
Can I Sight in My Rifle Scope at Home Without Going to a Shooting Range?
Bore sighting at home with a laser or by visually aligning the bore can get you close, but final zero requires live fire at a safe outdoor range to accurately adjust.
How Often Should I Re-Zero My Rifle Scope?
Re-zero your scope after any scope adjustments, changes in ammunition, or if the rifle has experienced impact or rough handling to maintain accuracy.
Final Thoughts
Sighting in your rifle scope takes patience and practice, but following these steps helps you achieve reliable accuracy. Prioritize safety and stability throughout the process, and verify your zero before any critical shooting. Start with simple bore sighting and steadily work to fine adjustments. Your next step is to head to the range equipped with a target, a stable rest, and your rifle ready to zero in precisely.