How to Change Sights on a Pistol: A Complete Step-by-Step Guide
Learning how to change sights on a pistol improves your aiming and shooting accuracy quickly. Start by safely removing the old sights with the right tools, then properly install new sights aligned to your shooting preferences. Accurate alignment and sight height adjustment ensure your shots hit where intended.
Key Takeaways
- Use a sturdy vise with at least 4-inch jaws to secure your pistol during sight removal and installation.
- Identify your sight type and dovetail angle, 60 degrees is most common for proper fitting and removal.
- Use a sight pusher tool or carefully tap out sights with a punch and drift them gradually for damage-free removal.
- Inspect night sights regularly; replace every 10 to 15 years due to tritium decay to maintain visibility.
- Use dial or electronic calipers to measure sight position precisely before installing new sights.
- Keep spare screws and use the correct driver when removing or installing screw-mounted sights to avoid loss or damage.
How to Safely Remove Old Sights from Your Pistol

Carefully removing old sights from your handgun requires the right tools and steps to avoid damaging the slide or sights. Start by making sure the gun is fully unloaded, remove the magazine, and lock the slide open so you can see the chamber and magazine well clearly. Use a trigger clamp or gun vise to hold the handgun steady during the removal. Wear safety glasses to protect your eyes from any metal fragments. Common tools for this task include brass or steel punches, a small hammer, and screwdrivers that match the size of any set screws on adjustable sights.
Front and rear sights often differ in attachment methods. Front sights usually tap directly into a dovetail slot and may require gentle drifting from left to right. Rear sights might be secured with set screws or pins, especially if they are adjustable. Applying gradual, controlled taps with a brass drift punch avoids damaging the slide’s dovetail cuts. Avoid excessive force or hammer strikes, as this can deform the slide or damage sight interfaces. Encountering resistance during sight removal calls for checking thoroughly for concealed screws or pins before applying more force. Carefully organize removed screws or pins to avoid losing small parts.
- Confirm pistol is unloaded: Remove the magazine, lock the slide back, and visually check the chamber and magazine well.
- Secure the pistol: Place the unloaded pistol in a trigger clamp or gun vice on a stable surface and put on eye protection.
- Inspect the sights: Look for set screws on the rear sight or drift pins; identify the appropriate tools such as punches or screwdrivers.
- Remove set screws if present: Use the correct screwdriver to carefully unscrew any retaining screws and keep them safe for reuse.
- Drift the sight from the dovetail: Use a brass drift punch positioned on the side of the sight and tap gently with a hammer; remove the punch between strikes to prevent damage and check progress.
- Work cautiously for front sights: Since front sights typically press-fit, tap out sideways carefully without bending or damaging the slide cut.
- Clean and inspect the dovetail: After removal, clean any debris or old lubricant from the dovetail slot to prepare for the new sight.
- Double-check all parts: Verify all screws, pins, and the slide are undamaged before proceeding.
Choosing the Right Replacement Pistol Sights
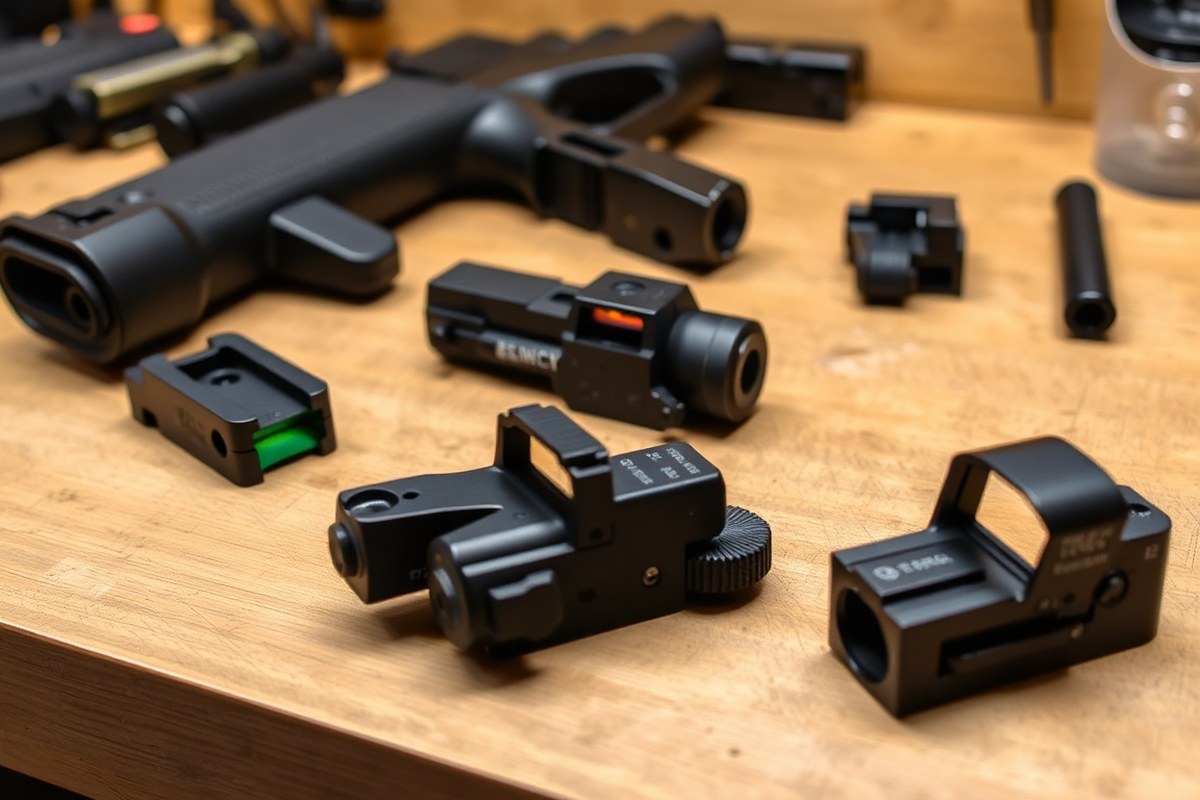
Choosing the right replacement sights for your pistol means considering sight type, material, compatibility with the gun and holster, and your shooting needs. The right sights improve accuracy, durability, and your ability to maintain consistent aim under different conditions.
Fixed vs. Adjustable Sights
Fixed sights are simpler and usually more durable because they have no moving parts. These sights often require changing the entire sight if you need to adjust the point of impact, usually by swapping for a different height or style. Adjustable sights allow you to tweak windage and elevation directly, making them ideal for shooters who want precise control or handload their ammunition for specific performance. However, adjustable sights are usually more expensive and can be less strong, which might not suit everyday carry or rugged defensive use.
Choosing between fixed or adjustable depends on your use. Competition shooters benefit from adjustable sights due to fine-tuning ability. For carry or defense pistols, fixed sights often offer better reliability and fewer chances of damage. Keep in mind that changing sight height even on fixed sights can shift your bullet impacts significantly, so selecting the right sight height upfront can reduce the need for adjustment later.
Night Sights and Their Lifespan
Night sights use tritium inserts to glow in low light, helping you maintain a sight picture in the dark. Their glow intensity fades over time because tritium has a half-life, commonly requiring replacement every 10 to 15 years. Regular inspection every six months ensures they are free from chips and still luminous enough for practical use.
Night sights add value to a defensive handgun but check whether your state allows phosphorus or tritium sights. Installation costs tend to be higher, and you may have to send your gun to a professional if you want precise alignment with self-illuminated elements. Some shooters use night sights as a backup to fiber optic or bright daylight sights.
Materials: Steel, Polymer, Tritium
Sight material affects durability, visibility, and maintenance. Steel sights are tough and wear-resistant, making them standard in many factory and aftermarket options. Polymer sights are lighter and less likely to cause holster wear, but they can chip or wear down faster with hard use.
Tritium night sights combine steel or polymer bases with tritium vials for illumination. The tritium component requires more care because impact or rough handling may break the vial, reducing lifespan and performance. Cost varies from about $40 for basic polymer fixed sights to over $200 for tritium night sights.
| Material | Durability | Visibility | Typical Cost Range | Maintenance |
|---|---|---|---|---|
| Steel | High | Good in daylight | $40 – $150 | Low |
| Polymer | Moderate | Good in daylight | $20 – $80 | Moderate (can chip) |
| Tritium Night Sights (Steel or Polymer base) | High (steel base preferred) | Glows in low light | $100 – $250 | Replace every 10-15 years; inspect often |
Material choice should align with your shooting conditions and how often you plan to carry or train. Polymer suits casual use or budget upgrades, while steel and tritium are preferred for serious carry or competition.
Compatibility with Handgun Models
Not all sights fit every handgun. Before buying, verify the replacement sights match your pistol’s make, model, and year. Aftermarket options like those from Angry Bear Arms often specify compatible handgun models for easier selection. Compatibility also extends to sight width and height, which impacts not just fit but point of impact.
Changing sight height or style can affect how your pistol cycles in different holsters or if your sight picture changes drastically, so check this before installation. Use manufacturer guides or consult forums for your pistol model to confirm compatibility. Keep receipts and documentation in case warranty claims arise due to fitment issues.
Holster and Handling Considerations
Replacement sight changes may affect holster fit and draw smoothness. Wider or taller sights, especially adjustable or tritium night sights, might not fit in tight or custom holsters designed for factory sights. Measuring both sight height and overall width is critical before purchase.
Try fitting your handgun with new sights into your holster before final installation if possible, or select sights specifically marketed as holster-friendly. Some shooters choose lower-profile sights to maintain concealment and draw speed. Remember, a sight upgrade that improves your accuracy but compromises your holster fit might not meet your practical shooting needs.
Always measure your current sights and holster space before ordering replacements to avoid compatibility issues and pistol handling problems.
Essential Tools and Preparation for Sight Replacement
To change the sights on your pistol, gather the right tools and set up a safe, organized workspace. Securing your pistol properly and using the correct equipment based on your slide material will prevent damage. Wearing eye protection and understanding how to apply thread locker will ensure a reliable sight installation.
Basic Toolkit for Sight Changes
A basic set of tools covers most sight replacements but varies by sight type. For dovetail sights, use a sight pusher and brass or nylon punches to prevent marring the slide. For screw-mounted sights, screwdrivers with correct tips and front sight tools are needed to avoid stripping screws or damaging sight posts.
Keep a small hammer and a punch set handy for stubborn pin or taper pins common in some dovetail installations. Organizing all tools on a clean surface before starting helps avoid delays or frustration during the job.
- Sight pusher tool designed for precise sight movement
- Brass or nylon punches to protect finish on slide and sights
- Small gunsmith hammer with a soft face
- Precision screwdrivers with correct tip sizes
- Front sight tool for tightening front sight screws
- Cleaning cloths and light lubricant for maintenance
- Magnifying glass or headlamp for detailed work
Choosing tools that match your pistol’s sight type reduces risk of damage and improves fit accuracy. Avoid hitting sights with steel punches or using improper screwdrivers that can slip or round screws.
Using a Gun Vice or Trigger Clamp
Properly securing your pistol is essential to prevent movement and injury during sight removal or installation. Use a gun vice or a trigger clamp designed for firearms. These devices stabilize the slide or frame without applying pressure to sensitive components like the barrel.
Place the pistol unloaded and verify the chamber and magazine are empty before clamping. Position the clamp or vice on a padded surface or with non-marring jaws to protect the finish. The clamp should hold the slide firmly but gently, avoiding deforming polymer frames or metal slides.
Test stability by gently trying to move the pistol. A secure hold allows precise use of punches or the sight pusher tool without slipping or shifting, important for installing sights to factory specifications.
Protective Gear and Safety First
Eye protection is mandatory when changing sights. Small punches, pins, or springs can fly loose during removal or installation, causing eye injury. Choose safety glasses rated for ballistic impact and wear them throughout the process.
Wearing gloves is optional, but thin nitrile gloves can protect your hands from oils and sharp edges without affecting dexterity. Keep your workspace well lit and free of distractions to maintain focus.
Always confirm your pistol is completely unloaded by checking the chamber and magazine by both sight and touch before beginning. Relying solely on your memory or assumption increases the risk of accidents.
Tools for Polymer Versus Metal Slides
Polymer slides require gentler handling than metal slides to avoid scratching or deforming the surface. Use nylon or brass punches with polymer slides instead of steel to minimise marks during pin and sight removal. Metal slides can handle steel punches but using brass is safer to protect the finish.
When using a sight pusher on polymer slides, adjust the tool’s tension and pressure settings carefully. Excessive force can crack or warp polymer, while metal slides tolerate stronger pressure for stubborn sights.
Some front sight tools designed for metal slides may not fit polymer profiles correctly. Verify compatibility before starting to prevent damaging the sight or slide during installation.
Applying Thread Lockers Correctly
Thread locker secures screws on sight installations to prevent loosening from recoil and vibration. Use a medium strength thread locker such as Loctite Blue 242. It holds well but still allows future disassembly without damaging screws or threads.
Apply a drop of thread locker to the screw threads before inserting. Avoid putting it on the sight post or contact surfaces to prevent gumming them up. After installation, let the thread locker cure at room temperature for about 15 to 30 minutes before shooting.
Using too strong a thread locker like Loctite Red 271 can cause screws to be very difficult to remove and requires heat or special tools. If replacing sights again is likely, medium strength thread locker balances security and serviceability.
Step-by-Step Installation of New Pistol Sights
Changing pistol sights involves fitting new sights into dovetail slots and securely mounting front sights, ensuring correct alignment for reliable shooting. The rear sight often requires drifting or using a sight pusher tool for windage adjustments, while front sights are usually secured with screws and thread locker. Proper alignment during installation and the use of set screws or pins help maintain sight stability.
Preparing the New Sights for Installation
Start by inspecting the new sights to confirm they match your pistol’s dovetail dimensions. Many sights come slightly oversize and may need fitting. Using a fine file or stone, carefully remove excess material from the base of the rear sight to achieve a snug fit in the dovetail slot. Avoid over-filing to prevent a loose fit, which can cause shifting during firing.
Examine the securing method for the rear sight. Check that a setscrew is included and fits properly when your sight uses one. For front sights, ensure screws are the correct length and thread type for your pistol. Replace any old screws or pins rather than reusing them to avoid loosening under recoil.
Installing Rear Sights with a Sight Pusher
The rear sight is typically installed by drifting it into the dovetail slot or pushing it with a sight pusher tool designed for accuracy and safety. Fixed rear sights require lateral adjustment for windage, which is done by moving the sight slightly left or right after installation. A sight pusher provides controlled pressure and prevents damage to the pistol frame.
- Place the rear sight into the dovetail slot, aligning its base to the slot’s bottom.
- Use the sight pusher to apply slow, steady pressure to move the sight into place without forcing it.
- Drift the sight left or right to roughly center it, considering your expected point of impact.
- Secure any setscrew provided to lock the rear sight after final positioning.
When the sight doesn’t move smoothly, gently heating the area with a propane torch can help loosen tight fits. Avoid overheating and damaging any coatings or polymers.
Mounting Front Sights Securely
Front sights are generally secured with screws, sometimes supplemented by pins or adhesives. Before mounting, slightly loosen any screws on the existing front sight to make removal easier. When fitting the new sight, test its fit for proper seating and alignment without tightening the screws.
Use a small amount of blue or medium-strength thread locker on the front sight screws before final tightening. This prevents screws from backing out during recoil. Avoid over-tightening, which can strip the screw threads or damage the sight base. For fixed front sights, ensure the sight sits flush and does not rock or move once secured.
Confirming Alignment and Fit
Initial sight alignment involves visually checking that the front sight is centered within the rear sight notch. Place the pistol in a bore-sighting tool or look down the barrel to approximate alignment. Rear sights with adjustment options can be fine-tuned by dialing changes for windage and elevation after installation.
The goal is to have the front sight directly aligned vertically and horizontally within the rear sight. Check for any lateral play in dovetails; a tightly fitted rear sight reduces the risk of shift after firing. Perform a few dry-fire tests to confirm the sights hold position without stuttering or walking.
Final Tightening and Securing with Thread Locker
Once alignment is confirmed, apply thread locker to all screws and setscrews used on the sights. Medium-strength thread locker provides a secure hold but can be removed later with hand tools. Avoid using permanent thread locker unless you plan on never removing the sights again.
Tighten all fasteners to manufacturer specifications or firmly enough to prevent movement without stripping. Recheck sight position after tightening. On sights secured by pins, ensure the pins are properly driven and seated flush to avoid snagging. Allow thread locker to cure fully according to product instructions, typically 24 hours, before firing the pistol for adjusted zero.
How to Adjust and Zero Your Newly Installed Sights
The difference between point of aim (POA) and point of impact (POI) matters because your sights are set to align your POA, but your shots hit at the POI. For example, if you aim at the center of the target but your shots land consistently to the right, POI is off from POA and your sights need adjusting. You check shot groupings at a fixed distance to see how far off POI is horizontally (windage) and vertically (elevation).
Adjustable sights are designed to let you move the POI horizontally or vertically to match your POA. Windage adjusts left or right to fix horizontal deviation. Elevation adjusts up or down to fix vertical deviation. On fixed sights, you cannot make these adjustments; instead, change the height of the front sight to affect elevation.
Ammunition choice affects POI because different loads produce different bullet velocities, which change bullet trajectory and impact point. Changing ammo may require sight re-zeroing to maintain accuracy. Follow these steps to properly adjust your new sights for accurate shooting:
- Secure a safe shooting range setup: Place your target at your desired zeroing distance, usually 7 to 25 yards for handguns.
- Fire a consistent three to five shot group aiming at the exact same spot: This creates reliable data rather than relying on a single shot.
- Assess your shot grouping relative to POA: Measure how far and in which direction the center of the group is from the aiming point horizontally and vertically.
- Adjust windage for horizontal deviation: If the group is right of aim, move rear sight left to shift POI left. If left, move rear sight right. One click typically moves POI by 1/4 to 1/2 inch at 25 yards, check your sight manufacturer’s specs.
- Adjust elevation for vertical deviation: If impacts are low, raise the rear sight or lower the front sight to raise POI, and vice versa if impacts are high.
- Fire another group to verify adjustments: Repeat grouping and adjustment until POI aligns consistently with POA.
- Test different ammo if needed: If you switch loads and notice POI shifts, re-zero your sights using the same procedure.
Make adjustments only after firing multiple shots to ensure accurate evaluation, single-shot deviations often mislead your sight settings.
Common Mistakes and How to Avoid Them When Changing Sights
Damage or misalignment often results from forcing sights into the dovetail slot with incorrect tools or too much pressure. This not only risks bending or breaking the sight but can also damage the slide, potentially voiding your pistol’s warranty if aftermarket modifications breach the manufacturer’s terms. Checking the sight angle is important; most sights use a 60-degree compound angle, but variations exist depending on the model. Ensuring you have the correct replacement sight before installation prevents forcing a sight that doesn’t properly fit, which is a common cause of misalignment.
Using the wrong tools or applying excessive force leads to binding or “jumping” sights that can shift during recoil, ruining your zero. Sight jumping occurs when the sight isn’t seated firmly or is damaged during installation. To avoid this, use appropriate sight punches or a sight pusher designed for your pistol model, and gently tap or push the sight into place rather than hammering. Always look for hidden set screws that may lock the sight; neglecting these can cause the sight to slip unexpectedly.
Adjusting sights based on a single shot is risky because that shot can be affected by variables like shooter error, wind, or range irregularities. Corrections should rely on analyzing a group of at least three to five shots to determine consistent point-of-impact changes. This prevents over-adjustment, which can complicate zeroing and make your pistol less accurate.
- Inspect the dovetail angle and ensure replacement sight matches the pistol
- Use a proper sight pusher or punches, avoid excessive hammering
- Check for hidden set screws before removing or adjusting sights
- Confirm the sight is seated fully; it should slide in smoothly one-fourth or more of the way
- Base adjustments on reliable shot groups, not single shots
- Look for sight movement during recoil and retighten or reseat if needed
- Seek professional help if the sight is stuck or if damage occurs during installation
Recognizing sight jumping includes noticing inconsistent point of impact after zeroing or feeling loose movement on the sight after recoil. Tightening set screws or reseating the sight usually fixes binding. If a sight won’t budge after careful attempts or shows visible damage, stop immediately. Taking the pistol to a licensed gunsmith avoids further harm and preserves both function and legal warranty status. Professional installation often costs between $40 and $100 but ensures proper fitment and lasting reliability.
Safety Protocols and Best Practices While Working on Pistol Sights
Always start by confirming your pistol is completely unloaded. Remove the magazine first, then lock the slide back to visually inspect the chamber and ensure no round remains. Physically and visually checking is important because a false assumption can lead to accidental discharge. This step prevents potentially fatal accidents during your sight replacement work.
Eye protection is essential throughout the process. Small tools, metal shavings, or springs can fly unexpectedly when removing or installing sights. Use safety glasses that fully cover your eyes to shield against debris. Wearing protection costs about $10 to $20 for a durable pair but offers critical defense against injury.
Securing the pistol solidly to prevent movement is equally important. Use a gunsmith’s bench vise with padded jaws to firmly hold the pistol without damaging the finish. If you don’t have a vise, a stable surface with non-slip rubber pads beneath the gun can help steady it. Avoid holding the pistol in your hand while working; any slip can cause damage or injury.
Keeping your workspace clean and organized improves safety and efficiency. Work on a flat, well-lit surface with a clean cloth or mat to catch small parts and tools. Avoid clutter to reduce the risk of losing screws or dirt contaminating your pistol. Organize tools and parts in trays or magnetic bowls. This professionalism saves time and prevents mistakes.
- Wear eye protection before handling the pistol or tools
- Unload pistol: remove magazine, lock slide, visually and physically check chamber
- Secure pistol in padded bench vise or on stable non-slip surface
- Use a clean, well-lit, and clutter-free workspace with a mat or cloth
- Keep all small parts and tools in trays or magnetic bowls
- Follow manufacturer torque specs when tightening new sights
- Before live-fire testing, confirm sights are securely installed and pistol is fully reassembled
Before live-fire testing, double-check all screws or set screws holding the new sights are tightened to the manufacturer’s recommended torque, often between 10 to 15 inch-pounds. Confirm the pistol is fully reassembled with no leftover parts. This reduces malfunctions or damage during shooting. Also, re-verify the pistol is still unloaded until you are ready to load at a safe firing range.
Following these protocols minimizes risk and ensures a smoother installation process. Skipping any step increases danger and may cause improper sight alignment, unsafe handling, or damage to your pistol’s components.
When to Call a Professional Gunsmith for Sight Installation
Changing your pistol sights yourself can save money and let you customize exactly to your preferences, but certain situations call for a professional gunsmith. Complex sight types like tritium night sights, optics-ready plates, or adjustable target sights often require specialized tools and knowledge to install correctly. Those with dovetail mounts may be manageable DIY projects if you carefully file the edges for a snug fit, but pistols with proprietary mounts or integral optics might void warranties or suffer damage if improperly handled.
Warranty considerations should weigh heavily on your decision. Many manufacturers state in their user manuals that unauthorized modifications, including sight changes done outside their recommended procedures, can void the warranty. If your pistol is new or under warranty support, check the manufacturer’s instructions before removing sights yourself. Professional installation preserves sight alignment and maintains durability, especially on expensive or competition-grade handguns.
Improper installation by amateurs risks misaligned sights, loosened mounts, or damage to the handgun’s slide. Misalignment affects accuracy and can be difficult to fix without a gunsmith’s tools. Pushing sights in without filing or using the correct method can lead to bent sights or damaged dovetail slots. For precision shooting or defensive pistols where reliable sighting is important, professional fitting ensures the sights will hold zero and last through extensive use.
Professional gunsmiths use sight pushers with proper calibration and can perform sight alignment checks that go beyond visual inspection. They also have access to sight models and tools that most hobbyists won’t. Cost ranges from $40 to $100 depending on complexity and local labor rates, which can be justified by the peace of mind and correct result. To find a qualified gunsmith, ask at local shooting ranges or gun shops, check online reviews focused on firearm customization, and verify their certifications or memberships in professional gunsmithing organizations.
Use this quick checklist to decide when to call a professional: If you have night or adjustable sights, proprietary mounts, a pistol still under warranty, or if your DIY attempts risk damaging the dovetail, seek a gunsmith. Consider professional help if you lack the right tools like dovetail files or sight pushers or if your pistol demands factory-spec installation. Otherwise, ensure you have the manufacturer’s guidance, proceed with care, and prepare to break in dovetail edges gently for proper fitting.
Never force a sight into place; if it resists, stop and consult a gunsmith to avoid damaging your pistol or voiding the warranty.
Step-by-Step Action Plan for Changing Pistol Sights
Follow this plan to replace your pistol sights safely and accurately. Each step guides you toward a precise, customized sight setup.
- Before You Start: Gather all essential tools such as a sight pusher or punch set, thread locker, and cleaning supplies. Ensure your workspace is well-lit and free of distractions.
- Day 1, Remove Old Sights: Safely unload the pistol and secure it. Use the appropriate tool to carefully remove the old sights without damaging the slide. Confirm removal by inspecting the slide for debris or damage.
- Day 1, Prepare the Slide: Clean the sight slots and surrounding area thoroughly. Check for any burrs or residue that could affect the new sight fit. The slide should be dry and smooth to the touch.
- Day 1, Install New Sights: Apply a small amount of thread locker or adhesive if recommended by the sight manufacturer. Use a sight pusher or punch to install the new sights firmly in place. Confirm proper seating by checking alignment visually.
- Day 2, Adjust and Zero Sights: At the range, fire test shots at a target 7 to 10 yards away. Adjust windage and elevation screws on the sights to bring your point of impact to point of aim. Verify zero by achieving consistent grouping on target.
- After 1 Week, Recheck Zero: Return to the range to confirm that your sights hold zero after regular use. Make small adjustments if necessary to maintain accuracy.
- After 2 Weeks, Routine Maintenance: Inspect sights for wear or loosening. Clean them along with your pistol during regular maintenance to ensure longevity and reliability.
Frequently Asked Questions
Can You Use Universal Sight Pushers for All Pistols?
Universal sight pushers exist, but they aren’t truly universal and may not fit every pistol. Some models cost over $100 and might not work correctly on certain pistol sights, so verify compatibility before buying one for your specific handgun.
How Precise Should Sight Positioning Be When Installing New Sights?
Use dial or electronic calipers with at least 6-inch reach for precise sight placement. Accurate positioning impacts your shot placement and overall accuracy, making these tools useful for fine adjustments.
How Do Sight Height Differences Affect Shooting Accuracy?
Sight height directly influences the point of impact, shifting where your shots land compared to the point of aim. This effect is noticeable when switching from factory to aftermarket sights and needs consideration during installation and zeroing.
What’s the Importance of Consistent Groups Before Adjusting New Sights?
Establishing a consistent shot group helps verify your sight picture is correct before making adjustments. Adjusting sights after a single shot can lead to inaccurate zeroing and poor shooting results.
Should the New Pistol Sights Slide in Easily or Require Force?
Ideally, new sights should slide in under finger pressure, roughly between one-third and half the full slide fit. Too loose or too tight fitting affects stability and accuracy, so aim for a snug but not forced fit.
Can Changing Sights Impact the Reliability of a Handgun?
Installing improper or poorly mounted sights can negatively affect your handgun’s reliability by interfering with slide operation or causing misalignments. Ensure sights fit your pistol well to maintain function and accuracy.
Final Thoughts
Changing sights on your pistol can significantly improve your shooting accuracy and comfort. Taking the time to follow proper steps ensures the installation is safe and effective. Next, schedule a live-fire session to confirm your zero and get accustomed to the new sights before critical use or competition.