What Does AO Mean on a Rifle Scope? A Complete Guide to Using Adjustable Objective
AO on a rifle scope refers to Adjustable Objective. This feature lets you tweak the parallax to match the distance to your target. Adjusting the AO removes image distortion and keeps the reticle sharp across different shooting ranges. Match the AO ring to your target distance for better clarity and shot precision.
Key Takeaways
- Use the AO adjustment ring to match the scope’s parallax correction with your target’s distance for sharper images.
- Set magnification before adjusting AO, since optimal settings depend on the zoom level you’re shooting with.
- For targets beyond 100 yards, AO scopes enable precise parallax correction improving shot accuracy.
- Quick AO adjustments accelerate target acquisition by eliminating image distortion during quick shots.
- Confirm AO settings after zeroing your rifle to keep reticle alignment consistent with the target range.
- AO is particularly valuable when shooting at close range (5 to 10 yards) to maintain sharp reticle focus.
What Does AO Mean on a Rifle Scope?

AO on a rifle scope stands for Adjustable Objective, a function that lets you fine-tune the front lens for various target distances. Adjusting the objective lens shifts the target image to match the reticle’s plane, improving image clarity and minimizing parallax. Parallax occurs when the reticle moves against the target because of changes in your eye position, which can lead to decreased shooting accuracy.
The primary function of an AO scope is to reduce parallax error by allowing you to manually focus the objective lens based on how far the target is. Unlike many standard rifle scopes that are fixed and set to be parallax-free at a single distance, usually around 100 yards, an adjustable objective lets you focus precisely at distances closer or further away. You rotate the objective bell or front ring, which often has distance markings like 50, 100, 200 yards, and beyond, so you can quickly set the scope to the right focus for your shot.
Adjusting the AO matters for shooters who engage targets at varying ranges because parallax error grows larger the further the target distance deviates from the fixed parallax setting. When you adjust AO correctly, your target image stays sharp and aligned with the reticle regardless of slight head movement. This accuracy boost is especially important for long-range shooting, hunting, and precision target shooting, where tiny aiming errors can cause misses.
To use AO, look through your scope at the target and slowly turn the objective adjustment ring until the target appears sharpest and the reticle remains still if you move your eye position. It may take a few tries, but focusing the AO to the exact distance usually improves shot precision noticeably. AO scopes generally cost a bit more than fixed-focus scopes, reflecting their additional mechanical complexity and the improve performance they provide.
A few things can go wrong if AO is misused or set incorrectly. Leaving the AO at the wrong distance setting can introduce parallax error instead of eliminating it, which will cause the reticle to blur or shift. Also, not all scopes have smooth AO adjustments; some require a bit more effort or can be bumped out of position unintentionally. However, when you understand that AO means Adjustable Objective and how it works, this feature gives you a powerful way to sharpen your shots across a wide variety of shooting conditions and distances.
How Adjustable Objective (AO) Works to Improve Clarity
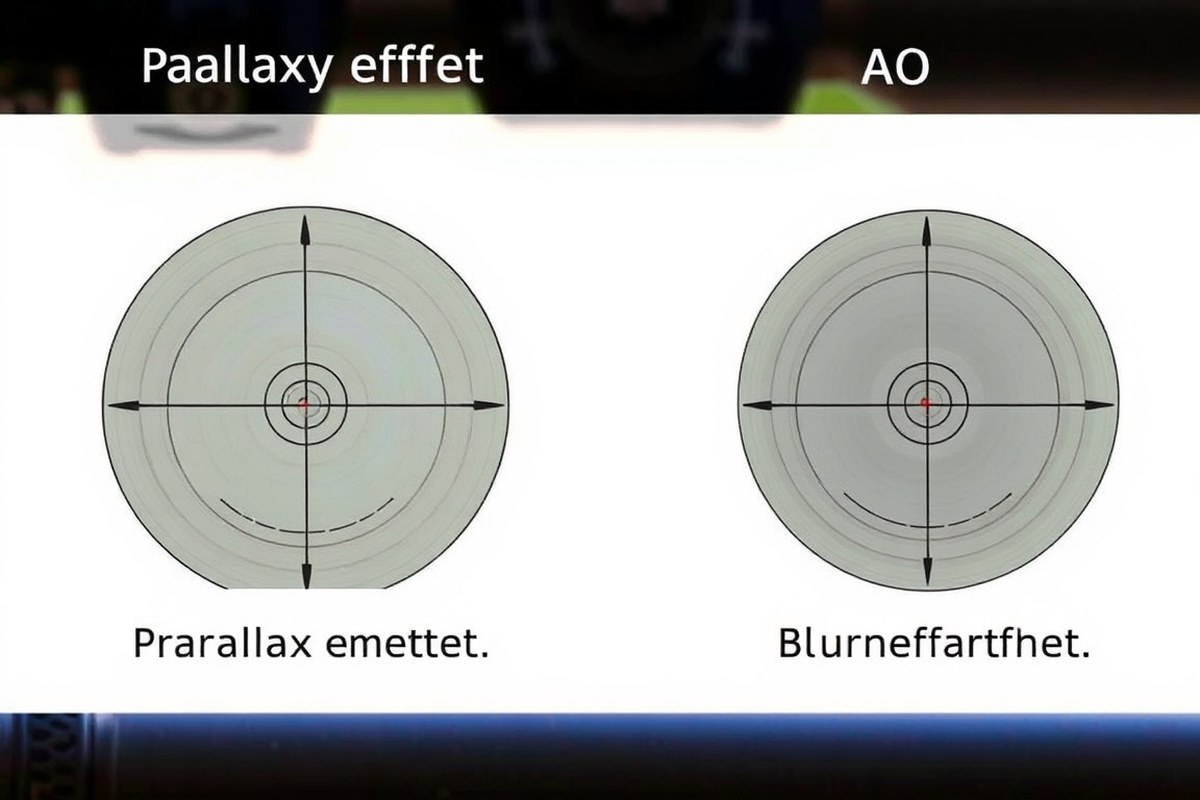
An Adjustable Objective (AO) on a rifle scope works by rotating the front lens ring to focus the scope’s optics on targets at different distances. This adjustment corrects parallax error, an image shift caused by the reticle and target being out of alignment, and improve image clarity for precise shooting. Turning the AO ring changes the objective lens position, aligning the focal plane with the target distance, which keeps the reticle stable when your eye moves.
The Parallax Effect Explained
Parallax error happens when the reticle and the target image are not focused on the same plane inside a rifle scope, causing the reticle to appear to move on the target if your eye shifts slightly. This effect worsens at close or variable distances and can lead to aiming inaccuracies. Correcting parallax is essential because a misaligned reticle changes point-of-impact and reduces shot precision.
Most fixed-focus scopes have parallax set for 100 yards, which is only ideal for shooting at that distance. Variable shooting distances, common in hunting or tactical situations, require parallax correction. Adjustable Objective scopes fix this by letting you match the focus to the exact target distance, ensuring the reticle stays steady on the target regardless of slight head or eye movement.
AO Lens Rotation Mechanism
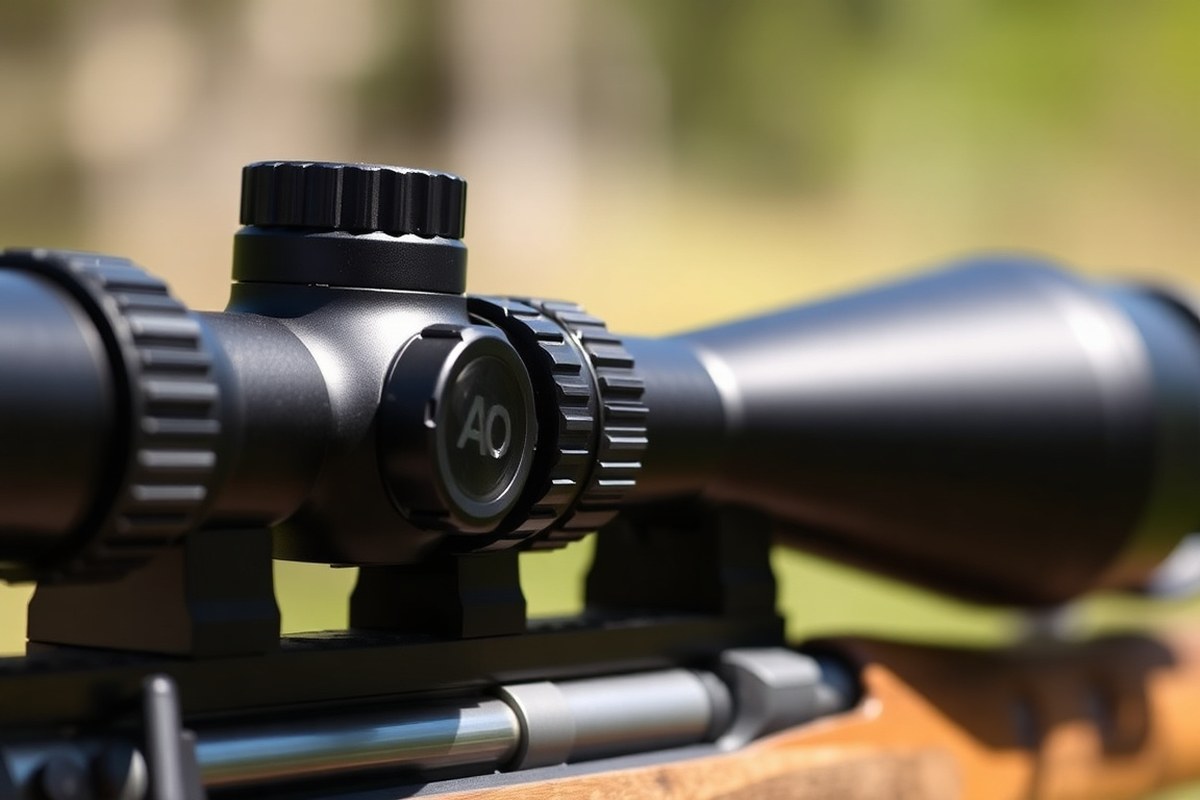
The AO system has a rotating ring around the scope’s objective lens, which is the large lens at the front. Turning the ring adjusts the lens assembly by moving it slightly forward or backward inside the tube. This movement adjusts the focal point, aligning the reticle and target image so both appear in focus together.
For example, if your target is about 50 yards away, rotate the AO ring and stop when the target image sharpens and the reticle no longer shifts with your eye movement. This process effectively removes parallax error and improves clarity. The mechanism generally has distance markings from around 10 yards up to infinity, allowing you to quickly dial in focus depending on your shooting scenario.
Test for parallax correction by moving your eye slightly side to side; the reticle should not shift against the target when AO is properly adjusted.
Magnification’s Impact on AO Adjustment
Magnification influences AO adjustment because the size of the target image changes with zoom, affecting how parallax errors appear. At higher magnifications, parallax error can be more noticeable, making precise AO adjustment more critical. AO scopes usually provide the best parallax correction at a specific magnification setting, often the highest or mid-level zoom.
Adjust the AO at the magnification you plan to use for your shot since changes in zoom may require readjusting the AO ring for sharp focus. For instance, zeroing at 4x and shooting at 12x can cause parallax if you don’t re-focus using the AO. This means after you change your zoom, test for reticle shift and fine-tune the AO setting accordingly for crystal-clear images and consistent aiming.
When to Use AO on Your Rifle Scope for Best Results
You should adjust the AO setting when shooting at distances where parallax error can impact your precision, typically from about 5 to 50 yards. AO is especially useful for short- to moderate-range shooting because it sharpens the image and ensures your reticle aligns perfectly with the target. At these distances, even slight eye movements behind the scope can cause your point of impact to shift if parallax is not corrected.
AO is most beneficial when you need tight groups and clear target acquisition in situations like benchrest shooting or hunting in dense environments. Adjusting the AO is less critical at very long ranges beyond 100 yards because many scopes include side focus or fixed parallax correction optimized for those distances. For air rifles and rimfire rifles such as .22 caliber, AO can greatly improve performance because these firearms often shoot within the 10 to 50-yard range where fixed-focus scopes tend to produce blurry images. To decide when to use AO adjustment, follow this decision rule:
- Use AO for shooting distances under 50 yards where parallax error is noticeable.
- Apply AO when shooting air rifles or .22 rimfire rifles, as their typical ranges fall within AO’s effective range.
- Adjust AO prior to shooting by setting the scope to maximum magnification for precise tuning.
- If you regularly shoot stationary or from a bench, AO is preferable due to its front lens adjustment, despite being less quick to change in the field.
- Avoid frequent AO adjustments while moving since it can be slower compared to side focus scopes.
Adjusting your AO involves rotating the front lens housing until the reticle and target share the same focal plane. After adjustment, perform the “eye-shift test” by slightly moving your eye behind the scope without moving the rifle. A properly adjusted AO scope will show no reticle or target movement relative to each other despite the eye shift. This confirms parallax correction and improves shot consistency.
Costs or effort related to AO adjustments are low, requiring only familiarity with the front lens ring and a few seconds at the shooting bench. Good AO adjustment results in sharper images and more consistent grouping, key for precision shooting. Without proper AO focus, shots may drift off target due to parallax error, frustrating your accuracy. Take time to dial in AO before critical shooting to get sharp focus and tight groups.
Step-by-Step Guide to Adjusting AO on Your Rifle Scope
Adjusting the AO (Adjustable Objective) on your rifle scope requires careful preparation and precise steps to ensure clear focus and accurate parallax correction at different target distances. You first mount and zero the scope, then set the magnification to maximum before rotating the AO ring to the target yardage. Finally, perform an eye-shift test to verify the parallax adjustment is effective and the reticle stays aligned with the target despite slight eye movement.
Mounting and Setting Magnification
Proper mounting is essential to ensure the AO adjustments work correctly. The scope must be securely attached and aligned to avoid parallax errors caused by loose or misaligned mounts. Setting your magnification to its maximum level before adjusting the AO makes the parallax error more noticeable and the correction easier to fine-tune.
- Mount the rifle scope securely following manufacturer instructions and ensure proper eye relief.
- Adjust the rifle to your normal shooting position and stabilize it with a rest or bipod.
- Set the scope to its maximum magnification to make parallax more apparent.
- Zero the rifle at your chosen sight-in distance to align the point of impact with the reticle.
- Confirm the zero after mounting and before adjusting the AO ring.
Adjusting AO to Match Target Distance
The AO ring is located near the objective lens at the front end of your scope. It typically has yardage markings to help you dial in the correct focus for the distance to your target. Adjusting this ring changes the position of the objective lens, compensating for parallax by bringing both the reticle and target into the same optical plane.
- Identify the distance to your target using a rangefinder or known range.
- Rotate the AO ring until the yardage marking aligns with your target distance (for example, 100 yards).
- Look through the scope and fine-tune the AO ring until the target image is sharp and the reticle appears crisp with no blur.
- Maintain your support hand position but adjust your grip slightly to reach the AO ring comfortably without disturbing the rifle’s stability.
Confirming AO Adjustment with Eye-Shift Test
Once the AO ring is set, the eye-shift test helps verify that the reticle remains accurately aligned with the target regardless of small head or eye movements. This test ensures that parallax has been properly corrected at the chosen target distance, confirming your adjustment’s effectiveness.
- With the rifle steady and support in place, look through the scope at the target.
- Gently tilt your head from left to right and then up and down while keeping the rifle still.
- Check if the reticle stays fixed on the target without shifting position relative to it.
- Check the reticle’s position relative to the target and make small adjustments to the AO ring. Continue this process until the reticle stays steady.
- Repeat this test at different magnifications and distances as needed, since AO adjustments can vary with these settings.
AO vs Side Focus: Choosing the Right Parallax Adjustment
Adjustable Objective (AO) and Side Focus (SF) scopes both serve to correct parallax, but they adjust it differently and suit various shooting needs. AO scopes adjust parallax by rotating the objective lens, while SF scopes use a side-mounted dial to set it. Your choice depends on shooting distance, ease of use preferences, and budget considerations.
Adjustment Mechanism Differences
AO scopes feature an adjustment ring on the objective (front) end. Rotating this ring changes the lens position, focusing the image and eliminating parallax at different distances. SF scopes, however, use a focus dial located on the side of the scope tube near the eyepiece. Turning this dial shifts an internal lens element to adjust parallax without moving the objective lens.
Because AO rings are on the scope’s front, you often need to lower your shooting position or remove your eye from the scope to adjust it. SF side dials are more accessible in shooting position, allowing quicker fine-tuning of parallax without losing sight alignment.
Performance at Different Ranges
AO scopes excel when shooting at a fixed range or within medium distances, typically from 25 yards up to 300 yards. This setup provides precise parallax correction once dialed in but is less convenient for rapidly changing distances. SF scopes accommodate a wider range of adjustments on the fly, making them ideal for dynamic shooting scenarios and longer distances beyond 300 yards.
Both AO and SF eliminate parallax error, which ensures the reticle stays true to the target regardless of eye position. Proper parallax adjustment improves shot accuracy and reduces eye strain.
Ease of Use and Cost Factors
Side Focus scopes offer more convenient and quicker parallax adjustment in the field. Their focus dial can be quickly accessed without moving your head or altering your shooting stance. AO scopes require more deliberate adjustment and may slow you down during fast target transitions.
Entry-level AO scopes usually cost between $90 and $120, while fixed scopes without parallax correction can be $60 to $80. SF scopes tend to be pricier due to their more complex internal focus system, often starting above AO prices depending on brand and magnification.
| Feature | Adjustable Objective (AO) | Side Focus (SF) |
|---|---|---|
| Adjustment Location | Rotating ring on objective end | Dial on side of scope tube |
| Ease of Use | Must break sight picture to adjust | Adjustable without losing sight alignment |
| Ideal Shooting Distance | 25 to 300 yards | Suitable for short to very long distances |
| Cost Range (entry-level) | $90, $120 | Typically higher than AO |
| Parallax Correction Quality | Effective when set properly | More convenient for on-the-fly adjustment |
Always confirm your scope model’s adjustment type and practice making precise parallax corrections at known distances before hunting or competition.
Choosing between AO and SF depends on balancing convenience and shooting requirements. Use AO for steady shooting at set distances and SF if you frequently change target range or need faster parallax adjustments during operation.
Common AO Scope Mistakes and How to Fix Them
One common mistake shooters make with AO scopes is setting the adjustable objective at a default or arbitrary position rather than matching it to the exact shooting distance. This causes parallax error, where the reticle shifts relative to the target if your eye moves slightly off-center, leading to missed or off-target shots.
Another frequent error is failing to re-check or readjust the AO after zeroing the rifle. Zeroing usually happens at a fixed distance like 100 yards, so if your AO remains incorrectly set, you risk blurry images or inaccurate shot placement, especially when engaging targets at different ranges.
An incorrect AO setting also impacts focus clarity, causing eye strain and fatigue. Without proper adjustment to the target distance, the image may remain blurry or the reticle may appear to “float,” which affects precision during critical shots.
- Set your AO to the exact known target distance before zeroing your scope.
- After zeroing, re-check AO by moving your eye slightly side to side and up and down; the reticle should stay perfectly on target.
- Mark common distances on your AO ring with a fine permanent marker for quick reference during shooting sessions.
- Adjust AO whenever changing shooting distance by twisting the objective lens ring until the image and reticle become sharply focused.
- Perform regular maintenance on the AO ring mechanism to ensure smooth, accurate adjustments without slipping.
- Practice adjusting AO in safe conditions before hunting or competition to build muscle memory.
- Use a spotting scope or a fixed target to verify clarity and parallax correction after each AO adjustment.
Remember, good AO adjustment takes only a few seconds and can dramatically improve shot accuracy, especially beyond 100 yards where even a small parallax shift causes significant errors on target. Budgeting time to practice precise AO setting and re-checking it during shooting drills helps you avoid costly misses. It’s also important to note that AO settings vary by scope manufacturer and model, so consult your scope’s manual for specific calibration steps and distances. Consistency in AO use can significantly reduce eye fatigue and ensure clear sight pictures at various ranges.
Maintaining Your AO Rifle Scope for Optimal Performance
Maintaining the AO adjustment mechanism on your rifle scope requires careful attention to cleanliness and calibration. Dirt, dust, or moisture can cause the AO knob to become sticky or less responsive over time, affecting your ability to fine-tune the parallax setting and image clarity. Regularly wiping down the scope with a soft, lint-free cloth removes debris that may hinder movement. Use compressed air sparingly to blow out dust from the AO adjustment ring without forcing particles deeper into the mechanism.
Cleaning the lenses in your AO scope is just as important since clear optics are essential for accurate targeting. Use a quality lens brush or microfiber cloth to remove loose dirt. For stubborn smudges, apply a small amount of lens cleaning solution designed for optics, avoiding household cleaners that can damage lens coatings. Dry the lens gently and check for smears before storing the scope.
Proper storage protects your AO scope from environmental factors that could degrade its performance. Keeping the scope in a padded case prevents mechanical shocks from knocks or drops, which can misalign the AO mechanism or affect zero retention. Avoid storing the scope in extreme temperatures or high humidity locations. Ideal conditions are a dry area with temperatures between 40°F and 80°F to prevent internal fogging or corrosion.
- Wipe AO knob and scope exterior weekly with a dry microfiber cloth
- Use compressed air to clear dust from the AO adjustment ring as needed
- Clean lenses with lens-specific solutions and soft cloth only
- Store the scope in a padded case away from extreme temperatures
- Check for smooth AO adjustment movement before each shooting session
- Use quality mounting gear to keep the scope securely zeroed
Checking the AO adjustment for smooth operation before every use can prevent surprises in the field. If the AO ring feels stiff or loose, consult your scope’s manual for specific troubleshooting or send it to a professional for inspection. Maintaining the calibration ensures the focus adjustment does not interfere with the clarity at different distances or hinder your night vision if applicable. Investment in routine care can keep the AO mechanism functioning smoothly for years, avoiding costly repairs or premature replacement.
Choosing the Right AO Scope for Your Rifle and Shooting Style
Choosing the right AO scope depends on your rifle type, typical shooting distance, budget, and desired features like reticles and illumination. AO scopes fine-tune the focus of the objective lens, aligning the focal plane with your target range. This precision makes them especially useful for varying distances but requires understanding how objective lens size and magnification interact with your shooting style.
For airguns and rimfire rifles, select AO scopes with smaller objective lens diameters, typically around 32 to 40 millimeters. These smaller lenses gather enough light for the shorter ranges common to these rifles without adding extra weight or bulk. Higher magnification isn’t usually necessary here; a range of 3-9x is often sufficient for target practice or small game hunting.
Scopes with illuminated reticles can be beneficial if you shoot in low-light conditions, like dawn or dusk. Illumination helps track your reticle against dark backgrounds, but adding it raises the price and may require batteries. Consider how often you’ll shoot in dim light before committing to this feature.
Magnification ranges and objective lens size affect the benefits of AO adjustments. Larger objective lenses (40mm and up) help gather more light, leading to brighter images especially useful at higher magnifications or longer ranges. If you mainly shoot at targets beyond 100 yards, prioritize scopes with a larger objective lens and a wider AO adjustment range. Below is a comparison table outlining typical AO scope choices based on rifle type, shooting distance, and features, including common price brackets:
| Rifle Type | Typical AO Lens Diameter (mm) | Magnification Range | Illuminated Reticle Recommended? | Shooting Distance | Price Range (USD) |
|---|---|---|---|---|---|
| Airguns / Rimfire | 32, 40 | 3-9x | Optional (for low light) | 10-100 yards | $100 – $300 |
| Hunting Rifles | 40, 50 | 4-12x or 3-9x | Recommended for dawn/dusk hunts | 50-300 yards | $200 – $600 |
| Long-Range / Precision Rifles | 50+ | 6-24x or higher | Usually recommended | 200+ yards | $400 – $1,200+ |
Choosing a model with smooth and precise AO calibration is critical. You want to easily adjust the objective lens without losing zero or clarity. High-quality lenses reduce optical distortion when shifting focus. Also, pick a magnification range that aligns with your typical shooting distances to avoid overpaying for features you won’t use.
Practice adjusting your AO settings at known distances before your next trip; this builds confidence in focusing quickly and precisely under field conditions.
Price often correlates with lens clarity, reticle quality, and durability. Set your budget with those priorities in mind and balance it against the features you need for your typical shooting scenarios. An AO scope can improve accuracy and reduce parallax errors, but only when you match its capabilities to your rifle and shooting style.
Your First Steps: Adjusting and Using AO on Your Rifle Scope
Getting started with your Adjustable Objective (AO) is simple and improves your shooting accuracy quickly. Follow these clear steps to see the benefits in action.
- Before your next range session: Familiarize yourself with the AO ring on your scope by turning it through its full range. You should feel smooth, indexed clicks or stops indicating adjustment points.
- At the range, Day 1: Set your AO to the estimated distance of your target (usually marked on the ring). Shoot a group and note the clarity and sharpness of the target image.
- During the session: Adjust the AO slightly if your target image or crosshairs appear blurry. The correct setting will make the target clear and crosshairs steady. Confirm with a second shot.
- After you find clear focus: Record the AO setting for that distance. Use this as a baseline for similar range setups.
- Over the next week of practice: Test AO adjustments at multiple distances (25, 100, 200 yards as examples). Note improvements in target clarity and shot grouping.
- After two weeks: Incorporate AO adjustments into your routine before every shooting session to maintain clear sight picture at varying distances.
- Ongoing maintenance: Clean the AO ring and lens surfaces regularly and check for any stiffness or damage. Smooth adjustment indicates proper function.
Frequently Asked Questions
What Does AO Stand for on a Rifle Scope?
AO stands for Adjustable Objective, a feature that lets you change the focus of the front lens to correct parallax and sharpen the image at different distances. It ensures your target and reticle are on the same plane for better accuracy.
How Does Adjustable Objective Improve Shooting Accuracy?
Adjustable Objective reduces parallax error, which causes the reticle to shift when your eye moves. Correcting parallax helps keep your shots consistent, especially at varying ranges, by aligning the target focus with the reticle position.
Can Adjustable Objective Be Used at All Shooting Distances?
AO scopes work best at short to moderate ranges where parallax is more noticeable. At very long distances, other focus adjustments might be more effective for optimal clarity.
How Often Should I Maintain the AO Feature on My Scope?
Regular maintenance is recommended, such as cleaning the objective lens and checking adjustment rings. This keeps focus crisp and mechanisms smooth to prevent accuracy loss over time.
Is AO Better Than Side Focus for Parallax Correction?
AO and side focus achieve similar goals but differ in operation. Choose AO if you prefer front-lens focus or are hunting where quick parallax adjustments at various distances are needed.
What Common Mistakes Should I Avoid with AO Scopes?
Avoid forcing the adjustment ring beyond limits and neglecting parallax correction at various ranges. Doing so can damage the scope or reduce shot precision.
The Bottom Line
AO on your rifle scope lets you sharpen your target focus and reduce parallax error, making your shots more accurate. The best next step is to practice adjusting the AO at different ranges to get comfortable with its effect on image clarity. Use your recorded settings to make quick adjustments in the field and improve your shooting confidence.