How Accurate Is Bore Sighting? A Complete Guide to Reliable Alignment
How accurate is bore sighting? Laser bore sighting generally gets your rifle or pistol on paper within a few inches at typical zeroing distances, such as 25 to 50 yards for rifles. This method saves time and ammo by aligning your scope close enough to start live-fire zeroing without wild shots. Begin your bore sighting by choosing the right laser bore sighter compatible with your firearm’s barrel length and caliber for the most reliable initial alignment.
Key Takeaways
- Use a green 520nm laser bore sighter for clear visibility up to 400 yards during alignment.
- Select a bore sighter that fits your barrel length, ensuring at least 4.5 inches for most laser devices.
- Keep bore sighting distances within 10, 25 yards for pistols and 25, 50 yards for rifles to reduce beam divergence errors.
- Expect laser bore sights to group shots within 3, 4 inches on target at 100 yards, enough for initial zeroing.
- Prioritize bore sighters with long battery life (40+ hours) to avoid downtime during multiple sighting sessions.
- Opt for bore sighters with caliber adapters for compatibility across different firearms, especially rifles.
How Accurate Is Laser Bore Sighting in Real Use

Laser bore sighting typically gets you within about 3 to 4 inches of zero at 100 yards. This means the laser helps align your scope or sights so your bullet will land inside a roughly 3- to 4-inch circle around your point of aim at that distance. This level of precision is usually enough to get you “on paper” during sight-in, so you don’t waste time or ammo guessing where to aim. You can quickly confirm the adjustment by firing a few shots at the target.
The accuracy of laser bore sights depends on laser color and quality. Green lasers at 520 nanometers offer better visibility and useful range, often up to 400 yards under good lighting, compared to red lasers, which are typically visible for 30 to 100 yards. Green lasers give you more precise initial alignment over longer distances, but can cost more. Red lasers remain a practical choice for quick bore sighting out to about 25 yards, where they are most effective as a starting point.
For practical zeroing, bore sight at 25 to 50 yards before moving to live-fire zeroing at 100 yards. The laser helps you adjust your scope close enough so that your shot group falls within a few inches of the bullseye, saving plenty of time on final adjustments. You still need actual test shots at your target distance to finalize your zero because factors like ammunition variance, barrel harmonics, and shoot position affect your point of impact.
Keep in mind that inexpensive or poorly made laser bore sights can mislead you with inaccurate dots or weak laser output, forcing you to spend more time on the range correcting errors. Investing in quality bore sight kits that include multiple adapters for different calibers and a strong, clear laser increases your chances of achieving a close initial zero quickly. Kits with ergonomic designs and rechargeable batteries typically provide better consistency over time.
Laser bore sighting doesn’t replace live-fire zeroing but acts as a fast and reliable way to get you very close to your target. It reduces the need to waste rounds making large scope adjustments, especially when sighting in new optics or unfamiliar rifles. You should still expect a margin of error of a few inches at 100 yards, making it a useful but not final step for precise shooting setups.
Factors That Impact Bore Sighting Accuracy
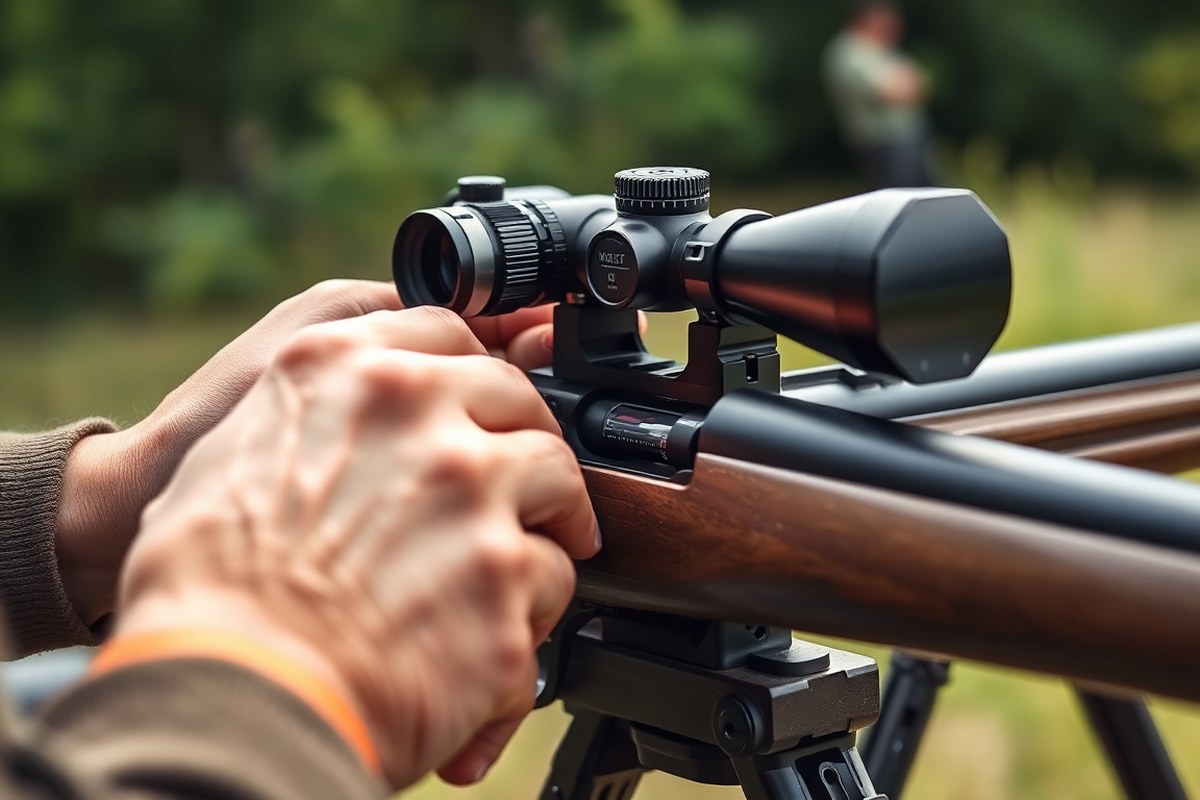
Several factors influence the accuracy of bore sighting, including barrel length, adapter fit, laser quality, distance, and environmental conditions. Each plays a specific role in how well the laser aligns with the firearm’s bore axis and how clearly you can see the laser on your target.
Barrel Length and Its Limitations
Barrel length directly affects whether and how a laser bore sighter can be used. A minimum barrel length of about 4.5 inches is necessary to properly insert and stabilize the laser sighter inside the bore. Short barrels may not provide enough space for the adapter and laser to fit securely, which leads to poor alignment and inaccurate results. Longer barrels generally accommodate bore sighters better, allowing a straighter path for the laser beam down the bore axis, improving precision.
The barrel’s internal surface condition and rifling can also impact accuracy by causing slight deviations or reflections of the laser beam. Ensuring the bore is clean and free from obstructions helps maintain the laser beam’s straight path. When dealing with very short barrels or unusual calibers, verify that the bore sighter manufacturer offers the correct adapter and compatibility, or consider alternative alignment methods.
The Importance of Adapter Fit and Stability
Adapter size is important for accurate bore sighting because it holds the laser device firmly inside the barrel. A snug fit eliminates micro-movements that shift the laser beam off-center. Loose adapters cause wobble or runout, misrepresenting the true alignment of the bore with your sights or scope. Choose adapters that precisely match your firearm’s caliber, typically ranging from .17 to 12 gauge for common bore sighters.
Good bore sighters include multiple labeled adapters covering a wide calibers range with easy swapping. The adapter usually includes an arbor to stabilize barrels from .54 up to 12 gauge by centering the laser device along the bore axis. Proper fit ensures concentricity and reduces axial play, making the sighting process repeatable and dependable. Always check the fit visually and feel for any looseness before starting the bore sighting process.
Laser Quality and Visibility Factors
Laser laser quality affects how precisely the beam aligns with the barrel’s center and how visible it is on the target. Class IIIA red lasers are common, effective under low to moderate lighting conditions. Higher-quality bore sighters offer longer battery life, typically around 40 hours, and stable laser output to maintain consistent results during the alignment process.
The laser’s wavelength and power also play a role in visibility and beam stability. For example, green lasers at 520 nanometers wavelength often appear brighter and can be seen at distances up to 400 yards, but red lasers are usually sufficient for bore sighting within typical distances of 10 to 50 yards. Ensure the environmental lighting matches the laser’s visibility range; bright sunlight can wash out the laser dot, making adjustments difficult.
Distance Effects and Environment Impact
Distance selection for bore sighting must balance between practical range and laser beam limitations. For pistols, the ideal distance is roughly 10 to 25 yards; for rifles, 25 to 50 yards is preferred. Beyond these distances, beam divergence, environmental factors like temperature and humidity, and slight movements from unstable rests can cause the laser dot to spread out or shift. This degrades alignment fidelity and misleads adjustments.
Ambient light is a key environmental factor. Bright daylight reduces laser visibility, especially for red laser types. Using a target with high contrast and a non-reflective surface improves the laser spot’s clarity. Stable rest conditions, such as sandbags or shooting benches, reduce operator motion, which otherwise introduces errors during bore sighting. Calmer air and moderate humidity also help maintain the laser beam’s integrity over distance.
Always confirm your adapter is securely fitted and the bore is clean before aligning your sights, or the laser beam won’t represent true bore alignment.
Types of Bore Sighters and Their Accuracy Differences
Bore sighters come in three main types: laser bore sighters, in-chamber bore sighters, and mechanical bore sights. Laser bore sighters generally offer the highest accuracy and fastest setup, while in-chamber models provide convenience and solid precision. Mechanical bore sights tend to be less precise but work without batteries and are often favored for pistols. Choosing the right one depends on your firearm type and how quickly and accurately you need to align your sights.
Laser Bore Sighters Explained
Laser bore sighters project a laser beam either from the barrel’s end or through an adapter inserted into the chamber to mimic the bullet’s path. This laser serves as an aiming point for adjusting your scope or iron sights before live firing. They typically offer accuracy within about 1.5 MOA (minute of angle) on paper for rifles, giving a tight initial zero that reduces wasted ammo at the range.
Battery life ranges from 1 to 40 hours depending on model and laser type, with green lasers often lasting longer and being visible at distances up to 300 yards. You can buy kits with multiple adapters covering calibers from .17 HMR up to 12 gauge, fitting rifles, pistols, and shotguns. Prices vary widely; for example, professional-grade laser bore sighters can cost over $100 while budget models start around $30.
In-Chamber Bore Sighters Overview
These bore sighters fit directly inside the firearm’s chamber and align with the rifling much like a cartridge would. Because of their secure and repeatable placement, in-chamber models tend to be more accurate than barrel-insert lasers. Some users report getting on paper within 1.5 MOA using high-quality in-chamber lasers, which rivals or exceeds the performance of end-of-barrel laser bore sighters.
In-chamber lasers are especially useful for pistols and rifles where the barrel’s muzzle may be hard to access or where repeated consistent placement is a priority. The downside is they require precise chamber sizing and adapters that fit specific calibers. They are typically more affordable than many end-of-barrel lasers and often need just two standard batteries to operate.
Mechanical (Optical) Bore Sights Compared
Mechanical bore sights use optical collimation or physical arbors that fit inside the barrel to provide a direct alignment between the bore and sights, without batteries or lasers. They rely on a physical rod or collimator to visually center the bore axis on the target. While this method avoids battery-dependent drawbacks, it provides less precise alignment, often off by multiple MOA compared to laser bore sighters.
These are popular for handloading and checking rough alignment on pistols, where simplicity and reliability matter more than pinpoint accuracy. Mechanical bore sights also tend to be cheaper but take more time and care to use effectively. They perform best when used in conjunction with live-fire zeroing, as their initial accuracy is lower, especially for rifles with longer barrels or scopes.
Step-by-Step Bore Sighting Process for Best Accuracy
Bore sighting accurately sets the foundation for precise shooting by aligning your rifle’s barrel with the scope before live firing. The process involves stabilizing the rifle, inserting a laser bore sighter, and adjusting your scope’s windage and elevation turrets to match the laser dot. Following the exact steps ensures quick, reliable alignment and reduces rounds wasted at the range.
Prepare and Secure the Rifle
Start by ensuring the rifle is completely unloaded and pointed in a safe direction. Stability is key, so use a solid gun vise, bench rest, or sandbags to hold the rifle firmly without movement. The steadier your setup, the more accurate your bore sighting adjustments will be, as wobbling can misalign the scope with the bore axis.
Place the rifle on a level surface where you have a clear view of the target area, ideally in shade to prevent the laser dot from fading outdoors. Consistent positioning during bore sighting avoids shifting that could cause errors when you load live rounds later.
Insert and Activate the Laser Bore Sighter
Select the appropriate laser bore sighter for your rifle’s caliber and barrel type, common versions fit into the chamber or attach to the muzzle. Insert the bore sighter into the rifle’s barrel or chamber according to its design, then power the laser on. The laser projects a bright, precise dot along the bore’s centerline to serve as your aiming reference.
Use the laser in shaded or dim conditions so the dot is crisp and easy to see through the scope. Avoid bright sunlight that can wash out the laser spot, making scope alignment difficult. Keep the rifle steady, and do not touch it once the laser is active to preserve zero.
Adjust the Scope to Align with the Laser
Look through your scope’s eyepiece and note the laser’s dot position relative to the reticle center. Adjust the elevation turret to move the reticle vertically and the windage turret to shift it horizontally until the crosshairs align exactly with the laser dot.
The goal is to bring the reticle on the scope into perfect coincidence with the laser’s projected point, which represents the bore axis. Make small turret adjustments to avoid overshooting the laser dot. Remember, this step sets a “rough zero” so you will refine it with live firing later.
Verify Alignment at Recommended Distance
After aligning the reticle with the laser dot, move to a shooting bench 25 to 50 yards away, depending on your firearm and scope’s intended use. Place a target at this distance and verify the point of aim by firing a few test rounds. This confirms your bore sight adjustments were effective and helps identify any necessary fine-tuning.
Stability remains important during shooting, use the same rest or vise setup from bore sighting to maintain consistency. Adjust the scope turrets finely based on shot placements to achieve your final zero. Without this step, bore sighting alone can leave significant aiming errors uncorrected for actual bullet trajectory.
- Unload your rifle completely and ensure it’s safe to handle.
- Secure the rifle firmly in a gun vise, sandbags, or bench rest to prevent movement.
- Insert the correct laser bore sighter into your rifle’s chamber or muzzle according to the device instructions.
- Turn on the laser and confirm the dot is visible and steady through the scope.
- Look through the scope and adjust elevation and windage turrets to align the reticle with the laser dot.
- Once aligned, remove the bore sighter and move to a recommended target distance (usually 25, 50 yards).
- Fire test rounds from the same stable rest and adjust the scope turrets further to refine the zero.
Choosing the Right Distance for Bore Sighting
Bore sighting works best at moderate distances because it helps you align your firearm’s sights or scope close to the target point before live firing. For rifles, the ideal bore sighting distance is typically between 25 and 50 yards. This range lets you place your initial shots close to the bullseye, reducing the amount of adjustment needed when you zero the scope properly. Too close, like 5 or 10 yards, and small misalignments translate to large misses at real shooting distances. Too far, above 100 yards, and most affordable bore sighters don’t have the precision to remain accurate because the laser beam spreads or the firearm’s mechanical tolerances become critical.
Handguns require a shorter bore sighting distance since their effective range is closer and sights are designed for shorter shots. A standard handgun bore sight target distance is usually 7 to 15 yards. This allows you to get the front and rear sights roughly on target before live firing. Going beyond this range for bore sighting is less effective because the laser or mechanical bore sight may not maintain reliable accuracy at longer distances for handguns.
Laser bore sighters are generally the tool of choice for bore sighting at these distances, fitting calibers from .17 up to 12 gauge with appropriate adapters. The laser remains visible during bore sighting at the recommended distances, helping you quickly adjust your scope or sights. The device’s cost also factors into distance choice; very expensive models can extend bore sighting range farther, but most affordable versions offer the best accuracy inside 50 yards. The process involves inserting the bore sighter into the barrel or chamber, aiming at a paper target placed at the recommended distance, and adjusting your optics to center the laser point.
| Firearm Type | Recommended Bore Sighting Distance | Reasoning |
|---|---|---|
| Rifle | 25, 50 yards | Balances visibility and practical alignment; reduces impact of minor bore sighting errors |
| Handgun | 7, 15 yards | Matches typical handgun effective range; easier laser visibility and sight adjustment |
| Shotgun (with scopes or red dots) | 25 yards | Useful for sighting with optics; shorter range due to wider pellet spread |
Choosing a distance too close means minor bore alignment errors cause your point of impact to shift significantly at actual shooting ranges, making the initial zeroing harder and wasting ammo as you compensate. Too far and you risk the laser beam spreading or shifting inside the barrel, especially with lower-end bore sighters. Once you complete bore sighting at these recommended distances, you’ll get your first rounds usually within one to two inches of the point of aim on paper targets, preparing you to finely zero your sights or scope during live fire.
Always double-check your bore sighter is compatible with your barrel length and caliber; using the wrong adapter or distance can produce misleading results and waste ammunition.
Common Bore Sighting Mistakes and How to Fix Them
One frequent mistake that reduces bore sighting accuracy is rushing the alignment process. Skipping careful setup results in the laser not sitting perfectly in the bore, leading to an off-target point of aim. Taking time to securely mount the laser, making sure it’s flush inside the barrel, pays dividends in initial alignment quality. Using a bore sighter kit with a suitable adapter, such as those ranging from .17 to .50 calibers, like the XAegis or ADAFAZ kits, helps ensure a tight, stable fit that minimizes wobble.
Another common error involves using the wrong adapter or no adapter at all. This can cause the laser to sit crooked or off-center, throwing off the alignment. Match the adapter size exactly to your rifle’s bore diameter. Kits with a wide range of numbered adapters, like the Visiofire 64-adapter set, allow precise matching for calibers from .177 up to .50. When the laser isn’t steady inside the bore, use an arbor or tighten the fit with a supplied collet to stabilize the beam for reliable sight-in.
Holding the rifle unstable during bore sighting also reduces accuracy. Any slight movement or inconsistent support compromises the laser’s projection on the target. Use a solid rest such as sandbags or a stable shooting bench to keep your firearm fixed firmly and level during the procedure. This practice prevents shifts in alignment as you make adjustments and gives consistent results on the target.
It’s important to understand that bore sighting serves as a preliminary alignment step and not a replacement for complete zeroing with live ammunition. Bore sighting narrows down scope or sight adjustments but doesn’t account for bullet drop, wind, or individual rifle-ballistic factors. After bore sighting, always take the rifle to the range for final zeroing through live-fire testing. The laser aids by reducing the time and shots needed to reach your zero, but it cannot guarantee perfect accuracy on its own.
Fixing a laser that isn’t steady involves ensuring the correct adapter size and using any securing components provided with your kit, like arbors or collets. Avoid forcing the device into the bore, which can damage the laser or the barrel. Persistent wobble calls for a check on selecting the correct diameter adapter and ensuring the rifle stays steady on a flat surface or rest. Using a rechargeable laser bore sight with known battery life, such as kits lasting about 40 hours, helps maintain consistent power and beam stability during the process.
Maintaining and Calibrating Your Bore Sighter for Consistency
Maintaining and calibrating your bore sighter ensures reliable laser output and precise alignment over time. Proper battery care is critical for consistent laser brightness, which directly affects accuracy. Most laser bore sighters use common batteries like 123A or CR2 lithium cells, so replacing them before the laser dims helps maintain sharp projection. Expect battery life to range from about 8 hours for some rechargeable models to up to 72 hours for high-quality green laser sighters. Store batteries separately if you won’t use the device for more than a month to avoid leakage and corrosion inside the battery compartment.
Check the bore sighter adapters regularly, especially if you use different calibers. The adapter must fit snugly in your firearm’s chamber for true concentric alignment; a loose or worn adapter leads to inaccurate laser projection. Inspect the adapters for any dents, scratches, or deformation each time you prepare to bore sight. Replace adapters if the fit feels loose or the laser beam shifts unexpectedly during mounting. High-end kits may include up to 64 color-coded, serial-numbered adapters to cover calibers from .17 HMR through 12 gauge, so keeping these organized prevents mix-ups that reduce precision.
Perform calibration checks by aiming the bore sighter at a target at a known distance, preferably between 10 and 25 yards indoors or at a safe shooting range. Begin by visually confirming the laser dot is centered within the adapter’s diameter while mounted. Then power on the laser and verify the beam remains stable and on target after briefly removing and remounting the device. If the dot shifts more than a few inches at 25 yards, the sighter may need cleaning, adapter replacement, or battery swapping.
A simple maintenance checklist to maintain accuracy includes: First, check the battery level and replace or recharge as needed. Second, inspect all adapters for a proper, tight fit and signs of damage. Third, clean the bore sighter’s laser lens gently with a microfiber cloth to remove dust or oil residue. Finally, test the laser alignment on a flat surface at the recommended distance before each use. Conducting these steps monthly or before a significant shooting session keeps your bore sighter reliable.
Costs for upkeep typically stay low. Replacement adapters often come bundled in kits ranging from $30 to $80, depending on brand and number of calibers covered. Batteries cost around $5 to $10 per pack or a rechargeable USB option is available with some models. Investing in proper storage, like a padded case, avoids accidental damage that impairs the laser’s function and adapter seating.
When to Use Professional Gunsmith Services for Bore Sighting
Consider getting a professional gunsmith to perform bore sighting if your firearm setup involves complex optics like high-magnification scopes, custom barrels, or if you have persistent zeroing errors that DIY methods can’t fix. Gunsmiths have the precise tools and expertise to align your scope with your barrel accurately, which can mean the difference between spending hours adjusting and hitting your target on the first attempt.
Use professional services when the firearm has custom modifications that change the barrel-to-sight relationship, such as aftermarket barrels or specialized mounts. These setups often require calibration beyond standard bore sights because small misalignments can lead to consistent misses downrange. A gunsmith can also detect subtle issues like barrel warping or improper mount torque, which affect your bore sighting results.
Another sign you need a professional is if your bore sighting results keep drifting despite repeated attempts. For example, if you sight in at 25 yards and the point of impact shifts noticeably at 100 yards or reverts after firing, your bore sight may lack consistency. Persistent discrepancies many times come from mechanical problems or improperly installed components that a gunsmith can diagnose and correct.
To decide when to call in a professional, try this rule: After using your laser bore sight or traditional methods, check your grouping consistency at various distances. Your shots hitting within a 1-inch circle at 100 yards consistently indicate your bore sighting is probably accurate enough to continue without professional help. Groups that are wider or inconsistent, after ruling out shooter error, mean it’s time to schedule a gunsmith appointment for recalibration.
Professional bore sighting services typically range from $50 to $150 depending on the gunsmith and complexity of your firearm. This fee includes mounting precision equipment and test-firing to confirm exact zero. While some DIY bore sighting tools like the Wheeler Professional Bore Sight with its bright green laser and magnetic attachment offer reliable preliminary alignment, they may not resolve every alignment issue.
Engaging a gunsmith becomes even more important if you’re preparing for precision shooting competitions or hunting where shot placement matters greatly. Their experience ensures that your scope matches your barrel perfectly, reduces time spent at the range, and improves confidence in your equipment. Regular maintenance visits can include bore sight checks to keep your setup consistent over time, avoiding surprises when conditions change.
Don’t ignore persistent shifting of your point of impact after bore sighting; that’s a key indicator you need a professional check to diagnose hidden alignment or mechanical problems.
Step-by-Step Action Plan for Accurate Bore Sighting
Follow this sequence to align your firearm sights or scope accurately using bore sighting techniques.
- Before you start: Gather your bore sighter, firearm, and tools. Ensure the firearm is unloaded and safe to handle.
- At home: Set up a stable rest and mount your bore sighter securely in the barrel or chamber as instructed. Confirm the device is centered before proceeding.
- Day 1: Position a target at 25 yards and adjust your scope or irons to align with the projected bore sighter dot or laser. Check that your adjustments move the reticle toward the projected point.
- Day 2: Move the target out to 50 or 100 yards, depending on your shooting preference. Fire a group of three rounds on paper to verify point of impact relative to point of aim.
- After initial shooting: Fine-tune your scope or iron sights based on bullet impact. Repeat firing groups until the bullet impact matches your reticle at your desired distance.
- Weekly practice: Verify sight alignment by firing a few rounds at your chosen distance before your next shooting session. Note any drift and recalibrate if necessary.
- Monthly check: Maintain your bore sighter by cleaning lenses and checking battery life or marker condition to ensure consistent performance.
- As needed: Consult a professional gunsmith if you encounter persistent accuracy issues or if your firearm has mechanical irregularities beyond scope alignment.
Frequently Asked Questions
How Accurate Is Bore Sighting for Initial Shot Placement?
Bore sighting typically aligns your shots within about an inch of the point of aim at close range, helping save ammunition during zeroing. It improves your chances of hitting paper with the first rounds fired.
Can Bore Sighting Replace Full Zeroing at the Range?
No, bore sighting is only an initial alignment step. You still need to zero your firearm by firing live rounds to confirm and adjust for bullet trajectory and environmental factors.
Does Barrel Length Affect Bore Sighting Accuracy?
Longer barrels can make bore sighting more sensitive to alignment errors because even slight deviations magnify downrange. Proper setup and stable mounts reduce this issue regardless of barrel length.
How Does Ambient Lighting Impact Laser Bore Sighting?
Bright daylight can reduce the visible distance for the laser dot, lowering accuracy at longer ranges. Using a bright green 520 nm laser helps maintain visibility up to 400 yards in most conditions.
Are All Laser Bore Sighters Equally Accurate?
No, cheap or poorly made lasers can give misleading results, causing incorrect zeroing. Investing in quality tools and using the correct adapters ensures more consistent and accurate bore sighting.
Can Bore Sighting Be Done on Any Firearm Type?
Bore sighting works on rifles, pistols, and shotguns with clear bores or adapters. Tight barrel diameters or break-actions may require specialized adapters or methods for accurate alignment.
Before You Go
Bore sighting offers a solid starting point to bring your firearm’s sights close to the target, saving time and ammo at the range. It’s not a substitute for live-fire zeroing but can get you within a few inches at 25 yards for most rifles. Your next step is to use live rounds to confirm and fine-tune your zero so that your shots land precisely where you want at your preferred distance.