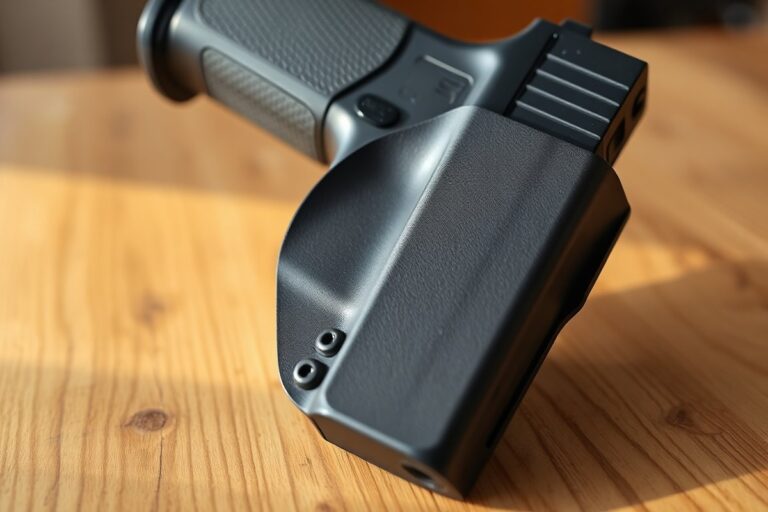
How to Clean a Red Dot Sight: Safe Steps and Best Tools for Clear Optics
How to clean a red dot sight safely depends on using the right tools and technique to avoid damaging the lens or coatings. Start by blowing away dust with gentle air, then use a soft brush before applying a microfiber cloth and an optical cleaner containing at least 90% isopropyl alcohol. This step-by-step approach helps maintain clear optics without scratching or smearing the lens.
Key Takeaways
- Use a non-abrasive microfiber cloth and optical-grade cleaner with ≥90% isopropyl alcohol for all lens cleaning.
- Begin cleaning by blowing off loose dust to prevent scratching before touching the lens surface.
- Employ a soft brush or carbon cleaning tool, like a LensPen, to remove stubborn particles gently.
- To maintain reliable performance, you need to replace the battery in your red dot sight every 6 to 12 months if you use it regularly every day.
- Clean the sight housing and mount with a damp cloth to avoid dirt buildup affecting function.
- Verify zero after cleaning, since even minor smearing can shift point-of-impact by about 1 MOA.
How to Clean the Red Dot Sight Lens Without Damaging It

Cleaning the lens of your red dot sight requires care to avoid scratching or damaging delicate optical coatings. These coatings improve light transmission and reduce glare, so preserving them keeps your sight clear and accurate. Using harsh chemicals or rough fabric can permanently mar the lens, so it’s best to rely on optical-grade cleaners and soft, non-abrasive materials for every cleaning session.
Start by gently removing loose dust and debris; this prevents rubbing particles into the lens surface. The most effective technique involves using steady, straight wiping motions, which reduce the risk of scratches compared to circular or random scrubbing. Opt for lens-safe cleaning fluids, especially those with 90% or higher isopropyl alcohol, as they safely dissolve oils and fingerprints without harming coatings. Avoid water-based or household cleaners, which may leave residues or damage optics.
- Blow off loose dust and particles. Use a clean, compressed air can or gently blow with your mouth to remove dry dirt without touching the lens.
- Brush the lens with a soft-bristled lens brush. This loosens any remaining fine dust. Use a brush designed for optics to prevent scratches.
- Apply a small amount of optical-grade lens cleaner. Place a drop on a clean microfiber cloth, never directly on the lens. Use a cleaner with at least 90% isopropyl alcohol for effective but safe cleaning.
- Wipe the lens in straight, gentle strokes. Move your cloth across the lens from one side to the other or top to bottom. Avoid circular motions, which can spread dirt and cause micro-abrasions.
- Repeat with a dry section of the cloth. Use a fresh microfiber cloth area to gently buff away any streaks or remaining moisture.
- Use a carbon cleaning tool like a LensPen if needed. These tools are designed for optics and help remove stubborn smudges without damage.
It’s best to clean your red dot sight lens only when necessary, such as after exposure to sweat, fingerprints, dirt, or rain. Over-cleaning can wear coatings prematurely. Using non-abrasive microfiber cloths that cost under $10 and optical cleaners costing $5 to $15 ensures an affordable and safe routine. Never use paper towels or clothing, as these can scratch the lens. By following these steps precisely, you maintain your red dot sight’s clarity and prolong its lifespan.
Essential Tools and Cleaning Materials Checklist

To clean a red dot sight effectively without risking damage, you need the right tools and cleaning materials designed for optical surfaces. Use non-abrasive cloths, lens-safe cleaning solutions with high isopropyl alcohol content, and specialized brushes or LensPen tools. These items work together to ensure your red dot’s lens and housing stay clear and functional while preserving coatings and preventing scratches.
Non-Abrasive Microfiber Cloths
Microfiber cloths designed for optics are your primary tool for wiping the lens and housing. They are soft and non-abrasive, reducing the risk of scratching sensitive lens coatings. A good microfiber cloth will pick up dust and oils without pushing debris into the glass surface.
Use a clean microfiber cloth each time to avoid transferring dirt from previous cleanings. Depending on use, replace these cloths every few months or when they show signs of wear, such as fraying or trapped grit that could scratch the lens. Always gently pat or wipe the lens without applying excessive pressure to protect delicate coatings.
Lens Cleaning Solutions with >90% Isopropyl Alcohol
Cleaning solutions intended for optics should contain at least 90% isopropyl alcohol. This concentration effectively dissolves oils, fingerprints, and grime without damaging lens coatings, while also evaporating quickly to prevent moisture buildup inside the sight housing. Avoid any solutions with ammonia or harsh chemicals, as these can degrade coatings.
If your lens has stubborn residue, lightly dampen a microfiber cloth or lens tissue with the alcohol-based cleaner and carefully wipe the surface. Use cotton-tipped swabs dipped in the same solution for precise cleaning of edges or corners. Always allow the lens to dry fully before reinstalling the sight or moving it back into use.
- Optical microfiber cloths for wiping lens and housing
- Isopropyl alcohol-based lens cleaner (>90% concentration)
- Cotton-tipped swabs for detailed cleaning
- Lens tissue for single-use cleaning to avoid dirt buildup
- Dedicated cleaning brush or LensPen tool
- Small towel or cloth for drying components
Gathering these tools before you begin simplifies the process and ensures you don’t skip important steps.
Dedicated Brushes and LensPen Tools
Using specialized cleaning tools makes a difference when maintaining red dot sights. A LensPen designed for red dots combines a retractable soft brush with a carbon cleaning tip that does not require liquid solutions. This tool gently removes dust and fingerprints without scratching or leaving residue.
A brush alone is essential for loosening dirt trapped around the housing and mount where cloths can’t reach. Clean these tools regularly to avoid reintroducing dirt during cleaning. While not strictly necessary, the LensPen is highly recommended for its convenience and safe cleaning process, especially if you carry your gun frequently or shoot in dusty environments.
Never use household cleaners or abrasive materials on your red dot sight lenses to avoid permanent damage to optical coatings.
Cleaning the Red Dot Sight Housing and Mount
Cleaning the red dot sight housing and mount removes dirt and grime that could affect the sight’s durability and function without impacting accuracy. Focus on carefully removing debris around the mount and battery area while preserving the sight’s zero and avoiding moisture inside sensitive compartments. Proper care varies slightly based on the housing material, but the approach stays consistent to maintain reliability.
Remove Batteries Before Cleaning
Power off your red dot sight and remove the batteries before starting any cleaning. This step prevents accidental activation or short circuits and helps avoid corrosion caused by trapped moisture around the battery compartments. Check battery contacts for dirt or residue; clean these gently if necessary using a dry, soft cloth or a cotton swab.
Battery compartments on most red dot sights are sealed with rubber O-rings to keep moisture out. Avoid using excess liquids near this area to protect the seal and the internal electronics. Remove batteries and keep them dry during cleaning to extend their lifespan and maintain reliable performance.
Use Soft Brushes and Damp Cloths for the Housing
Choose cleaning tools that won’t scratch or damage the housing material, whether it’s metal or polymer. A soft brush helps dislodge dirt and debris from crevices, while a lightly dampened microfiber cloth removes surface grime without scratching.
Metal housings can tolerate a slightly damp cloth more than polymer, but both require gentle wiping without harsh chemicals. Avoid excessive moisture near battery compartments or lens interfaces to prevent damage. Polymer bodies may attract static dust, making a soft brush particularly useful to clean grooves and textured surfaces.
Check and Clean Mount Screws and Interfaces
The mount’s stability ensures that your red dot sight holds zero during use, so cleaning here is important. Dirt or debris lodged in mounting screws or interfaces can loosen your sight or throw off alignment.
Carefully inspect the mount screws and clean around and inside the mounting surfaces with a soft brush or a dry, lint-free cloth. Tighten screws as needed according to manufacturer specifications to maintain solid attachment without over-torquing, which might damage threads or distortion.
Frequent checks after shooting sessions prevent grime buildup that could compromise zero retention. Proper attention to these interfaces extends the life and accuracy of your red dot sight.
- Turn off the red dot sight and remove all batteries from the compartment.
- Inspect battery contacts for dirt or corrosion; clean gently with a dry cloth or cotton swab.
- Use a soft brush to remove loose debris from the housing, focusing on crevices and textured surfaces.
- Lightly dampen a microfiber cloth with water (avoid alcohol or solvents) and wipe the housing gently.
- Avoid getting moisture near the battery compartment seal or lens edges to protect internal components.
- Check the mount screws and interfaces for dirt or grime; clean with a soft brush or dry cloth.
- Tighten mount screws following manufacturer torque specifications to maintain zero without damaging parts.
- Reinstall fresh or inspected batteries, ensuring contacts are clean and dry before closing the compartment.
How Often Should You Clean a Red Dot Sight?
Cleaning frequency for your red dot sight depends mostly on how often you use it and the conditions you expose it to. Using your sight regularly, such as weekly at the range or for hunting, means you should clean it after every few sessions to keep the lens clear and aiming reliable. For occasional shooters, cleaning every two to three months might be enough, as dust and debris buildup happens more slowly. Avoid cleaning after every single use if you only fire a few rounds in controlled indoor settings, since excessive wiping can wear coatings prematurely.
Environmental conditions directly affect how often your red dot sight needs cleaning. Shooting in dusty, sandy, or muddy terrain requires more frequent attention since particles can scratch the lens or affect internal mechanisms if they enter crevices. Wet or humid climates accelerate dirt accumulation and can cause fogging, requiring prompt cleaning after exposure. Cold weather shooting carries risks like condensation inside the sight, so wait for your sight to reach room temperature before cleaning to avoid moisture damage.
Signs that your red dot sight needs immediate cleaning include visible dirt, smudges, or water spots on the lens that interfere with your target view. A dim, blurry, or distorted reticle, or debris inside the sight housing, calls for immediate cleaning to keep accuracy intact. Similarly, sticky residue or corrosion on the mount or controls indicates it’s time to remove contaminants before they cause permanent damage. Address these signs quickly to avoid degraded performance during critical use.
To implement a cleaning routine, start by inspecting your sight before and after every shooting session. Wipe away surface debris gently using a microfiber cloth or lens brush if needed. Schedule a more thorough cleaning every 500 to 1,000 rounds fired, or after any outing in harsh environments. Keep a small cleaning kit handy so you can deal with dirt as soon as it appears, reducing buildup and maintaining optimal clarity. Consistent care extends the sight’s lifespan, which typically ranges from 2 to 5 years depending on quality and maintenance.
Integrating usage-based cleaning with environmental awareness ensures your red dot sight stays clear and dependable. Clean sooner rather than later if you notice performance changes or exposure to harsh elements. Excessive cleaning without cause can harm coatings or seals, so balance is key. By watching for dirt, moisture, and wear, you protect your sight’s function and your shooting accuracy.
Common Mistakes That Damage Your Red Dot Sight and How to Avoid Them
Cleaning a red dot sight improperly can cause serious, sometimes irreversible damage. Using the wrong tools or chemicals may scratch the lens or strip the delicate coatings that improve brightness and clarity. These coatings are essential for the sight’s performance, so protecting them preserves your shot accuracy and speed. Excessive force during cleaning can also shift the sight’s zero, impacting your ability to hit targets precisely.
A significant mistake is using household cleaning products like Windex or standard window cleaners. These contain harsh chemicals such as ammonia, which can deteriorate reflective coatings, leaving spots or residues that reduce visibility. Similarly, wiping lenses with paper towels, tissues, or clothing fibers can cause micro-scratches that worsen with every cleaning session. Instead, use only products designed specifically for optics cleaning, such as lens-specific cleaners and microfiber cloths.
- Using paper towels, tissues, or clothes to clean the lens
- Applying household glass cleaners or harsh chemicals not made for optics
- Exerting excessive pressure when wiping, potentially shifting sight zero
- Failing to remove grit or debris before cleaning, which causes scratching
- Cleaning the sight while it’s wet with abrasive grime instead of dust-free
To avoid damage, start by blowing off dust or dirt with a manual air blower or a soft brush before wiping. Apply a small amount of lens cleaner to a microfiber cloth, never directly on the lens. Gently wipe in a circular motion with light pressure, focusing on cleaning only what’s necessary. Avoid scrubbing or repeated wiping over the same spot.
Scratches and coating damage are sometimes unavoidable, but you can minimize their appearance using very fine optical polish and following manufacturer recommendations. Some owners use professional repair services to replace heavily damaged lenses, which might cost $50 to $150 depending on the model. Checking your sight’s zero after cleaning ensures no shift occurred. If you notice inaccuracy, a quick re-zeroing is essential before shooting.
Always use soft microfiber cloths and lens-specific cleaning solutions to protect coatings and maintain your sight’s accuracy.
How Optical Coatings Affect Cleaning Methods and Choices
Red dot sight lenses typically feature multiple layers of anti-reflective (AR) coatings. These coatings reduce glare, improve light transmission, and improve image clarity. Unlike ordinary glass, coated optics are delicate and can be damaged by abrasive materials or harsh cleaning chemicals. This sensitivity makes it important to choose cleaning products and tools designed specifically for optical coatings.
Coatings on red dot lenses are sensitive because they are often only a few microns thick and can be scratched or removed by improper cleaning. Using household glass cleaners that contain ammonia, alcohol, or surfactants can break down these coatings, leading to a foggy or faded sight picture. Abrasive cloths or paper towels can leave micro-scratches that degrade the lens’s performance over time.
Safe cleaning involves gentle supplies and techniques. Microfiber cloths designed for optics work best because they trap dust and particles without scratching. Lens-safe cleaning solutions are typically water-based or contain specialized optical detergents without harsh chemicals. Before using any cleaner, check the product label or manufacturer’s guidelines to verify compatibility with anti-reflective coatings.
| Coating Type | Purpose | Cleaning Compatibility | Precautions |
|---|---|---|---|
| Anti-Reflective (AR) | Reduce glare, increase light transmission | Microfiber cloth, lens-safe water-based cleaners | Avoid ammonia, alcohol, abrasives, excessive pressure |
| Hydrophobic | Repel water and oils | Gentle wiping, mild detergents | No solvents, no scrubbing to preserve layer |
| Anti-Smudge | Minimize fingerprint marks | Soft cloth, lens cleaning fluids made for coated lenses | Do not use household glass cleaners or rough fabrics |
| Scratch-Resistant | Increase surface hardness | Compatible with microfiber cloth and mild cleaners | Still avoid harsh abrasives and chemical solvents |
To maintain the coatings, start by blowing away loose dust or debris with a blower or canned air. Gently apply a small amount of lens-safe cleaner to the microfiber cloth rather than spraying directly on the lens. Clean using light, circular motions. Avoid excessive rubbing that can wear down coatings. If residue remains after cleaning, verify lens clarity by viewing from different angles. Faint haze often indicates leftover film rather than permanent damage.
Investing in approved lens cleaning kits or optical-grade microfiber cloths can cost between $10 and $30, which is reasonable compared to replacing a damaged sight. Keeping the coatings intact extends the useful life of your red dot by preserving optimum brightness and contrast during shooting. Always follow product directions that come with your sight or its accessories to prevent accidental damage caused by well-intentioned but improper cleaning.
Verifying Sight Performance After Cleaning
After cleaning your red dot sight, carefully testing its performance ensures that your effort didn’t affect its accuracy or functionality. Checking lens clarity, reticle brightness, and confirming the sight remains zeroed avoids surprises during shooting. Follow a systematic post-cleaning inspection to catch issues early and maintain reliability.
Visual Inspection of Lens and Reticle
Start with a close look at the lens and reticle to confirm clarity and brightness. A clean lens shows no streaks, smudges, or scratches that could blur the dot or distort the sight picture. The reticle should appear bright and consistent without flickering or dimming, which might signal a low battery or internal problem.
Use natural light or a well-lit area to examine the lens. Hold the sight at eye level and look through it to check the red dot’s sharpness and shape. Any fading or irregular glow can reduce aiming precision.
Confirming Zero at a Known Distance
Verifying that the red dot sight has not shifted during cleaning requires live-fire testing at a controlled range. Zero confirmation is critical to maintain accurate shot placement. Choose a familiar distance where your firearm has previously been zeroed, commonly 25 or 50 yards for pistols and carbines. Follow these steps to confirm zero:
- Set up a target at the known zero distance.
- Secure your firearm on a stable rest or bench to reduce shooter error.
- Align the red dot on the target’s aiming point as you normally would.
- Fire a three to five shot group, keeping steady and consistent trigger control.
- Inspect the target to compare your group’s impact point with the aiming point.
- Note any deviation; a shift greater than 1 inch at 25 yards suggests the zero moved.
- Adjust the windage and elevation turrets if necessary to restore zero.
Repeat the test after adjustments, and record your findings for future reference or troubleshooting.
Testing Battery and Electronics Function
Battery health and reticle electronics reliability affect dot brightness and operation time. Post-cleaning, test the sight’s brightness settings and check for consistent illumination. Turn the sight on and off several times to confirm stable startup.
Observe the dot under various brightness levels, including the lowest and highest settings. A flickering or dim dot, even with fresh batteries, might indicate electronic damage or poor connections caused during cleaning.
Consult the manufacturer’s specifications for battery lifespan and replacement recommendations; most red dot sights run on CR2032 cells that last between 12 to 24 months under typical use. Keep spare batteries on hand to avoid downtime at the range.
Proper Storage and Maintenance Tips to Extend Sight Life
Store your red dot sight in a cool, dry, and climate-controlled environment between 32°F and 77°F. This temperature range helps maintain the integrity of the seals and protective coatings, reducing the risk of moisture damage and seal degradation. Avoid leaving your sight in places with fluctuating temperatures or high humidity, such as garages or uninsulated sheds, since moisture can seep past the seals and cause internal fogging or corrosion.
Protecting your sight from moisture and extreme temperature changes preserves both the optics and the electronics. For long-term or seasonal storage, remove the batteries to prevent leakage or corrosion. Store batteries separately in a dry place at room temperature, as this helps extend their shelf life. Before reinstallation, check both the battery contacts and compartment for any signs of corrosion or residue, cleaning them carefully if needed.
Do not leave batteries inside the sight if you won’t use it for more than a couple of weeks, as this can lead to battery leakage and damage to internal components.
Keep the red dot sight in a padded case or original box to shield it from dust, impacts, and environmental contaminants. Using silica gel packs within the storage container helps absorb excess moisture. Regularly inspect your sight during storage, especially if stored for months, and clean any dust or grime build-up before your next use to maintain optimal function.
- Use a dry, climate-controlled storage space between 32°F and 77°F
- Remove batteries for long-term storage and keep them separately at room temperature
- Store the sight in a protective case or original packaging
- Include silica gel packs to control humidity inside storage containers
- Check and clean battery contacts before reinstalling batteries
- Inspect the sight periodically during off-season storage for dust or moisture
- Avoid exposure to direct sunlight or rapid temperature changes
An off-season maintenance checklist helps prevent damage while the sight is not in use. After cleaning, dry all components thoroughly, remove the batteries, place silica gel packets inside the storage container, and seal it in a dust-proof case. This process safeguards the red dot sight’s optics, electronics, and external finishes until it’s time to shoot again. Storing the sight properly reduces the risk of rust, corrosion, and loss of battery power, ensuring reliable performance every time you mount it back on your firearm.
Step-by-Step Action Plan for Maintaining Your Red Dot Sight
Follow these steps regularly to keep your red dot sight clear, accurate, and functioning well. Each phase ensures your sight performs at its best without damage.
- Before Each Use: Inspect the lens and housing for dirt, moisture, or damage. Use a soft lens brush or air blower to remove loose debris.
- After Every Shooting Session: Wipe the lens gently with a microfiber cloth and lens cleaner approved for optical coatings. Check that the red dot remains sharp and aligned.
- Weekly: Clean the housing and mount with a damp, lint-free cloth. Tighten any loose screws to maintain a secure fit.
- Monthly: Remove the sight from the firearm and perform a detailed cleaning of all parts using appropriate tools. Confirm zero and proper function before remounting.
- Seasonally or After Exposure to Harsh Conditions: Inspect for water intrusion or corrosion. Apply recommended protective sprays if suitable, avoiding the lens area.
- After Cleaning: Store your red dot sight in a dry, padded case to avoid dust and impacts. Keep batteries in the sight or out separately following the manufacturer’s advice.
- Anytime You Notice Performance Issues: Recheck lens cleanliness, mounting stability, and battery life. Address these promptly to avoid long-term damage.
Frequently Asked Questions
Can I Use Household Cleaners on My Red Dot Sight?
No, household cleaners can damage lens coatings. Use optical cleaning solutions designed for firearms optics to avoid harming the sight’s anti-reflective coatings.
How Do I Avoid Moisture Buildup Inside My Red Dot Sight?
Keep the sight sealed and dry; store with a moisture absorber if possible. Regularly check O-rings and keep the sight in a climate-controlled environment.
Is It Necessary to Remove the Red Dot Sight Before Cleaning?
You don’t have to remove it if you clean carefully, but removal allows better access and reduces accidental damage risk.
Can Excessive Cleaning Harm My Red Dot Sight?
Yes, over-cleaning or using abrasive materials can wear down coatings and damage components. Clean only when necessary and follow recommended methods.
What Should I Do If the Red Dot Sight Fogs After Cleaning?
Dry the sight thoroughly, avoid excessive liquid use, and allow it to acclimate to temperature changes slowly to prevent fogging.
Are Battery Terminals on a Red Dot Sight Affected by Cleaning?
Yes, moisture or cleaning solutions can corrode battery contacts. Avoid spraying cleaners directly on battery areas and wipe dry after maintenance.
Before You Go
Keeping your red dot sight clean and well-maintained preserves its optical clarity and accuracy for reliable shooting. Start by checking your sight before the next session and clean the lens with care. Staying proactive with maintenance protects your investment and ensures the sight performs when you need it most.