How to Move a Heavy Gun Safe Safely: Expert Tips and Cost Guide
How to move a heavy gun safe requires careful planning and the right equipment to prevent injury and damage. Use a heavy-duty appliance dolly and enlist at least one helper to handle safes under 400 pounds safely. For heavier safes, stairs, or tight spaces, consider hiring professional movers to avoid costly accidents.
Key Takeaways
- Measure your safe and pathways to ensure it fits through doors and hallways before moving.
- Use an appliance dolly rated for your safe’s weight, especially for safes around 400 pounds.
- Empty the gun safe first; most doors account for 30-40% of the total weight.
- Lift with your legs, not your back, keeping the safe close to your body during moves.
- Plan extra help or professionals if your safe weighs over 500 pounds or requires stairs navigation.
- Secure your safe after moving to prevent tipping or prying by anchoring it to the floor or wall.
How to Move a Heavy Gun Safe Safely Yourself

Moving a heavy gun safe yourself requires careful preparation, the right tools, and a team you can coordinate efficiently. Planning the route and organizing helpers prevents injury and protects both your safe and your property. Proper teamwork balances the weight evenly and allows everyone to move together safely, reducing the risk of accidents.
Having at least two strong helpers is important for safely maneuvering a 400-pound or heavier gun safe. Before lifting, clear the path from obstacles, check door widths and stair dimensions, and prepare the safe by emptying it, locking the door, and wrapping it with moving blankets. Use equipment like a heavy-duty appliance dolly and secure straps to stabilize the safe. Assign clear roles and communicate each step to your team before starting to move.
- Plan the route: Measure doorways, hallways, and staircases. Remove rugs or obstacles that could cause tripping. Know exactly where the safe will go in the new location.
- Prepare the safe: Empty all contents to reduce weight. Lock the door or secure it with strong tape, and wrap the safe with moving blankets to protect walls and the safe’s finish.
- Gather equipment and helpers: Use a heavy-duty appliance dolly rated to support the weight. Wear gloves for a better grip. Confirm you have at least two strong helpers, ideally more for extra safety.
- Assign roles and communicate: Decide who will guide, who will lift from the base, and who will push or pull. Walk through the movement steps to coordinate timing and responses to obstacles.
- Lift with care: Bend at your knees, not your back. Lift and set down the safe slowly and evenly. Use secure straps to fasten the safe to the dolly before moving to increase stability.
- Move steadily along the planned route: Keep the safe close to your body, move slowly, and pause if needed. Communicate any adjustments immediately to avoid sudden shifts.
- Handle stairs cautiously: If stairs are involved, only proceed if you have professional-grade equipment and strong, experienced helpers. Otherwise, hire professionals to prevent injury or property damage.
A safe move balances careful planning and reliable teamwork. Without clear roles and a well-measured route, you risk personal injury or damage to your safe and home. Taking the time to prepare your safe and organizing your helpers reduces stress and lets you manage the weight effectively. Attempt stair moves only if you can guarantee proper equipment and assistance; otherwise, it is safer to hire professional movers familiar with heavy gun safes.
Choosing the Right Equipment to Move Your Gun Safe
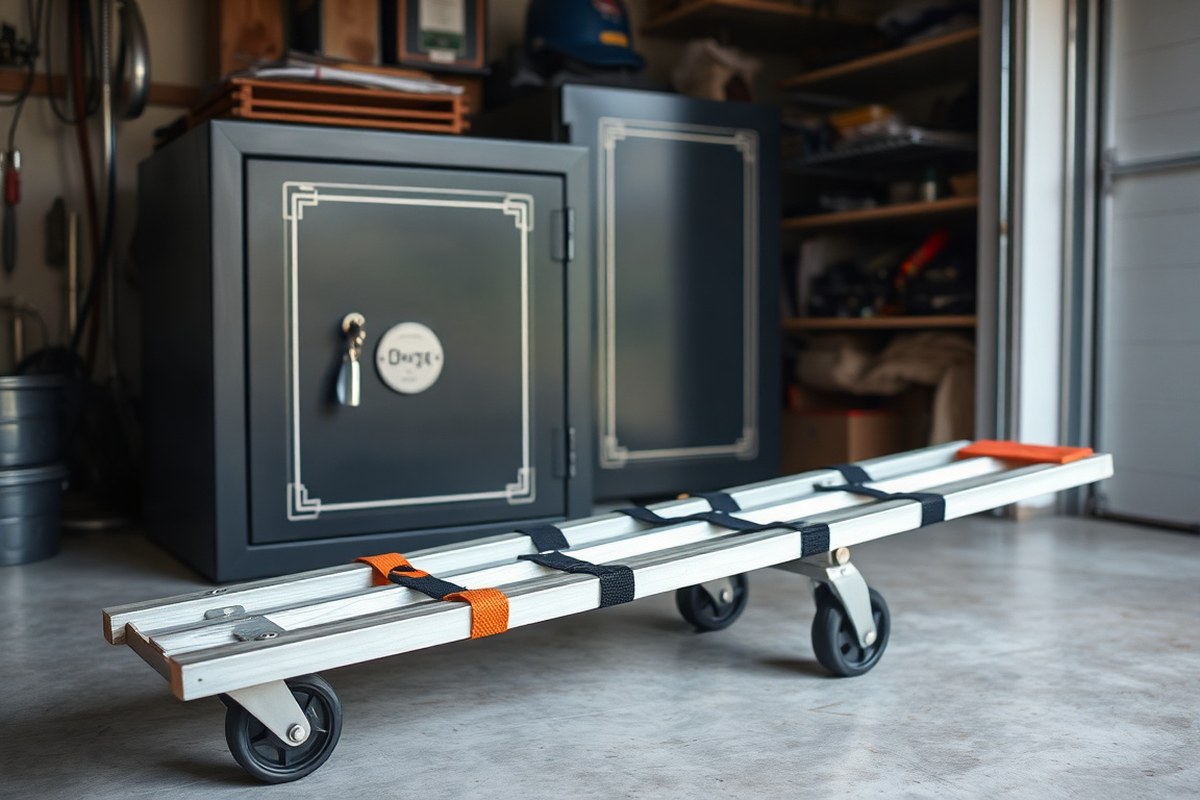
Choosing the right tools makes moving a heavy gun safe safer and more secure. A heavy-duty dolly or hand truck designed for the weight of your safe is essential. Smaller safes under 400 pounds can often be handled with an appliance dolly, while larger, heavier safes require equipment rated for 1,000 pounds or more. Securing the safe with strong straps or ropes prevents shifting and falling during the move, reducing the risk of injury or damage.
Moving blankets and protective padding shield your safe and home from scratches and dents. Rollers or steel plates can help slide extremely heavy safes over short distances, but they require careful control to avoid tipping or damage. Properly selecting and using the right equipment ensures not only your safety but also protects your investment.
| Equipment Type | Weight Capacity | Best Use Cases | Advantages | Disadvantages |
|---|---|---|---|---|
| Appliance Dolly | Up to 400 lbs | Small to medium safes on flat ground | Widely available and affordable | Not suitable for heavy safes or stairs |
| Heavy-Duty Dolly | 1,000 to 2,000 lbs | Large safes, uneven surfaces, and loading trailers | Supports heavy loads, often with straps | Heavier and costlier than appliance dollies |
| Heavy-Duty Hand Truck | Up to 2,000 lbs | Moving safes over short distances, stairs | Offers use and ease in tight spaces | Requires more strength and skill to use |
| Steel Rollers or Pallet Jack | Varies; often 2,000+ lbs | Sliding safes on floors, commercial moves | Less lifting, good on hard surfaces | Can be unstable; not practical for stairs or uneven floors |
Before moving your safe, measure doorways and hallway widths. This helps decide whether your chosen dolly or hand truck will fit through tight spaces with the safe on it. Secure the safe firmly with ratchet straps rated for your safe’s weight. Also, wrap the safe in moving blankets to protect finishes and walls. For stairs, heavy-duty hand trucks with stair climber features or specialized equipment are often necessary.
Always test the stability of your dolly setup before moving the safe to avoid sudden tipping that could cause injury or damage.
Preparing Your Gun Safe and Home Before Moving
You should always empty your gun safe before moving it, but removing the door is optional and depends on its weight and design. Wrapping the safe completely with thick moving blankets or protective padding protects both the safe and your home from damage. Clearing and protecting pathways inside your home is essential to prevent injuries and preserve floors and walls during the move.
Emptying and Securing the Safe Contents
Empty your gun safe entirely to reduce its weight and prevent damage to the contents. Removing firearms, ammunition, and valuables ensures their safety and makes the safe easier to handle. The door can often remain attached if it has secure hinges and your equipment can handle the full weight. However, if the door is detachable and heavy, removing it reduces the overall weight and lowers injury risk. To empty the safe:
- Remove all firearms, ammunition, and other valuables.
- Take out removable shelves or drawers.
- Lock the door for transport if not removed.
- Place contents in secure containers for safe transport.
- Label the boxes to keep track of items during the move.
This preparation step reduces the chance of damage and injuries. Without emptying, shifting guns or ammo inside during the move can cause serious harm or breakage.
Wrapping and Padding the Gun Safe
Wrap the entire gun safe with thick moving blankets or padding to protect it from scratches and dents. This is essential to maintain the safe’s exterior finish and prevent damage to walls and doorways while moving. Use heavy-duty moving blankets and secure them tightly with moving straps or strong tape to keep the padding from slipping off. Steps for wrapping:
- Cover all sides of the safe thoroughly with moving blankets.
- Use foam padding around corners for extra protection.
- Secure blankets with ratchet straps or packing tape without damaging the safe’s surface.
- Wrap doorways in your path with additional blankets or foam padding.
Well-wrapped safes resist impacts better and reduce cosmetic or structural damage. Without proper wrapping, walls and doorframes can be scratched or dented during tight maneuvers in hallways.
Protecting Floors, Walls, and Doorways
Measure and plan your moving route carefully, noting door widths, ceiling heights, and potential tight corners to avoid surprises. Protect floors and walls along this route by laying down materials that prevent scratches and dents. Use thick moving blankets, foam padding, or plywood sheets to shield surfaces. Doorways and doorframes require special padding to absorb impacts. Your checklist for home preparation might include:
- Measuring door widths and hallways to ensure the safe fits.
- Removing rugs and furniture from the moving path.
- Applying moving blankets or foam padding to doorframes and walls.
- Covering floors with plywood sheets or thick cardboard where the safe will pass.
- Clearing any clutter or obstacles from the route.
- Ensuring adequate lighting and dry conditions in the path.
- Asking a helper to hold padding in place if the route is narrow.
Protecting surfaces prevents expensive repairs and preserves your home’s condition. Without adequate floor and wall protection, moving a heavy, bulky gun safe can cause costly damage to drywall, wood floors, and doorframes. Using inexpensive moving blankets and plywood offers good protection at a reasonable cost, typically under $50 in supplies.
Proper Techniques for Lifting and Moving a Gun Safe
Moving a heavy gun safe requires using the right lifting postures to protect your back and muscles, careful handling of the dolly to stabilize the safe, and precise techniques to navigate floors and stairs safely. Proper team coordination and controlled, step-by-step movements reduce the risk of injury and damage.
Safe Lifting Postures and Team Coordination
Use your legs, not your back, when lifting the gun safe. Keep your feet shoulder-width apart, bend at your knees, and maintain a straight back. Avoid twisting your torso while lifting or carrying the safe; instead, pivot your entire body. Communicate clearly with your team before and during each movement to coordinate lifting, resting, and turning.
Wear sturdy gloves and steel-toed shoes to protect your hands and feet. Secure the safe properly before lifting, ensuring no loose parts. Avoid lifting alone if the safe weighs more than 200 pounds. Use at least two people to share the load and reduce strain. One person should lead and give commands to keep movement smooth and synchronized.
Operating the Appliance Dolly Properly
The appliance dolly is the primary tool for moving a gun safe across flat surfaces. Position the dolly so it fits snugly against the safe’s base. Secure the safe with straps to prevent slipping. Tilt the dolly back carefully to rest the safe’s weight on its wheels, making it easier to roll. Follow these steps to operate the dolly safely:
- Position the dolly base close to the safe’s bottom edge.
- Secure the safe to the dolly using heavy-duty straps or ratchet straps.
- Tilt the dolly back slowly to transfer the safe’s weight onto the wheels.
- Keep your back straight and use your legs to handle the dolly during tilting.
- Push or pull the dolly with steady, controlled movements; avoid sudden jerks.
- Use a spotter to guide and watch for obstacles while you move the dolly forward.
- Stop often to ensure straps remain tight and the safe stays secure.
Handling Stairs and Narrow Passageways
Stairs introduce extra risk when moving a heavy gun safe. A stair-climbing dolly is the safest option for navigating steps, as it has special wheels designed to ease the move. Secure the safe firmly to the dolly before ascending or descending. Always have at least two helpers: one above and one below to control the safe’s movement.
Communicate constantly during stair navigation to adjust speed and balance. Take small, slow steps to maintain control and prevent slips. For narrow passages, pivot the dolly carefully, making sure the safe does not scrape walls or door frames. Clear the path before moving to avoid last-minute stops or adjustments.
How to Move a Gun Safe on Stairs and in Tight Spaces
Moving a gun safe on stairs or through tight spaces requires careful coordination and precise techniques. The right number of helpers, clear team roles, and a step-by-step approach reduce injury risk and protect your safe and property. Handling narrow doorways and hallways demands patience and strategic positioning to avoid damage.
Personnel Required for Safe Stair Moves
At least three strong adults are necessary to move a heavy gun safe safely on stairs: two to lift and balance the safe, and one to guide and monitor the process. More helpers may be required for larger or extra-heavy safes and steeper or longer staircases.
Assign specific roles: two lifters handle the front and back of the safe, while the guide calls out commands, watches for obstacles, and ensures steady movement. Everyone should be briefed on the moves and safety protocols before starting.
Stepwise Method for Moving Up and Down Stairs
Follow these steps to ensure a controlled, safe movement on stairs. Take breaks to rest and reposition if needed, and use moving straps or a hand truck designed for stairs if available.
- Clear the stairway of all obstacles and secure pets or children away from the area.
- Position the two lifters on opposite ends of the safe, lifting carefully with knees bent and back straight.
- The guide stands on the side or top of the stairs to direct steps and watch for hazards.
- For ascending, lift the safe onto each stair step one at a time, moving slowly and ensuring stable footing.
- For descending, lower the safe carefully down each step, keeping it close to your body to maintain balance.
- Communicate clearly throughout, using commands like “lift,” “hold,” and “step” to coordinate movement.
- Pause at landings or turns to adjust grip and direction as necessary.
Never rush on stairs; moving slowly reduces the chance of slips or pins between steps.
Negotiating Doors, Corners, and Hallways
Measure all doorframes, hallways, and stairwell widths before moving to ensure clearance for your safe’s dimensions. Remove door hinges or handle hardware if the safe barely fits through tight doorways.
When turning corners or squeezing through narrow halls, designate one person as the spotter to watch all sides and guide the safe smoothly without scraping walls or doorframes. Tilt the safe slightly as needed to align with tight passages. Avoid sudden tilts or jerks to prevent tipping.
Cost and When to Hire Professional Gun Safe Movers
Hiring professional movers for your gun safe typically costs between $250 and over $2,000 depending on the safe’s weight and the difficulty of the move. The main factors that affect these costs include the weight of the safe, the number of stairs or obstacles, the distance it needs to be moved, and whether you require special equipment or additional movers. Safes over 1,500 pounds almost always require professionals who have the right tools and experience to handle the job safely. Here is a breakdown of typical costs based on safe weight:
| Weight Range | Typical Moving Cost Range | Notes and Conditions |
|---|---|---|
| 200, 400 lbs | $250, $450 | Smaller residential safes, minimal stairs |
| 400, 800 lbs | $480, $850 | Mid-weight safes, may need more helpers or equipment |
| 800, 1,500 lbs | $900, $1,700 | Large safes, possibly second-floor moves |
| Over 1,500 lbs | $2,000+ | Heavy commercial or high-security safes; professional crew required |
Stairs and narrow spaces increase the cost significantly. Each flight of stairs can add to the difficulty and require more movers or special dollies. The presence of multiple obstacles in the home, like tight hallways, elevators, or sharp corners, also requires equipment rentals or more manpower, which adds to the price.
When considering whether to hire professionals, weigh the risks of injury, damage to floors, walls, or your safe, and the stress of managing the move yourself. The safest choice is hiring pros when your safe weighs more than 800 pounds or needs to be moved on stairs. Professionals use industry-grade dollies, straps, and protective gear, and they carry insurance to cover potential damage or injury. They also work faster and reduce the chance of dropping or scratching your gun safe. Here are pros and cons of hiring professionals versus moving the safe yourself:
- Pros of professional movers: Reduced injury risk, proper equipment, insurance coverage, faster move, no damage to home or safe
- Cons of professional movers: Higher cost, need to coordinate schedules, less personal control over timing
- Pros of DIY: Lower cost or no cost, flexibility on timing, personal control
- Cons of DIY: High injury risk, risk of damaging the safe or property, requires multiple helpers, need for renting or buying equipment, can take much longer
You should definitely hire a professional if the safe weighs over 1,500 pounds or you face stairs or tight spaces. If you lack experience or sufficient manpower, professional help reduces risk and hassle. For smaller safes, especially under 400 pounds on a single level, a careful DIY move with proper equipment and at least three helpers could work.
Safe Loading and Transporting of a Gun Safe
Loading and transporting a heavy gun safe securely protects it from damage and prevents dangerous shifting during transit. Using heavy-duty straps and protective covers helps keep the safe stable and shields it from scratches or dents. Preparing your vehicle with a cushioned surface and proper tie-down points reduces movement risks, which is key given the safe’s weight and bulk.
To move your gun safe safely in a truck or trailer, follow these steps carefully. Start by placing a protective mat or thick moving blanket on the vehicle bed or trailer floor to absorb shocks and prevent surface damage. Use a strong loading ramp rated for the safe’s weight to roll it inside smoothly. Secure the safe to a dolly with heavy-duty ratchet straps while loading and continue to fasten it firmly once in the vehicle. Attach multiple straps from the safe to anchor points inside the truck or trailer, checking each strap for tightness to avoid shifting during turns or stops. Always balance the load evenly to maintain vehicle control and reduce strain on the suspension. Remember to drive slower than usual, avoiding sudden accelerations or sharp turns to keep the safe stable throughout the trip.
- Prepare the vehicle bed: Lay down a rubber mat or thick moving blankets to cushion the gun safe and prevent sliding or scratches during transport.
- Set up a heavy-duty loading ramp: Position a ramp capable of supporting the safe’s weight (often 400+ pounds) securely against the truck or trailer edge to ensure a smooth roll-in.
- Secure the safe to a moving dolly: Use ratchet straps to tightly fasten the safe to a dolly before moving it up the ramp; this prevents it from tipping or shifting while loading.
- Load the safe into the vehicle carefully: Roll the dolly up the ramp with help from at least one other person for control; do not rush or take sharp angles to avoid tipping.
- Fasten the safe inside the truck or trailer: Attach two or more heavy-duty ratchet straps from the safe to anchor points on opposite sides of the vehicle, tightening each to eliminate any movement.
- Balance the load: Position the safe over or near the axle to distribute weight evenly, preventing excessive strain on the vehicle and improving driving stability.
- Cover the safe with protective padding: Wrap the safe in moving blankets or a padded cover to guard against scratches and minor impacts during travel.
- Drive cautiously: Maintain slower speeds, especially around turns and when braking, to reduce forces that might loosen straps or shift the load.
Expect to invest in heavy-duty ratchet straps costing between $15 and $30 each, moving blankets ranging from $20 to $40 apiece, and a strong loading ramp priced around $100 to $200, depending on length and weight capacity. Prioritizing these steps helps avoid costly damages or injuries caused by an unsecured gun safe sliding or tipping inside your moving vehicle.
Anchoring and Securing Your Gun Safe After the Move
Anchoring your gun safe firmly after moving it is a key security step to prevent theft and avoid tipping hazards. Different floor types require specific anchoring methods to ensure the safe remains stable and secure. Using the right anchors and installation process improves your safe’s protection by making removal or tipping difficult. Here’s a quick comparison of anchoring methods by common floor types:
| Floor Type | Recommended Anchor Type | Installation Tips |
|---|---|---|
| Concrete | Expansion bolts or wedge anchors | Drill pilot holes 1/4” larger than anchor diameter with a hammer drill; clean dust before insertion |
| Wood | Lag bolts or heavy-duty wood screws | Pre-drill pilot holes 1/8” smaller than shank diameter to prevent splitting |
| Tile over concrete | Expansion bolts with special tile drill bit; use washers to distribute force | Drill slowly to avoid cracking; place rubber or plastic washer under bolt head |
| Laminate or vinyl flooring | Anchor through flooring into subfloor with lag bolts | Locate subfloor studs; use longer lag bolts (3, 4 inches) for secure hold |
| Carpeted floors | Anchor through carpet and padding into concrete or wood subfloor | Lift carpet temporarily; use appropriate concrete or wood anchors |
Anchoring begins with carefully positioning the safe where you want it to stay permanently. Mark the anchor points on the floor through the safe’s pre-drilled holes or mounting brackets. Use a hammer drill with a masonry bit for concrete floors, and a regular drill for wood. Clean dust and debris from holes to ensure proper anchor seating. Insert anchors or lag bolts and tighten securely but avoid over-torquing that could damage flooring or hardware.
Secure all anchors tightly, but do not overtighten, as this can crack concrete or strip wood threads.
Proper anchoring stops thieves by making it nearly impossible to carry away the safe without heavy tools or destruction. It also prevents the safe from tipping, which can happen if the floor is uneven or the safe is top-heavy. Safety hazards include injury or damage to walls and flooring. Expect anchoring materials like expansion bolts and lag screws to cost between $10 and $40 total depending on quantity and brand. Tools needed include a drill, appropriate drill bits (masonry or wood), wrench or ratchet set, and a vacuum or brush for cleanup.
Taking the time to anchor your gun safe correctly after moving it completes the security setup and protects your investment. Ignore this step, and the risk of theft and tipping hazards increases substantially, negating the effort of moving the safe carefully to a new location.
Step-by-Step Action Plan to Move Your Heavy Gun Safe
Follow this plan to move your gun safe safely and decide when to call professionals.
- Before You Start: Measure your gun safe and all doorways, hallways, and stairwells to confirm it will fit through every space. Verify it fits before moving to avoid surprises.
- Day 1 – Equipment Gathering: Rent or buy a heavy-duty furniture dolly, moving straps, gloves, and, if needed, stair climber attachments. Confirm all equipment handles your safe’s weight (check rated capacities).
- Day 2 – Preparing the Safe: Empty the gun safe of all firearms, ammunition, and valuables. This lightens the load and keeps contents secure during the move.
- Day 3 – Plan the Route: Clear a path from the safe’s current location to the moving vehicle. Remove rugs, cords, or obstacles and test maneuverability with the empty dolly.
- Moving Day: Have at least two strong helpers to lift and steady the safe on the dolly. Secure it with moving straps, maintain a straight back, and lift using your legs to avoid strain.
- Transport Time: Secure the safe inside the moving vehicle with ratchet straps attached to anchor points. Check tightness after every stop to prevent shifting.
- Unloading Day: Repeat careful lifting techniques; take extra care on stairs and tight spaces. Use additional helpers if needed for safety.
- After the Move: Anchor your gun safe in its new location using bolts or floor anchors appropriate for your floor type. Test stability by gently rocking it to ensure it’s secure.
Frequently Asked Questions
What Should You Check Before Moving a Heavy Gun Safe?
Measure doorways, hallways, and clear obstacles to ensure safe passage. This prevents damage and makes the move smoother.
How Many People Are Needed to Move a 400-pound Gun Safe?
Two people can move a 400-pound gun safe safely using an appliance dolly on flat ground. More may be needed for stairs or tight spaces.
Can You Move a Gun Safe Alone with the Right Equipment?
Moving a heavy gun safe alone is not recommended due to safety risks. Assistance reduces injury risk and helps control the safe better.
What Type of Dolly Is Best for Moving a Gun Safe?
A heavy-duty appliance dolly designed for heavy loads is best. It supports the weight and provides better control when moving the safe.
How Long Does It Typically Take to Move a Gun Safe?
Moving a gun safe can take around 10 to 15 minutes for a simple move, but more time is needed if stairs or tight spaces are involved.
When Is It Better to Hire Professional Movers for a Gun Safe?
Hire pros if your safe is very heavy, the move involves stairs, or you lack proper equipment. Professionals reduce damage and injury risks.
Before You Go
Moving a heavy gun safe yourself requires careful planning, the right equipment, and safe lifting techniques. Getting professional movers who specialize in gun safes is a smart choice whenever the moving task feels too difficult or poses a risk of injury. Start by measuring your safe and your home’s layout to decide if a DIY move is feasible for you today.