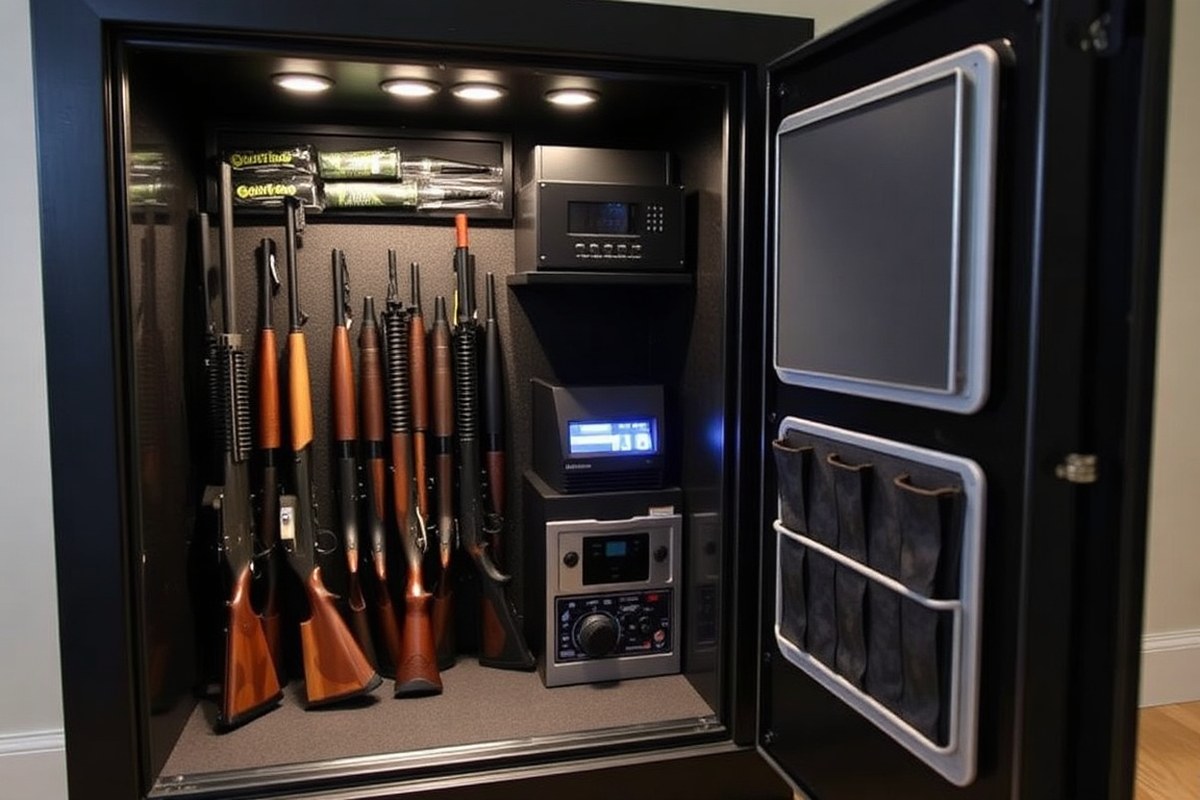
Must Have Gun Safe Accessories for Ultimate Protection and Organization
Must have gun safe accessories solve common problems like rust, poor visibility, wasted space, and theft risk inside your gun safe. Essential items include moisture absorbers, interior lighting, door panel organizers, and anchoring kits. Start by controlling moisture to prevent rust, as humidity above 70% damages steel in just weeks.
Key Takeaways
- Use silica gel canisters to keep humidity below 55%, preventing rust and corrosion inside your gun safe.
- Install motion-activated LED strip lights powered by AAA batteries to improve visibility without wiring hassles.
- Add rifle and pistol racks to organize firearms securely and increase storage capacity by up to 50%.
- Install door panel organizers sized to your safe’s door to maximize unused space efficiently.
- Anchor all safes under 750 lbs with bolt-down kits to prevent dolly-and-two-person haul-away thefts.
- Use foam rifle racks for extra protection and secure upright storage inside large gun safes or cabinets.
Essential Accessories Every Gun Safe Needs

The absolute must-have accessories for any gun safe start with a quality dehumidifier like the Eva-Dry E-333. This device prevents rust by maintaining humidity levels below 55%, which is critical because corrosion can begin in as little as two to four weeks once indoor relative humidity climbs above 70%, according to NRA storage guidelines. By inserting this compact, renewable unit into your safe, you continuously absorb moisture, protecting steel firearms without the need for electricity or constant monitoring. This investment typically costs around $30 to $50 and pays off by preventing costly rust damage.
Next in importance is proper firearm organization through modular racks or pistol holders. These racks secure guns upright and separated, minimizing contact that can cause scratches or wear. Having each firearm in its own slot simplifies quick identification and retrieval, which addresses a common complaint about cluttered safes that waste space and slow access. For safes with shelves, adding a Lockdown vault drawer organizer or hanging basket creates dedicated spots for paperwork, ammo, or small parts. While these accessories add $50 to $100 depending on size, the result is a more efficient use of space and reduced risk of misplacing smaller valuables.
Another essential is a reliable gun safe door organizer. This accessory maximizes every inch by mounting on the inner door panel and is ideal for storing cleaning supplies, extra magazines, and handguns. By keeping these items off the floor or shelves, you maintain clear space while preventing scratches. Door organizers typically cost $40 to $80 and come in sizes matched to door width. Installing one involves securing it with included hardware, ensuring a snug fit that won’t shift when the safe door opens and closes. The benefit is constant easy access to frequently used items without digging through clutter.
A strong LED lighting kit inside your safe is important for quick, efficient use. Unlike external room lighting, installed LED strips or puck lights activate when the door opens, ensuring complete visibility of every firearm and accessory, which addresses the common complaint of poor visibility. This becomes especially important in emergencies or dim conditions. Kits vary from $30 to $70 and typically feature battery power or plug-in options. Installation requires minimal tools and can be done in under an hour to transform your safe’s usability.
All these accessories together improve durability, organization, and accessibility inside your gun safe, addressing top complaints like rust, space inefficiency, and poor visibility. The total cost for these core upgrades ranges from $125 to $250 depending on safe size and accessory brands. This spending equips your gun safe to protect your firearms long-term, keep them well ordered, and make sure you can find and use them efficiently when needed.
How to Control Moisture and Rust Inside Your Gun Safe
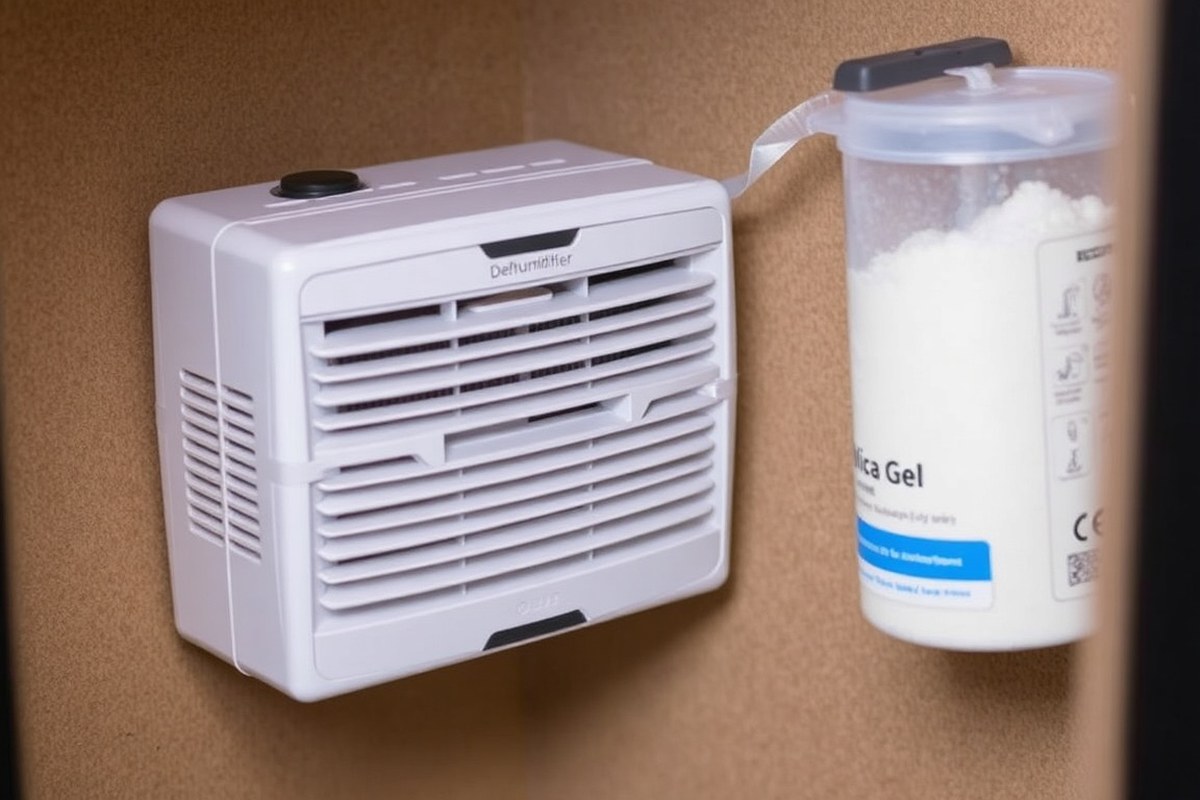
Controlling moisture inside your gun safe is essential to prevent rust and keep your firearms in top condition. The best way to reduce humidity is by using dehumidifier rods or silica gel canisters. These devices lower the relative humidity (RH) inside your safe, ideally between 30% and 50%, as recommended by the NRA. Humidity above 70% RH can cause visible rust on unprotected carbon steel in just 2 to 4 weeks.
Electric dehumidifier rods gently heat the inside of your safe to prevent moisture buildup. They usually plug into a power source outside the safe, requiring no refills and offering continuous humidity control. Rods like the Hornady Rechargeable Dehumidifier use silica gel to absorb moisture and are rechargeable, which reduces waste and ongoing purchase costs.
Silica gel canisters absorb moisture chemically without electricity. For example, the TOAAOT 200g Silica Gel Canister measures about 2 inches high and 3 inches wide, fitting easily into medium to large gun safes. Multiple canisters can be used for larger safes or humid environments. These need periodic recharging by drying them out in an oven or replacing when saturated, usually every 6 to 8 weeks depending on your local humidity.
| Device | Features | Benefits |
|---|---|---|
| Electric Dehumidifier Rod | Continuous heating, plugs into power source | Reliable continuous moisture control without refills |
| Silica Gel Canister (e.g., TOAAOT 200g) | Compact size, absorbs moisture chemically | Affordable, portable, ideal for medium to large safes |
| Rechargeable Silica Gel (e.g., Eva-Dry) | Color indicator for saturation, reusable by drying | Eco-friendly, cost-effective over time, easy monitoring |
| Wireless Hygrometer (Hornady) | Wireless, min/max humidity readings | Accurate monitoring to track humidity levels remotely |
Maintaining these devices keeps your guns safe from rust. Electric rods should be checked annually for proper function; replace if damaged. Silica gel canisters show color changes indicating saturation and need recharging or replacing every 6 to 8 weeks or sooner in humid climates. Rechargeable options like Eva-Dry provide a color change indicator and must be dried in an oven to restore them. Wireless hygrometers can help you monitor humidity levels without opening your safe.
Using a combination of a dehumidifier and a hygrometer gives you proactive control over moisture. In very humid areas, multiple silica gel canisters or a rod plus canisters might be necessary. Regularly inspect firearms for early signs of corrosion despite moisture control to catch problems early.
Tip: Always place dehumidifier rods or silica gel canisters away from direct contact with firearms to avoid uneven heating or moisture exposure that could damage finishes.
Best Gun Safe Lighting Options and Installation Tips
Choosing the right lighting for your gun safe depends on its size and how you access your firearms. Small safes often do well with motion-activated LED puck lights, while larger safes benefit from LED tape or strip lights for even coverage. Battery-powered options offer easy installation but require periodic replacement, whereas plug-in systems provide consistent brightness but need a nearby power source.
Types of Gun Safe Lighting
LED puck lights are compact, provide focused light, and usually deliver around 70 lumens. They’re great for smaller safes or supplementing other lighting. LED strip or tape lights emit between 600 to 1,200 lumens, suitable for large safes that need even illumination along the walls. Motion-activated lights turn on automatically when you open the safe, adding convenience and preserving battery life.
Standard bulbs with multiple LEDs, often arranged in strips with 20 to 30 bulbs, give uniform bright lighting useful for illuminating every corner. For quick access, motion-activation combined with LED strip lights offers the best balance of brightness and energy efficiency.
Power Sources and Battery Considerations
Battery-powered lights, such as those running on AAA batteries, usually last several months depending on use and motion sensor effectiveness. They avoid complicated wiring but add ongoing costs for battery replacement. Plug-in lights require your safe to have an accessible power outlet, such as the Stealth Gun Safe Power Outlet some models include, offering continuous power without maintenance.
Battery systems are simpler to install, ideal if your safe is in a location without easy electrical access. Plug-in setups offer brighter, steady light good for safes with heavy use. Motion-activated lights reduce power use by only activating when the door opens, extending battery life or reducing electricity bills.
| Light Type | Brightness (Lumens) | Power Source | Installation Complexity |
|---|---|---|---|
| LED Puck Light | 70 | Battery (6 AAA) | Easy (mount with adhesive or screws) |
| LED Tape/Strip Light (e.g., Lockdown) | 600, 1,200 | Battery or Plug-in | Moderate (requires mounting and wiring/powering) |
| Motion-Activated LED Light | Varies (usually 70, 600) | Battery or Plug-in | Easy to Moderate (adhesive mounting, sensor setup) |
| Standard LED Bulb Strip (20, 30 bulbs) | High (varies) | Plug-in | Complex (requires wiring) |
This table shows the tradeoffs between brightness, power, and ease of installation, helping you pick an option that fits your safe’s size and location.
Installation Tips and Safety Precautions
Start by selecting a lighting location that illuminates the entire safe interior without interfering with door seals or firearm placement. For adhesive lights, clean and dry surfaces before mounting. Use screws if provided, for a more secure fit. Motion-activated units should have sensors facing the door opening to detect movement accurately.
Before installation, disconnect any power source or remove batteries to avoid shorts. Check compatibility with your gun safe’s interior materials to prevent damage. After mounting, test the system multiple times by opening and closing the door, confirming consistent activation and brightness. Follow these steps:
- Measure your safe’s interior and choose appropriate light size and power source.
- Turn off or remove power sources.
- Clean mounting surfaces thoroughly.
- Attach lights with adhesive or screws according to instructions.
- Install batteries or connect to power outlet.
- Test motion sensors by opening and closing the safe door multiple times.
- Adjust sensor angles if necessary for reliable activation.
Installing lighting inside your gun safe makes firearm retrieval safer and faster while preventing fumbling in the dark. Always use manufacturer-approved accessories and adhere to safety recommendations to avoid electrical hazards or damage to the safe’s interior.
Organizing Firearms: Choosing Gun Racks and Holders
Choosing the right gun racks and magnetic mounts tailored to your firearms and safe size helps you maximize storage space and ensures quick access when necessary. Rifle and shotgun racks should securely hold larger long guns while pistol racks and magnetic mounts organize handguns efficiently without wasting shelf space. Proper placement inside the safe also plays a key role in maximizing capacity and accessibility.
Rifle and Shotgun Rack Options
Rifle racks come in various styles, with foam and plastic combinations offering superior hold compared to typical carpet-wrapped particle board racks found in many gun safes. Look for racks like the Adoreal 2 Pack, which features a magnetic 5-slot design that secures rifles and shotguns firmly. These racks typically fit rifles with scopes or attachments better than older models that only accommodate standard rifles.
Dimensions vary, but a typical magnetic rifle rack slot measures about 2 inches wide and 16 to 18 inches deep to fit barrel length comfortably. A two-pack retails around $40-$60 and can hold multiple rifles or shotguns, freeing up floor space. Properly chosen racks will reduce leaning and shifting inside the safe, protecting your firearms from scratches and damage while making retrieval easier.
Pistol Racks and Magnetic Mounts
Handgun storage requires compact, organized solutions designed to keep pistols separated and easy to identify. Foam pistol racks like the BSTTEK model measure approximately 5.6 inches high, 7.5 inches wide, and 9.7 inches long, holding up to 6 pistols. These racks can be placed on shelves or mounted vertically to save shelf space.
Magnetic mounts improve handgun organization by securely holding pistols on the safe’s walls or door panels without cluttering shelves. Magnetic pistol pegs and hooks allow you to position firearms where you can quickly spot and grab your preferred handgun. Modular systems combine racks and magnets for customizable layouts.
- Foam pistol racks hold 6-10 handguns; ideal shelf dimensions roughly 6″x8″x10″
- Magnetic racks and pegs attach to metal walls; no drilling required
- Stackable or wall-mounted to optimize limited shelf space
- Magnetic shotgun racks hold barrels firmly without damage
- Modular kits mix pistol racks and magnetic mounts for flexible setups
Pricing for quality pistol racks ranges from $15 to $40 depending on materials and capacity. Magnetic mounts vary similarly. Investing in both types improves order and access.
Spatial Planning and Installation Advice
Maximize your gun safe space by combining different mounting methods and placements. Install rifle racks along the back or side walls of the safe to hold long guns upright, leaving shelves free for pistols and accessories. Magnetic racks work well on side walls and door panels, especially for small firearms and gear.
Place foam and plastic racks on sturdy shelves or inside pull-out drawers to keep pistols stable and visible. Avoid stacking firearms loosely to prevent scratching and confusion. Use modular pistol racks to cluster handguns by type or frequency of use, placing the most accessed pistols near the top.
Good results include improved firearm protection and quicker retrieval times. Common mistakes are overcrowding shelves or placing racks where they block other items. Always measure your safe interior first and choose rack sizes that fit comfortably with space for firearms plus some room to grab them easily.
Maximizing Gun Safe Storage with Door Panel Organizers
Mounting door panel organizers inside your gun safe door efficiently uses space that usually remains empty. These organizers come in various sizes to match specific door widths, turning flat door panels into functional storage for pistols, magazines, ammo, holsters, and important documents without reducing your interior shelf space.
Choosing the right size is important. Measure the interior width of your safe door accurately before purchasing. Sizes typically range from 12 inches to 50 inches wide, and pricing scales accordingly, from about $55 for a 12-inch panel to around $131 for a 50-inch option. Most gun safe doors will fit one of these standard sizes, but custom options like Wilde Custom Gear’s MOLLE organizers can be made to order for a perfect fit and versatile attachment points. Below is a size and price comparison of common door panel organizers to help you select the best match for your gun safe:
| Panel Size (Width in inches) | Approximate Price (USD) | Typical Uses/Features |
|---|---|---|
| 12 | $55 | Compact pistol racks, ammo pouches, holsters for small lockers |
| 17-18 | $75-$80 | Medium pistol racks, document baskets, accessory hooks |
| 20-25 | $90-$110 | Larger pistol racks, combined holster and magazine holders |
| 30-40 | $120 | Extended storage for multiple pistols, ammo crates, expanded MOLLE options |
| 50 | $131 | Maximum coverage for large guns safes, full MOLLE setups, document baskets |
Before installing, ensure your door panel organizer fits securely without interfering with the locking mechanism or sealing gaskets that provide fire and theft protection. Well-installed door organizers typically do not affect the safe’s fire rating or overall security since they occupy the door’s interior flat space and do not alter the steel structure. Sturdier organizers with heavy-duty magnets or solid mounting can hold up to 35 pounds of weight, offering reliable support for heavier items. Use a checklist when selecting features:
- Match organizer width to your safe’s interior door dimensions.
- Choose organizers with pistol racks or holster attachment points if you store handguns.
- Consider MOLLE panel systems for modular, customizable storage.
- Look for document baskets or ammo crates for additional accessory storage.
- Check weight ratings, especially for magnetic hooks and shelves.
- Verify that installation does not block safe door seals or lock components.
Tip: Accurately measure your safe’s interior door width before purchasing a door panel organizer to avoid returning the wrong size and to ensure full compatibility with your lock and fireproof seals.
Door panel organizers offer a cost-effective way to increase your gun safe’s storage capacity without sacrificing the safe’s strength or fire protection. Investing about $55 to $131 depending on size provides versatile storage for firearms and valuables. Proper selection and installation improve your safe’s organization and accessibility, especially for smaller locker sizes like a 3-5 rifle safe where space is at a premium.
Power Solutions and Environmental Sensors for Gun Safes
Power kits and environmental sensors for gun safes provide a important layer of monitoring and control over the safe’s internal conditions. Electrical outlet kits supply convenient power inside your safe for devices like dehumidifiers and chargers, while digital hygrometers and temperature sensors track moisture and heat to prevent corrosion. Alert systems can notify you promptly if humidity or temperature levels reach unsafe ranges or if the safe is tampered with, helping protect your firearms and valuables.
Popular Gun Safe Power Outlet Kits
Electrical outlet kits installed inside your gun safe offer a protected power source, avoiding the need to run extension cords through the door seals. Common kits include Liberty Safe’s Gun Safe Electrical Outlet Kit, which features dual 110-volt outlets and surge protection. Another option is the Stack-On Safe Outlet Kit, providing a single 110-volt outlet with a grounded plug and 6-foot cord for easy wiring outside the safe.
Prices usually range from $20 to $50 depending on features and brand. Installation involves drilling a small hole in the safe’s rear or side panel to run the power cord outside while preserving the safe’s seal. Some kits come with adhesive mounting plates and screw-on covers to secure the outlet inside. Proper installation ensures reliable power supply for devices like dehumidifier rods or internal LED lights.
How Digital Hygrometers and Temperature Sensors Work
Digital hygrometers measure relative humidity and temperature inside the safe, displaying real-time data on an external digital screen or sending it wirelessly to your phone. The Hornady Wireless Digital Hygrometer is a favored model that uses internal sensors to detect moisture levels and temperature, helping maintain an ideal humidity range of 30-50%, which reduces rust risk.
These devices have a sensor probe placed inside the safe near stored firearms, often attached magnetically or with adhesive. The data transmits to a separate monitor screen or smartphone app where you can check conditions at any time. This real-time awareness allows you to adjust humidity controls, such as activating a dehumidifier rod or replacing moisture-absorbing packs promptly.
Alert Systems for Safe Environmental Conditions and Security
Advanced gun safe monitoring systems combine environmental sensors with security alerts. Some packages offer motion sensors, vibration detectors, and humidity alarms that notify you via app alerts or built-in sound alarms if thresholds are exceeded or the safe is tampered with. This dual protection helps you respond quickly to both security threats and environmental hazards.
For example, a system may trigger an alert if humidity rises above 55% or temperature exceeds 85°F, conditions that promote firearm corrosion or mold growth. Motion or vibration alerts detect forced entry attempts or movement of the safe, improving security. These systems usually require Wi-Fi or Bluetooth connections and a compatible smartphone for alerts.
Installation Tips for Wiring and Sensor Placement
Proper installation maximizes the function of power kits and environmental sensors. Drill the smallest hole possible for wiring near the safe’s back or bottom panel to maintain the integrity of the fire seal. Use rubber grommets to protect cords from abrasion. Run cords neatly along the interior corners using cable clips or adhesive mounts.
Place humidity and temperature sensors at mid-level inside the safe, near your firearm collection but not touching metal surfaces, which can skew readings. Avoid placing sensors near lights or dehumidifier rods, as heat sources may affect accuracy. Position internal outlet kits away from moisture sources and secure cords to prevent damage.
- Choose power kits with surge protection for sensitive electronics
- Place sensors away from direct heat or cold drafts inside the safe
- Seal cord entry points with weatherstripping or silicone to maintain airtightness
- Regularly calibrate hygrometers for accurate readings
- Test alert systems monthly to ensure connectivity and functionality
- Employ wireless sensors for easier installation and remote monitoring
- Keep extra batteries or power backups for sensors and alarms
Protecting Documents and Valuables with Fireproof Bags
A fireproof bag inside a gun safe serves as an extra layer of defense for documents and valuables, particularly if your safe’s fire rating isn’t very high. Most gun safes provide some fire resistance, but paper and electronics require a much stricter environment to survive intense heat. A dedicated fireproof bag can offer roughly an additional 50 degrees of protection beyond the safe’s built-in insulation, which can make the difference between losing or preserving critical papers and digital storage devices.
When selecting a fireproof bag, capacity should match the volume of important items you plan to protect. Common options range from small document-sized bags that hold papers and USB drives, to larger bags that can accommodate notebooks, passports, and even small electronics. Look for bags rated to resist temperatures of at least 1550°F for 30 minutes, as this is a standard benchmark for fireproof document storage. Bags made from silica fiber or similar materials often meet these ratings and deliver reliable protection.
Fireproof bags are suitable for protecting digital storage devices, like external hard drives, flash drives, and SD cards. Many digital devices can tolerate heat up to around 120°F for short periods but will fail under prolonged exposure to higher temperatures. A high-quality fireproof bag maintains an internal temperature well below critical levels during a fire, preserving both paper and electronics. Confirm the bag’s rating includes digital media protection if you plan to store such items.
For effective use, place the fireproof bag on a stable shelf inside the safe to avoid direct contact with metal surfaces or safe walls that could conduct heat faster. If your safe comes with shelf hanger baskets, use them to keep the bag improve and organized along with other accessories. Avoid overstuffing the bag, as tight packing can reduce heat protection. Leaving enough space inside the bag for air pockets allows it to better insulate contents.
Integrating the fireproof bag within your gun safe means balancing accessibility and protection. Store frequently needed documents or devices near the front but ensure they remain inside the fireproof bag at all times. Label the bag clearly for quick identification in an emergency. Expect to spend between $30 and $100 for a durable, certified fireproof bag; the price varies mainly by size, brand, and certification rating.
Using a fireproof bag addresses the common flaw in lower-rated or budget gun safes that do not maintain safe internal temperatures during a fire. Without this secondary barrier, important papers and digital backups might still be lost even if your firearms survive. On the downside, adding fireproof bags requires extra space and occasional inspection to ensure the bag’s seams and material remain in good condition, especially after moving or opening the safe frequently.
Anchoring and Securing Your Gun Safe Against Theft
Anchoring your gun safe solidly to the floor or wall is key to preventing haul-away theft and stabilizing the safe during use. Safes under about 750 pounds are especially vulnerable to being moved by two thieves with a dolly, so installing an anchor kit is critical. Most safes come with a basic anchoring kit, but upgrading to a heavy-duty bolt-down kit designed for your floor type offers better security. Concrete floors require heavy-duty anchor kits with concrete anchors, while wood subfloors need lag bolts sized to the depth of the floor joists.
Improper anchoring can damage your safe, the floor, or both. Use anchor kits appropriate for your safe’s size and weight and follow installation instructions closely. Over-tightening bolts or using incorrect drill bits can warp the safe’s anchoring points or crack concrete. Anchoring also stops the safe from tipping and ensures it remains firmly in place when opening or closing the door. Choosing the right anchor kit depends on your safe’s weight and installation surface:
- Safes up to 750 lbs: Bolt-down anchor kits with concrete anchors or lag bolts are recommended. A 300-lb safe can be lifted by two people easily without anchoring.
- Heavy safes: Anchoring is still advised but may require specialized hardware or professional installation due to size and weight.
- Concrete floors: Use heavy-duty anchor kits with wedge or sleeve anchors made for concrete.
- Wood floors: Use lag bolts long enough to penetrate floor joists, typically 3 to 4 inches.
Tools required include a hammer drill with a masonry bit for concrete, a drill with a wood bit for lag bolts, wrenches or socket drivers, a wrench or ratchet set, measuring tape, and a level. The installation process involves marking anchor points, drilling pilot holes, inserting anchors, aligning the safe, and tightening bolts evenly. Follow this step-by-step checklist to anchor your gun safe securely:
- Locate factory anchor points on the safe’s base.
- Select anchor kit matching your floor: concrete anchors or lag bolts for wood.
- Mark drill points on floor through safe base anchor holes.
- Move safe aside to prevent damage during drilling.
- Drill pilot holes using proper bit size and drill type for floor material.
- Insert anchors according to kit instructions (tap wedge anchors into concrete).
- Return safe over anchor points and insert bolts through base into anchors.
- Tighten bolts evenly until firmly secured, avoiding overtightening.
Use a level to ensure the safe sits flat before tightening bolts and never force anchors, this prevents cracking or warping of the floor and safe.
Quick-Start Action Plan for Upgrading Your Gun Safe
Follow these steps to improve your gun safe’s protection, organization, and convenience effectively.
- Day 1: Install a moisture control system such as silica gel packs or a dehumidifier. Check for condensation or rust spots within a week to confirm it’s working.
- Day 2: Add LED lighting inside your safe. Turn on the lights and inspect how well you can see your firearms to ensure proper installation.
- Week 1: Install gun racks and door panel organizers to separate and organize firearms and accessories. Verify all guns fit securely and can be accessed easily.
- Week 2: Place fireproof bags inside the safe for important documents and valuables. Confirm items remain dry and protected after a short inspection.
- Week 3: Set up power solutions such as backup batteries or hardwiring if needed. Test the backup power during an outage to check reliability.
- Week 4: Use environmental sensors like temperature and humidity monitors linked to your smartphone. Review data daily to monitor safe conditions actively.
- Month 2: Anchor and secure your safe to the floor or wall with approved hardware. Attempt gentle rocking to confirm stability without damaging your floor.
Frequently Asked Questions
What Are Some Must-Have Accessories to Improve Gun Safe Usability?
Must-have accessories include lighting, dehumidifiers, magazines storage, and racks to keep firearms organized and in good condition. These additions help in easy access and protect your guns from damage and rust.
Why Are Door Panel Organizers Recommended for Gun Safes?
Door panel organizers maximize storage space and keep small items like magazines and accessories within easy reach. This improves organization and speeds up access during urgent needs.
How Do Dehumidifiers Benefit a Gun Safe Owner?
Dehumidifiers control moisture inside the safe, preventing rust and corrosion on firearms. Keeping humidity below 50% is ideal for maintaining gun condition.
Can Adding Lighting Inside a Gun Safe Improve Functionality?
Yes, lighting allows you to locate and access guns quickly, especially in low light conditions. Battery-powered LED strips or motion-activated lights are popular choices.
What Role Do Quick-Access Mounts Play Inside a Gun Safe?
Quick-access mounts hold your firearm in a ready position for fast retrieval. They improve safety by allowing selective access without cluttering your safe.
Why Should You Use Fireproof Bags Inside a Gun Safe?
Fireproof bags protect important documents and small valuables from heat and fire damage. They add an extra layer of security beyond the safe’s fire rating.
The Bottom Line
Upgrading your gun safe with the right accessories improve its function and security significantly. Prioritize installation of moisture control and organization tools to protect your firearms immediately. Start by selecting a reliable dehumidifier or silica packs to prevent rust, then add tailored racks and lighting for quick access. Proper accessories turn your safe into a better protector of both your guns and valuables.


