What Is a Reflex Sight? A Complete Guide for Better Aiming and Use
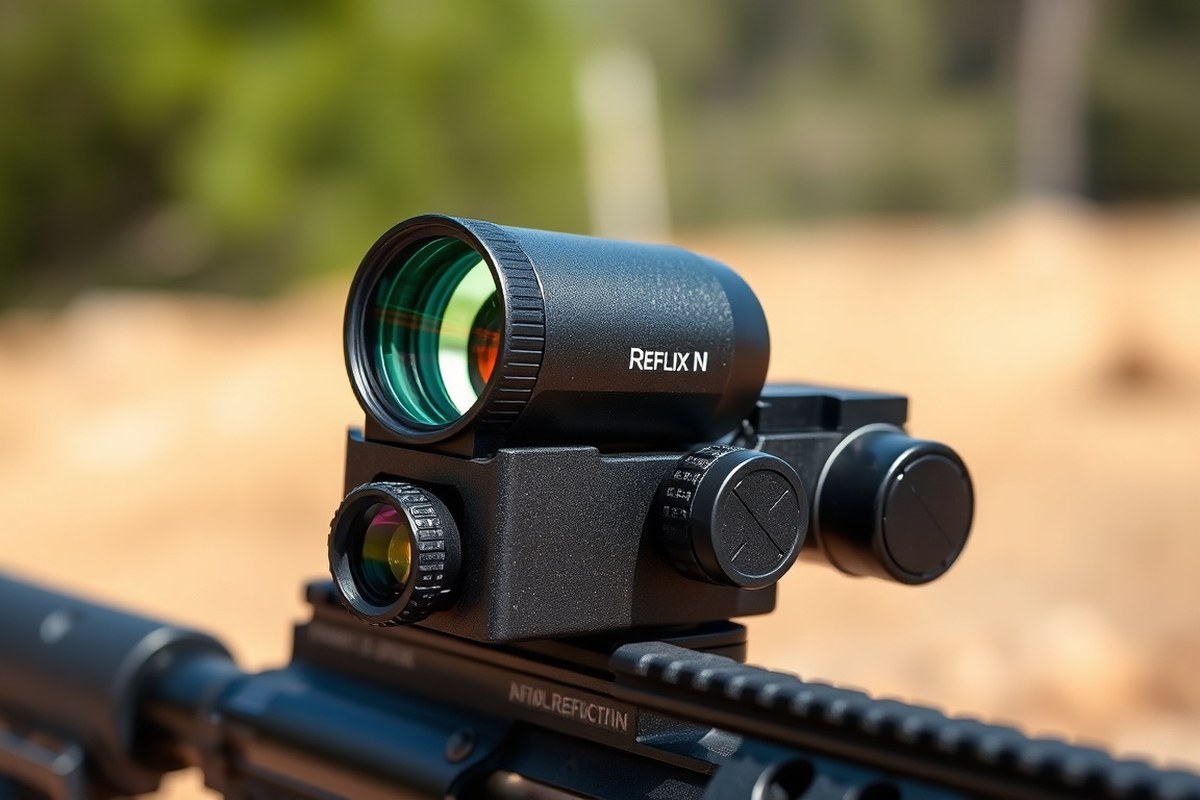
What is a reflex sight? It is a type of optical device that projects a red dot reticle onto a lens, allowing quick target acquisition without aligning front and rear sights. These sights work by reflecting an LED-generated reticle back to the shooter’s eye while maintaining a wide field of view and parallax-free aiming. Starting with a reflex sight improves response time and shooting accuracy by letting you focus on the target instead of sight alignment.
Key Takeaways
- Reflex sights typically weigh between 1 and 3 ounces, making them lightweight options for carbines and pistols.
- Look for reflex sights with battery life upwards of 5,000 hours for reliable, extended use.
- Open emitter designs offer a wide field of view but can expose the lens to debris and damage.
- Enclosed reflex sights protect internal components and lenses, improving durability in harsh environments.
- Dot reticles come in various sizes, usually between 3 MOA and larger, affecting precision and speed.
- Motion-activated auto-off features extend battery life by shutting the sight down after inactivity.
What Is a Reflex Sight and How Does It Work

A reflex sight is a type of red dot optic designed for rapid target acquisition on firearms. It uses an LED to illuminate a reticle, typically a red dot, which is projected onto a curved, semi-transparent lens. This lens acts like a mirror, reflecting the aiming point directly back to your eye while allowing you to see the target through the same optical path. The simple setup lets you keep both eyes open, improving awareness and speed, especially at close to medium ranges.
The key design feature of a reflex sight is its open emitter style. In this design, the LED and lens assembly is exposed rather than enclosed in a tube. This reduces weight and size, making reflex sights extremely lightweight, usually between 1 and 3 ounces, while offering wide fields of view. The LED shines light onto the angled lens surface, reflecting only the reticle toward your eye without affecting the clarity of the target image behind it. The reticle appears to float on the same plane as your target, which aids fast shooting without needing precise eye alignment.
Reflex sights differ from holographic sights in how the reticle is created. Reflex sights rely on an LED and a curved mirror coating on the lens, while holographic sights use a laser to illuminate a holographic film within the optic. This film produces a reticle pattern visible through the sight. Reflex sights generally offer longer battery life, with some models running 10,000 to 50,000 hours on a single battery, compared to holographic sights that usually last around 500 to 1,500 hours. Reflex sights are also typically lighter and less expensive.
Comparing reflex sights to other red dot designs reveals minimal functional difference, as the terms often overlap. Traditional red dot sights include both tubed and reflex styles, but reflex sights specifically highlight the open emitter, curved lens design. This design aims for parallax-free viewing, meaning the reticle stays aligned with the barrel even if your head moves slightly. That stability helps maintain accuracy without constant re-zeroing during rapid or dynamic shooting situations.
One important operational detail with reflex sights is how the LED illumination appears under different conditions. The intensity of the LED can be adjusted to match ambient light, avoiding washout in bright daylight or dimness indoors. Most reflex sights allow the dot size and brightness to be changed, tailored to the shooter’s preferences or mission requirements. Good results come from zeroing the sight so the dot perfectly coincides with bullet impact at your chosen distance, commonly 50 or 100 yards, ensuring consistent shot placement.
Some reflex sights cost as little as $100, like the Burris FastFire III, offering multiple brightness settings and reliable performance. High-end models, such as the Sig Sauer Rome5 or Vortex Venom, bring advanced durability, aluminum housings, and longer battery lives, which may reach beyond 30,000 hours. Choosing the right sight depends on your firearm platform, typical shooting distances, and budget.
Types of Reflex Sights: Open Emitter vs Enclosed Designs
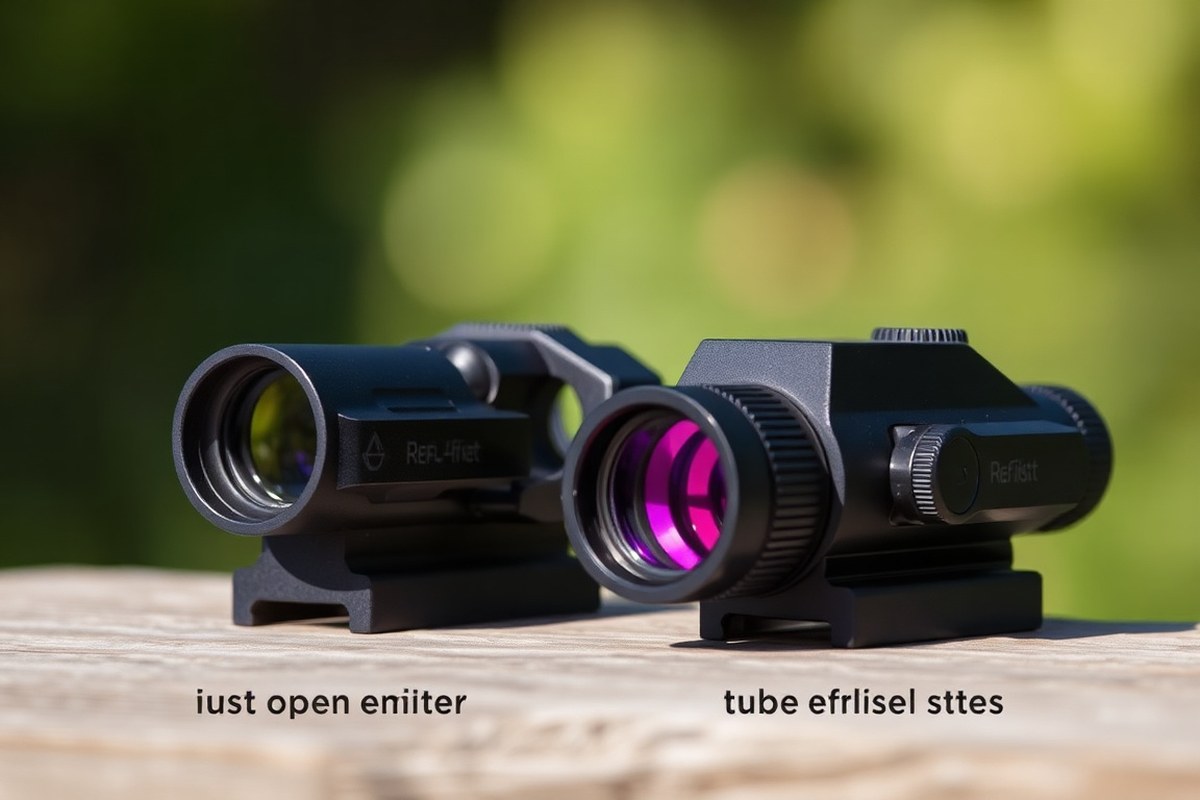
Open emitter reflex sights differ from enclosed tube designs mainly in structure and field of view. Open emitter sights expose the emitter diode, enabling a wide viewing area ideal for quick target acquisition on carbines and fast-paced shooting. These sights often feature larger lenses around 24×32 mm, providing more peripheral awareness and battery lives up to 50,000 hours. Conversely, tube reflex sights, commonly called true red dot sights, fully enclose the emitter within a single housing, protecting it from glare and direct sunlight.
The tube-style reflex sight typically has a lens diameter between 20 to 30 mm and offers improve durability. Its enclosed design shields internal components from environmental hazards better than open types, making it suitable for harsher conditions and longer-term reliability. Both types adapt well to rifles and handguns, although smaller models are especially popular for handguns and speed shooting competitions like 3-Gun.
| Feature | Open Emitter Reflex Sight | Enclosed Tube Reflex Sight |
|---|---|---|
| Field of View | Wide (up to 24×32 mm lens size) | Narrower (20-30 mm diameter lens) |
| Durability | Moderate; emitter exposed to elements | High; emitter enclosed, better protection |
| Battery Life | Up to 50,000 hours | Varies, generally less than open type but depends on model |
| Weight | Generally lighter due to less housing | Heavier due to full enclosure |
| Mounting Options | Versatile, fits carbines, rifles, handguns | Also versatile, common on rifles and handguns but often bulkier |
| Typical Applications | Fast target acquisition, competitive shooting, hunting | Durability-focused use, tactical environments, adverse weather |
Choosing between these two designs depends on how you plan to use your optic. Open emitter reflex sights work well for fast shooting because they offer a wide viewing angle and long-lasting batteries. Their light weight and large viewing window help you aim quickly and make swift follow-up shots. On the other hand, enclosed tube designs provide solid durability and reduce glare, which is useful outdoors in bright sunlight or tough environments with dust and moisture.
Always test reflex sights on your firearm under the lighting and environmental conditions you expect to encounter for best performance.
Understanding these tradeoffs lets you match your reflex sight to your shooting style. When adding a sight to a rifle for hunting or a handgun for competition, focus on lens size, how well it protects the optic, and battery life. Both types support multiple mounting systems, so integration is straightforward regardless of firearm type.
Reticle Options: Dot Size, Color, and Shapes Explained
Reflex sights come with various reticle sizes, colors, and shapes, each affecting how quickly and accurately you can aim. The size, typically measured in MOA (minutes of angle), influences precision versus speed, while color choice affects visibility in different lighting conditions. Beyond simple dots, reticles may include circles or hybrid shapes to assist with aiming at diverse distances and situations.
Standard Dot Sizes and Their Uses
Dot sizes for reflex sights usually range from 1 MOA to 5 MOA. Smaller dots like 1 MOA provide fine precision for long-distance shots but require more focus, making them slower for quick target acquisition. Larger dots, such as 4 to 5 MOA, cover more of the target and allow faster aiming, ideal for close-range or dynamic shooting.
Choose your dot size based on typical target distances and shooting context. A 2 or 3 MOA dot often strikes a good balance, offering moderate precision and speed for general applications. For example, tactical shooters and hunters who expect shots around 100 yards might prefer a 2 MOA dot for center-mass aiming. Competitive shooters focusing on precise hits at longer ranges might opt for 1 MOA or smaller if available.
Red vs Green Dot Color Advantages
Red and green reticles are the most common colors for reflex sights. Red dots generally perform well in most lighting, especially low light or overcast conditions due to human eyes’ sensitivity to red wavelengths. Green dots can appear brighter in bright daylight, improving visibility against lush backgrounds like forests or grassy terrain.
Choosing the right color depends on your shooting environment and personal preference. Try both colors if possible, since some shooters find green easier to pick up quickly, while others prefer red for lower battery consumption and battery life. Adjust brightness levels to avoid reticle washout in bright settings or insufficient contrast in shadows.
Alternative Reticle Shapes and Benefits
Besides simple dots, many reflex sights offer alternatives like circles, rings, or combined dot-and-circle reticles. Circles help with quick target acquisition and maintaining situational awareness, especially useful in close quarters or fast-moving scenarios. A dot inside a circle allows for precise aiming with a quick reference frame, helpful at varied distances.
Hybrid reticles, such as a small dot surrounded by a 65 MOA ring, enable shooters to switch between rapid target acquisition and detailed precision without changing sights. Some reflex sights allow you to swap reticles on the fly, offering flexibility for multiple shooting roles.
- 1 MOA dot, best precision, use for distant targets beyond 100 yards
- 2 to 3 MOA dot, balanced choice for general hunting, tactical, and target shooting
- 4 to 5 MOA dot, ideal for close-range, fast engagement or low-light
- Red reticles, better visibility in low to moderate light
- Green reticles, stand out better in bright daylight against natural backgrounds
- Circle and dot combinations, quick target acquisition with precision aiming
- Switchable reticles, adaptability for multiple shooting conditions and distances
Selecting the right reticle size and color depends on your specific firearm, shooting style, and environment. Testing different sizes and colors at your usual engagement distances and lighting conditions will help optimize accuracy and speed. Reticle sharpness and brightness adjustment also affect how clearly you see the aiming point and therefore your performance.
How to Properly Mount and Zero a Reflex Sight
Properly mounting and zeroing a reflex sight ensures it remains accurate and reliable during use. Secure attachment to your firearm and a systematic zeroing process give you confidence in point-of-aim and point-of-impact alignment. Following careful setup and routine checks helps maintain that accuracy over time.
Mounting Basics: Tools and Alignment
Start by choosing the right mounting location on your firearm, typically a Picatinny or Weaver rail, that offers a stable base near the bore axis. Use the mounting screws and brackets supplied with the reflex sight, ensuring they fit your firearm and sight model. Secure tools like a Torx or Allen wrench set will be necessary to tighten these screws properly.
Align the sight parallel to the barrel and make sure it sits firmly without rocking or movement. Confirm the iron sights or previous optic zero first to have a reliable baseline before fine-tuning your reflex sight. Avoid over-tightening screws, which can damage the sight or rail; torque values in most manuals specify about 15-20 inch-pounds as safe.
Zeroing Steps: From Bore Sighting to Final Adjustment
Zeroing sets the reflex sight so that its reticle matches the bullet’s point of impact at a chosen range, typically 15 to 25 yards for pistols. Start by bore sighting to get your point-of-aim close to point-of-impact, then proceed to live-fire adjustments on a stable rest.
- Confirm your firearm is clean and use a stable shooting rest at your zeroing distance, usually 15-25 yards for handgun reflex sights.
- Fire a 3-5 shot group aiming at the centre of the target. Use the optic’s windage (left-right) and elevation (up-down) adjustment screws to move the reticle overlay.
- Adjust the sight’s controls based on where the group impacts relative to your aim point. Typically, 1 click equals about 1/2 inch at 25 yards, but check your sight’s specifications.
- Repeat shooting groups and adjusting until the group consistently hits at your aim point.
- Lock any adjustment screws or settings once you are satisfied to prevent movement during use.
- Fire a final verification group to validate consistent zero.
Consider environmental factors like lighting and target color, and lower reticle brightness if glare interferes. For rifles or longer ranges, increasing the zero distance may help maintain point-of-aim out to 50 yards.
Maintaining Zero: Tips for Retention and Checking
Most zero loss comes from loose mounting screws rather than optic defects. Regularly check the tightness of all screws especially after heavy recoil shooting sessions. Use thread-locking compounds only if recommended by your optic manufacturer to avoid over-tightening or damage.
Routine cleaning and inspection for dirt or debris on the sight window helps maintain a clear sight picture. Store your firearm with the sight protected from impacts and extreme temperatures, as excessive heat over 140°F may affect electronic components.
Verify zero periodically during regular shooting to catch any shifts early. Adjust as necessary but keep a log of your zeroing settings for consistent results. If using a magnifier with your reflex sight, confirm the combined zero to avoid discrepancies in point-of-aim.
Advantages and Limitations of Reflex Sights for Shooting
Reflex sights excel in scenarios requiring rapid target acquisition and close to medium-range engagements, usually within 100 yards. Their wide field of view lets you keep both eyes open, maintaining full situational awareness and making it easier to spot and engage moving targets quickly. This advantage suits tactical shooting, home defense, and hunting, especially in dynamic or low-light conditions where speed and accuracy must work hand in hand.
Their design offers near-parallax-free aiming, meaning the reticle remains on target regardless of slight shifts in your head position, simplifying the aiming process. This feature is particularly helpful for beginners and anyone under stress, allowing faster alignment without needing a perfectly consistent cheek weld. For precision at longer ranges, opting for a smaller reticle dot around 1 to 2 MOA can improve accuracy, while larger dots of 3 to 5 MOA favor quick sight picture acquisition at shorter distances.
Using a reflex sight effectively means mounting it at eye level to line up naturally with your sight picture. This setup supports the technique of focusing on the target while allowing the red dot to “float” onto it, speeding up your response time without sacrificing precision. These sights typically work best in daylight and low-light conditions, especially models with adjustable brightness to match ambient lighting.
Limitations come into play beyond about 100 yards where lack of magnification reduces precision compared to traditional scopes. Bright sunlight or reflective surfaces can sometimes make the reticle harder to see, though many modern reflex sights help mitigate this with adjustable brightness and anti-reflective coatings. Also, while parallax is minimal, it is not completely eliminated on all models, so consistently aligning your eye behind the sight improve accuracy.
To maximize speed and accuracy, focus your eyes on the target, not the red dot, allowing the reticle to appear naturally in your sight picture for quick alignment.
Common Reflex Sight Issues and How to Fix Them
Battery failure is a common cause of a reflex sight losing brightness or shutting off. Most modern reflex sights run on CR2032 coin cell batteries that can last between 3 and 5 years on a single battery if you keep brightness at mid-level settings. To avoid sudden power loss, replace the battery proactively every 3 years or after about 10,000 hours of use. Always carry a spare battery in your gear and remember that after swapping the battery, you must re-zero the sight to maintain accuracy.
Lens fogging reduces visibility and aiming speed, especially when transitioning between cold and warm environments. You can prevent fog by storing your reflex sight in a dry case with desiccant packs and by using anti-fog sprays or wipes designed for optics. When the lens fogs up while shooting, gently clean it with a microfiber cloth or lens tissue without pressing too hard to prevent scratches. Avoid using oily or abrasive substances that damage lenses.
Glare on the reflex sight lens can cause eye strain and obscured reticle visibility in bright sunlight or around bright artificial lights. To reduce glare, clean the lens regularly to remove dust and smudges that increase reflection. Applying an anti-reflective coating or using lens covers that minimize light bounce can help as well. Position yourself or your firearm to block direct sunlight from hitting the lens at extreme angles. Low-reflective lens coatings are common in higher-end reflex sights and improve shooter comfort and sight clarity.
- Check and replace the CR2032 battery every 3 years or 10,000 hours of use
- Carry a spare battery and re-zero the sight after replacement
- Store the sight with desiccant packs to reduce moisture build-up
- Use anti-fog sprays or lens wipes designed for optics regularly
- Clean lenses gently with a microfiber cloth without applying harsh chemicals
- Apply anti-reflective coatings or lens covers to minimize glare
- Avoid direct sunlight angles that cause glare on the lens
Loss of zero can happen if the reflex sight experiences strong impacts, or if you switch batteries, as the reticle’s position may shift slightly. Frequent checks of zero after rough handling or battery swaps ensure you maintain point-of-impact accuracy. A drop in accuracy beyond 100 yards means you should adjust zero settings, as reflex sights are designed mainly for close to mid-range shots, normally within 150 yards.
How to Choose the Right Reflex Sight for Your Needs
Selecting a reflex sight means weighing factors like dot size, battery duration, durability, how you’ll mount it, and cost against your shooting style. A dot with 1 to 2 MOA precision benefits target shooting or competitions by allowing fine aiming. On the other hand, a bigger dot speeds up aiming for close-range or defense. Battery life changes a lot between models: some last up to 50,000 hours on one battery, useful for extended shooting or hunting, while brighter modes or compact pistol sights might only run around 300 hours before needing a new battery.
Durability depends on the optic’s construction and environmental sealing. Choose reflex sights with tough aluminum bodies and water resistance for outdoor shooting and tactical use in changing weather. For pistols or carbines, ensure the reflex sight uses a mounting footprint compatible with your firearm, such as the common RMSc mount for subcompact pistols or the more versatile Picatinny rails on carbines. Price often reflects features and build quality; budget models can run under $100, but premium sights with longer battery life, better glass coatings, and advanced reticles might cost $400 or more. Evaluating reflex sights by purpose, use this checklist:
- Dot size: 1-2 MOA for precision, 3-6 MOA for speed
- Battery: longevity of 300 hours to 50,000 hours based on usage
- Durability: aluminum body, weather sealing, shock resistance
- Mounting: RMSc for handguns, Picatinny for carbines or rifles
- Price range: budget-friendly under $150, premium over $300
- Reticle options: solid dot vs. Dot with ring for different target acquisition
For pistols, compact reflex sights optimized for carry-size frames often use smaller 24mm or 25mm windows with battery life around 300 hours at high brightness. Carbines and competition rifles typically benefit from larger windows and 2 MOA dots, prioritizing fast target acquisition and extended battery life closer to tens of thousands of hours. Beginners should match the optic’s simplicity with their budget and firearm type, while experienced shooters may invest in premium optics offering improve reticle customizations and durability. Considering shooting style helps avoid overspending or ending up with a sight that can’t keep up in your intended scenarios.
Reflex Sight Use and Aiming Techniques for Best Accuracy
Using a reflex sight effectively involves shooting with both eyes open to maintain situational awareness, placing the reticle dot aligned precisely on your target, and practicing consistent follow-through to ensure each shot lands where intended. These aiming techniques help you maximize speed, accuracy, and shot placement, especially under dynamic conditions.
Shooting with Both Eyes Open
Shooting with both eyes open preserves your depth perception and widens your field of view, enabling you to acquire targets faster and track multiple threats. Reflex sights are designed for this method because the reticle appears superimposed on the target without needing to line up your eye perfectly with the sight.
To train yourself for shooting with both eyes open, start by identifying your dominant eye. Close one eye at a time to see which one aligns better with the sight’s reticle. Then practice aiming while consciously relaxing the non-dominant eye rather than closing it, allowing your brain to blend the two images into one clear sight picture.
Proper Dot Placement on Target
The bright dot or reticle in a reflex sight acts as your point of aim, so placing it correctly on the target is critical for accuracy. You want to align the dot exactly where you want the bullet to land. This can differ by situation, such as aiming center mass when hunting or placing a smaller dot on a specific point when shooting targets at longer distances.
Smaller dots (around 2 to 2.5 MOA) are better for precision shots at longer ranges, up to 300 yards, while larger dots (4 to 6 MOA) speed up target acquisition at close quarters but reduce pinpoint accuracy. Adjust the reticle brightness to ensure the dot is visible against the background but does not obscure the target.
Maintaining Follow-Through and Consistency
Follow-through means keeping your shooting stance, cheek weld, and sight alignment steady immediately after the trigger breaks. This practice prevents flinching and movement that can throw off your shot placement. A stable hold combined with a consistent cheek weld produces a repeatable sight picture that makes tracking hits and adjusting faster.
When the shot is fired, keep looking through the reflex sight, observe where your dot lands relative to the target, and reset your position for the follow-up shot if needed. This helps you maintain rhythm and speed while improving accuracy over multiple shots. Here are steps to improve your aiming and follow-through with a reflex sight:
- Focus both eyes on the target and keep the reflex sight dot visible without closing the non-dominant eye.
- Place the reticle dot directly on the precise point of impact you want on the target.
- Maintain a consistent cheek weld and steady grip on the firearm.
- Squeeze the trigger smoothly without anticipating the shot.
- Hold your shooting position briefly after the shot to observe the impact and ensure minimal movement.
- Reset your stance and sight picture quickly and consistently for follow-up shots.
- Adjust the dot brightness and reticle size as needed to match lighting and distance conditions.
- Practice this routine regularly to build muscle memory and speed.
Always resist the urge to immediately look away after shooting; maintaining your sight picture after the shot improves accuracy and allows for quicker follow-up shots.
Step-by-Step Action Plan for Using and Maintaining Your Reflex Sight
Follow this plan to get the most out of your reflex sight and keep it performing well.
- Before You Begin: Mount your reflex sight securely on your firearm using the appropriate tools. Confirm it holds firmly without wobble or looseness.
- Day 1: Zero the sight at a short distance (25 yards) using a rest for stability. Verify your shots group close to the point of aim.
- Week 1: Practice shooting on the move and at different distances to get used to the reticle and sight picture. Track your accuracy improvements and adjust if needed.
- Week 2: Change reticle settings like dot size or brightness in different lighting to find your preferred setup. Choose whatever offers the sharpest sight picture without strain.
- Month 1: Inspect the reflex sight for loose screws, dirt, or scratches and clean the lens with a microfiber cloth. Confirm clarity and mounting remain optimal.
- Every 3 Months: Replace batteries or recharge as specified by the manufacturer. Check that the reticle illuminates consistently to avoid surprises.
- As Needed: Troubleshoot common issues like reticle flicker or dead spots using manufacturer guidelines or by consulting a gunsmith if problems persist.
Frequently Asked Questions
What Is the Main Difference Between a Reflex Sight and a Red Dot Sight?
A reflex sight uses a curved lens to project the reticle, while a red dot sight typically uses a reflective lens. Reflex sights often provide a wider field of view and longer battery life, making them popular for close-to-mid-range shooting on AR-15s.
Are Reflex Sights Suitable for Handguns?
Yes, compact reflex sights are designed for handguns, especially larger models like full-size carry pistols. They offer quick target acquisition and improve accuracy for quick shots at close range.
Can You Use a Reflex Sight in Low-Light Conditions?
Reflex sights work well in low light due to their illuminated reticles, which provide clear aiming points even in dim environments. Adjusting brightness settings helps prevent the reticle from being too bright or washed out.
Do Reflex Sights Require Special Batteries?
Reflex sights use standard coin cell batteries that can last from 10,000 to over 50,000 hours depending on the model. Always follow manufacturer recommendations to ensure reliability and carry spare batteries for extended shooting sessions.
How Durable Are Reflex Sights in Harsh Outdoor Conditions?
Reflex sights are generally durable but vary by model. Many have rugged, waterproof designs suitable for hunting and tactical use; check product specifications for shock and weather resistance before choosing one for extreme environments.
Can You Zero a Reflex Sight Yourself at Home?
Yes, zeroing a reflex sight at home is possible with a stable rest and proper target. Adjust windage and elevation screws according to shot impacts; recheck zero after firing multiple rounds for consistent accuracy.
Key Points to Remember
Reflex sights give you a fast, intuitive aiming solution that improves speed and accuracy when used properly. Adjusting settings and maintaining your sight regularly ensures it performs reliably for years. Start by mounting and zeroing your reflex sight today, then commit to consistent practice to see clear benefits at the range or in the field.