How to Set Up a Gun Safe: Complete Guide for Secure and Easy Installation
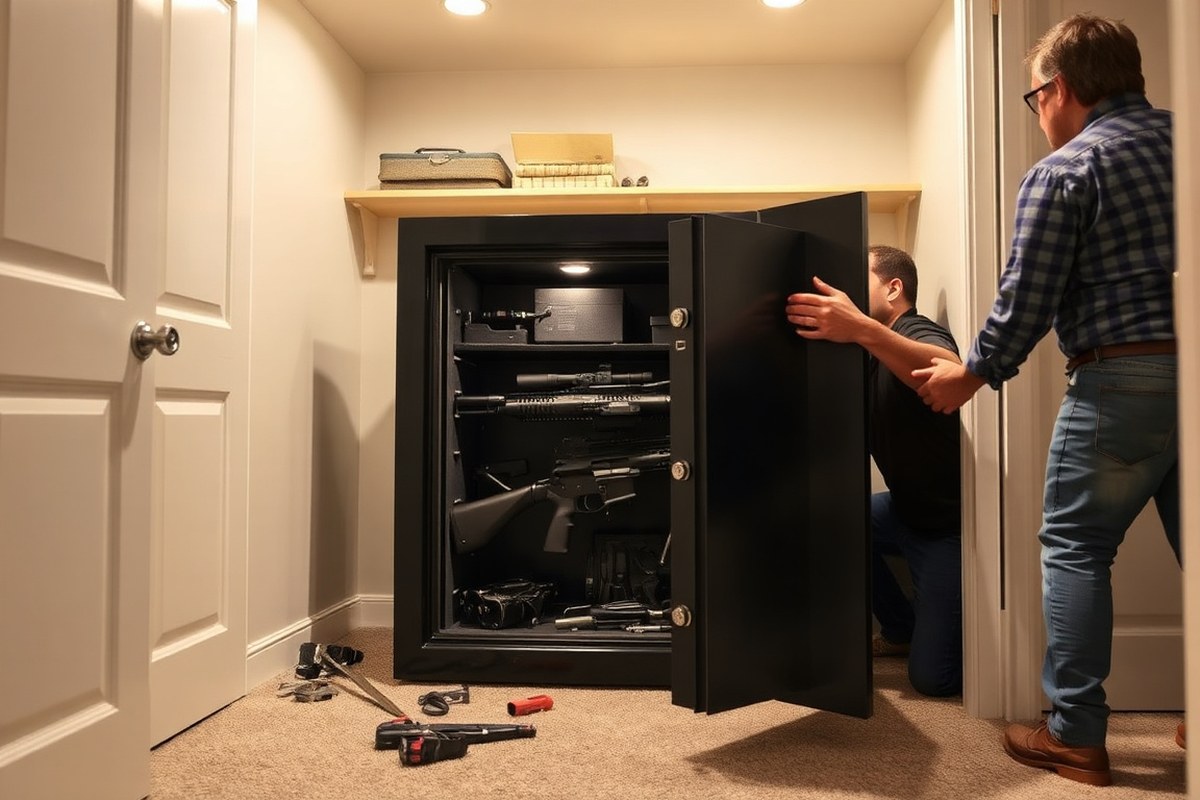
How to set up a gun safe starts with choosing a solid location and securely anchoring it to prevent tipping or theft. Select a site with a sturdy floor and minimal exposure to heat or moisture. Begin by marking the installation area accurately to match your safe’s size and weight for proper fit and support.
Key Takeaways
- Choose a location with a durable floor structure to support gun safes weighing up to 800 pounds when empty.
- For concrete floors, anchor the safe using heavy-duty bolts and a 9/16 inch socket set for maximum security.
- Match the safe door thickness to your room’s construction; thin steel doors don’t suit thick concrete safe rooms.
- Select a gun safe made with a minimum of 10-gauge steel to ensure resistance against forced entry.
- Choose fire-resistant safes that are tested and certified to maintain a temperature under 350 degrees Fahrenheit inside for a minimum of one hour.
- Organize firearms inside the safe using shelves, racks, or bins to prevent damage and allow easy access.
Step-by-Step Process to Set Up a Gun Safe Securely

Setting up a gun safe securely in your home requires careful preparation and precise execution. Proper installation prevents unauthorized access, improve stability, and ensures your firearms remain safe during events like earthquakes or forced entry attempts. The process varies somewhat depending on your floor type, such as concrete, hardwood, or carpet over wood subfloor, but the core principles remain the same: position the safe correctly, level it, and firmly anchor it to a structurally sound surface.
Time investment typically ranges from one to three hours, depending on factors like the safe’s weight, floor type, and whether you have an assistant. Expect concrete floor drilling to take longer due to the need for carbide drill bits and hammer drills, while wooden floors often allow quicker bolt installation.
- Clear and prepare the installation area. Remove any furniture, rugs, or debris around the selected spot. Clean the floor surface and check for adequate lighting and accessibility. On wooden floors, ensure the subfloor is strong enough to support the safe’s weight, usually at least 500 pounds.
- Position the safe in its intended spot. Use a furniture dolly or have helpers assist you to move the safe without damage. For proper positioning, place the safe so it sits flat without rocking. Use a carpenter’s level placed on the safe’s base to check both side-to-side and front-to-back alignment. Adjust as needed using shims designed for safe installations to maintain stability.
- Mark anchor points through the base of the safe. Safes usually have pre-drilled holes in the bottom plate for anchoring. With the safe temporarily lifted slightly, mark the drilling spots onto the floor using a pencil or marker. Double-check that these marks correspond with studs or concrete slab positions to ensure secure anchoring.
- Drill pilot holes for anchors or bolts. Select drill bits appropriate for your floor type: a masonry bit for concrete and a wood bit for wooden subfloors. Drill holes at the marked points to the depth recommended by the anchoring kit’s instructions, typically 2 to 4 inches for concrete anchors and at least 3 inches deep for lag bolts in wood floors.
- Install anchors or bolts to fasten the safe. For concrete floors, insert wedge anchors or sleeve anchors and tighten them with a wrench to the manufacturer’s specified torque to prevent loosening. For wooden floors, use lag bolts with washers driven through the safe’s base plate and into the joists beneath. A torque wrench can confirm each bolt is securely tightened without damaging the floor.
- Lower the safe back onto the anchor points carefully. Align the bolts with the pre-drilled holes in the safe’s base. Secure each bolt firmly. Check once more with the level to confirm the safe remains stable and even. The safe should no longer rock when you push it by hand.
- Test the locking mechanism multiple times. After anchoring, operate the safe’s locking system (keypad, dial, biometric) five times to ensure smooth function and locking engagement without obstruction. This step confirms the safe was not shifted during anchoring and is fully operational.
- Perform a final security check. Try gently rocking the safe with your hands to detect any looseness. Inspect all bolts for tightness using a wrench or torque tool. Confirm no gaps exist between the safe and floor, and that the installation does not damage flooring or surrounding walls. This check verifies secure installation ready for long-term safety.
Choosing the Best Location for Your Gun Safe

Selecting the ideal spot for your gun safe requires balancing security, concealment, quick access, and structural support. The location directly affects how well your firearms are protected and how easily you can reach them when needed. Most homeowners find that basements offer greater security due to limited entry points and sturdier concrete floors, but they might sacrifice accessibility. A garage or mudroom can work well if you need frequent access, such as daily range trips, though these areas can be less concealed from outsiders who have knowledge of your home’s layout.
When determining the best room, assess how visible the safe will be to visitors or intruders. Concealing your safe inside a bedroom closet or a hidden corner of a basement can reduce the chance of theft. Make sure the chosen space has no direct line of sight from windows or common entry points. While closets offer concealment, verify if the floor can bear the safe’s weight, many gun safes weigh between 300 and 500 pounds. Concrete or reinforced basement floors usually handle this load better than standard flooring or suspended joists found on upper levels.
Structural support matters to avoid damage or tipping hazards. Anchoring your safe requires a solid base, so if the floor cannot bear the weight or movement is an issue, reconsider the spot. Avoid placing it on carpeted surfaces or loose subfloors, as this can cause instability or complicate anchoring. In cases where the basement is finished, confirm the moisture level and ensure proper ventilation to prevent rust or swelling of your safe’s interior components. Basements with high humidity levels require a dehumidifier or moisture barrier.
Accessibility depends on your routine. If you visit the range often or use firearms regularly for professional or recreational purposes, locate the safe in a high-traffic area with swift access, such as near the garage entrance or a main floor hallway. For home defense purposes, choose a location reachable within seconds from common living spaces but still hidden from obvious view. Prioritize electronic or biometric locks for rapid access without compromising security. Avoid placing the safe where it will block exits, doorways, or be cumbersome to approach quickly.
Do not place your gun safe in direct sunlight or near heating vents, as extreme temperatures can damage your firearms and the safe’s locking mechanism over time.
Keep in mind common mistakes like setting the safe in a damp basement corner without protection or in a visible spot near front entryways. Cluttered areas may slow emergency access and obscure your ability to quickly retrieve firearms. A balanced location combines sturdy, low-moisture flooring with moderate concealment and a clear path for fast entry and exit. This effort can prevent theft, tipping, and environmental damage while ensuring you can access your firearms when necessary without delay.
How to Anchor a Gun Safe: Comparing Floor Types and Methods
Anchoring a gun safe requires using the right method and hardware based on your floor type to ensure maximum security and stability. Concrete floors need deep, heavy-duty anchor bolts, while wood floors require bolts driven into solid joists. Tile floors cannot be directly drilled without risk, so weight distribution matters. When drilling isn’t possible, cable locks serve as a less secure option to limit safe movement.
Anchoring Gun Safes on Concrete Floors
Concrete slabs rank among the strongest foundations for securing gun safes. Use a 3/8-inch concrete drill bit to create anchor holes at least 2.5 inches deep. Most residential gun safes require 3/8-inch diameter anchor bolts. Employ a hammer drill with a concrete bit to bore the holes, then drive the anchor bolts in and tighten them using a 9/16-inch or ½-inch socket set.
Removing the safe’s floor panel and floor caps reveals pre-cut anchoring holes where the bolts should be secured. Drill pilot holes carefully and level the safe before permanently anchoring it. This method maximizes theft resistance by securely fixing the safe to the strongest part of your floor. Expect to spend 1 to 3 hours depending on your tools and experience, and the cost of anchors and bits typically ranges from $20 to $50.
Anchoring Gun Safes on Wooden Floors
Wood floors require anchors driven into solid joists to safely support the safe’s weight, especially for heavy models. Avoid anchoring into subflooring alone; use a stud finder to locate floor joists below. Drill your bolt holes at least 2.5 inches deep to grip the wood securely. Use heavy-duty lag bolts or structural screws with washers designed for wood.
Distributing your safe’s weight is important on upper floors to prevent damage. Position the safe so its weight spreads across multiple joists. Anchoring a safe on upper floors calls for measures like reinforcing the floor below or installing a plywood base by a professional to help distribute weight and prevent floor damage.
Alternatives When Drilling Is Not Possible
Drilling into some floors, such as tile or rental property surfaces, may not be an option due to damage or restrictions. Since tile floors are too brittle for direct anchoring, avoid bolting your safe to them to prevent cracking. Instead, evenly distribute the safe’s weight on a sturdy platform or base to reduce floor stress.
For renters or quick setups, use high-strength security cables and padlocks or integrated locking cables designed to fix the safe to heavy furniture or fixed fixtures. These don’t offer the same level of theft resistance as bolting but can deter casual theft. Typically, installation takes 15 to 30 minutes and requires only the cable lock and a securing point. Remember, cables work best with safes that are not in immediate risk of urgent tampering.
| Installation Type | Complexity (1, 5) | Avg. Install Time | Tools Required | Security Level (1, 5) | Best For |
|---|---|---|---|---|---|
| Floor Bolt-Down | 3 | 1, 3 hours | Hammer drill, concrete bits, wrench, level | 5 | Heavy rifle safes, basements, garages |
| Wall Between Studs | 4 | 2, 4 hours | Stud finder, drywall saw, drill, level, voltage tester | 4 | Handguns, discreet bedroom or closet storage |
| Under-Bed / No-Drill | 1 | 15, 30 minutes | Security cable, padlock or integrated lock | 2 | Renters, quick-access bedside safes |
This table breaks down common installation methods by complexity, time, tools, and security level. Floor bolt-down offers the highest security but requires power tools and moderate effort on concrete or wood floors. Wall installations involve more steps and tools. Cable locks require the least setup and tools but only provide moderate theft deterrence.
Selecting Your Gun Safe Type Based on Security Needs
Choosing the right gun safe hinges on balancing security needs, access speed, fire resistance, and size. Popular types include firearm cabinets, biometric safes, and traditional combination safes. Firearm cabinets provide basic security at modest cost but lack advanced locking and fire protection features. Biometric safes offer the fastest access through fingerprint recognition, ideal for urgent use, yet tend to cost more and rely on battery power that must be maintained. Traditional combination safes use mechanical or electronic codes, presenting high security with moderate access speed and good fire resistance.
Fire resistance becomes important if you live where wildfires are common or aim to shield your firearms from heat-related harm. Seek safes certified by established testing organizations and check the fire rating level. For instance, doors on Smith Security Safes feature expanding seals that offer one hour of protection against heat and smoke. Heavier-duty doors may be 1.5 inches thick, made with AR500 steel plates that can stop medium-caliber rifle rounds, but they are much heavier and need strong floors to support the safe.
| Type of Safe | Security Level | Access Speed | Typical Use |
|---|---|---|---|
| Firearm Cabinets | Low | Moderate | General storage of firearms |
| Biometric Safes | High | Very Fast | Quick access for authorized users |
| Traditional Combination Safes | High | Moderate | Secure storage of firearms |
Size and weight are critical factors for installation. Heavier safes with thicker steel doors, like an Extreme safe door with a 1-inch AR500 steel plate, provide superior security but need reinforced floors and proper anchoring. Lighter cabinets or biometric safes may suit apartments or rooms with less structural support. Custom door thickness is advisable only for extreme risk environments or professional-grade protection. A quarter-inch steel door skin, like the Titan model, stops small arms fire but won’t hold against larger calibers or high-impact attacks.
Consider safes that combine features for flexibility. For example, models that offer biometric access plus a backup keypad lock reduce risks from battery failure or fingerprint recognition errors. Align your decision with your daily needs: if quick access is primary, biometric safes are best. For highest security against theft and fire, traditional combination safes with thick doors and certified fire protection are more appropriate. Fire resistance levels range from basic (1 hour) up to advanced ceramic fiber insulation that can handle higher temperatures for longer, but often add cost and weight.
Setting and Testing Your Safe’s Locking Mechanism
Setting and testing your gun safe’s locking system correctly ensures quick access and maximum security. Electronic keypads and mechanical dials require careful installation and multiple tests to confirm reliability. Regularly updating and verifying your combination prevents lockouts and unauthorized access.
Installing Electronic Keypad Locks
Electronic keypad locks connect to your safe’s locking mechanism, allowing access via a numeric code. Proper installation is important to prevent malfunctions and ensure secure locking. Follow these steps for installing an electronic keypad lock:
- Remove the battery cover and insert fresh batteries according to the polarity indicators.
- Attach the keypad to the safe’s exterior panel, aligning it with mounting holes provided by the manufacturer.
- Secure the keypad with screws, making sure it sits flush to avoid accidental damage.
- Connect the interior locking mechanism cable to the keypad module, ensuring a firm connection.
- Replace the battery cover and verify power is active; the keypad should light up or beep.
- Enter the default code supplied with the safe to get the door and confirm proper operation.
- Set a new access code following the manufacturer’s instructions, typically by pressing a program or reset button and entering your chosen code twice.
Always use fresh, high-quality batteries during installation to avoid sudden lock failures.
Setting Mechanical Dial Combinations
Mechanical dial safes require precise setting of the combination to ensure the lock’s tumblers align properly. Following exact turn sequences protects against lockouts and mechanical wear. Here’s how to set the combination correctly:
- Locate the safe’s factory default combination or your existing code.
- Turn the dial clockwise three full revolutions to clear the lock.
- Stop at the first number of your combination and carefully align it with the indicator mark.
- Turn the dial counterclockwise one full turn passing the first number and stop at the second number.
- Turn the dial clockwise directly to the third number and stop precisely at the mark.
- Pull the handle or knob to open the safe; if it doesn’t open, repeat the sequence making sure to stop exactly on each number.
- If resetting a new combination, follow the manufacturer’s reset procedure, which may involve removing the dial and adjusting a change key behind it.
Only turn the dial in the specified directions to avoid damaging the lock’s internal components.
Testing Lock and Bolt Functionality
Testing helps confirm that both the locking mechanism and boltwork operate smoothly and reliably. Without thorough testing, you risk locking yourself out or having a compromised safe. Conduct these checks immediately after installation and whenever you change your lock code or combination:
- Enter your code or dial your combination multiple times (at least five) with the door open to confirm consistent operation.
- Close the door and engage the lock to verify the bolts fully extend and retract without resistance or delay.
- Inspect the boltwork visually or by feel; ensure there is no unusual binding or grinding.
- Check the door’s alignment; improper alignment can prevent the lock from engaging correctly.
- Schedule routine tests every 3 to 6 months or after battery replacements for electronic locks.
Regularly changing electronic lock codes, ideally every 6 months, reduces the risk of unauthorized access.
Organizing Firearms and Accessories Inside Your Safe
Keeping firearms safe and accessible inside your gun safe depends on thoughtful organization and the right storage products. Shelves provide easy access and customizable height options but can become overloaded if you try to store too many guns or accessories on them. Gun racks are excellent for preventing movement and damage to firearms during opening and closing, but they require enough space inside the safe to install properly.
Bins or small boxes help organize accessories like cleaning kits, magazines, and scopes, but they can turn into clutter if you don’t regularly declutter. Using padded dividers or lined trays prevents damage from contact and scratches. Avoid overfilling your safe to keep firearms from shifting and scratching; an overly packed safe also slows down quick access in emergencies. A good rule of thumb is to use about 75% of the safe’s capacity, allowing room to move guns easily.
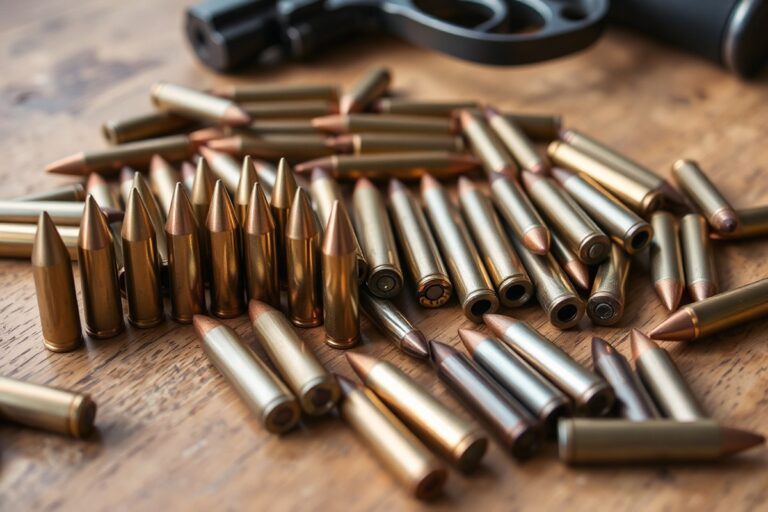
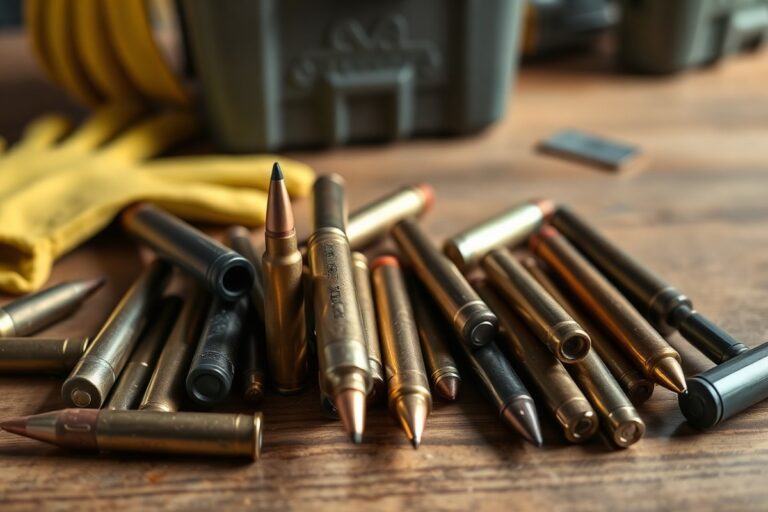
Ammo storage depends on your safe’s size and security features. Storing ammunition inside the safe is convenient but requires separation from firearms to avoid accidental ignition during a fire. Many gun owners use dedicated ammo boxes with airtight seals and desiccant packs to control moisture, reducing the risk of corrosion. Consider a small, fire-resistant ammo container that fits inside the safe if you want quick access without cluttering the main gun area.
Maintaining a clean pathway around your safe ensures no obstructions for quick retrieval of firearms when time is critical. Monitor humidity inside the safe with a hygrometer and use a dehumidifier pack to prevent rust, especially in humid climates. Keeping the safe interior neat speeds up locating your gear and reduces wear on firearms and accessories.
- Use wall-mounted gun racks to secure rifles and shotguns and prevent movement.
- Install adjustable shelves to organize pistols and smaller firearms for easy access.
- Use small, labeled bins for accessories; sort cleaning kits, optics, and magazines.
- Keep ammo in sealed, moisture-proof containers separate from firearms.
- Place a hygrometer inside to monitor humidity; replace dehumidifiers every 6-12 months.
- Leave 25% of the safe’s space free to avoid overcrowding and damage.
- Maintain a clear area around the safe for emergency access.
Good organization balances security with practicality. Using purpose-built racks and bins reduces the risk of damage and speeds up firearm retrieval. Avoid stuffing the safe beyond its limits, which can cause scratches and hamper access. Keeping ammo well-separated and in moisture-controlled containers protects both your guns and the ammunition from long-term damage.
Fire and Theft Protection Features to Look For
Effective fire resistance ratings for gun safes typically range from 1,400°F to 1,700°F for periods of 30 to 60 minutes. A safe rated to withstand 1,700°F for an hour offers strong protection for your firearms and documents during typical house fires. Look for safes tested and certified by recognized organizations, which assures they meet these standards. Fire seals around the door prevent heat and smoke from entering the interior, usually made from intumescent materials that expand when exposed to high temperatures. Inside, insulation materials like gypsum, concrete composites, or proprietary fireproof panels absorb and deflect heat, helping the safe maintain a survivable internal temperature.
Door thickness is a key factor in both fire and theft protection. A safe door skin thickness of at least 1/4 inch steel provides adequate resistance to most prying tools and offers a solid base for fire-resistant layers. Thicker doors, sometimes up to 1 inch with added AR500 steel plating, improve ballistic protection and slow down attack methods like drilling or cutting. The walls of the safe should also be substantial, wall thickness ranging from 3/16 inch to 1/2 inch with layered insulation improves security and fire resistance. Thicker materials increase weight and cost but significantly raise the barrier to unauthorized entry and heat penetration.
Balancing cost and protection means choosing a safe that fits your risk level. For example, if the safe sits in a basement anchored to a concrete slab, it benefits from cooler temperatures since heat tends to rise and concentrate near ceilings during fires. Safes in upper floors may require higher fire ratings or more insulation layers because of the increased fire exposure. For gun owners worried about floor collapse during a fire, select safes with a strong steel base and consider placing the safe on a reinforced concrete slab rather than wood to reduce the risk of falling into hotter fire zones beneath.
Anti-theft features also matter alongside fire protection. Look for gun safes with heavy-duty locking bolts that secure the door on multiple sides, and reinforced door frames. Ballistic-grade steel upgrades, such as AR500 plates, help resist bullets and high-powered impacts, an important consideration if theft attempts might involve forced entry with firearms. While high-end safes with thick steel, multiple locking points, and fire-tested insulation can cost several thousand dollars, lower-cost safes often compromise on fire rating or thickness. Prioritize what matters most: if fire protection is critical due to your home’s layout or environment, invest more in certified fire ratings; if theft risk is higher, focus on door thickness and lock strength.
Maintenance, Troubleshooting, and When to Call a Professional
Regular upkeep keeps your gun safe secure and functioning properly. You should inspect and maintain your safe at least once a year to prevent issues like lock malfunctions or boltwork problems. Professional help is necessary when the safe no longer opens smoothly or if the locking mechanisms show signs of failure.
Routine Inspections and Cleaning
Check your gun safe annually for any signs of wear, moisture, or corrosion inside and out. Wipe down the exterior using a soft cloth and mild soap, avoiding harsh chemicals that could damage the finish. Inside, vacuum dust and debris that could interfere with hinges or locking components. Inspect the locking bolts to ensure they extend and retract smoothly without resistance.
Lubricate mechanical parts with a recommended gun safe lubricant or light machine oil every 6 to 12 months. Avoid over-lubricating, as excess oil can attract dust and dirt, creating new problems. Confirm the combination or digital lock functions by testing multiple openings per year. Replace batteries in electronic locks yearly or sooner if low battery alerts appear.
Common Problems and DIY Fixes
Lock and boltwork issues often stem from dirt, low battery power, or minor misalignments. If the locking bolts stick, clean the boltwork area with a dry brush and apply a small amount of lubricant. For electronic locks, replace batteries promptly to avoid lockouts. Mechanical dial locks can be recalibrated by carefully following the manufacturer’s resetting instructions. Here are quick troubleshooting steps to try before calling a professional:
- Clean and lubricate bolts and hinges to reduce sticking
- Replace electronic lock batteries annually or at low battery alerts
- Tighten any loose screws or door hinges
- Reset combination locks according to the manual
- Verify door alignment and adjust if necessary
- Test locking mechanism fully after each adjustment
- Check and clear debris in the keypad for electronic safes
Many issues can be resolved with basic cleaning and minor adjustments, preserving security without costly repairs.
Signs You Need Professional Assistance
Contact a locksmith or safe installer when the safe’s lock won’t open despite correct codes or keys, or when boltwork jams persist after cleaning and lubrication. Unusual sounds during locking or unlocking and physical damage to bolts or door components also warrant expert evaluation. Avoid forcing the locking mechanism as this could cause permanent damage.
Maintain records of all maintenance and repairs to preserve warranty coverage and safety certifications. Verification by a professional is especially important if your safe has complex electronic locking or custom security features. An installer can also update or replace security components like lock cylinders to match insurance requirements or personal security upgrades.
Never force a lock or bolt mechanism; doing so can damage the safe and increase repair costs.
Step-by-Step Action Plan for Setting Up Your Gun Safe
Follow this plan to securely install your gun safe and keep your firearms protected and accessible only to authorized users.
- Before you start: Choose a low-traffic, discreet location with solid flooring. Confirm the spot is near a power source if using an electronic lock.
- Day 1: Assemble the safe according to the manufacturer’s instructions and test the locking mechanism for reliability.
- Day 2: Anchor the safe securely to the floor using hardware appropriate for your floor type (concrete anchors for slab floors, lag bolts for wooden floors). Check for any movement after installation.
- Day 3: Organize firearms and accessories inside using racks, foam inserts, or lockboxes to prevent damage and allow quick access.
- Week 1: Set up any fire or theft protection features such as smoke detectors or alarms integrated with the safe. Test the alert functions to confirm readiness.
- Week 2: Perform a full functionality test of the safe’s locking system, fire seals, and anchors. Address any issues immediately.
- Month 1: Schedule a monthly maintenance check to clean, lubricate, and inspect the safe for rust or wear. Plan to call a professional locksmith if you encounter persistent locking problems or damage.
Frequently Asked Questions
What Is the Best Way to Prepare the Site Before Installing a Gun Safe?
Clear the area of debris and ensure the floor is level and structurally sound. This helps the safe sit firmly and anchors securely to prevent tipping or theft.
How Can I Improve Moisture Control for My Gun Safe Room?
Use a dehumidifier or moisture absorber inside the safe or room. This prevents rust and damage since moisture is the number one enemy of firearms storage.
Should I Consider Ballistic Protection for My Gun Safe Door?
Yes, if you want to protect against gunfire, choose a door with thick AR500 steel plates. This offers resistance against small arms fire like 0.22 caliber bullets.
How Often Should I Test and Maintain My Gun Safe’s Locking Mechanism?
Test the lock monthly and lubricate moving parts as needed. Regular maintenance ensures reliable access and prevents lock failure when you need it most.
Is There a Disadvantage to Placing a Gun Safe in a Basement?
A damp basement risks moisture damage unless properly sealed and ventilated. Consider a ground-level location if moisture is a persistent issue in your basement.
Can I Install a Gun Safe by Myself, or Should I Hire a Professional?
You can install simpler models on your own using anchor kits. For heavier or customized safes, a professional ensures correct anchoring and setup for maximum security.
The Bottom Line
Securely setting up your gun safe ensures your firearms remain protected from unauthorized access and damage. Take your time to pick the right location, properly anchor the safe, and routinely test the locking system for peace of mind. Start by anchoring your safe today to guarantee it stays fixed where you need it most.