How to Level a Gun Safe: 8 Essential Steps for Safety and Stability
How to level a gun safe starts with using a carpenter’s level across the top surface to find any uneven areas. Correct leveling prevents door alignment problems and lock damage, keeping your firearm secure and stable. Begin by clearing debris and placing the level carefully to spot exactly where adjustments are needed.
Key Takeaways
- Use a 4-foot carpenter’s level to check the top surface for unevenness before final placement.
- Clear the installation area of any debris to ensure a stable, flat base for the safe.
- Concrete floors offer the best support for heavy safes over 500 pounds and allow secure anchoring.
- Use shims or reposition the safe to fix uneven corners identified by the level.
- Put a 3/4 inch plywood board beneath the safe on carpeted floors to provide a stable and even surface.
- Check door alignment and lock operation after leveling to avoid malfunction from uneven positioning.
1. How to Level a Gun Safe Correctly in 8 Steps
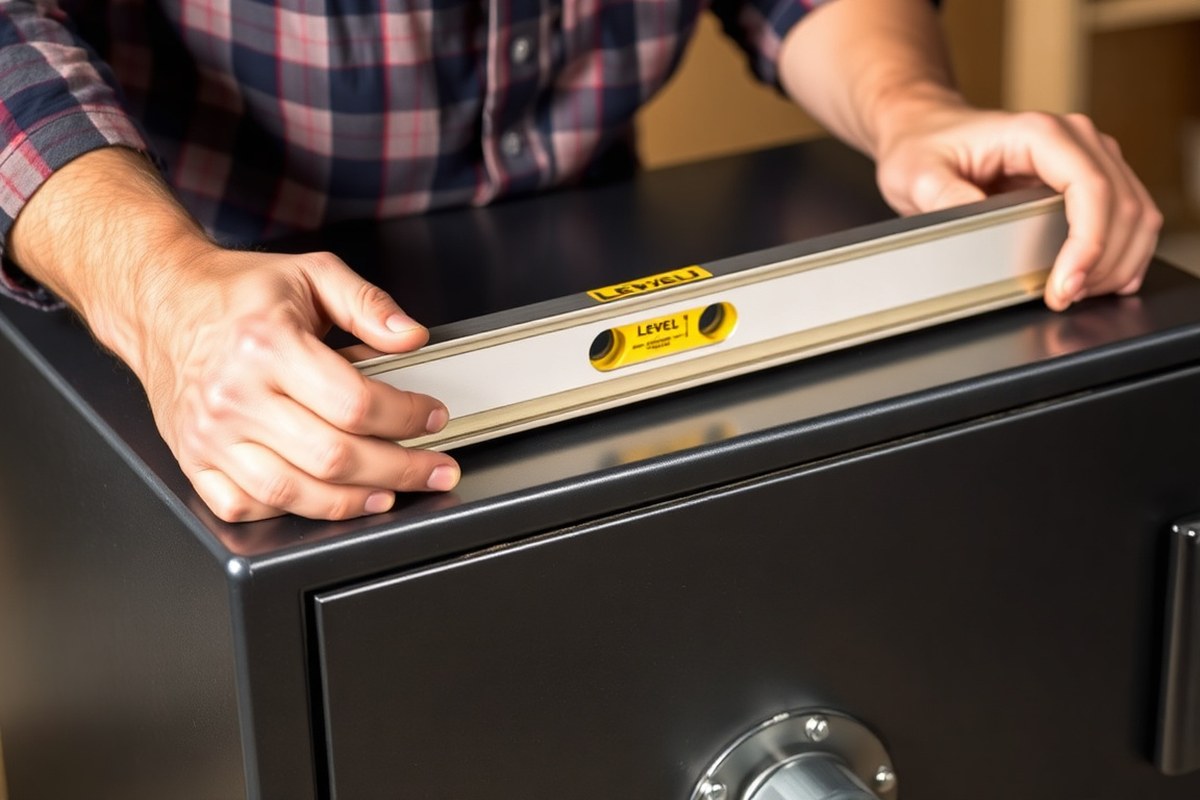
Leveling a gun safe properly is essential for its stability and lasting security. An uneven safe can cause door misalignment, locking issues, and increased wear over time. To achieve a stable setup, use a carpenter’s level to check the top surface from multiple points, adjusting as necessary. This process requires clear preparation, precision, and patience to avoid damage to both the safe and your flooring.
The following eight steps provide a clear, repeatable method for leveling your gun safe accurately. You’ll need a 4-foot spirit level or a digital level and appropriate shims or adjustable feet, depending on your safe model and floor surface. Check the floor for debris or bumps before you start, as this can affect your results.
- Clear the installation area. Remove all debris and dirt from the floor where the safe will sit. This ensures no small objects create uneven pressure points under the safe.
- Place the gun safe in its intended position. Set it down roughly where you want it to stay. Avoid sliding it awkwardly to protect both the flooring and safe base.
- Set the level on the safe’s top surface. Position your carpenter’s level across the front edge, then side edges, then across the safe diagonally to check for tilt in every direction. Note where the bubble deviates.
- Mark the low spots for adjustment. Identify which corners or sides sit lower based on the level readings. This determines where you’ll insert shims or raise feet.
- Insert shims or adjust leveling feet under the low spots. Use wood or metal shims specifically rated for supporting heavy loads, or turn the safe’s adjustable feet if available. Raise incrementally and re-check the level after each adjustment.
- Repeat the leveling check. Move the level across the top surface systematically until the bubble stays centered on all edges and diagonals, confirming the safe is level front-to-back, side-to-side, and corner-to-corner.
- Secure the safe’s feet or shims. Once level, tighten any adjustable foot locknuts or wedge shims to prevent movement over time. This step helps maintain stability.
- Test the door operation. Open and close the door several times to ensure it aligns smoothly without binding, which confirms your safe’s level and functional setup.
2. Essential Tools and Materials for Accurate Leveling

To level your gun safe precisely, you’ll need a few essential tools and materials. The right equipment helps identify uneven spots on your floor and corrects the safe’s positioning to maintain security and stability. Start with at least one accurate level, shim materials for adjustments, and optionally a tape measure to confirm distances from walls or corners.
For leveling, the two main types of levels to consider are a traditional bubble level and a digital level. A bubble level is reliable and cost-effective, often priced under $20. Use a longer level (24 inches or more) for better accuracy across larger surfaces. Bubble levels are simple but may require careful eye positioning to avoid parallax errors. Digital levels, costing around $40 to $60, provide precise readings in degrees, making them easier for fine adjustments. They excel when you need to measure slight tilts but may require batteries and calibration.
Shims fill in gaps under the gun safe’s base to achieve perfect balance. Selecting the right shim material depends on your floor condition and the safe’s weight. Wood and plastic shims work well for small gaps but wear down faster over time. Steel washers provide durability and are suited for heavy safes on uneven concrete. Polymer or composite shims offer very high long-term support and resist moisture and compression.
| Shim Type | Best For | Durability |
|---|---|---|
| Wood/Plastic Shims | Small gaps | Moderate |
| Steel Washers | Heavy safes, uneven floors | High |
| Polymer/Composite | Long-term support | Very High |
Before placing any shims, use your level to spot which corners or sides need raising. Adjust the shims incrementally, checking the level after each placement. Avoid stacking too many thin shims since they can slip or compress unevenly. If your safe has adjustable leveling feet, tweak those first before adding shims. Shims should fit securely without shifting during daily use or when the safe is opened and closed.
Use a level on multiple axes, front to back and side to side, to ensure your gun safe is balanced evenly on all sides.
Having these tools at hand helps reduce errors and speeds up the leveling process. The combination of a precise level and suitable shims ensures the gun safe door aligns properly and the lock operates smoothly, which is important since nearly 30% of malfunctions result from improper leveling. While wood and plastic shims are affordable options (often less than $5 for a pack), investing in steel or composite shims can be worth the extra cost for stability in the long run, especially on uneven or rough floors.
3. How Floor Types Affect Gun Safe Leveling and Stability
Floor type has a major impact on how you level your gun safe and which anchoring method you should use. For example, concrete floors provide a stable and strong foundation, allowing you to use heavy-duty concrete anchors and bolts for a secure hold. On wooden floors, you’ll need to anchor into floor joists using wood screws or bolts, making sure to include washers to spread the load and improve stability. Carpet and other soft or plush surfaces can reduce the safe’s stability, so placing a solid 3/4-inch plywood board underneath is recommended before leveling and anchoring.
| Floor Type | Anchor/Bolt Type | Notes |
|---|---|---|
| Concrete Slab | Concrete Anchors | Drill precise holes with masonry bits, then insert anchors |
| Wooden Subfloor | Wood Screws | Anchor into joists, use washers for stability |
| Carpet (over wood or concrete) | Varies | Place 3/4-inch plywood under safe for level support |
| Tile or Stone | Depends on Underlying Surface | Distribute weight evenly, confirm stable base before anchoring |
| All Types | Bolts and Washers | Tighten firmly but avoid overtightening to prevent damage |
| Maintenance | Regular Checks | Check that bolts stay tight over time |
Soft or plush floors like carpet require extra care because they compress under weight, causing instability. Placing a thick plywood sheet under the safe spreads its weight evenly and gives you a firm surface to level against. On hardwood floors, locate floor joists with a stud finder before drilling pilot holes to avoid weakening the floor. Using heavy-duty wood screws with washers keeps the safe anchored while protecting the wood from damage.
Concrete floors offer the easiest and most secure anchoring options. Mark safe anchor points carefully, drill using masonry bits, and install concrete anchors designed for high weight loads, which suits most gun safes over 500 pounds. This method resists tipping and shifting even during seismic events if seismic-specific anchors are used. Remember to tighten bolts firmly but not so much that you crack the floor or strip the hardware.
Tile and stone floors can support a gun safe if weight is evenly distributed by a solid base, like plywood. They may require anchors specific to the subfloor beneath, so ensure you know what lies below before drilling. For any floor type, regularly check the tightness of anchors and bolts because vibration, settling, or use can loosen them, reducing the safe’s stability.
4. How to Stabilize and Protect Floors During Leveling
Protecting your floor while leveling a gun safe is essential to avoid scratches, dents, or carpet damage. Wooden floors can dent or scratch quickly under a safe’s heavy weight, especially when moving or adjusting it. Using protective materials spreads the weight and prevents marks. Carpet fibers can get crushed or tears if the safe’s base presses unevenly or if shims dig in, so cushioning materials help maintain carpet integrity.
One effective floor protection method for wood is placing thin plywood sheets or hardboard under the safe’s feet. These create a barrier that distributes the safe’s weight evenly and resists dents from direct contact. For carpets, a sturdy rubber mat or a plastic floor protector designed for heavy appliances works well. These mats shield the fibers and keep the safe stable on softer surfaces.
Anti-vibration pads are also a smart investment. These pads, usually made of dense rubber or foam, absorb and reduce movement caused by opening and closing the safe door or external vibrations. They protect both the floor and safe by minimizing shifting and scratching. While not absolutely mandatory, they add a layer of security against wear and improve stability.
When adding shims or adjusting feet, place protective pads or the floor barrier material underneath the adjustment points. This prevents the sharp edges of metal shims from gouging wood or carpet. Avoid using thin or soft materials that compress too much under the safe’s weight, as they can become ineffective over time. Thick rubber pads or layered plywood sections work best.
- Use plywood or hardboard sheets under wooden floors to spread weight
- Place rubber or plastic mats beneath the safe on carpeted surfaces
- Install anti-vibration pads below the safe feet for extra cushioning
- Put shims on top of protective material, never directly on the floor
- Lift the safe carefully with help to avoid dragging and scratching floors
- Check floor levelness frequently with a level during adjustments
- Replace or reposition pads if they show signs of compression or damage
Costs for floor protection materials vary but expect to spend around $20 to $50 for good plywood sheets or appliance mats. Anti-vibration pads typically cost $10 to $30 for a set depending on size and quality. Using these materials properly helps preserve your floor’s condition and keeps your gun safe balanced and secure. Neglecting floor protection can result in permanent damage, uneven leveling, and potential safety hazards from shifting or tipping over time.
5. Checking Door Alignment and Lock Operation After Leveling
Ensuring your gun safe door aligns correctly and the lock operates smoothly is critical after leveling. Uneven surfaces can cause the door to misalign, making locking bolts fail or jam, which compromises security. Checking these elements helps you confirm the safe is stable and fully functional, avoiding damage or false alarms later.
Use the following steps as a checklist to inspect and verify door alignment and lock performance. These steps help you identify small issues, which can be fixed with simple adjustments like shims or the safe’s built-in leveling feet. Persistent problems may indicate you need to re-level the safe altogether.
- Open and close the door several times. Listen and feel for any sticking, rubbing, or resistance. The door should move smoothly without force or hesitation.
- Check the lock mechanism during operation. Engage and disengage the locking bolts by turning the handle or entering the code. The bolts should slide freely and lock fully without extra force.
- Inspect the door gaps. Look around the door edges for uneven spacing or noticeable gaps. A consistent gap usually means proper alignment, while wide or uneven gaps suggest misalignment.
- Try manually pressing or lifting the door edges. See if this changes how the door closes or locks. Movement may reveal that the safe is still uneven or that the door hinge needs adjustment if accessible.
- Adjust leveling feet or add shims under the safe. Use leveling feet for minor height corrections or shims under the low corners to reduce gaps or sticking. Avoid over-shimming, which can cause new misalignments.
- Re-test the door and lock after adjustments. Repeat opening, closing, and locking several times to confirm smooth and secure operation.
- Re-level the safe if problems persist. If sticky locks or door gaps remain after adjustments, the safe likely still sits unevenly. Return to the leveling step, making precise corrections before rechecking alignment again.
Regularly inspect your safe’s door and lock after any moves or floor changes to catch alignment problems early and avoid costly repairs.
6. Safety Tips: Moving Heavy Gun Safes for Leveling
Moving a heavy gun safe weighing between 400 and 1000 pounds requires careful planning and at least three to four people to do it safely. Wearing the right protective gear and using proper techniques reduce the risk of injury and flooring damage. In some cases, you may be able to level the safe without moving it, depending on access and floor condition.
Recommended Team Size and Lifting Techniques
For a 400 to 1000 lb gun safe, you should have at least three to four strong people assisting. This spreads the weight evenly and reduces the risk of dropping or tipping. Using mechanical aids like a furniture dolly or a safely positioned hand truck can help, but don’t rely on them alone. Communication is critical; coordinate lifts to avoid sudden movements.
When lifting, bend your knees and keep your back straight to prevent strain. Avoid twisting your torso while carrying the safe. When moving the safe, slide it a few inches at a time using plastic sliders placed under its base whenever possible. This method reduces the lifting effort and helps prevent floor scratches.
Protective Equipment and Floor Precautions
Protect yourself and your floors by preparing in advance. Gloves with good grip help prevent hand injuries. Wear steel-toed boots if you have them, as dropping the safe could crush toes. Use knee pads if you need to position yourself low to the ground while sliding the safe.
Protect floors with furniture sliders or sturdy cardboard panels to prevent scratching. For carpeted floors, ensure the sliders are smooth and strong enough to handle the weight without tearing. Hard floors like hardwood or tile need more delicate protection because scratches and cracks cost much more to repair.
- Wear gloves with firm grip
- Use steel-toed boots to protect feet
- Employ knee pads for ground-level work
- Place furniture sliders under the safe’s corners
- Use thick cardboard or plywood to protect flooring
- Clear the moving path of debris and tripping hazards
- Keep communication clear among all helpers
Taking these precautions limits injury risk and potential flooring damage, saving time and money in the long run.
When to Avoid Moving the Safe
Leveling a gun safe without moving it is often preferable if you have restricted space or fragile flooring. When the safe rests on a stable surface and you can reach the leveling points by lifting one side slightly, use adjustable leveling feet or shims. Sliding the safe slightly instead of lifting completely may also work if the floor is otherwise level.
A decision rule for moving versus leveling in place depends on access and structural condition. Don’t move the safe if the floor has cracks, is uneven beyond what shims can fix, or if you lack adequate help or equipment. Attempting to move a heavy safe solo or without protection increases the chance of injury or damage. When in doubt, hire a professional mover specializing in gun safes to avoid costly mistakes.
7. When and How to Anchor Your Gun Safe After Leveling
Anchoring your gun safe after leveling helps prevent it from tipping or being moved during a break-in attempt. Concrete floors require expansion or wedge anchors, while wooden floors need lag bolts or heavy-duty screws. Even if your safe is perfectly level, anchoring is highly recommended for security and stability.
Anchoring on Concrete Slabs
Concrete provides a strong base ideal for anchoring gun safes, but requires special anchors that grip the hard surface. Expansion anchors and wedge anchors are commonly used because they tighten as you drive them deeper, providing a firm hold without damaging the concrete. Here is a table summarizing anchor choices for concrete floors:
| Anchor Type | Material | Drill Bit Size | Holding Strength | Recommended Use |
|---|---|---|---|---|
| Expansion Anchor | Metal (steel/zinc) | 3/8 inch (masonry bit) | 2,500+ lbs | Standard concrete slabs 3″+ thick |
| Wedge Anchor | Steel (galvanized) | 3/8 inch (masonry bit) | 3,000+ lbs | Heavy-duty security needs, thicker slabs |
Choose anchors rated for at least 2,500 pounds to match typical safe weight and resist attempts to move it. Avoid anchors that require drilling holes larger than 3/8 inch, since larger holes may damage slabs or reduce holding strength.
Anchoring on Wooden Subfloors
Wood requires anchors that bite into lumber without splitting or loosening over time. Use lag bolts of at least 3/8 inch diameter and 3 inches long to ensure a secure grip through subfloor planks and into floor joists or framing below.
If you cannot bolt directly into a joist, install a plywood washer or mounting plate between the safe base and floor to spread the load and prevent crushing. Avoid screws that are too short or thin, as they may strip out under the safe’s weight.
Tools and Hardware Needed
Before anchoring your safe, gather the proper tools and safety gear. You will need a power drill, masonry drill bits for concrete, drill bits for wood, a socket set or wrench matching your anchors’ nuts or heads, and safety goggles to protect your eyes from debris.
Carefully measure and mark anchor points on the safe base and floor to avoid shifting the level. Confirm each hole aligns with an appropriate thicker section of floor for maximum holding power.
- Wear safety goggles before drilling into concrete or wood to protect your eyes from dust and chips.
- Mark the anchor hole locations through the safe’s pre-drilled holes while the safe is leveled.
- Slide the safe away and drill pilot holes in the floor at marked points, using the correct bit size for your floor type.
- Position the safe back over the holes and insert anchors or lag bolts through the safe base into floor pilot holes.
- Tighten anchors or bolts evenly with a socket wrench or screwdriver, ensuring the safe does not shift or become unlevel.
- Double-check the safe’s level and lock functionality after anchoring.
8. Maintaining Your Gun Safe’s Level and Security over Time
Inspect your gun safe’s level at least twice yearly to ensure it remains secure and operates correctly. Floors naturally settle or shift over time, which can disrupt the safe’s balance, causing issues with the lock and door alignment. Routine checks and corrections help maintain the safe’s stability and smooth function.
Biannual Level Inspection Routine
Schedule level checks every six months, ideally in spring and fall, when seasonal temperature and humidity changes can affect floor conditions. Use a reliable carpenter’s level to test the base at multiple points, including all four corners and the center. Place the level on the safe’s base surface or bottom edge to verify the bubble remains centered in the vial. A bubble that moves even a little away from the center indicates your safe requires leveling adjustments.
Inspect the safe while it is unloaded and use a helper to carefully tilt or lift the safe to add shims or adjust the leveling feet as needed. Typical leveling corrections require 1/16- to 1/8-inch thick steel or composite shims positioned under the safe’s feet or base corners. Retighten any loose anchoring bolts and mounting hardware at the same time to prevent shifting. This routine takes about 30 to 45 minutes and protects your investment from premature wear or malfunction.
Signs of Leveling Loss to Watch For
Uneven floors, loose bolts, or a door that sticks or fails to lock correctly indicate your gun safe may be off level or unsecured. Check for:
- Door binding at the latch or hinges
- Locking bolts that don’t fully extend or retract
- Wobbling or rocking when gently pushed
- Visible gaps between the safe’s base and the floor
- Shifting of the safe after cleaning or heavy use
- Corrosion or moisture near the safe’s base
These signs suggest a need for re-leveling, re-shimming, or tightening anchor bolts. Ignoring them can lead to forced entries being easier and damage to the locking mechanism, compromising safe security and firearm protection.
Maintaining Door Seals and Preventing Rust
The door seal’s integrity depends on the safe staying level and firmly anchored. Regularly check the door gasket for cracking or compressed areas, which may allow moisture and humidity inside. Moisture promotes rust on your firearms and internal safe components. After verifying the safe is level and stable, clean and lubricate hinge pins and locking bolts with manufacturer-recommended lubricant to keep the door functioning smoothly.
Never block ventilation around the safe, especially in damp basements or garages. Use a dehumidifier or silica gel packs inside the safe to reduce moisture buildup. Tighten any screws holding the door seal to avoid loosening that creates gaps. Well-maintained seals contribute to a secure safe and prolong its lifespan.
Practical tip: Always check the safe’s level before storing firearms after relocation or significant floor repairs to avoid damage and security risks.
Step-by-Step Action Plan for Leveling Your Gun Safe
Follow these steps to ensure your gun safe is properly leveled and secure for long-term use.
- Before you start: Gather all essential tools like a bubble level, shims, and a wrench. This ensures smooth progress and accuracy.
- Day 1: Place your gun safe in the intended spot on the floor. Check initial leveling with the bubble level to identify uneven sides.
- Day 1: Use shims under the safe’s base on uneven areas until the bubble level shows level front-to-back and side-to-side.
- Day 2: Confirm door alignment by opening and closing the door. Adjust shims as needed if the door sticks or lock won’t operate smoothly.
- Day 2: Secure the safe by anchoring it to the floor if your model and local laws require it. Check stability by gently rocking the safe.
- Week 1: Monitor the safe for any shifting or settling around the shims. Adjust if the level reading changes or door operation worsens.
- Week 4: Reinspect the floor protection and shims for wear or damage. Replace any worn materials to keep the safe stable and floors intact.
Frequently Asked Questions
What Is the Best Type of Level to Use for Leveling a Gun Safe?
A 4-foot carpenter’s level or spirit level works best to check your gun safe’s top surface for evenness. Longer levels provide more accuracy, making it easier to spot slight tilts or uneven spots on the safe.
Can I Level a Gun Safe by Myself, or Do I Need Help?
Leveling a gun safe alone is possible but having help improves safety and accuracy. Gun safes are heavy and awkward to move, so assistance reduces injury risk and helps stabilize the unit during the process.
How Do I Know If My Gun Safe Is Not Level?
Use a carpenter’s level across the top edges to spot tilting or gaps under the level. Uneven gaps or movement when closing the door also indicate the safe isn’t level.
Can Improper Leveling Damage My Gun Safe or Firearms?
Yes, improper leveling can cause door misalignment, locking mechanism issues, and internal gun damage. A safe that’s not level may strain hinges and locks, leading to long-term wear or difficulty accessing your firearms.
What Types of Shims Are Recommended for Leveling a Gun Safe?
Plastic or metal shims are preferred as they provide stable, durable support under the safe’s base. Avoid wood shims because they can compress or warp over time, affecting the safe’s level and stability.
How Often Should I Check If My Gun Safe Is Still Level?
Make it a habit to inspect your gun safe’s level two times a year or anytime after relocating it to keep it steady. Routine inspections help avoid lock failures or instability caused by shifts in the floor or small movements.
The Bottom Line
Leveling your gun safe properly keeps it secure and helps the door function without issues. Start today by gathering your tools and assessing your floor surface. Taking these steps now reduces problems and preserves the safe’s integrity over time.