How to Light a Gun Safe: Proven Methods for Clear, Safe Visibility
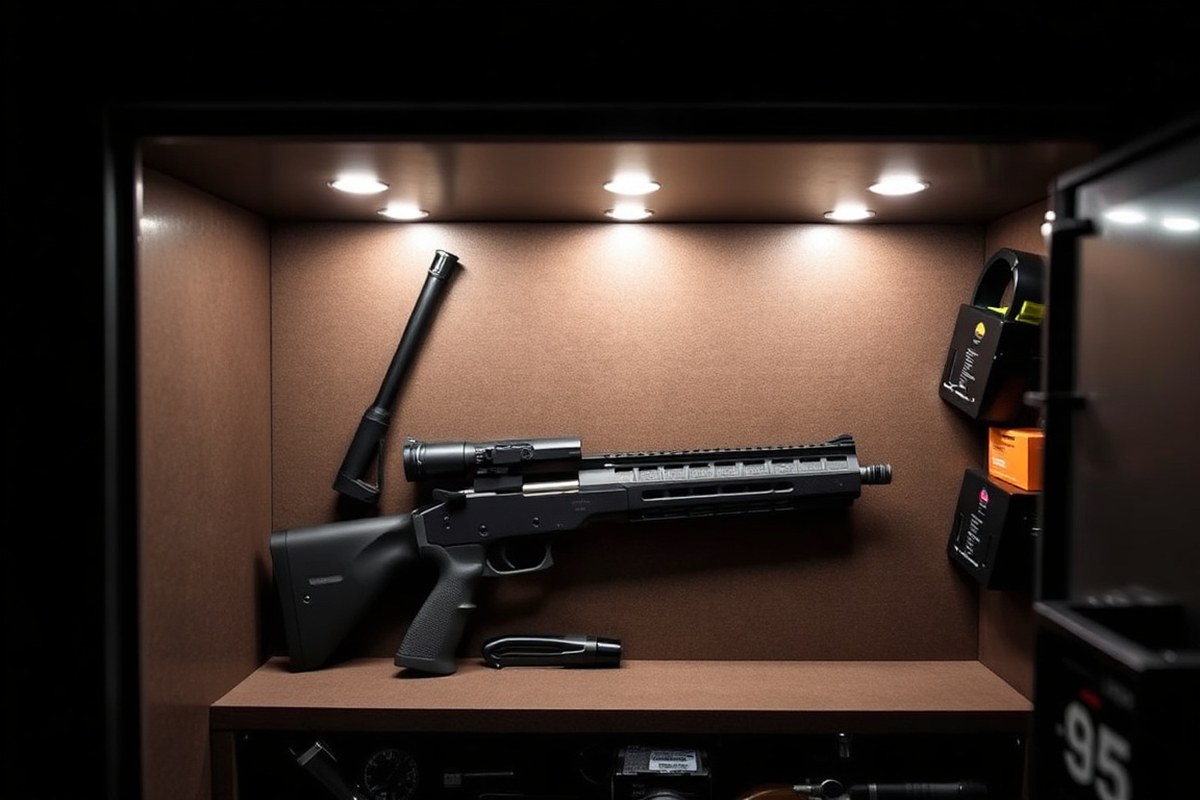
How to light a gun safe starts with choosing LED lighting, which offers bright illumination, long life, and low heat inside your safe. Using motion sensors or adhesive LED strips provides instant, efficient light without wiring hassle. Begin by measuring your safe’s interior to determine light placement and brightness levels that work best for your collection.
Key Takeaways
- Select LED lights producing around 150 lumens per light wand for clear visibility inside most gun safes.
- Use red light emitters with 100 lumens to preserve night vision and reduce eye strain in low light environments.
- Install motion sensor lighting to ensure your safe lights up immediately upon opening, improving safety and convenience.
- Choose adhesive-backed LED strips with 3M or hook and loop backing to simplify installation and allow repositioning.
- Consider 12V plug-in systems if your safe already has factory power outlets or passthrough holes for neat wiring.
- Maintain humidity near 45%-50% inside your gun safe to protect firearms while using lighting that does not increase heat.
Choosing the Best Lighting Type for Your Gun Safe
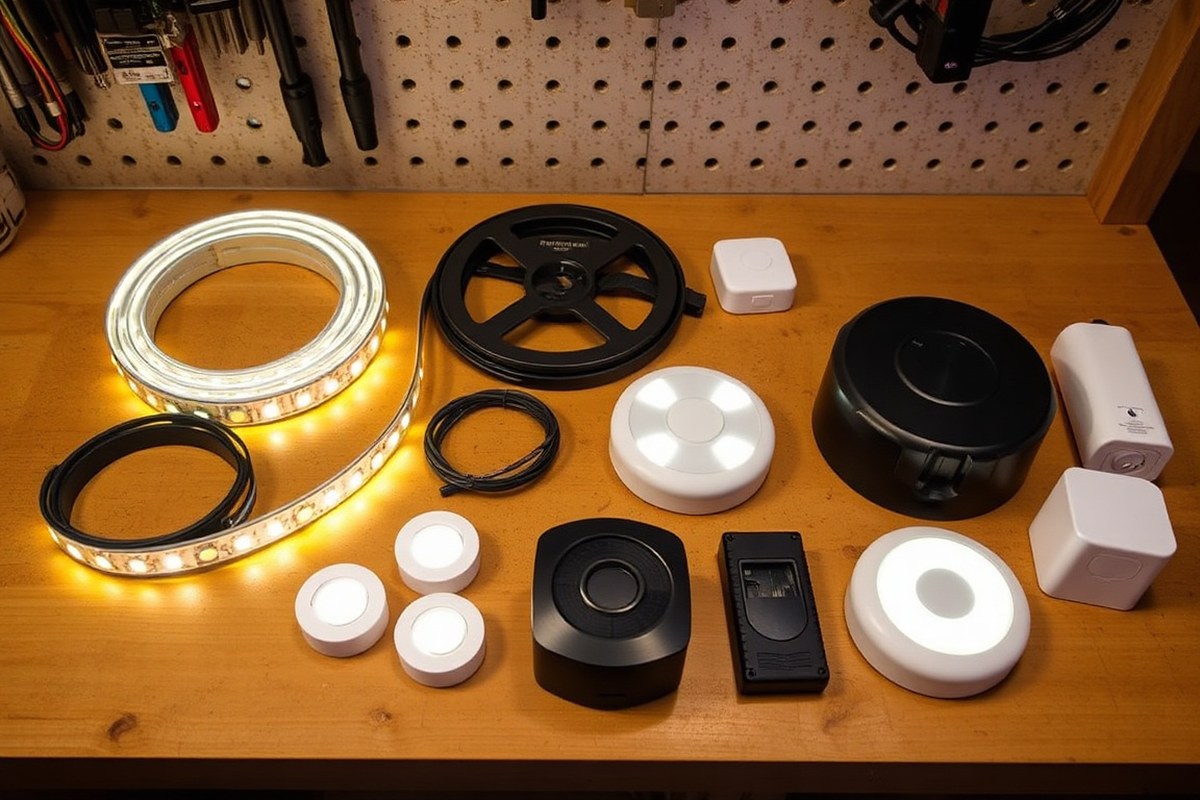
Selecting the best lighting for your gun safe depends on factors such as the size of the safe, the type of interior material, and your preferred method of controlling the lights. LED lights are popular due to their low energy consumption, cool operation, and features like adjustable brightness and color modes including white and red. These colors can help reduce glare and protect your night vision while examining your firearms. Battery-powered LED lights are easy to set up and mobile but require frequent battery replacement and may not be ideal for long-term use. Wired lighting systems provide steady power and can link to door sensors for lights that turn on automatically, though installing them can be more complex and might need expert help.
Mounting options affect how secure and flexible your lighting setup will be. Adhesive-backed LED strips provide even light distribution and fit well on shelves or long-gun safes. However, adhesive performance varies based on the safe’s interior lining, wood or fabric liners might reduce adhesion or leave residue. Magnetic mounts allow for fast installation and repositioning on steel surfaces but may not stick well to composite or fabric interiors.
Humidity and heat inside a gun safe can be affected by lighting. LEDs emit minimal heat compared to incandescent bulbs, reducing risks that could impact the safe’s internal environment. Waterproof or moisture-resistant LED strips protect against common spills and humidity issues inside gun safes. Choosing lighting with low heat output helps preserve the condition of stored firearms and prevent increased moisture buildup.
| LED Option | Best Use | Main Advantage | Main Limitation |
|---|---|---|---|
| Adhesive Strip Kit | Long-gun safes and shelf interiors | Even light distribution and flexible routing | Adhesive quality varies by liner material |
| Magnetic Light Bar | Steel interiors or temporary setups | Fast installation and easy repositioning | Weak hold on fabric-lined or composite surfaces |
| Puck Light | Small lockers and document compartments | Simple installation | Creates shadows in larger safes |
| Hardwired System with Door Switch | Permanent setups in all safe sizes | Reliable automatic lighting with no battery issues | Requires professional installation and wiring |
| Rechargeable Kit | Moderate use safes without power outlets | Portable and no constant battery replacements | Needs regular recharging and may dim over time |
To select the best light, assess your gun safe’s interior surface, size, and your preference for adjustability. Consider an adhesive strip if you have shelves or smooth surfaces, or a magnetic bar for quick changes on steel walls. For a hands-free experience, a hardwired system with a door-activated switch is best but requires more setup. Rechargeable kits provide a middle ground between battery operation and hardwiring. Choose waterproof LED lights to reduce negative effects on humidity and keep heat inside the safe to a minimum.
How Many Lumens and What Color Light Do You Need?
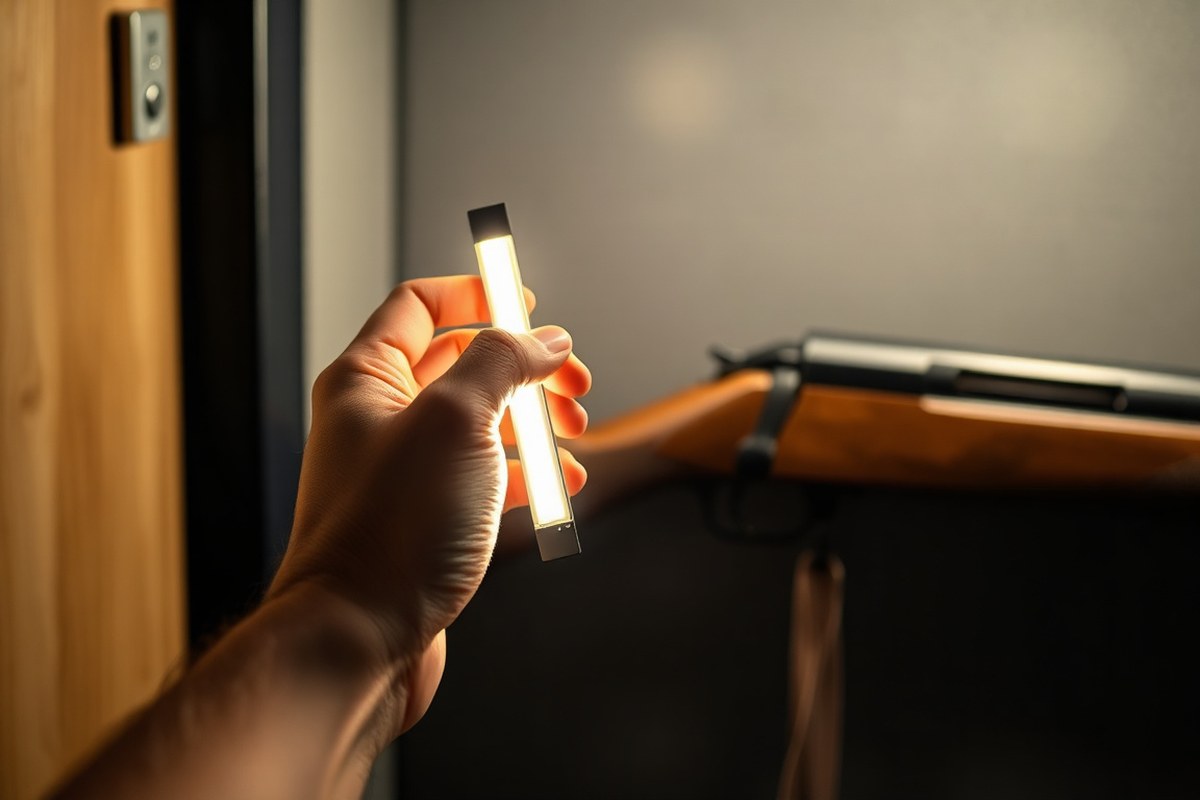
The ideal brightness inside a gun safe typically ranges from 40 to 200 lumens. Smaller safes, around 10 to 20 cubic feet, often need about 40 to 80 lumens to provide sufficient visibility without overwhelming the space. Larger safes or those with multiple shelves and compartments benefit from brighter lights, roughly 150 to 200 lumens, to ensure clear visibility of firearms and accessories. Too little brightness can make it difficult to identify small details like serial numbers or safety mechanisms, while excessive brightness may create harsh glare or shadows that reduce visibility.
Choosing the right color temperature is also key. A white light with a color temperature near 4000K offers a neutral, natural tone that shows true colors and fine details of your firearms and gear. Warmer lights under 3000K can make it harder to distinguish subtle features, while cooler temperatures above 5000K may appear too harsh and cause eye strain inside the confined safe. A balanced 4000K setting combines visibility with comfort, helping you inspect details accurately without fatigue.
Adjustable or dimmable LED lights are highly recommended since they allow you to tailor brightness according to the safe’s size and your current need. For instance, motion-activated lights that let you adjust their lumens enable efficient use of battery power while providing bright illumination only when you open the safe. If you often inspect multiple items or reload in low-light conditions, manual switches with dimming capabilities let you set continuous light at a comfortable level without flickering off.
To decide how many lumens you need, measure the internal volume of your safe and apply a basic rule: choose about 5 to 10 lumens per cubic foot of storage space. For example, a 15-cubic-foot safe would ideally have lighting between 75 and 150 lumens. Next, determine whether you prefer motion-triggered or manual control, then pick LEDs offering adjustable brightness within this range so you can optimize your setup over time.
Cost varies based on features; simple battery-powered LED strips providing 40 to 80 lumens start around $15, while high-end kits with multiple adjustable 150-lumen wands and dimming switches may run $50 or more. Long-lasting LEDs also help reduce maintenance, which benefits safe owners concerned about battery life and frequent replacements.
Always test different brightness levels after installation to find the setting that reveals firearm details clearly without causing glare or shadows inside your gun safe.
Preparing Your Gun Safe for Light Installation
Preparing your gun safe for light installation means clearing out the interior, cleaning it thoroughly, measuring the inside space, and checking your options for power access. These steps help make your lighting project efficient and ensure the final setup provides good coverage without interfering with the safe’s function.
Empty and Clean the Interior
Remove all firearms, ammunition, and any stored items from the safe before starting. This clears the space so you can work safely and avoid damaging your guns or equipment. Once empty, clean the interior surfaces by dusting and wiping with a mild cleaner to remove dirt and dust, which can reduce adhesive strength for light strips and cause sensors to malfunction.
Allow the safe to dry completely before proceeding. This simple step improves adhesion and prevents moisture from causing electrical issues. Avoid harsh chemicals or abrasive materials that could damage the safe’s finish.
Measure Interior Dimensions Carefully
Use a tape measure to record the height, width, and depth of your safe’s interior. Measure along the walls, ceiling, and door frame, noting space taken by shelves or racks. This information guides where to place lights for the best coverage and helps you choose LED strips or bars that fit your safe’s size.
Plan to position lighting so it shines downward or outward without obstructing locks or shelves. For example, mounting strips along the top inside frame or vertically on front corners often works well. Accurate measurements avoid buying lighting that doesn’t fit or leaving dark spots inside.
Check Power Source Accessibility
Determine whether your safe has an internal power source or if your lights will need batteries or external wiring. Many gun safes don’t come with built-in outlets, so you may choose battery-operated LED strips or install a power passthrough for hardwiring.
Your safe may not have pre-drilled holes for power cords, so you might have to drill carefully or route cables along door seals while keeping security intact. Consider the convenience of replacing batteries versus the permanence of wiring before deciding.
- Inspect your safe’s back, floor, or nearby wall for available outlets or passthroughs
- Confirm the voltage requirements, most LED kits use 12V systems compatible with safe lighting
- For battery-powered lighting, measure the space to install the battery pack without obstructing your firearm storage.
- Plan cable routing that won’t interfere with the safe’s door or locking mechanisms
- Take note of any manufacturer instructions regarding modifications to your specific safe model
Ensuring good power access before installation prevents the need to undo your work or compromise security later.
Select Mounting Locations
Decide exactly where your LED strips or light bars will go based on your measurements and power source. The most common favorable mounting spots include the upper perimeter of the safe, inside door frames, and the vertical edges of the front corners. This arrangement bathes the interior in even light and limits shadows.
Use temporary tape to hold strips in place and check the illumination with the safe door open. Adjust locations to avoid glare or blocked beams caused by shelves or stored guns. Without pre-drilled holes and wanting a secure mount, select adhesive-backed LED strips designed for metal surfaces and stick them to clean, dry metal for strong adhesion. Have the following tools and materials ready for installation:
- Tape measure
- Drill and appropriate drill bits (if holes are needed)
- Screwdriver
- Adhesive-backed LED strips or mounting clips
- Cleaning cloth and mild cleaner
- Cable clips or channels if routing cables inside
Step-by-Step Guide to Installing Gun Safe Lights
Installing LED lights in your gun safe improves visibility and makes selecting firearms easier and safer. The process involves mounting the lights securely, routing and concealing the wires, connecting the power source, and testing the system to confirm proper operation. You can complete this project with basic tools and no advanced electrical skills, using low-voltage LED kits designed for gun safes.
Mount the Light Fixtures
Start by finding the optimal positions for the LED light strips or fixtures inside your safe. Top and side panels work best for even illumination, avoiding shadows in corners. Clean the mounting surfaces with isopropyl alcohol so adhesives stick well. Most LED strips come with adhesive backing or magnetic mounts, which make installation straightforward and minimally invasive.
- Measure the interior dimensions of your safe to determine where to place the lights for even coverage.
- Wipe down the mounting surfaces to remove dust, grease, or oils.
- Peel the backing off the adhesive strips on the LED lights or attach the magnetic mounts to the fixtures.
- Press the lights firmly against the clean surface, holding for 30 seconds to ensure adhesion.
- Secure any additional light strands in corners or along shelves for better visibility.
Proper mounting prevents lights from falling off or interfering with safe doors and shelves. Avoid placing lights near hinges or locking bolts where they could be crushed.
Route and Secure Wiring
Concealing and protecting wires inside your gun safe prevents damage and maintains a clean interior. Use cable clips or wire channels compatible with metal surfaces to keep cables flat and out of the way. Route wiring along edges and corners to avoid interference with items inside the safe.
- Plan your wiring path from the lights to the power source, sticking close to edges.
- Attach wire clips or adhesive-backed cable channels every 6 to 12 inches along the route.
- Press the wiring into the clips or channels to secure it firmly.
- Bundle extra wire length and tuck it neatly behind shelves or panels to avoid clutter.
- Check that wires do not block doors, locking bolts, or shelves when closed or moved.
This method minimizes wire wear caused by frequent use of the safe and preserves a tidy appearance.
Connect to Power Source
Connecting your gun safe lighting depends on the power option you choose: battery pack, plug-in AC adapter, or hardwired connection. Battery kits are simplest, requiring no electrical work, while hardwiring may need a licensed electrician. For plug-in adapters, ensure the outlet is accessible and protected from moisture.
- For battery-powered kits, install batteries according to the manufacturer instructions, usually AA or rechargeable lithium-ion types.
- For plug-in kits, route the power cord through the safe’s wiring hole or use cable glands to maintain safe integrity.
- Plug the adapter into a grounded outlet in close proximity to the safe.
- If hardwiring, consult a licensed electrician to connect to the building’s electrical system safely and to code.
- Secure all power connections to prevent accidental unplugging or short circuits.
Low-voltage LED lighting does not pose significant electrical hazards when installed correctly, but follow all product guidelines for safe operation.
Test and Adjust the Lighting
Test the lighting system before loading your safe with firearms or valuables. Turn on the lights using the manual switch or by triggering the motion sensor if equipped. Check for consistent brightness and confirm no flickering or dark spots exist inside the safe.
- Switch on the LED lights to verify they illuminate all intended areas clearly.
- Inspect wiring and connections for any loose ends or exposed conductors.
- Adjust light placement as needed to eliminate shadows or bright spots.
- Test any motion sensor function by opening and closing the safe door multiple times.
- Confirm that the power source maintains the light operation as expected over several minutes.
Proper testing guarantees that your gun safe is safely illuminated without putting firearms at risk of heat or electrical damage, as LED lights generate minimal heat when installed with adequate ventilation.
Safety Precautions and Avoiding Common Mistakes
Take safety seriously when installing lighting inside your gun safe. Before starting, disconnect all power sources to prevent electric shocks or short circuits. Choose LED lights as they generate less heat, reducing fire risk inside the enclosed safe space. Avoid overcrowding wiring or placing lights too close to flammable items like gun oils or fabric linings.
Common mistakes often come from ignoring installation details and capacity planning. Test your lighting setup outside the safe first to identify faulty connections or dim bulbs. Measure carefully to prevent drilling into critical safe walls, which could void warranties or weaken structural integrity. Use the proper mounting hardware to keep lights secure and prevent falling components.
Consult a professional electrician if your lighting project involves hardwiring the safe to house power or if you’re not comfortable using tools like drills and wire strippers. Professionals help ensure your connections meet electrical codes and avoid hazards such as exposed wires or overloaded circuits. Expect to pay between $100 and $300 for professional installation depending on complexity.
- Switch off power at the circuit breaker before wiring any lights.
- Use LED motion-sensor lights to improve convenience and reduce battery use.
- Plan for future lighting additions by installing extra wiring or mounting spots.
- Keep wiring neatly organized and secured away from gun racks or moving parts.
- Test all light functions before fully assembling your safe.
- Seal any drilled holes to maintain safe humidity and temperature control.
- Regularly inspect your lights for wear or loose fittings to ensure consistent operation.
Never compromise the safe’s integrity by drilling blindly; always locate studs and avoid compromising structural walls.
Good lighting improves visibility and access, which improve security and your ability to identify firearms quickly. Properly installed lights should activate instantly, remain cool to the touch, and work without flickering. Mistakes like poor mounting or ignoring power limits can cause premature bulb failure or create fire hazards. Following a clear checklist and respecting electrical safety rules will protect both you and your valuable firearms.
How to Maintain and Extend the Life of Your Gun Safe Lights
Maintaining your gun safe lights helps protect both the lighting system and your firearms inside the safe. Regular battery replacement is one of the easiest tasks. Batteries should be checked every three to six months, depending on your light’s usage. Using rechargeable batteries is possible, but choose high-quality NiMH types that supply steady power to avoid flickering. Recharge them outside the safe to prevent heat buildup that might damage wiring or adhesives.
Cleaning the lights and sensors inside your gun safe prevents dust and grime from reducing brightness or causing sensor failure. Use a soft, dry cloth or canned air to remove debris gently. Avoid harsh chemicals that could damage LED covers or leave residues. Keeping the interior clean also protects your firearms from corrosion caused by dust accumulation on metal surfaces.
Proper temperature control inside the gun safe helps extend the lifespan of both your lights and guns. Even though LED lights generate minimal heat, lack of ventilation can trap warmth and moisture. Aim to keep the safe’s internal temperature between 50°F and 75°F, which is generally ideal for preserving guns and electronics. Investing in a small humidity control pack or dehumidifier can also improve conditions, especially in humid environments.
Regularly test your lighting system by turning it on at different times or triggering motion sensors to confirm proper function. Checking adhesives and mounting brackets helps prevent lights from loosening or falling, which could damage wiring or create electrical shorts. Easy-access lights with removable batteries or plug-in power sources reduce maintenance effort and allow quick replacements.
Improper lighting or faulty installation might pose risks to firearms by creating hotspots or allowing moisture buildup where rust can form. LED lights minimize this risk due to low heat output, but avoid placing lights very close to firearm surfaces. Space lights evenly and ensure wiring is well insulated and not pinched or bent sharply. Maintaining these standards costs very little beyond replacement batteries and occasional cleaning supplies.
Good results include steady, bright light that activates when you open the safe or approach it, no flickering or dimness, and well-secured mounting. Lights that fail to turn on, flicker frequently, or show signs of physical damage need prompt attention to avoid inconvenience or fire risk. By following these steps, your gun safe lighting will support safe and efficient access to your collection for years.
Customizing Lighting for Different Gun Safe Sizes and Interiors
Lighting inside a gun safe must match its size and interior layout to ensure every corner is visible and accessible. Start by measuring the interior dimensions of your safe to decide how many lights and what length of extension cords you’ll need. For small safes under 3 cubic feet, a single light near the top edge, close to the door frame, usually provides adequate illumination. Larger safes exceeding 10 cubic feet require multiple lights spaced evenly along the top or sides to avoid dark spots.
The interior materials also influence your lighting choices. Matte or dark-colored linings absorb light, which means you’ll need brighter or additional lights to maintain good visibility. Reflective surfaces, like metal or light paint, can help disperse light more efficiently, allowing fewer lights or lower brightness to achieve the same effect. Shelves and storage compartments create shadows, so adding small strip or puck lights inside each shelf or section improves clarity inside your safe.
Plan your lighting layout by visualizing how the lights will cover the interior. Position motion-activated lights near the door frame or the top inner edges where they detect movement effectively. This location helps turn on the lights automatically when you open the door, but avoid placing sensors behind shelves or gear that could block motion detection. For safes with complicated layouts or large volumes, install multiple sensors and lights in spots less likely to be obstructed, wiring them with compatible extension cords in lengths that suit the distance.
A clear decision rule is to estimate about one light per 3 to 5 cubic feet of interior space, adjusting upward if your safe has many shelves or darker interior surfaces. For example, a 15-cubic-foot safe with three shelves would benefit from at least four lights: one at the top and one in each shelf compartment. Use adhesive backs, magnetic bases, or screws to attach lights securely to the safe’s interior walls or ceiling.
Good results mean uniform lighting without excessive heat buildup. Choose LED lights known for low heat output and long lifespan to avoid damaging stored firearms or valuables. Test light placement before final installation by temporarily positioning lights and opening the safe to check for shadows or dark spots. Avoid clustering lights near one area, which can create glare and uneven brightness elsewhere.
Power Options: Batteries, Hardwiring, and Rechargeable Kits
Gun safe lights can draw power from batteries, hardwired connections, or rechargeable battery kits. Each power option has strengths and drawbacks related to installation complexity, reliability, and maintenance. Choosing the right source depends on your safe’s location, existing wiring, and how often you want to service the lights.
Battery-Operated Systems
Battery-powered lights offer simple installation with no wiring needed, making them ideal for safes without built-in power delivery. They typically use AA or AAA alkaline or lithium batteries, which last for months under normal use. You can find many models designed for low power consumption to maximize battery life.
The main advantage is portability and ease of setup since you just mount the light and insert batteries. However, you must monitor battery levels and replace them when the light dims or stops working. Battery failure may leave your safe unlit until you change them, so they are less reliable for frequent or long-duration use.
Costs are modest upfront, usually between $10 and $30, plus the ongoing expense of replacement batteries. Battery types vary in price and longevity: lithium lasts longer but costs more than alkaline. This tradeoff matters if you want low maintenance and reliable brightness without hardwiring.
Hardwired Installations
Wired lights connect directly to your safe’s factory power outlet or use a dedicated passthrough hole for an AC adapter or 12V plug-in system. This provides steady, consistent power with no need to change batteries. Many safes come with power outlet kits or cords originally for dehumidifiers, which can route wiring neatly to lighting fixtures.
Installation requires basic electrical knowledge or a professional to avoid damage and ensure safety. You mount the LED strip or light fixture then run a power cable through the safe’s existing holes or sealed gaps. Hardwired setups are permanent and ideal for safes located near an outlet, offering bright and reliable illumination every time.
Costs range higher than batteries, between $40 and $100 for quality kits including wiring and LED strips. The main limitation is the need for a nearby power source and careful installation to preserve safe integrity.
Rechargeable Light Kits
Rechargeable lights combine portability with the convenience of power from built-in battery packs that you can recharge via USB-C ports. Many kits include LED strips or puck lights with internal lithium-ion batteries and charging cables. This reduces ongoing battery replacement costs and hassle.
Rechargeable kits suit safes without hardwiring options but where a plug or USB charger might be accessible for periodic recharge. These systems offer steady brightness and often come with automatic on/off sensors or magnetic mounts for flexible placement.
Charging frequency depends on usage but commonly falls between every few weeks to months, based on battery capacity and light runtime. Total cost is generally higher upfront, around $30 to $70, but many find this a good balance for reliable lighting and reduced maintenance.
| Power Option | Installation Effort | Reliability | Maintenance | Cost Range (USD) | Best Use Case |
|---|---|---|---|---|---|
| Battery-Operated | Easy, no wiring | Moderate; depends on fresh batteries | Replace batteries every few months | $10 – $30 + battery cost | Safes without power source, quick install |
| Hardwired | Complex; may need pro | High; continuous power | Minimal, check wiring occasionally | $40 – $100+ | Safes near outlet, fixed lighting |
| Rechargeable Kits | Moderate; plug USB to charge | High if charged regularly | Recharge every few weeks/months | $30 – $70+ | Portable lights, no wiring possible |
Your choice depends on how much effort you want to spend on installation and maintenance versus the need for consistent, bright lighting inside your safe.
Test rechargeable batteries periodically to avoid dimming, and use the provided USB-C cable to recharge before the light goes dark inside your safe.
Step-by-Step Action Plan for Lighting Your Gun Safe
Follow these clear steps to install reliable lighting in your gun safe and make sure it works effectively for your needs.
- Before you start: Choose the type of lighting (LED strips, puck lights, or motion-activated lights) based on your safe size and power option preference. Confirm that your choice fits your safe’s interior and power source access.
- Day 1: Prepare your gun safe by cleaning the interior surfaces and clearing out firearms and valuables. This ensures proper light adhesion and safe working conditions.
- Day 2: Measure the interior dimensions and plan light placement for even coverage without glare or shadows. Mark mounting spots to guide installation.
- Day 3: Install the chosen lighting fixtures using recommended fasteners or adhesives. Test each light immediately after installation to confirm it turns on and illuminates the interior adequately.
- Day 4: Connect your lighting to the power source: insert batteries, connect to a hardwired circuit, or charge the rechargeable system as applicable. Check for stable operation without flickering.
- Week 1: Adjust light orientation or positioning if any dark spots or glare remain inside the safe. Run the lighting for several hours to monitor heat build-up or battery drain.
- After 2 weeks: Inspect light fixtures and power connections for signs of wear or loosening. Perform routine cleaning of light covers or strips to maintain brightness.
Frequently Asked Questions
What Are the Benefits of Using Motion Sensor Lights in a Gun Safe?
Motion sensor lights automatically turn on when you open the safe, providing immediate illumination. This is especially helpful in low-light conditions, so you don’t have to fumble for a switch.
Can You Use Red Light Inside a Gun Safe, and Why?
Yes, red light preserves your night vision and reduces eye strain compared to white light. Many users prefer red for quick access without losing dark adaptation.
Are Rechargeable Gun Safe Light Kits Reliable for Consistent Use?
Rechargeable kits are reliable but need regular charging to avoid outages. Keep a charging schedule to ensure your safe always has light when needed.
How Can You Improve Lighting in Large or Oddly Shaped Gun Safes?
Adding extra LED light strands helps cover dark corners and brightens large interiors evenly. This customization makes it easier to locate items inside.
Is It Possible to Install Gun Safe Lighting Without Electrical Skills?
Yes, many LED light kits are designed for simple installation without special wiring knowledge. Follow the provided instructions carefully for safe setup.
What Precautions Should You Take When Installing LED Lights Inside a Gun Safe?
Avoid obstructing vents and keep lights away from heat-sensitive components. Follow kit-specific safety guidelines to prevent damage and ensure safe operation.
Final Thoughts
Properly installed and maintained lighting inside your gun safe improve visibility and safety without risking damage to firearms or the safe. Start by picking a lighting setup that fits your safe’s size and power options, then install carefully following manufacturer guidelines. Making light improvements today will make firearm access faster, safer, and more convenient whenever you need it most.