How to Sight in Air Rifle: A Complete Guide for Accurate Shooting
Learning how to sight in an air rifle ensures your shots hit the target accurately at the intended range. Begin by shooting at 10 yards using a stable rest to establish initial grouping, then adjust sights or scope to move the point of impact toward the aim point. Progressively increase distance up to 25 yards while making precise corrections for consistent accuracy.
Key Takeaways
- Start sighting your air rifle at 10 yards on a stable rest to avoid sighting errors due to bad angles.
- Fire 10 to 20 shots per adjustment to get reliable groupings for sight corrections.
- Adjust the rear sight or scope in small increments to gradually align the point of impact with the aim point.
- Move from 10 yards to about 25 yards to refine sighting for typical small game and varmint ranges.
- A one-click adjustment on a scope typically moves the point of impact about ¼ inch at 100 yards.
- Keep the front sight alignment centered with the rear sight for clear and consistent aiming points.
Step-By-Step Process to Sight in an Air Rifle

Sighting in an air rifle involves more than just aiming and shooting. You need a stable setup, a clear target, and a methodical process to adjust your sights based on where your shots land. Proper sighting improves accuracy and consistency, whether you use open sights or a scope. A typical sighting session takes 10-20 shots to fine-tune your alignment. Starting closer to the target, at about 10 yards, lets you make initial corrections safely and easily. Here’s a step-by-step method to help you get your air rifle sights dialed in correctly.
- Set up a stable shooting position: Use a shooting rest or sandbags to steady your rifle. Ensure your body and arm support the rifle comfortably to reduce movement when firing. Choose a quiet, well-lit range area with a secure backstop behind your target.
- Place the target at the starting distance: For initial sighting, place your target at 10 yards. Use a target with a clear center dot or bullseye. This shorter distance helps identify large sighting errors without wasting pellets or risking stray shots.
- Aim and fire multiple shots: Take 3-5 shots aiming directly at the center of the target. Keep your aiming point consistent for every shot. Avoid rushing, take time to settle your aim before pulling the trigger to maintain shot consistency.
- Observe and record shot groupings: Note where your pellet holes cluster in relation to the target center. Look for patterns such as shots grouping to the left or right, or high or low. A tight group away from the aim point means your accuracy is good but your sights need adjustment.
- Adjust your sights based on groupings: Use your sight’s windage (left/right) and elevation (up/down) controls to move the point of impact toward the target center. Small adjustments work best, move the sights slightly and fire another 3-5 shot group to check progress.
- Repeat shooting and adjustment cycles: Continue firing 3-5 shot groups and adjusting sights until your shots consistently hit the center at 10 yards. This process may take 10-20 shots depending on how far off your initial setting was and how finely your sights adjust.
- Confirm zero at your preferred shooting distance: After sighting in at 10 yards, move your target to your usual shooting distance (often 20-30 yards for air rifles). Fire another 3-5 shot group to verify the point of impact. Make final sight adjustments if necessary.
- Maintain consistency during sighting: Use the same pellet type, shooting position, and environmental conditions throughout your session. Changing any of these can affect your groupings and lead to inaccurate sight adjustments.
Following these steps closely reduces guesswork and helps you methodically zero your air rifle. Proper sighting makes your shots more predictable and helps you enjoy shooting more, whether for target practice or hunting. Be patient and make small adjustments for the best results.
Understanding Air Rifle Sights: Open Sights vs Scopes
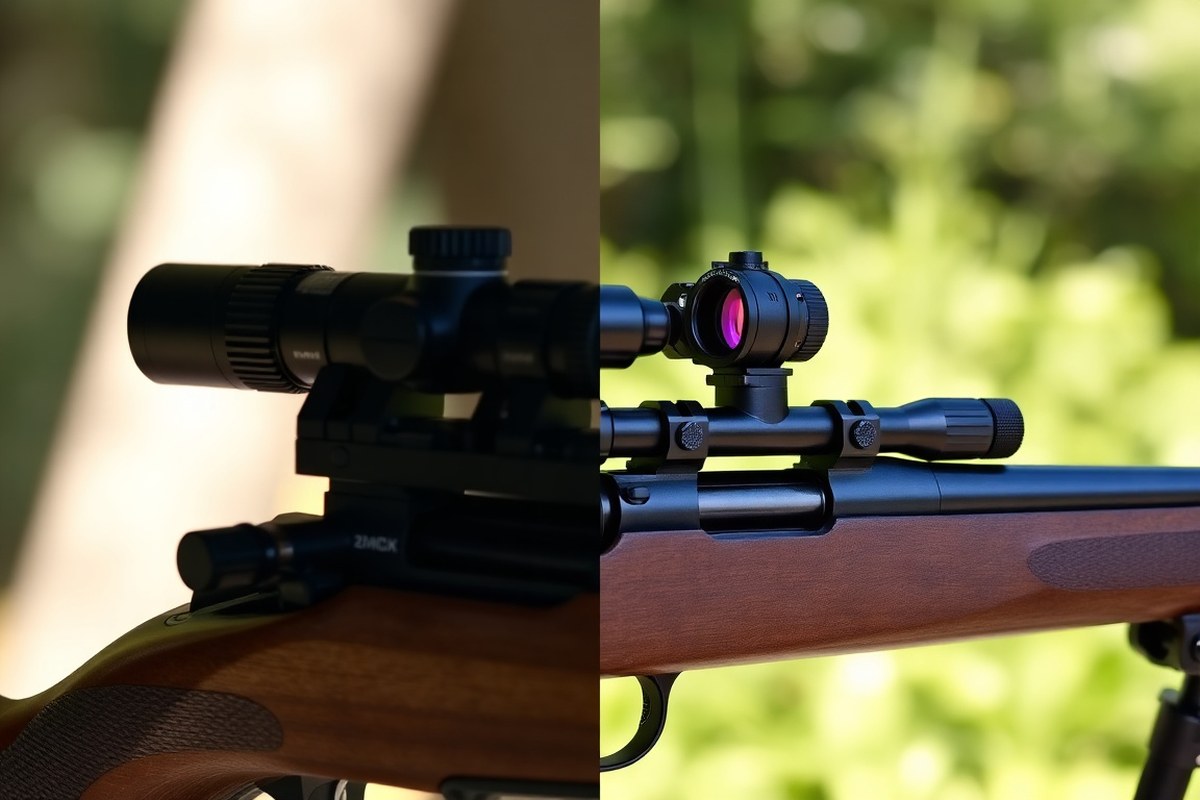
Open sights and scopes are the two main types of sight systems on air rifles. Open sights are simple, fixed or adjustable iron sights ideal for shorter distances. Scopes use magnification to improve target clarity and accuracy, especially at longer ranges. Each has benefits that affect ease of use, precision, and suitability for different shooting styles.
Features of Open Sights
Open sights, often known as iron sights, include a front post paired with a rear notch or small hole. Using these sights requires lining up the front and rear with your target. They are sturdy, lightweight, and run without batteries or lenses. Peep sights, a variant of open sights, have a tiny rear aperture that cuts down glare and helps sharpen your aim.
Using open sights demands you focus on the rear sight, front sight, and target simultaneously, which can challenge beginners. Accuracy is generally lower than with scopes, especially at distances beyond about 25 yards. However, open sights are quick to acquire targets and easy to maintain under rough outdoor conditions.
Advantages of Scoped Sights
Scopes provide magnification, usually starting from 3x and going up to 12x or more, allowing you to see distant targets in detail. This magnification helps improve accuracy and target acquisition over longer distances, making scopes a preferred choice for hunting and precision target shooting beyond 25 yards.
In addition, scopes have crosshairs or reticles that allow fine adjustments for windage and elevation, helping to zero in on your specific pellet trajectory. While scopes are heavier and more fragile than open sights and require careful mounting and alignment, they generally offer better consistency once zeroed.
| Feature | Open Sights | Scopes |
|---|---|---|
| Typical Effective Range | Up to 25 yards | 25 yards and beyond |
| Weight & Durability | Lighter, rugged | Heavier, fragile lenses |
| Ease of Use | Requires multi-point focusing | Single clear point of aim with magnification |
| Adjustment Options | Limited (basic windage/elevation) | Fine windage and elevation controls |
| Maintenance | Minimal | Requires cleaning and alignment |
| Cost Range | Typically $15 – $50 | Typically $100 – $300+ |
This table compares the key differences between open sights and scopes, highlighting factors that influence your choice depending on your shooting needs.
Choosing Sights Based on Shooting Purpose
Open sights are usually better for beginners and short-range shooting. Shooting within 25 yards or aiming for a lightweight setup that allows faster follow-up shots works well with open sights because they offer good enough accuracy for these purposes. Their simplicity also means less to adjust and maintain in the field.
Scopes benefit those focused on hunting or target shooting at longer distances. They improve your ability to spot and track targets, especially when lighting or background conditions challenge open sight clarity. For precision shooting, scopes allow finer aiming adjustments that help maximize pellet accuracy.
Combining practice with your chosen sight system matters most. You can technically sight in an air rifle perfectly with either option, but scopes generally make learning to aim easier due to clearer target definition.
Always ensure your scope is securely mounted and zeroed with the pellets you intend to use for best accuracy; different ammo can change point of impact.
How to Mount and Align an Air Rifle Scope Correctly
Mounting and aligning your air rifle scope correctly ensures stable, repeatable accuracy. A secure setup keeps the crosshairs precisely positioned and maintains your zero through multiple shots. This process involves matching the scope and rings to your rifle, preparing mounting surfaces, tightening rings evenly, and adjusting eye relief while leveling the reticle for clear aiming.
Scope and Ring Selection Matched to Rifle
Choose scope rings that fit both your air rifle’s mounting base and the scope tube diameter, typically 1 inch or 30 millimeters. Properly matched rings provide a stable hold and prevent creep or movement during shooting. Consider the rifle’s size and recoil; heavier recoil demands more strong rings, while lightweight air rifles can use lighter mounts.
Scope length also matters. Make sure the scope is long enough to provide adequate eye relief but not so long that it protrudes excessively or becomes unstable. Most air rifle scopes come in sizes like 3-9×40 mm. Pick one that balances magnification with field of view for your shooting needs.
Cleaning and Preparing Mounting Surfaces
Before mounting, confirm your air rifle is unloaded and safe to handle. Clean the mounting base and any ring surfaces with a cloth and a bit of isopropyl alcohol to remove dust, oil, and dirt. This prevents slipping and ensures a secure fit. Check the base for any damage or looseness and tighten or repair as needed.
Clean scope tube surfaces where the rings will clamp, but avoid any lubricants that might interfere with grip. Clean, dry surfaces are essential to maintain a rigid hold under shooting stress and prevent shifts in point of impact.
Mounting and Tightening Scope Rings Evenly
Proper mounting means placing the rings in position and tightening screws evenly to avoid stressing the scope or shifting alignment during the process. Start by loosely fitting the bottom halves of the rings on the rifle base. Follow these steps for the best mounting results:
- Place the bottom halves of the rings on your rifle base, aligning holes carefully.
- Lightly tighten ring base screws to hold rings in place but allow slight movement for adjustment.
- Set the scope into the rings, forward and backward, to find your ideal eye relief in your natural shooting position.
- Install the top halves of the rings and tighten screws finger-tight, alternating between screws on each ring to apply even pressure.
- Use a torque wrench if available to tighten screws to manufacturer’s recommended specs (often 15-20 in-lb), ensuring consistent tension.
- Check for any movement of the scope by gently trying to twist it; adjust or retighten if necessary.
- Repeat checks after firing about every 12 shots or after transporting the rifle to prevent loosening.
Aligning Crosshairs and Setting Proper Eye Relief
Adjust the scope while holding the rifle at your shoulder in your regular shooting stance. Slide the scope forward or backward within the rings until you have a full, clear sight picture without black rings around the view. Typical eye relief for air rifles ranges from 3 to 4 inches but may vary with your scope’s design and your comfort.
Align the reticle crosshairs so they sit horizontally with the horizon. Place a small bubble level on the rifle’s mounting base or on the scope’s turret caps to ensure this. Keeping the reticle level helps avoid side-to-side aiming mistakes, which become more noticeable at greater ranges.
Once positioned, tighten the ring screws evenly while ensuring the scope doesn’t rotate. Finally, zero your air rifle by shooting groups and adjusting the turrets in quarter-inch or equivalent increments at your chosen zero distance, commonly 10 to 25 yards for air rifles.
Choosing the Right Distance and Conditions for Sighting
Starting your air rifle sight-in at about 20 yards is often the best choice. This distance strikes a balance between manageable pellet drop and the ability to see clear shot groupings. Air rifle pellets travel slower than firearm bullets, following a noticeable arc, so zeroing at too close a range, like 10 yards, may cause your sights to be off at longer distances. Zeroing at 20 yards helps align the trajectory closer to your line of sight, allowing reasonable accuracy both near and far without complex holdover adjustments.
Choosing 20 yards accounts for the pellet’s ballistic coefficient and typical weight, which influence how fast the pellet slows and drops. After zeroing at this moderate distance, your pellet path crosses the sight line twice: once on the way up and once on the way down. This “two-point zero” means you’ll maintain good accuracy at shorter and longer ranges, roughly between 10 and 35 yards. For specialized shooting like hunting or target competitions, you might zero at distances that match your shooting scenarios, for example, 25 or 30 yards if you expect longer shots.
Environmental conditions play a big role in sighting precision. Bright, consistent daylight provides the best visibility for aligning sights and seeing pellet impacts clearly. Avoid sighting in low light, such as early morning or dusk, or in heavy cloud cover when your target or pellet holes may be hard to discern. Wind can also affect pellet flight, so pick calm days for sight-in sessions. Temperature and humidity subtly influence pellet velocity and drop; shooting in stable, moderate weather helps you avoid introducing variables that complicate adjustments.
Indoor sighting is possible, but it requires a space long enough to accommodate your chosen zeroing distance, typically 15 to 25 yards. Using an indoor range eliminates wind and lighting variability, which is beneficial for initial alignment. Make sure indoor lighting is bright and evenly distributed to clearly see your target and pellet strikes. Artificial light can be less forgiving than sunlight, so test your setup beforehand and adjust lighting angles to reduce glare on your sights or targets.
To get the best sight-in results, start by setting up a stable rest and target exactly 20 yards away in good lighting and calm weather conditions. Fire a careful shot group, then adjust your sights based on where the pellet clustered relative to your aiming point. Repeat this process until your pellet impacts center the bullseye or crosshairs consistently at that distance. Note your results and test at a few distances afterward to confirm your chosen zero covers the practical range you expect to shoot in.
Interpreting Shot Groupings to Adjust Sights Effectively
Reading your shot groupings on the target means locating the cluster of pellet holes and determining their average point relative to your aiming spot. Fire 3 to 5 shots at the same spot without adjusting your aim between shots. The tighter the group, the better your consistency. Next, measure how far the center of that grouping is from your intended point of impact, both horizontally and vertically. This offset shows exactly how much you need to adjust your sights.
The group offset indicates the direction and amount to move your sights. For open sights, move the rear sight toward the pellet group. For example, if your group is 1 inch to the right at 10 yards, slide the rear sight 1 click left to bring the pellets left. With scopes, turn the turret in the direction labeled to move the point of impact toward the center. Many scopes adjust about 1/4 inch per click at 25 yards, so at 10 yards, each click shifts the impact roughly 1/8 inch. Counting clicks precisely produces more accurate adjustment.
Calculate exact sight moves by dividing your horizontal and vertical offsets by the adjustment value per click. For example, if your pellet group lands 0.5 inches low and 0.75 inches left at 10 yards, and your scope adjusts 1/4 inch per click at 25 yards, scale that to about 1/8 inch per click at 10 yards. This means you move elevation turret up four clicks (0.5 ÷ 0.125) and windage turret right six clicks (0.75 ÷ 0.125). With open sights, the click value varies by model but usually corresponds to about 1/16 inch at the sighting distance. Smaller, careful adjustments avoid overshooting and wasting pellets.
Open sights require physically shifting the rear sight left, right, up, or down with your fingers or a tool. Front sight adjustments involve moving it in the opposite direction of the required point of impact correction. Scopes use turrets with audible clicks, which can be counted and turned precisely for elevation and windage. The scope’s adjustments are generally easier to repeat reliably than open sight moves. However, open sights provide a direct visual reference to line up your shot and may need more frequent refinement, especially when changing pellet types or weight.
For example, you fire 5 shots at a 10-yard target aiming at the bullseye. The pellet group centers 0.75 inches above and 0.5 inches right of the bullseye. Your scope adjusts 1/4 inch per click at 25 yards, roughly 1/8 inch per click at 10 yards. To lower the point of impact, turn the elevation turret down 6 clicks (0.75 ÷ 0.125). To move the group left 0.5 inches, turn the windage turret left 4 clicks (0.5 ÷ 0.125). After adjusting, fire another group to confirm the sights are now on target. Repeat the process until the group centers on the aiming mark.
Make small adjustments and re-fire groups; large sight moves can overcompensate and increase frustration.
Factors Affecting Sight Pictures and Aiming Precision
Eye relief is the distance between your eye and the scope’s eyepiece while maintaining a full sight picture. This distance matters because if you are too close or too far, the image will appear distorted or partial, making it harder to aim precisely. For most air rifle scopes, ideal eye relief ranges from 3 to 4 inches. To adjust, position your head so the entire circle of the sight is visible without black rings around the edges. Consistent eye relief reduces eye strain and prevents scopes from hitting your face when firing.
Parallax affects aiming by causing the reticle to appear to move relative to the target when you shift your head position. This issue arises because the target and reticle sit on different focal planes. Many air rifle scopes include an adjustable parallax or side focus ring, which lets you bring the target and reticle into the same plane. Setting parallax at your intended shooting distance, such as 25 yards for target shooting or 20 yards for hunting small game, keeps your point of impact consistent as you naturally move your head.
Scope magnification helps improve target clarity but does not automatically increase accuracy. Air rifle scopes typically range from 4x to 16x magnification, with 6x to 9x being versatile for both target shooting and hunting. Higher magnification makes small targets easier to see but narrows your field of view and can amplify scope shake, which reduces steady aiming. Start with moderate magnification to balance clear sight pictures and stability, adjusting upward when precision on distant targets is needed.
Pellet weight significantly impacts the trajectory and point of impact because heavier pellets have more momentum and drop less over distance, but may travel slower. Air rifles shooting pellets at speeds up to around 1250 ft/sec work well with medium-weight pellets in the 14 to 18 grain range. To maintain consistency, select a pellet weight suited to your rifle’s power and stick with the same brand and type when sighting in. Changing pellet weight after sighting can alter your point of aim, so test different pellets separately if you want to switch.
Lighting conditions affect how clearly you see your target and reticle. Bright daylight allows easier sight pictures, while low light at dawn, dusk, or under heavy canopy requires adjustments. Use scopes with adjustable reticle brightness or a mil-dot pattern to maintain visibility. Increasing scope magnification slightly in low light can help but avoid going too high, since brightness and clarity drop as magnification rises. Position yourself to minimize shadows and glare on your scope lens, and clean lenses regularly to keep sight pictures sharp.
Maintaining Sight Settings and Preventing Common Issues
Check and tighten your scope mounts regularly, ideally before each shooting session or after every 100 shots. Loose mounts or screws are a leading cause of aim shifts and sight inaccuracies. Use a torque wrench or screwdriver to tighten the screws to the manufacturer’s recommended torque, typically around 15, 20 inch-pounds for air rifle scope mounts, to avoid over-tightening that can strip threads or damage the scope.
Scope canting happens when the scope is slightly rotated along its axis, causing the reticle to tilt and skewing your point of impact. Prevent this by using a scope level during installation. Place the level on top of the scope and align the rifle so it’s perfectly horizontal before tightening mounts. A small cant angle of just a few degrees can move your shot group significantly at longer ranges, especially with air rifles firing lighter pellets prone to environmental effects.
Reticle shift or sight drift may result from gradual loosening of mount screws, mechanical wear, or thermal expansion of components. To spot this, compare your current point of impact against your previous zero at a familiar distance. Your groups have probably shifted vertically or horizontally without turret adjustments because your sight likely drifted. Re-tighten mounts first, then verify scope alignment using a scope level and test shots.
- Regularly clean and inspect mounting rails and scope rings for dirt or wear
- Use proper torque settings on mounting screws with a torque driver
- Employ a scope level tool when mounting or checking for cant
- Fire test groups at your zero distance every session to detect drift
- Keep records of adjustments and shifts for ongoing maintenance
- Replace worn mounting hardware to maintain stability
Recognize common sight problems early by watching for inconsistent groupings or a reticle that appears off-center at rest. Reticle shifting that continues after tightening and re-leveling could be due to internal mechanical wear or damage. In such cases, professional inspection and adjustment are recommended to realign or rebuild the turret mechanisms. Trying to fix internal scope issues without proper tools risks further damage and costly replacement. A professional can verify optical centering and fix cant or mechanical slop beyond simple user maintenance.
Sighting Strategies for Hunting Versus Target Shooting
Hunting and target shooting with an air rifle call for different sighting strategies tailored to each activity’s demands. The zero distance, sight system choice, and adjustment approach you use should match your shooting goals and environment for the best accuracy and success.
Zero Distance Considerations by Use Case
For hunting, zeroing your air rifle at a shorter distance, typically between 20 and 30 yards, is ideal because most small game shots occur within that range. This setup allows your pellet’s trajectory to stay flat enough within this zone, improving hit probability on moving or varying height targets. In contrast, target shooters often zero at longer distances like 40 or 50 yards to emphasize precision and group consistency at those standard range lengths.
Choosing a zero distance based on typical shooting scenarios matters because pellet drop and velocity loss affect point of impact as distance grows. Use a measured range reflecting where you expect to shoot actively. For example, if hunting crows or rabbits commonly at 25 yards, zero there to reduce holdover guesswork in the field. For 50-yard target matches, zero at 50 yards to keep adjustments straightforward.
Sights and Magnification Preferences
Hunting air rifles generally benefit from low to medium magnification scopes, such as 3-9x, or high-quality open sights. These allow quick target acquisition and a wider field of view to track fast or erratic game. Some hunters prefer variable magnification scopes with large objective lenses (around 40mm diameter) for versatility across light conditions. Conversely, target shooters lean toward precision scopes with fine reticles, high magnification (8-12x or more), and highly repeatable click adjustments that enable pinpoint shot placement.
Open sights remain popular for hunting because they are durable, simple, and require no batteries; however, scope features like 1/4 MOA click adjustments and clear illuminated reticles help hunters make rapid elevation shifts during a stalk. Target shooters prioritize optic features that produce consistent shot groups. These include parallax adjustments and fine windage controls, which may not be necessary for typical hunting angles and distances.
Adjusting for Field Conditions Versus Range
Field adjustments during hunting must accommodate variable lighting, weather, and target movement. Hunters often zero their rifles at home range distances but fine-tune sights on the spot using rapid, practical holds or scope adjustments for wind and elevation shifts in unfamiliar terrain. This means being comfortable with basic sight corrections and holding methods to compensate for moving targets or slight range miscalculations rather than fully resetting zero far from your base line.
Target shooters focus on precise mechanical adjustments on fixed benches using controlled environmental conditions. They rely on strict backstops, calm conditions, and careful measurement of shot groupings to make methodical sight corrections in standardized increments. This detailed approach is less flexible but maximizes consistency and scores.
A low-magnification scope with quick adjustable turrets can save hunting shots when you need to retarget fast on varying distances and moving game.
Useful Sighting Tools and Accessories for Accurate Setup
Laser bore sighters can speed up sighting your air rifle by providing a precise reference point inside the barrel. These devices fit into the muzzle or chamber, projecting a laser dot on the target that aligns roughly with the barrel’s bore axis. Using one reduces the time you spend guessing where your shots land initially and helps prevent wasted pellets. Most laser bore sighters cost between $20 and $50, making them an affordable addition for both beginners and experienced shooters. However, always fine-tune your sights with live-fire adjustments afterward, since bore alignment doesn’t always guarantee perfect point-of-impact.
Stability during sighting is important for consistent results. Shooting rests and benches help by steadying your rifle and minimizing movement between shots. There are many options, from portable sandbags priced around $15 to adjustable shooting benches and firearm rests costing $100 or more. A solid shooting rest absorbs recoil and reduces muscle fatigue, which improves your ability to see shot groupings clearly and adjust sights accurately.
Specialized sight adjustment toolkits make fine-tuning easier and more precise. These kits often include screwdrivers, Allen wrenches, and dial turners designed specifically for scope turrets or open sight screws. They provide better grip and tactile feedback than generic tools, so you avoid slipping or over-tightening. Quality kits range from $20 to $40 and can speed up the adjustment process while reducing the risk of damaging your rifle’s sight components.
- Laser bore sighter: fits the muzzle, projects a laser dot to roughly align sights before shooting
- Shooting rests: portable sandbags, foam rests, or adjustable benches to stabilize the rifle
- Scope mounting tools: torque wrenches and alignment bars for consistent scope installation
- Sight adjustment toolkits: precision screwdrivers and dial turners for fine sight tuning
- Target stands with grid paper or bullseye templates for easy shot placement analysis
Using a combination of these accessories significantly improves repeatability during sighting sessions. The laser bore sighter reduces guesswork at the start, while a stable platform lets you return to exact positions shot after shot. Specialized tools keep adjustment consistent and prevent damage or loose components that could shift your zero. In practice, this means your shot groups tighten much faster, and verifying changes takes fewer shots. The time invested in these tools pays off with more reliable accuracy and fewer frustrating sighting sessions.
Step-by-Step Action Plan to Sight in Your Air Rifle
Follow these clear steps to get your air rifle sights dialed in and improve your shooting accuracy quickly.
- Before you start: Secure a stable shooting rest to minimize movement and pick a calm day to reduce wind impact. Confirm your target is set at the recommended 20 yards for initial sighting.
- First firing session: Shoot a three-shot group using your current sight settings. Check if the group centers on the target and note where the shots cluster.
- After initial shots: Adjust your sights based on where the shots landed. For scopes, use the turret adjustments; for open sights, move the front or rear sight accordingly. Confirm adjustments by shooting another group.
- Second firing session: Repeat shooting groups and adjusting sights until your shot group lands consistently on your aiming point at 20 yards.
- Extended distance check: Move your target to a longer distance, such as 40 yards, then shoot and fine-tune your sights if needed. This helps match your sight settings to typical usage distances.
- Final confirmation: After sighting at various distances, confirm your rifle holds zero by firing a few groups in different lighting and weather conditions.
- Ongoing maintenance: Periodically check your sights after transportation or storage by firing a few test shots before regular shooting sessions to ensure settings stayed consistent.
Frequently Asked Questions
How Many Shots Does It Usually Take to Sight in an Air Rifle?
It usually takes 10 to 20 shots to sight in an air rifle properly. This allows you to make precise adjustments based on consistent shot groups.
Can Environmental Factors Affect How You Sight in Your Air Rifle?
Yes, wind, temperature, and lighting can change your sight picture. Adjust for conditions each time you shoot for better accuracy.
Is It Necessary to Use a Shooting Rest When Sighting in an Air Rifle?
Using a stable rest helps reduce movement and improves shot consistency. It’s highly recommended for accurate sighting.
Should I Adjust My Sights If I Change Pellet Types?
Yes, different pellets can fly differently, so checking and adjusting your sights ensures accuracy with each pellet type.
How Do I Know When My Air Rifle Is Fully Sighted In?
Your shots consistently hit the target’s center at your chosen distance without further adjustments.
Can Sighting in My Air Rifle Improve Its Long-Term Durability?
Proper sighting doesn’t affect durability directly but can reduce unnecessary wear caused by frequent adjustments or misfires.
Wrapping Up
Accurately sighting your air rifle sharpens your shooting precision and boosts confidence during every session. Start by setting up a steady rest and shooting your first group at 20 yards to see where your sights need adjustment. Regularly confirming your sight settings after changes and during different conditions keeps your shots true. Take the time to make these adjustments carefully, and your air rifle will perform at its best for both target practice and hunting.