What Is a Bore Sight? A Complete Guide with Proven Bore Sighting Methods
What is a bore sight? A bore sight is a tool or technique that aligns your rifle’s barrel with the scope or sights before firing live rounds. It saves time and ammo by getting your scope close to the target point quickly. Starting with bore sighting at a short distance, like 25 yards, gives you a solid reference for precise zeroing later.
Key Takeaways
- Bore sighting typically takes 15 minutes or less to get your rifle close to zero.
- Use 25 yards as a starting distance for bore sighting to balance convenience and accuracy.
- For rifles with scopes about 1.75 to 2 inches above the barrel, aim 1 inch low at 25 yards to zero at 100.
- AR-style rifles with scopes roughly 2.5 inches above the bore need about 1.5 inches low at 25 yards for a 100-yard zero.
- A quality laser bore sighter can place your first shot within 2 MOA, or roughly 2 inches at 100 yards.
- Repeat bore sighting and scope adjustments until your crosshairs and barrel align precisely on the target.
What Is a Bore Sight and Why It Matters
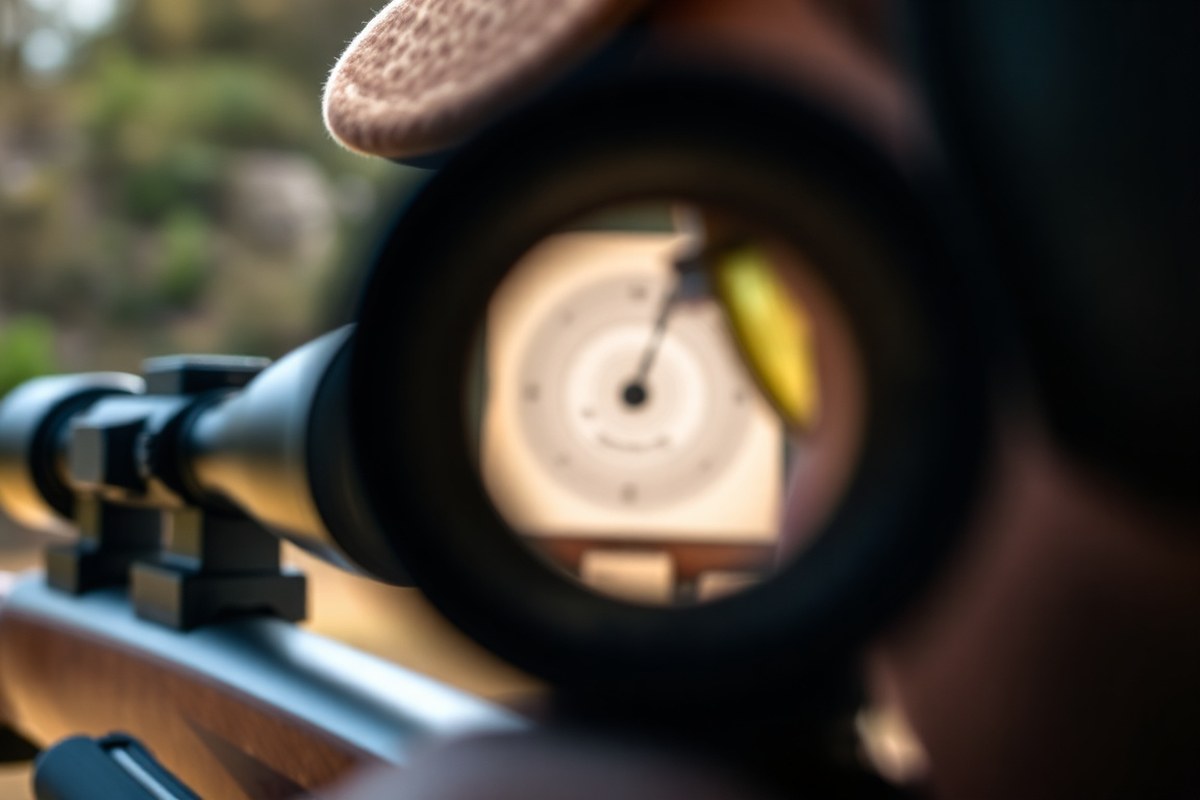
Bore sighting aligns your rifle’s sights or scope with the barrel’s bore, the path the bullet takes when it leaves the gun. This helps make sure what you aim at matches where the bullet will go, boosting accuracy immediately. Instead of estimating, bore sighting uses a visual guide like a laser or manual device to connect the sight line precisely with the bore’s center.
The importance of bore sighting lies in its ability to save you time and ammunition during the zeroing process. Zeroing a rifle involves firing multiple shots at a target and adjusting your sights to bring the rounds onto the bullseye. Bore sighting can get you on paper at 100 yards or closer much faster, meaning you spend fewer rounds and less time adjusting at the range. For example, laser bore sights can place your initial shots near the target’s center, reducing trial and error.
Accuracy improves when your bullet’s path directly aligns with your scope’s line of sight. The bore sighting process adjusts your scope so these lines match, preventing the frustration of rounds consistently hitting low, high, left, or right. Without bore sighting, your first shots might land far from the target, wasting ammo and forcing extended sight adjustments. With bore sighting, you’re more likely to hit close to where you aim, even before fine-tuning your rifle’s zero.
To bore sight a rifle, you first ensure the firearm is unloaded and safe. Then, looking down the barrel from the breech end or using a laser bore sight device, you project a reference point onto a target. You adjust your scope’s windage and elevation so the crosshairs line up with that reference. This step usually takes 15 minutes or less and requires minimal equipment, such as a basic laser bore sight costing around $30 to $60 or an optical bore guide. For rifles that don’t allow looking through the barrel, laser bore sights are especially useful.
Good results after bore sighting mean the first shots land on or very close to your target at the chosen distance, requiring only small adjustments to zero your rifle. Problems can arise if you bore sight at too long a distance, causing your initial shots to miss due to trajectory drop or if the bore sighting device is loose or improperly seated. Some shooters bore sight at 25 yards, which helps get the shots close enough to the bullseye before moving to longer ranges. Using bore sighting regularly, especially after mounting new optics or changing ammunition types, keeps you shooting efficiently and accurately.
How Bore Sighting Works: Laser vs Manual Methods

Bore sighting aligns your rifle’s barrel with the scope or sights to get your first shots close to your target without wasting ammunition. There are two main ways to do this: manual bore sighting, which involves visually aligning through the barrel, and laser bore sighting, which uses a laser device inserted in the rifle. Each method fits different rifle types and shooting situations.
Manual Bore Sighting Explained
This traditional method requires looking directly through the rifle’s barrel from the breech end to line it up with a target. You remove the bolt or open the action, then position the rifle so the bore points at a clearly visible target around 25 yards away. You adjust the scope’s crosshairs to match the exact point where the barrel is aimed.
It works well with rifles that have removable bolts or open actions, where you can easily see through the barrel to the target. Manual bore sighting is free and does not require extra equipment, but it depends on good lighting and having a visible target at a reasonable distance.
- Remove the bolt or open the action to look through the barrel.
- Secure the rifle in a stable position, such as a shooting rest or sandbags.
- Aim the rifle’s bore at a fixed target about 25 yards away.
- Adjust the scope’s windage and elevation turrets so the crosshairs align with the target.
- Double-check the alignment by repeating the process to ensure consistency.
- Reinstall the bolt or close the action and verify the scope adjustments.
Manual bore sighting is less effective in low light or if your rifle’s bolt can’t be removed to look through the barrel.
How Laser Bore Sighters Work
Laser bore sighters simplify the alignment process by projecting a laser beam from inside the barrel or chamber onto your target. You insert the device either into the chamber like a cartridge or attach it at the muzzle, depending on your rifle’s design and accessories like muzzle brakes.
The laser projects a bright dot at the target, which you can then adjust your scope or iron sights to match without needing to look through the barrel. They work well for rifles where looking through the bore is impossible or inconvenient, such as lever-action rifles or guns with removed bolts. These devices typically cost between $30 and $100 and can get you within about 2 MOA, or 2 inches at 100 yards, of your point of impact.
- Choose a laser bore sighter compatible with your rifle’s chamber size or muzzle type.
- Insert the laser device into the rifle’s chamber or muzzle securely.
- Place your rifle on a stable rest aimed at a target 25 to 100 yards away.
- Turn on the laser and observe the dot on the target.
- Adjust your scope’s windage and elevation to align the crosshairs with the laser dot.
- Remove the laser device and confirm scope zero with test shots at a range.
Using a chamber-insert laser is better for rifles with muzzle brakes, which can interfere with muzzle-mounted lasers.
Pros and Cons of Each Method
Manual bore sighting is cost-effective and requires no special equipment. It lets you physically align the rifle using direct sight, which can be reliable if you have good lighting and a proper shooting rest. On the downside, it’s time-consuming, can be challenging with rifle designs that limit barrel viewing, and less precise than laser methods.
Laser bore sighters speed up the process and work for most rifle types regardless of bolt removal. They offer accuracy within a few inches at 100 yards, reducing range time and ammunition use. The cost ranges from affordable to mid-priced units, making them accessible. Their drawback includes dependency on batteries, the need for compatible sizing, and potential inaccuracy if the laser or rifle isn’t firmly secured during alignment.
Choose manual bore sighting if you want a no-cost option and can remove your bolt easily. Opt for laser bore sighting to save time, improve precision, and bore sight non-traditional rifles or those with muzzle devices.
Essential Tools and Preparation Checklist
Bore sighting requires a specific set of tools and careful preparation to make sure your rifle and scope align precisely. Gathering the right equipment and following safety steps will help you bore sight effectively and avoid common errors.
Tools Needed for Laser and Manual Bore Sighting
The tools you need depend on whether you are using a laser bore sight or manual bore sighting. Laser bore sighters can cost between $30 and $150, but save time and improve accuracy. Manual bore sighting generally requires more physical setup and precise measurements.
- Laser bore sight device (compatible with your rifle caliber)
- Cleaning rod or chamber gauge for manual bore sighting
- Bore sighting tool such as a bore guide or breech plug to align with the barrel
- Screwdrivers or Allen wrenches for scope adjustments and mounting
- Target paper placed at the correct initial distance (usually 25 yards for manual or laser methods)
- Tape measure to set your shooting distance accurately
- Bipod or stable shooting rest to hold the rifle steady
Having the right tools upfront minimizes guesswork and improves the accuracy of your initial scope zeroing. Different rifles and scope mounts may require specific adjustment tools.
Preparing Your Rifle and Scope
Before starting bore sighting, clean the barrel and bore to remove any debris that might affect your view down the barrel. Remove any turret covers and lens caps on your scope so you can easily make elevation and windage adjustments. Ensure the scope rings and base are firmly attached; tighten screws if needed to prevent movement during sighting.
Next, confirm that the breech plug aligns correctly if your bore sight tool requires it. A misaligned plug can cause the sighting to be off, making your adjustments ineffective. Make sure your rifle is completely unloaded, then mount it securely on a stable rest or bipod to reduce movement when looking through the bore or making scope adjustments.
Once your rifle is ready, set up your target paper at the initial bore sighting distance. For lever-action rifles without a laser tool, start closer at 25 yards to get on paper before moving to longer ranges. Having the target ready lets you quickly confirm the scope alignment and make needed adjustments.
Safety Checklist Before Starting
Safety is the top priority anytime you handle a firearm. Begin by carefully unloading your rifle and double-checking the chamber and magazine to confirm it is empty. Keep the rifle pointed in a safe, clear direction away from people or pets.
- Verify rifle is unloaded by visually and physically inspecting the chamber and magazine
- Ensure the shooting area is secure and free of unauthorized individuals
- Use eye protection and hearing protection if you plan to fire live rounds after bore sighting
- Keep fingers off the trigger except when deliberately making adjustments or firing
- Remove nearby distractions and focus on the task to avoid mistakes
Following these safety steps avoids accidents during setup and sighting. Always treat your rifle as if it could fire, even when you are just lining up the barrel with your scope.
Step-by-Step Guide to Bore Sighting Different Rifles
Bore sighting varies by rifle type because each has a different barrel and scope setup. Knowing the right approach ensures quicker zeroing and better initial accuracy. Below are detailed steps tailored for bolt-action, AR-style, and lever-action rifles, highlighting key differences and tips.
Bore Sighting Bolt-Action Rifles
Bolt-action rifles usually have a solid barrel with a direct line of sight through the bore once the bolt is removed. This makes manual bore sighting straightforward and accurate. Most bolt rifles have scopes mounted about 1.75 to 2 inches above the bore, so you’ll want to keep that elevation difference in mind when setting your initial aim. Follow these steps for bore sighting a bolt-action rifle:
- Place the rifle securely on a stable rest or sandbags to prevent movement.
- Remove the bolt and look through the bore, aiming it at a clearly visible target 25 yards away.
- Adjust the rifle so the center of the bore aligns with the desired point on the target.
- Look through the scope and note where the crosshairs fall on the same target.
- Adjust the scope turrets to move the crosshairs to the bore’s point of aim, roughly 1 inch low at 25 yards for most deer-caliber rifles.
- Reinstall the bolt, ensure it locks smoothly, and secure all mounts if you had to loosen them.
- Fire a test group to confirm the bore sighting, then fine-tune the zero at a longer range.
Bore Sighting AR-Style Rifles
AR-style rifles usually mount scopes roughly 2.5 inches above the bore. This height affects where the bullet hits initially because the bullet’s path climbs to meet the sight line, requiring a distinct bore sight adjustment. At 25 yards, aim for the bullet to land approximately 1.5 inches below the point of aim to achieve a proper zero at 100 yards. Here’s how to bore sight an AR-style rifle:
- Secure the rifle in a rest or sandbags to reduce movement during adjustments.
- Remove or open the upper receiver’s bolt carrier group to access the barrel bore.
- Look through the bore or use a laser bore sight inserted into the chamber for more precision.
- Aim the bore at a target placed 25 yards away, centering the bore on the desired hit point.
- Look through the scope and adjust the windage and elevation turrets so the crosshairs align approximately 1.5 inches below the target center at 25 yards.
- Close or reinstall the bolt carrier group and check the fit and function of the upper.
- Take initial confirmation shots and adjust to finalize the zero at longer distances.
Bore Sighting Lever-Action Rifles
Lever-action rifles present a special challenge because the design often limits easy access to look through the bore. The curved action and fixed tubular magazines require different handling. Although you might find it harder to see through the bore directly, bore sighting is still possible and helpful for quick alignment. Try the following approach for lever-action rifles:
- Make sure the rifle is unloaded and place it securely on a rest.
- When the bolt or breech doesn’t come out easily, opt for a laser bore sight made for lever-action rifles or carefully peer through the barrel from the muzzle to align your shot.
- Aim the bore or laser at a target 25 yards away, stabilizing the rifle to keep it steady.
- Look through the scope or iron sights and adjust so the crosshairs or sights are about 1 inch low at 25 yards, similar to bolt-action rifles.
- Check that scope mounts are tight and that the action cycles smoothly after adjustments.
- Shoot test groups to verify bore sighting accuracy and fine-tune as needed.
Choosing the Right Distance for Bore Sighting
For most bore sighting sessions, setting your target at 25 yards strikes the right balance between convenience and accuracy. This distance is close enough to perform bore sighting safely indoors or in controlled home settings while still providing a meaningful reference point to align your scope and barrel. At 25 yards, you can clearly see your target and make precise adjustments before moving out to longer ranges for zeroing your rifle.
Twenty-five yards is popular because it reduces the effects of bullet trajectory and environmental factors like wind that increase with distance. When you bore sight at this range, you’re aligning your bore and scope to point roughly at the same spot. This rough agreement helps ensure your initial shots are on or near the target before you start fine-tuning at 100 yards or farther. This setup speeds up sighting in by allowing quick, iterative corrections without the need for long-range precision immediately.
Bore sighting at home or indoors is possible as long as you have a safe setup and a visible target at the right distance. Ensure you have a solid backstop to catch any stray rounds. Since the 25-yard distance is short, it minimizes the space needed and generally fits in larger garages, basements, or dedicated shooting rooms. Using a laser bore sighter or manually looking down the barrel, align your bore with the center of the target, then adjust your scope’s crosshairs to the same point.
Keep in mind that the purpose of bore sighting is not perfection but rough alignment. After bore sighting, your scope will need to be zeroed at your preferred shooting distance, often 100 yards, to account for bullet drop and fine corrections. You can repeat bore sighting at different distances, but 25 yards offers a manageable and reliable starting point in most cases.
Always confirm your target distance before adjusting your scope; misjudging the distance can lead to inaccurate bore sighting and wasted ammo during zeroing.
Understanding Scope Height and Bullet Trajectory Effects
The height of your rifle’s scope above the bore plays a key role in how you sight in your rifle and affects the bullet’s point of impact. Scope height creates a vertical offset between the barrel’s line of travel and the scope’s line of sight. Because these lines are parallel at first but converge downrange, knowing this height helps you properly adjust your aim during bore sighting and zeroing. The scope should sit about 1 to 1. 2 | Ignoring scope height and aiming dead center at 25 yards can cause your bullet to hit several inches high at 100 yards, requiring extra adjustments.5 inches above the bore, the bullet typically hits slightly low at short distances like 25 yards before climbing to the intended zero point at longer ranges.
The rule of hitting “1 inch low at 25 yards” is a common starting point for most center-fire rifles used in hunting or target shooting. This means adjusting your scope so the bullet’s impact lands 1 inch below the center of the target at 25 yards. The reason is bullet trajectories form a curved path: after leaving the barrel, the bullet drops due to gravity but rises relative to the line of sight because the barrel is angled slightly upward compared to the scope line. Setting the zero this way means the bullet will cross the vertical line of sight at about 100 yards, the typical range for many shooters. It’s a reliable rule of thumb regardless of caliber.
How you use scope adjustments to achieve this can be a bit tricky because scope turrets move the point of impact more dramatically at short range. Adjusting your scope by one click at 25 yards affects bullet placement about four times more than the same click at 100 yards. This means small changes make a big difference during bore sighting so dial carefully. For example, if you move the elevation turret up to raise your point of impact 1 inch at 25 yards, expect roughly a quarter-inch shift at 100 yards. When zeroing, first bore sight so the bullet impacts 1 inch low at 25 yards. Then move back to 100 yards, confirm impact, and fine-tune your scope settings to place the bullet at the target’s center.
Consider a deer rifle with a scope height of 1.25 inches above the bore. After bore sighting so the bullet hits 1 inch low at 25 yards, you’d expect the trajectory to intersect the line of sight near the 100-yard mark. If you ignored scope height and aimed dead center at 25 yards, your bullet might hit several inches high at 100 yards, forcing unnecessary adjustments. Bore sighting at the proper scope height accounts for this vertical offset and puts you on track to hit where you aim at typical hunting distances.
Understanding scope height and bullet drop tells you why bore sighting is only the first step. The bullet’s curved path depends on its velocity, bullet weight, and environmental factors like air density, so your actual zero might need tweaks at longer range. Still, by aiming 1 inch low at 25 yards during bore sighting, you set a practical baseline for zeroing your rifle effectively. This approach saves time and ammunition by focusing your adjustments downrange where the bullet will actually hit your target.
Common Bore Sighting Mistakes and How to Fix Them
Bore sighting mistakes often stem from rushing through the process or overlooking key steps. One common error is not securing the rifle firmly before starting, which causes shifts in alignment between the bore and the scope. Always use a stable rest or sandbags to hold your rifle steady, ensuring consistent positioning as you look through the bore and adjust the scope.
Skipping eye relief adjustment is another frequent problem. You need to set your scope’s eye relief, that is, the distance between your eye and the scope lens, to match your normal shooting posture. Failing to do this can make your reticle appear off-center during actual shooting, even if bore sighting looked correct.
- Use a solid rest or sandbags to keep the rifle steady during bore sighting.
- Adjust your scope’s eye relief before aligning the reticle with the bore.
- Clear the bore of any obstructions or dirt before sighting.
- Take your time to center the reticle precisely on the target point you aligned to through the bore.
- Don’t rely solely on the laser bore sighter; verify with manual bore sighting if possible.
- Check that your scope rings are tight to avoid movement after bore sighting.
Sometimes bore sighting seems off after adjustments because your rifle or scope moved during the process. Tighten scope rings properly after your initial alignment. After bore sighting, load a single round and fire at a paper target about 25 yards away, this confirms whether your bore sighting was accurate or needs adjustment. If your first shots land too far off, adjust your turrets based on the bullet impact before shooting again. Skipping this step wastes ammo and time at the range.
Rushing is perhaps the biggest culprit. Taking 5 to 10 extra minutes to carefully finish bore sighting saves significantly more time and ammunition when zeroing your rifle. Avoid trying to bore sight in low light without good visibility inside the barrel; daylight or strong flashlight illumination helps you line up properly.
For different rifles, mechanical tolerances or barrel twists can slightly affect your bore sighting. This means your bore and scope align well at short range but may require fine-tuning at your intended zeroing distance. Always treat bore sighting as a first step, not a final zero. Use it to get you on paper quickly, then fine-tune your zero with live fire at the range.
When to Seek Professional Help with Bore Sighting
You should consider professional help with bore sighting when you’re dealing with complex rifles, scopes, or if you encounter repeated alignment problems. Experts like gunsmiths bring precision tools and experience that ensure your bore sight is accurate, especially for long-range rifles or firearms with intricate optics. This can save you time and avoid frustration caused by trial and error when attempting to align sights on your own.
Gunsmiths typically offer services that include mounting and zeroing scopes, using professional-grade bore sighters, and adjusting sights based on your specific shooting needs. They have access to equipment like collimators and laser bore sighters tailored for different rifle types, such as bolt-action or AR-style firearms. Besides basic bore sighting, they can also fine-tune scope height, parallax settings, and even perform barrel inspections to check for any issues affecting accuracy.
The cost for professional bore sighting services varies but generally ranges from $30 to $75 depending on the complexity of the job and local rates. For beginners, professional help is often worth the price because it establishes a solid baseline for accurate shooting. This foundation helps you avoid frustration and wasted ammunition when you later zero the rifle at the range. Seeking help also provides an opportunity to learn proper techniques from experienced technicians, boosting your confidence with future adjustments.
In certain cases, such as using rifles with modular components like AR platforms, delicate scopes, or when you don’t have a proper vise or laser bore sighter, a professional setup can be invaluable. They can disassemble parts correctly, align optics precisely, and reassemble everything without damage. For example, removing the upper receiver on an AR rifle to bore sight accurately requires careful handling that gunsmiths perform routinely.
Many beginners start with manual bore sighting methods but find the process confusing or frustrating. Professionals can quickly identify if the problem comes from incorrect eye relief, loose mounts, or defective equipment. Their expertise shortens the learning curve and prevents common errors, such as looking through the bore from an awkward angle or skipping proper rest and support during alignment. In the long run, investing in expert services can improve your shooting accuracy and reduce gear wear.
Never attempt bore sighting without securing your rifle properly; a stable gun vise or rest is essential to avoid misalignment and frustration.
Step-by-Step Action Plan for Bore Sighting Your Rifle
Follow these steps to bore sight your rifle accurately and save ammo during final zeroing. Doing this right reduces guesswork and speeds up scope adjustments.
- Before you start: Gather your bore sighting tools, laser bore sight or manual bar, a stable rest, and your rifle’s manual. Check that the rifle is unloaded and the chamber is clear.
- Step 1: Secure your rifle in a rest or vice to minimize movement. Confirm your bore sight device fits your rifle’s barrel diameter and mount it as instructed.
- Step 2: Align the bore sight device with the barrel’s bore axis. For lasers, turn it on and verify the projected dot is steady and visible on the target at your chosen distance.
- Step 3: Adjust your scope turrets or rings so that the reticle aligns exactly with the bore sight dot or manual line. This will get your zero close enough to use ammo efficiently later.
- Step 4: Move to your shooting range and fire a test group at the selected distance (usually 25 to 50 yards). Check where your shots land relative to your sighted target.
- Step 5: Make fine adjustments to your scope based on the test group’s impact points. Confirm changes bring point of impact closer to point of aim.
- After zeroing: Record your final adjustment numbers for future reference and practice safe rifle storage after use.
Frequently Asked Questions
What Type of Rifles Benefit Most from Bore Sighting?
Bolt-action and scoped rifles benefit most, as bore sighting helps align the scope quickly to the barrel, saving ammo and range time during initial zeroing.
Can Bore Sighting Replace Live Firing for Zeroing a Rifle?
Bore sighting does not replace live firing but provides a rough alignment, so your first shots are closer to the target and adjustments are easier.
Is Bore Sighting Necessary for Iron Sights?
Bore sighting is less common but can help align iron sights roughly, especially on new or replaced sights before firing.
How Often Should You Bore Sight Your Rifle?
Bore sighting is usually done when mounting a new scope or after significant changes like barrel removal; frequent bore sighting is not required.
Can Bore Sights Damage My Rifle’s Barrel?
No, properly used bore sight devices do not damage the barrel; always confirm the rifle is unloaded before starting.
Does Temperature Affect Bore Sighting Accuracy?
Temperature can slightly affect your bullet’s trajectory, but bore sighting indoors or in stable conditions gives a reliable baseline before outdoor zeroing.
Before You Go
Bore sighting is a practical way to get your scope and rifle close to zero before heading to the range. It saves you time, ammunition, and frustration by helping you start with a well-aligned setup. Try bore sighting your rifle before your next range session to see how it improves your accuracy tuning.